Do it yourself - make API calls through your web browser
![]() Updated
by
Carl Geijer
Updated
by
Carl Geijer
Introduction
Our APIs are a fast and powerful way to fetch and update and delete data from Quinyx. While it may be convenient to manage data via the web application or mobile app, some things are in fact much faster and easier to do through the API, even if you're not a tech expert!
What you need
All you need to get started is:
- Google Chrome
- Your main unit's API key. This is basically a password that you need to provide in your API calls access the data on your Quinyx account. You will have to contact our support to get this key. Note that for security reasons you must request it from an email address that exists in Quinyx and has a Manager role.
Getting started
Now it's time to set things up.
- If you haven't already, download and install Google Chrome.
- Open Chrome and navigate to this HelpDocs article (the one you're reading now).
- Download/install the Boomerang - SOAP & REST Client - this is a Chrome extension that allows you to make API calls directly from your browser.
- Once it is installed, open Boomerang from the extension menu (the puzzle icon to the right of the address bar). It will open in a new tab.
- Right-click and "Save link as" on this link to download the Boomerang configuration file that we have prepared with some of the most used API calls prepared.
- In Boomerang, click the three-line menu button in the top-right and select "Import". Click "Browse" and select the configuration file that you just downloaded to your computer.
- Now select "Quinyx Web Service API" in the project selector menu which should have opened up automatically after importing - if not, it's the small blue triangle in the top of the left side panel.
Now you're ready to start using the Quinyx API!
How to make API calls
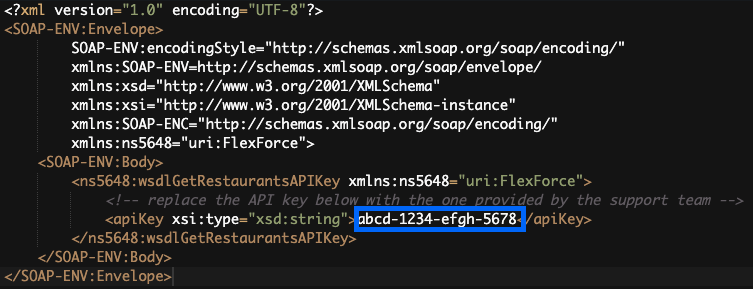
When making calls, you need to provide some information so that the Quinyx API understands what information you're trying to fetch (or update). This information is provided between XML tags. Here is an example of a tag for providing your API key. You would place your API between the > and <, replacing the red text.
<apiKey xsi:type="xsd:string">abcd-1234-efgh-5678</apiKey>In Boomerang, it would look like this. You would replace the text in the blue box.
Step-by-step guides for the example calls
Here are step-by-step guides for using the prepared calls included in the configuration file that you imported to Boomerang.
Get API keys
- In Boomerang's Requests panel, click on "Get API keys" under the "API keys" folder.
- Two new panels will open - a request panel (on the left) and a response panel (on the right). In the request panel, replace the dummy API key with your API key according to the instructions above.
- Click the blue "Send" button. The response panel should be populated with a list of all your units and their API keys.
Boom! Done.
Get text items (cost centers and projects)
- In Boomerang's Requests panel, click on "Get text items" under the "List/update projects and cost centers" folder.
- Two new panels will open - a request panel (on the left) and a response panel (on the right). In the request panel, replace the dummy API key with your API key according to the instructions above.
- Click the blue "Send" button. The response panel should be populated with a list of all your cost centers and projects. Place your cursor anywhere in the text in the response panel and press CTRL+F (CMD+F on Mac) to search for a specific item.
Update text items (cost centers and projects)
- In Boomerang's Requests panel, click on "Update text items" under the "List/update projects and cost centers" folder.
- Two new panels will open - a request panel (on the left) and a response panel (on the right). In the request panel, replace the dummy API key with your API key according to the instructions above.
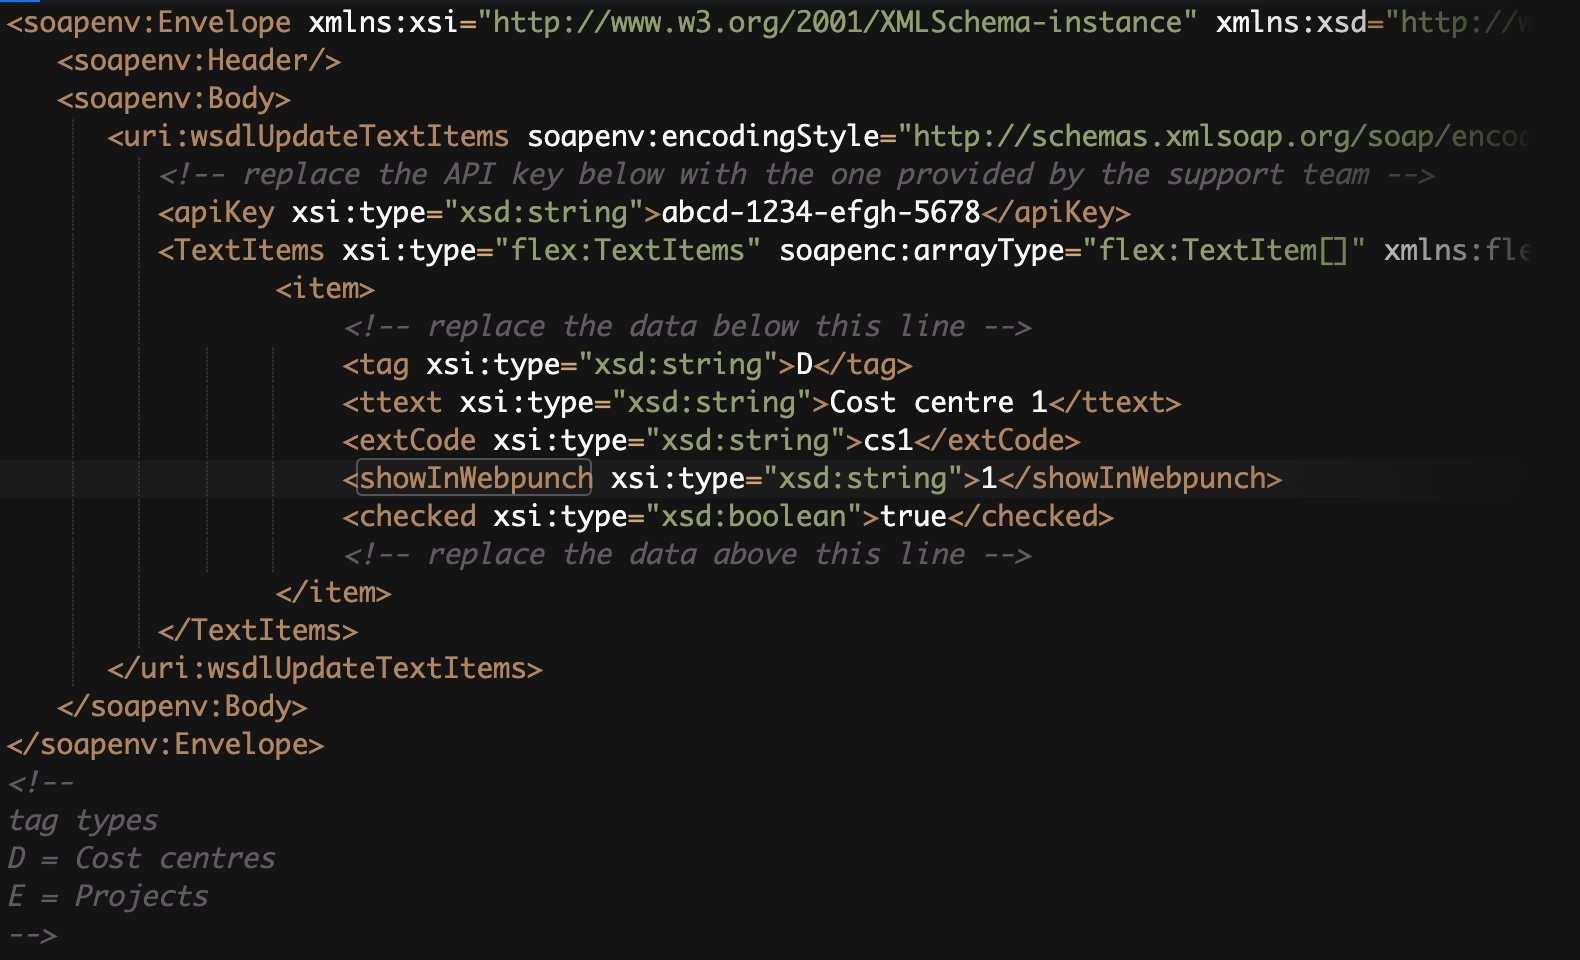
- Now you need to replace the data between the commented rows with the data that you want to add or edit in Quinyx.
If you want to add a cost center or project
Replace the information between the commented rows with the following. Replace the example data between > and < with your real data.
<tag xsi:type="xsd:string">D</tag>
<ttext xsi:type="xsd:string">Example</ttext>
<extCode xsi:type="xsd:string">example</extCode>
<showInWebpunch xsi:type="xsd:string">0</showInWebpunch>
<checked xsi:type="xsd:boolean">true</checked>
tag | D = cost center, E = project |
ttext | The name of the cost center / project |
extCode | The cost center / project code |
showInWebpunch | 1 = the cost center / project code should be selectable in Webpunch, 2= not selectable in Webpunch |
checked | true = the cost center / project is enabled and selectable in Quinyx, false = it is hidden in Quinyx |
When you're done adding your data, it should look something like this in Boomerang:
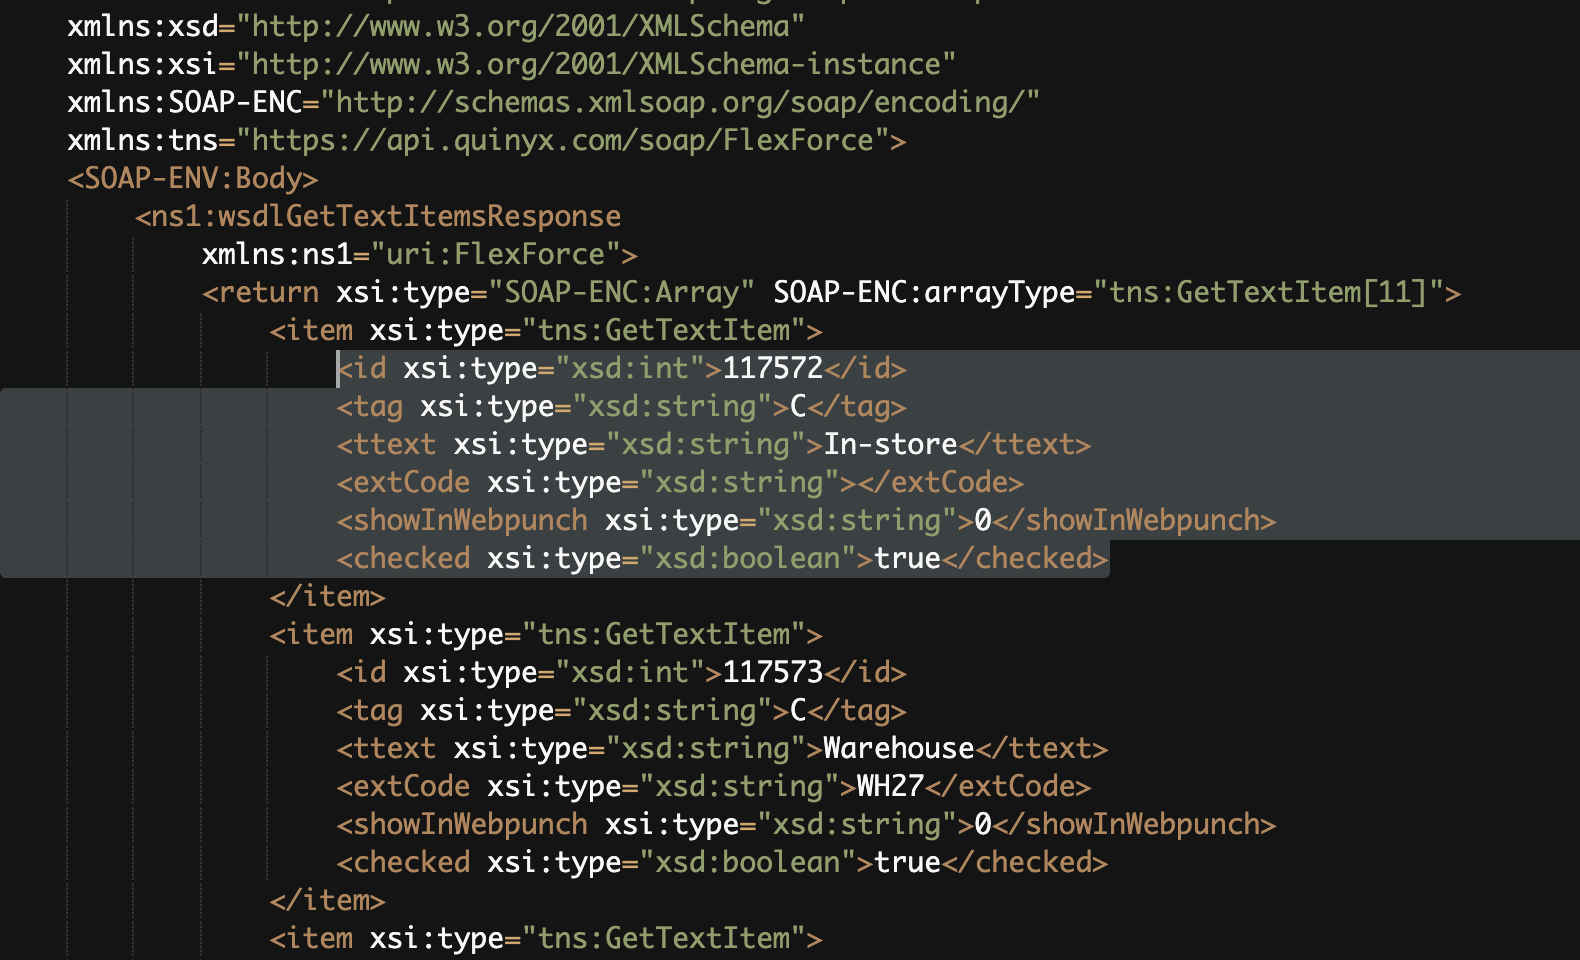
If you want to update a cost center or project
This is a bit trickier, because you first need to fetch the data for the item you want to update. Follow the instructions in the section Get text items (cost centers and projects), search for the cost center / project that you want to update and select (like in the image below) and copy its data.
Now go back to the "Update text items" tab in Boomerang to continue where you left off. Paste the data between the commented rows (if there is already data there, remove it). It should look something like this:
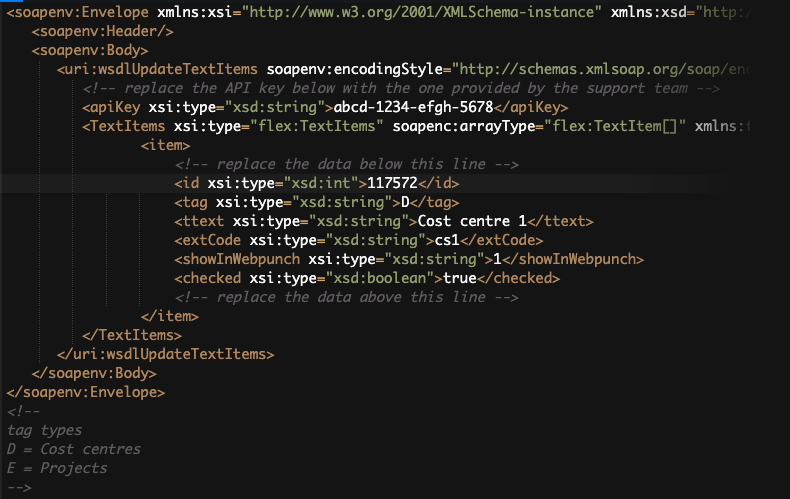
Do not tamper with the ID in the first tag, that tells Quinyx which cost center / project to update. If you change the ID you might end up changing the wrong item! Make sure you enter information correctly in the following tags. Refer to the table under If you want to add a cost center or project above.
- Click the blue "Send" button. The response panel should be populated with your new/updated item with the data you entered confirming that you did everything right.
Another success!