Tags follow up view
 Updated
by
Leigh Hutchens
Updated
by
Leigh Hutchens
The tags follow-up is designed to help local managers track scheduled versus worked hours for specific tags.
Reporting on tags is primarily intended for local managers and not for system-wide administrative reporting.
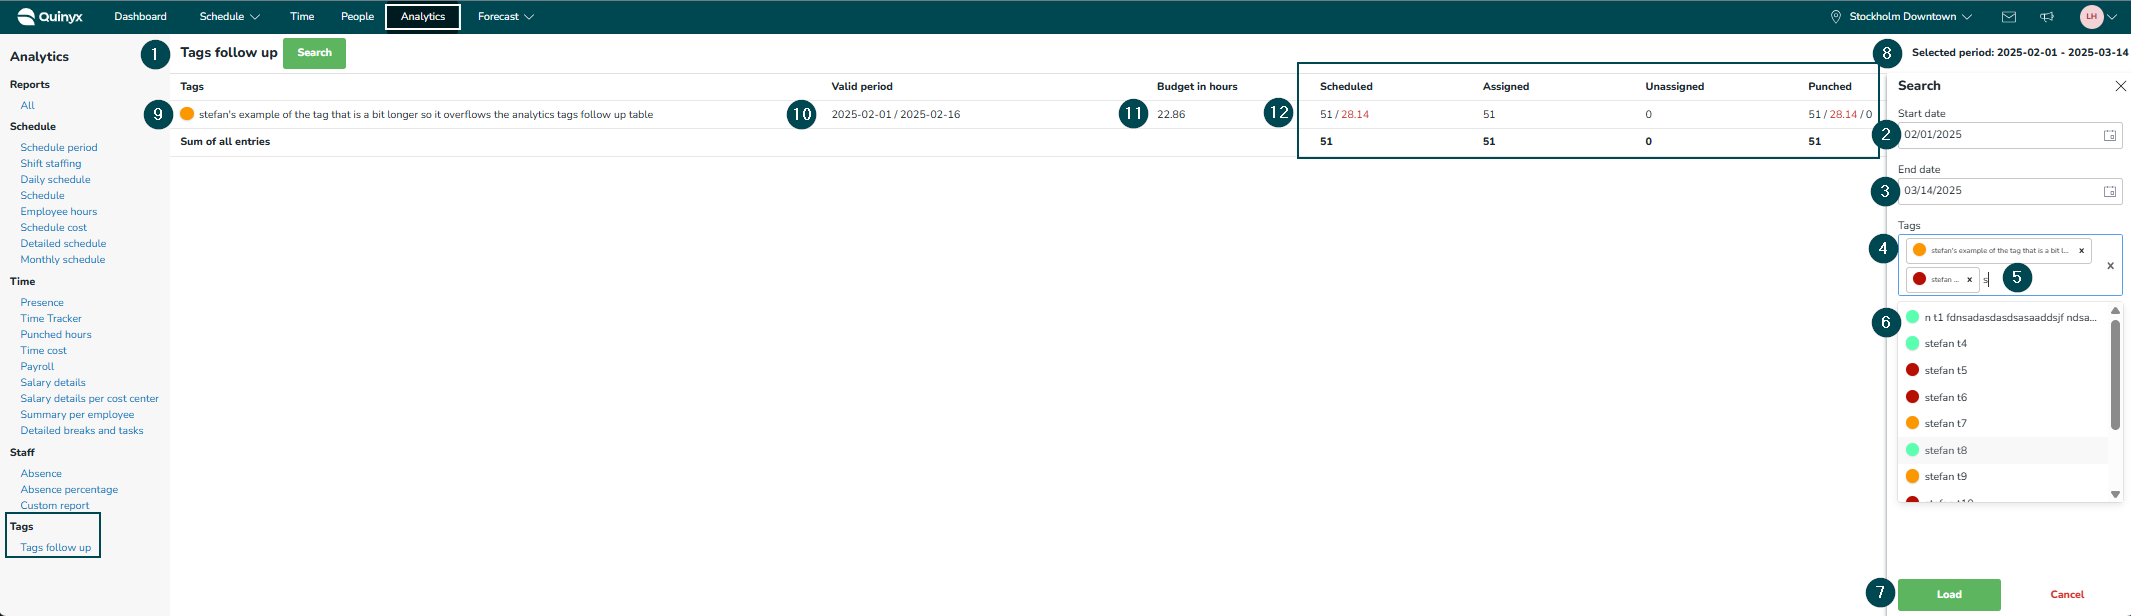
To follow up on data and outcomes for specific tags, go to Analytics > Tag follow up view.
- Click Search.
- Enter the start date for the period you want to examine.
- Select the end date.
- Select Tags.
- Search for tags using free text search on Tag names.
- It's possible to select another tag relevant to your search.
- Click Load when you are finished selecting tags.
- The selected period will show:
- (9) The list of selected tags
- (10) A date range of when the tag is valid if defined on a tag.
- (11) Budget in hours for the selected period if set on a tag.
- (12) Data, as explained below:
To enhance the user experience and provide clarity on the searched tags and date range, the search panel will retain the search details as long as you remain on the same view. However, if you navigate away from this page (except for the Tags Follow-Up Report), the data selected in the search details panel will be cleared.
- Column 1: Scheduled hours and Scheduled vs. budget hours in the selected period.
- The budget is calculated from the "Period" values for the tag, and the selected date range for the follow-up period.
- Over-scheduled hours vs. budget hours will show in red.
- Columns 2 and 3: Out of the scheduled hours, you can view how many are assigned and how many are unassigned to employees.
- Column 4: Punched hours, punched hours vs budgeted hours, and punched hours vs. scheduled hours.
- Punched hours in excess of budgeted or scheduled hours are displayed in red.
A missing value is displayed with a dash.
You can search/list up to 50 Tags at once.