Single Sign On Basics
 Updated
by
Victor Jespersen
Updated
by
Victor Jespersen
Before setting up SSO in Quinyx, it’s important to go through the basics to simplify the setup. SSO is short for Single Sign-On, and in Quinyx it's used to move authentication from the built-in ways of authenticating users via, for example, a username and password to a customer-controlled way.

SSO provides numerous improvements such as security, compliance, and simplicity over username and password - but most importantly, it gives the customer control over login and authentication to Quinyx.
Technologies and protocols
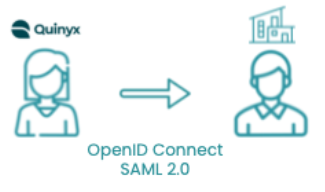
As SSO has developed over the years, a number of protocols and standards have been established to simplify SSO between different systems. Two common protocols supported by Quinyx are SAML 2.0 for Web and OpenID Connect (OAuth2) for mobile apps.
The protocols exist to simplify implementation and compatibility between different systems so each vendor, Quinyx in this case, doesn't have to build specific support for each type of provider (Azure ADFS, Onelogin, Okta, Google, etc.) - we all speak a common language. What's common among all protocols is that they have a list of settings such as certificates, URLs, and potential secrets that need to be shared to establish the trust between the two.
While the URLs can look different between different vendors, they all provide the same functionality as they are compatible with the protocol specified.
Quinyx SSO basic steps
Configuring and using SSO can be split into different steps:
- Technical trust between two systems
- Data mapping
- Login to Quinyx using SSO for employees
Technical trust between two systems
A prerequisite for SSO to work between Quinyx and the customer's IT environment is to establish the technical trust between the two parties. This is done once and often by the IT-department responsible for the system at the customer. Quinyx UI provides a self-service way of entering all settings required to establish the trust between Quinyx and the customer-chosen system.
This is where all the URLs, secrets, and certificates are used to configure and establish that trust. To simplify this process in SAML 2.0, all the required information is stored in a “metadata” file shared between the parties. This file minimizes the risk of typos and misconfiguration, as it contains all the information needed to configure the trust. OpenID Connect has similar instructions called “Well Known URIs” which is a weblink containing all the URIs needed to set up OpenID (often ends with /.well-known/openid-configuration).
Data mapping
When the technical trust is established, the two systems communicate during login. However, there is still one thing left to configure and that is the data mapping. The customer system, from here on called IDP (IDentity Provider), provides a database of the employees who are subject to log in to Quinyx. The IDP can be built up of many different systems internally at the customer with high complexity. Or it can be a single system in its most simple form, like a spreadsheet containing all the employee information.
When an employee uses SSO to log in to Quinyx, different user properties from the IDP database are sent to Quinyx as a part of the protocol used.
While protocols used for establishing trust have certain specific details and recommendations, they don't decide exactly what all fields should contain. This requires configuration in the data mapping. Many providers of OpenID Connect have some common claims which, for example, contain an email address in a certain claim (field). One specific claim might not fit every Quinyx customer so we allow the customer to choose which one to use.
Configuring the data mapping
The goal of data mapping is to connect the information about an employee in the customer IDP database to the information about the employee in Quinyx, so that Quinyx can identify who is logging in.
This requires us to choose a field/property from Quinyx and a field/property in the customer IDP database to match each other to uniquely identify that user. The fields chosen are entered into the configuration page in Quinyx for SSO.
Example data
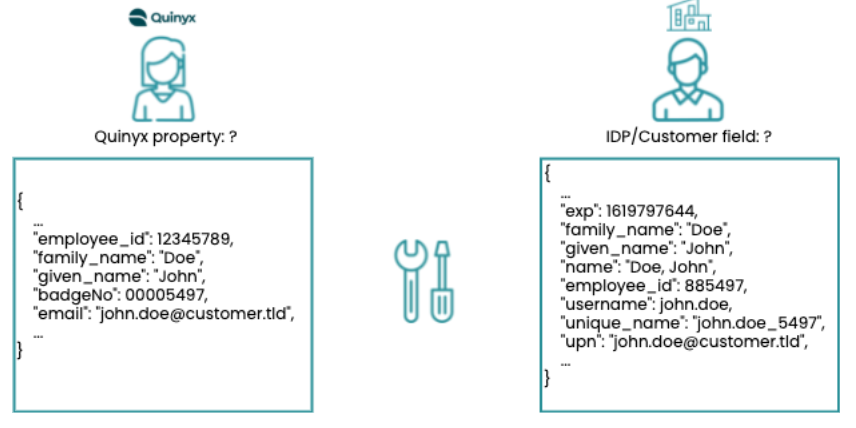
Example data in Quinyx (left) and on the Customer side (right).
Configure using email and username
First attempt to do the data mapping; the property email is chosen from Quinyx, and username is chosen from the customer data.
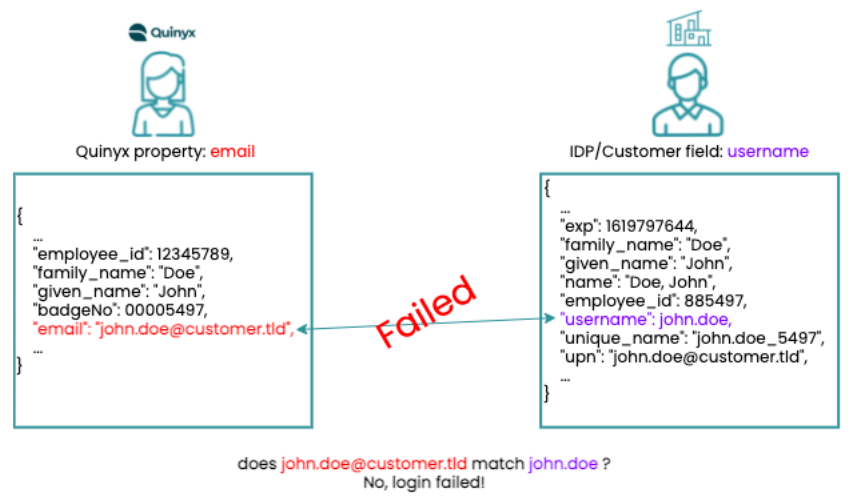
The login fails since the information doesn't match exactly on both sides.
Configure using email and UPN
Second attempt to do the data mapping; reconfiguring to use email from Quinyx and UPN from the customer data. This gives a different outcome.
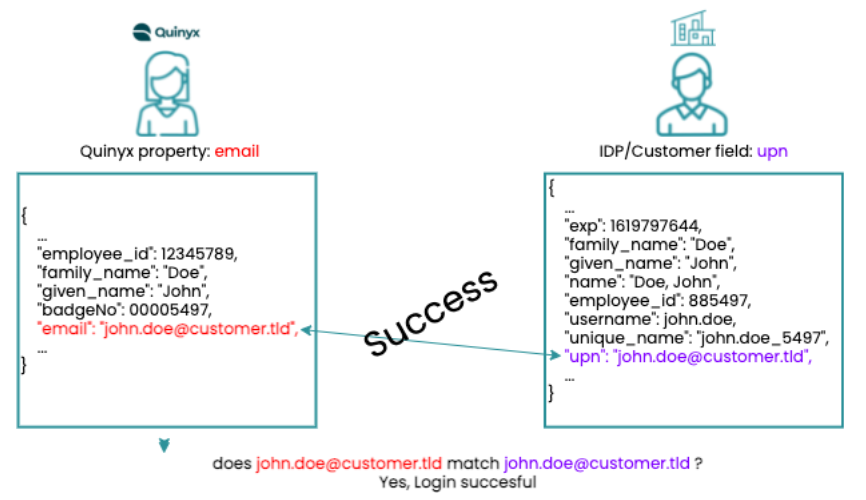
The login is now successful since Quinyx uniquely identifies the user as the correct John Doe from the customer.
How to decide which data to use
Since the protocol doesn't specify exactly which data to use during SSO the recommendation is to identify data available in both systems. Then find a suitable field to map users, before setting up SSO. As customer IDPs are often highly configurable, it's possible to modify what data is sent in which fields to Quinyx to help out in the data mapping process - the important part is that it's decided which field to use and ensure the data is consistent.
If no data is found to map each user, new information in either of the systems needs to be created. This can be any type of unique number or string, unique for each employee. Using integrations towards Quinyx and updating each employee with automation simplifies this process to avoid manual configuration of required data for login.