OpenID Single Sign On
 Updated
by
Victor Jespersen
Updated
by
Victor Jespersen
OpenID single sign-on (SSO) provider configuration
Quinyx supports Single Sign-On (SSO) via the OpenID Connect specification (version 1.0). This allows users to log in to Quinyx using their existing credentials from your organization's Identity Provider (IdP).
This guide covers the configuration for both web and mobile app SSO.
Prerequisites
Before starting the configuration, ensure you have:
- Access Rights: You must have the Account Manager role in Quinyx to access Authentication settings.
- Identity Provider (IdP): An Identity Provider set up that supports the OpenID Connect framework (e.g., Azure AD, Okta, Google Workspace).
- Client Credentials: The
Client IDandClient Secretgenerated by your Identity Provider.
1. Add a new provider
To create a new configuration or edit an existing one:
- Navigate to Account settings > Authentication settings > OpenID providers.
- Click Add to create a new configuration.
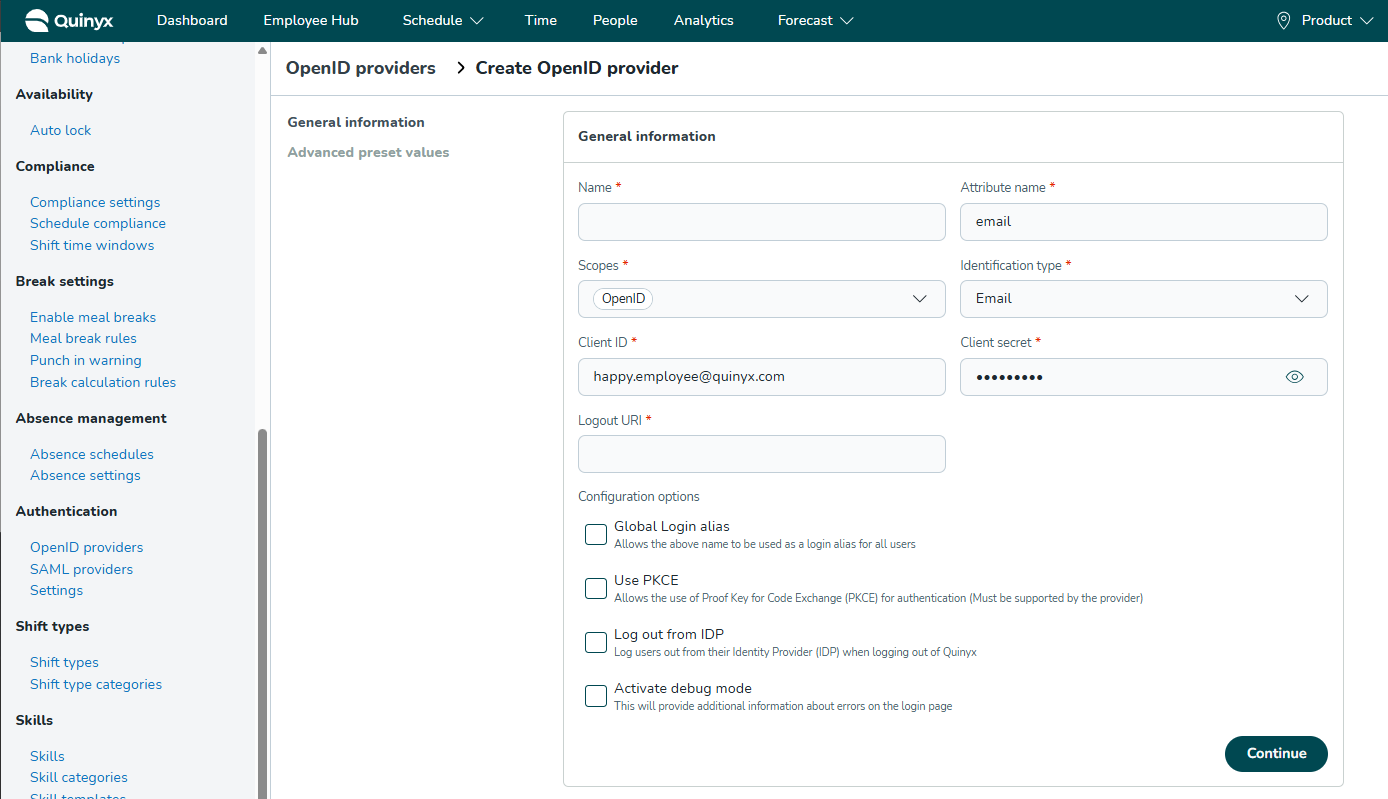
2. General information
Configure the core connection details. These values match the settings in your Identity Provider.
- Name: The display name for this login method (e.g., "Okta Login"). This name is visible to administrators and, if Global Login Alias is used, to end-users.
- Attribute name: The specific claim in the OpenID token that acts as the user's unique identifier (e.g.,
email,sub, orupn). This is case-sensitive and must match your IdP exactly. - Scopes: The permissions Quinyx requests.
- Required:
openid - Common additions:
profile,email(separate multiple scopes with spaces).
- Required:
- Identification type: Select which field in the Quinyx user profile matches the Attribute name from the provider.
- Example: If you select Email, Quinyx matches the IdP's
emailclaim to the user's email address in Quinyx.
- Example: If you select Email, Quinyx matches the IdP's
- Client ID: The public identifier for the Quinyx application provided by your IdP.
- Client secret: The private key/password provided by your IdP.
- Logout URI: The URL where users are redirected after logging out of Quinyx. This usually points to your IdP's logout endpoint.
3. Configuration options
These checkboxes control specific authentication behaviors.
- Global Login alias:
- Enabled: Allows users to enter the Name of this provider (e.g., "MyCompanyLogin") in the username field of the Quinyx Mobile App. They will be automatically redirected to your SSO login page without needing to select a specific region.
- Note: The name must be globally unique across Quinyx (EU and US). Validated upon saving.
- Use PKCE:
- Enabled: Activates Proof Key for Code Exchange (PKCE) for enhanced security. Ensure your IdP supports this before enabling.
- Log out from IDP:
- Enabled: When a user logs out of Quinyx, they are also logged out of their Identity Provider session.
- Activate debug mode:
- Enabled: Displays detailed error logs on the login page. Recommendation: Enable only during initial setup/troubleshooting and disable for production.
Click Continue to proceed to the Advanced settings.
4. Advanced preset values
This section defines the technical endpoints. You can populate this automatically or manually.
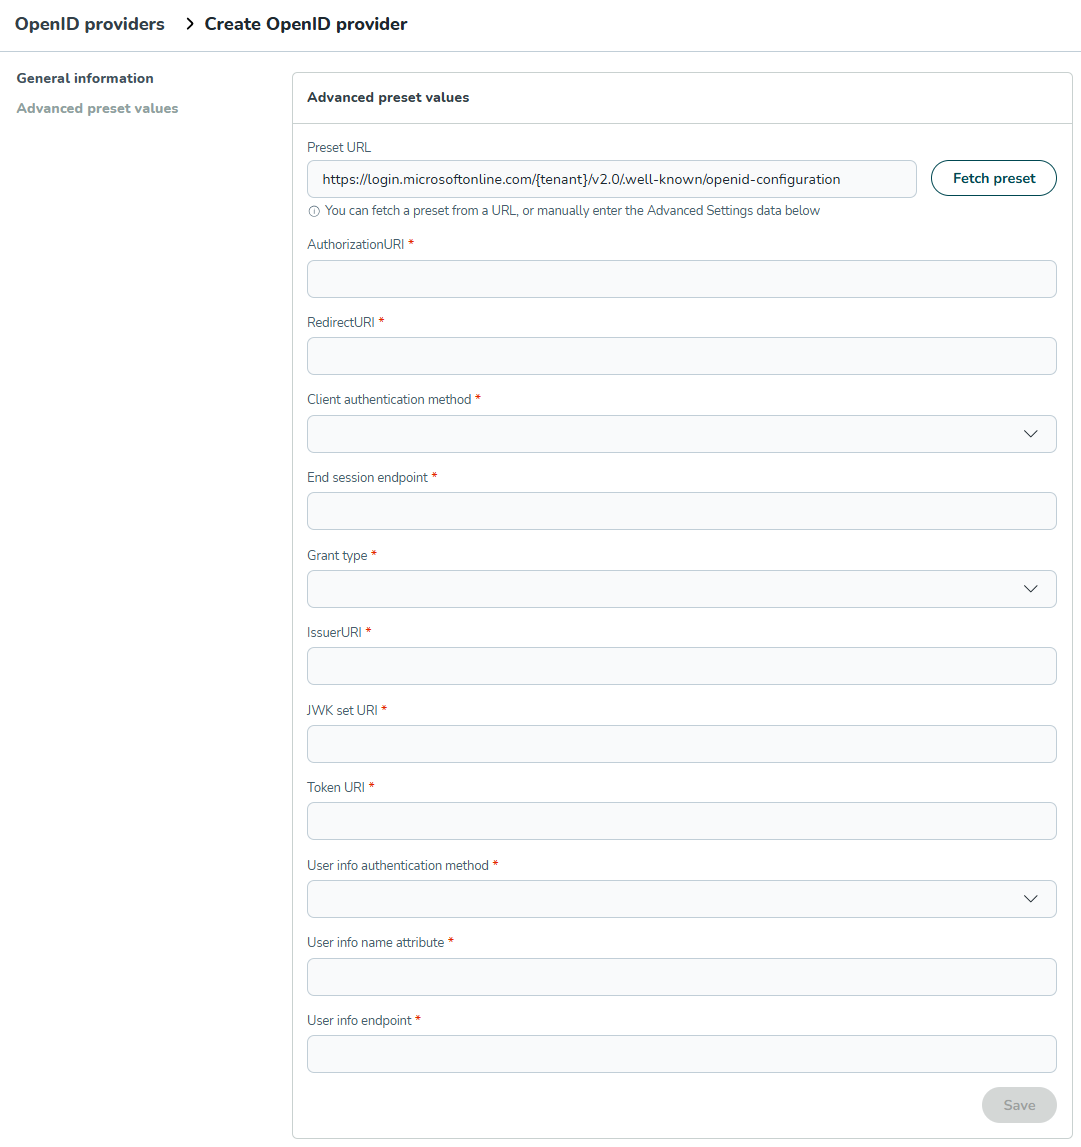
Method A: Fetch preset (recommended)
Most Identity Providers offer a metadata URL (Discovery URL).
- Paste your IdP's metadata URL into the Preset URL field.
- Example:
https://login.microsoftonline.com/{tenant}/v2.0/.well-known/openid-configuration
- Example:
- Click Fetch preset.
- Quinyx will automatically fill the fields below.
Method B: Manual configuration
If you cannot use the preset fetcher, enter the values manually based on your IdP documentation:
- AuthorizationURI: The URL for the login page.
- RedirectURI: The Quinyx URL where the IdP sends the user after login.
- Important: Copy this URL after saving and add it to your IdP's "Allowed Callback URLs".
- Client authentication method: How the client credentials are sent (e.g.,none or
client_secret_basicorclient_secret_post. - End session endpoint: The URL used to terminate the IdP session.
- Grant type: Can be set to
Refresh tokenorClient credentialsbut usually set toAuthorization Code - IssuerURI: The unique identifier of the Identity Provider.
- JWK set URI: The URL containing public keys for signature verification.
- Token URI: The endpoint for exchanging the authorization code for an access token.
- User info endpoint: The URL to retrieve user profile details.
5. Finalizing setup (redirect URI)
- Save your configuration in Quinyx.
- Re-open the configuration (click the padlock icon if the advanced section is closed).
- Locate the RedirectURI field in the Advanced preset values section.
- Copy this URL.
- Log in to your Identity Provider's admin portal and paste this URL into the Allowed Redirect URIs (sometimes called Reply URLs or Callback URLs) settings for the Quinyx application.
Appendix: Example setup (Azure AD)
Note: This is a general guide for Azure Active Directory. Interfaces may change.
1. Initial setup in Azure AD
- Go to Azure Active Directory > App registrations > New registration.
- Name the app (e.g., "Quinyx").
- For the Redirect URI, select Web and enter a temporary placeholder (e.g.,
https://localhost). You will update this later. - Click Register.
2. Gather credentials
- Client ID: On the Overview page, copy the Application (client) ID.
- Tenant ID: Copy the Directory (tenant) ID.
- Client Secret: Go to Certificates & secrets > New client secret. Create one and copy the value immediately (you cannot view it later).
3. Configure Quinyx
- In Quinyx, create a new OpenID Provider.
- Paste the Client ID and Client Secret from Azure.
- In Preset URL, enter the following (replace {your-tenant-id} with the ID copied in step 2.2):
https://login.microsoftonline.com/{your-tenant-id}/v2.0/.well-known/openid-configuration - Click Fetch preset.
- Set Scopes to:
openid profile. - Click Continue or Save.
- Important: In the Advanced settings, copy the RedirectURI generated by Quinyx.
4. Finalize in Azure AD
- Return to your App Registration in Azure > Authentication.
- Add the RedirectURI you copied from Quinyx.
- Delete the temporary placeholder URL you created in step 1.
- Ensure the ID tokens checkbox is checked (if required by your specific flow, though standard OIDC uses the Token Endpoint).
- Save changes.