Version 0086
 Updated
by
Leigh Hutchens
Updated
by
Leigh Hutchens
Release date July 15, 2020
New functionality
Group management
With this release, we introduce the fourth and last part of Group management. Group management allows you to add/edit/delete sections, units, and districts. In this release, we have included delete unit and edit unit.
Delete unit
Navigate to Account settings > Group management, and click on a unit. A side panel opens, and at the bottom of the panel you'll see a delete button:
After clicking delete, you will see a confirmation dialogue. Click OK if you want to proceed with the deletion. A message displays in the top-right corner indicating whether the deletion was successful.
Edit unit
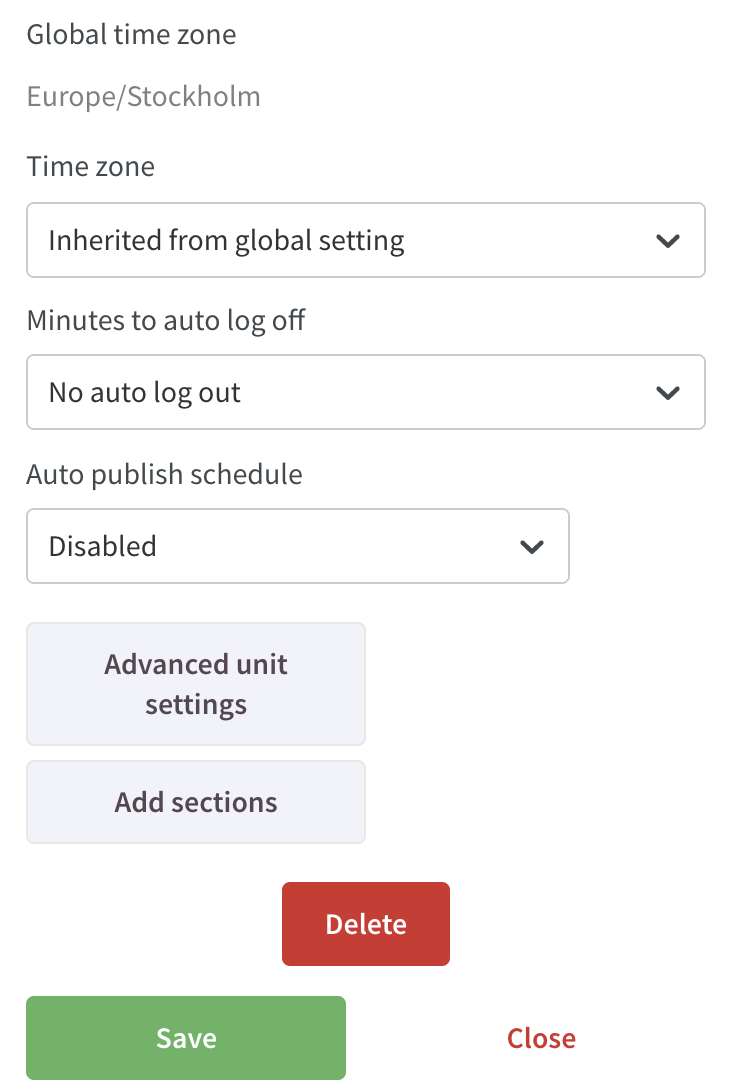
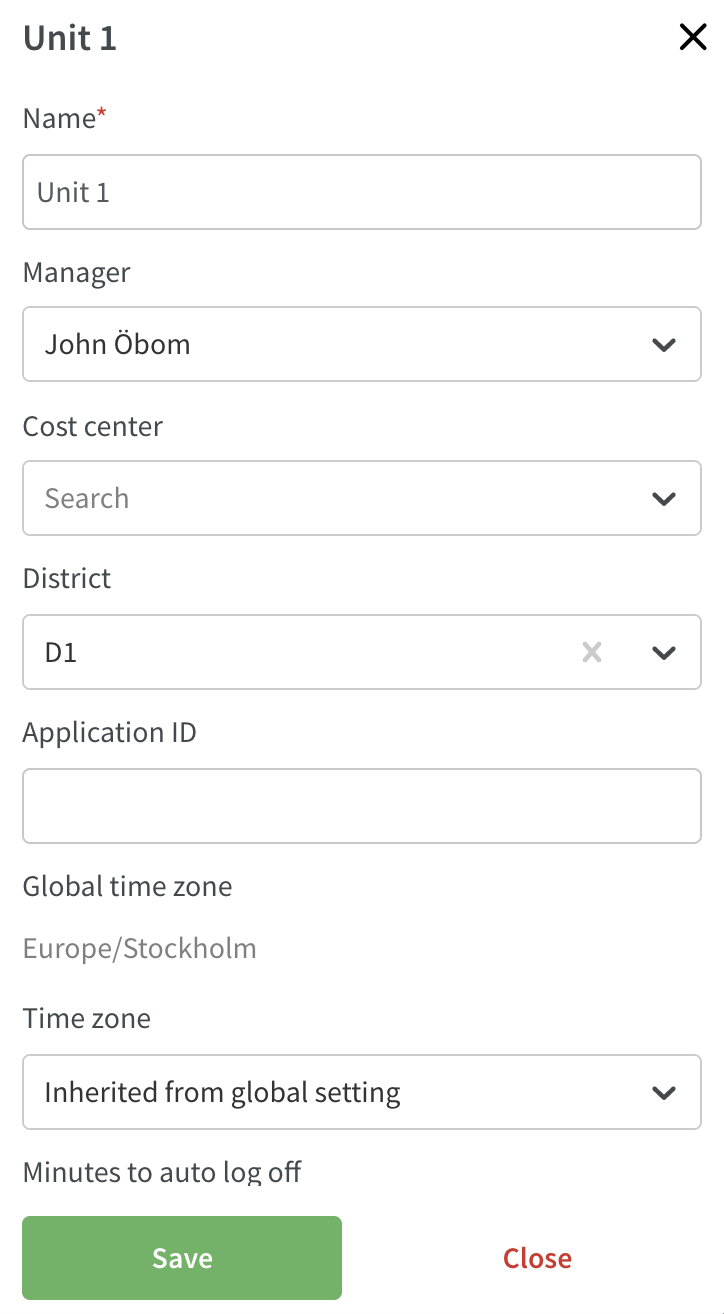
Navigate to Account settings > Group management and click on a unit. A side panel will open where you can edit the most common settings for the unit. Save when you are done changing one of the settings in the side panel:
If you wish to edit other settings for the unit, click on Advanced unit settings at the bottom of the side panel:

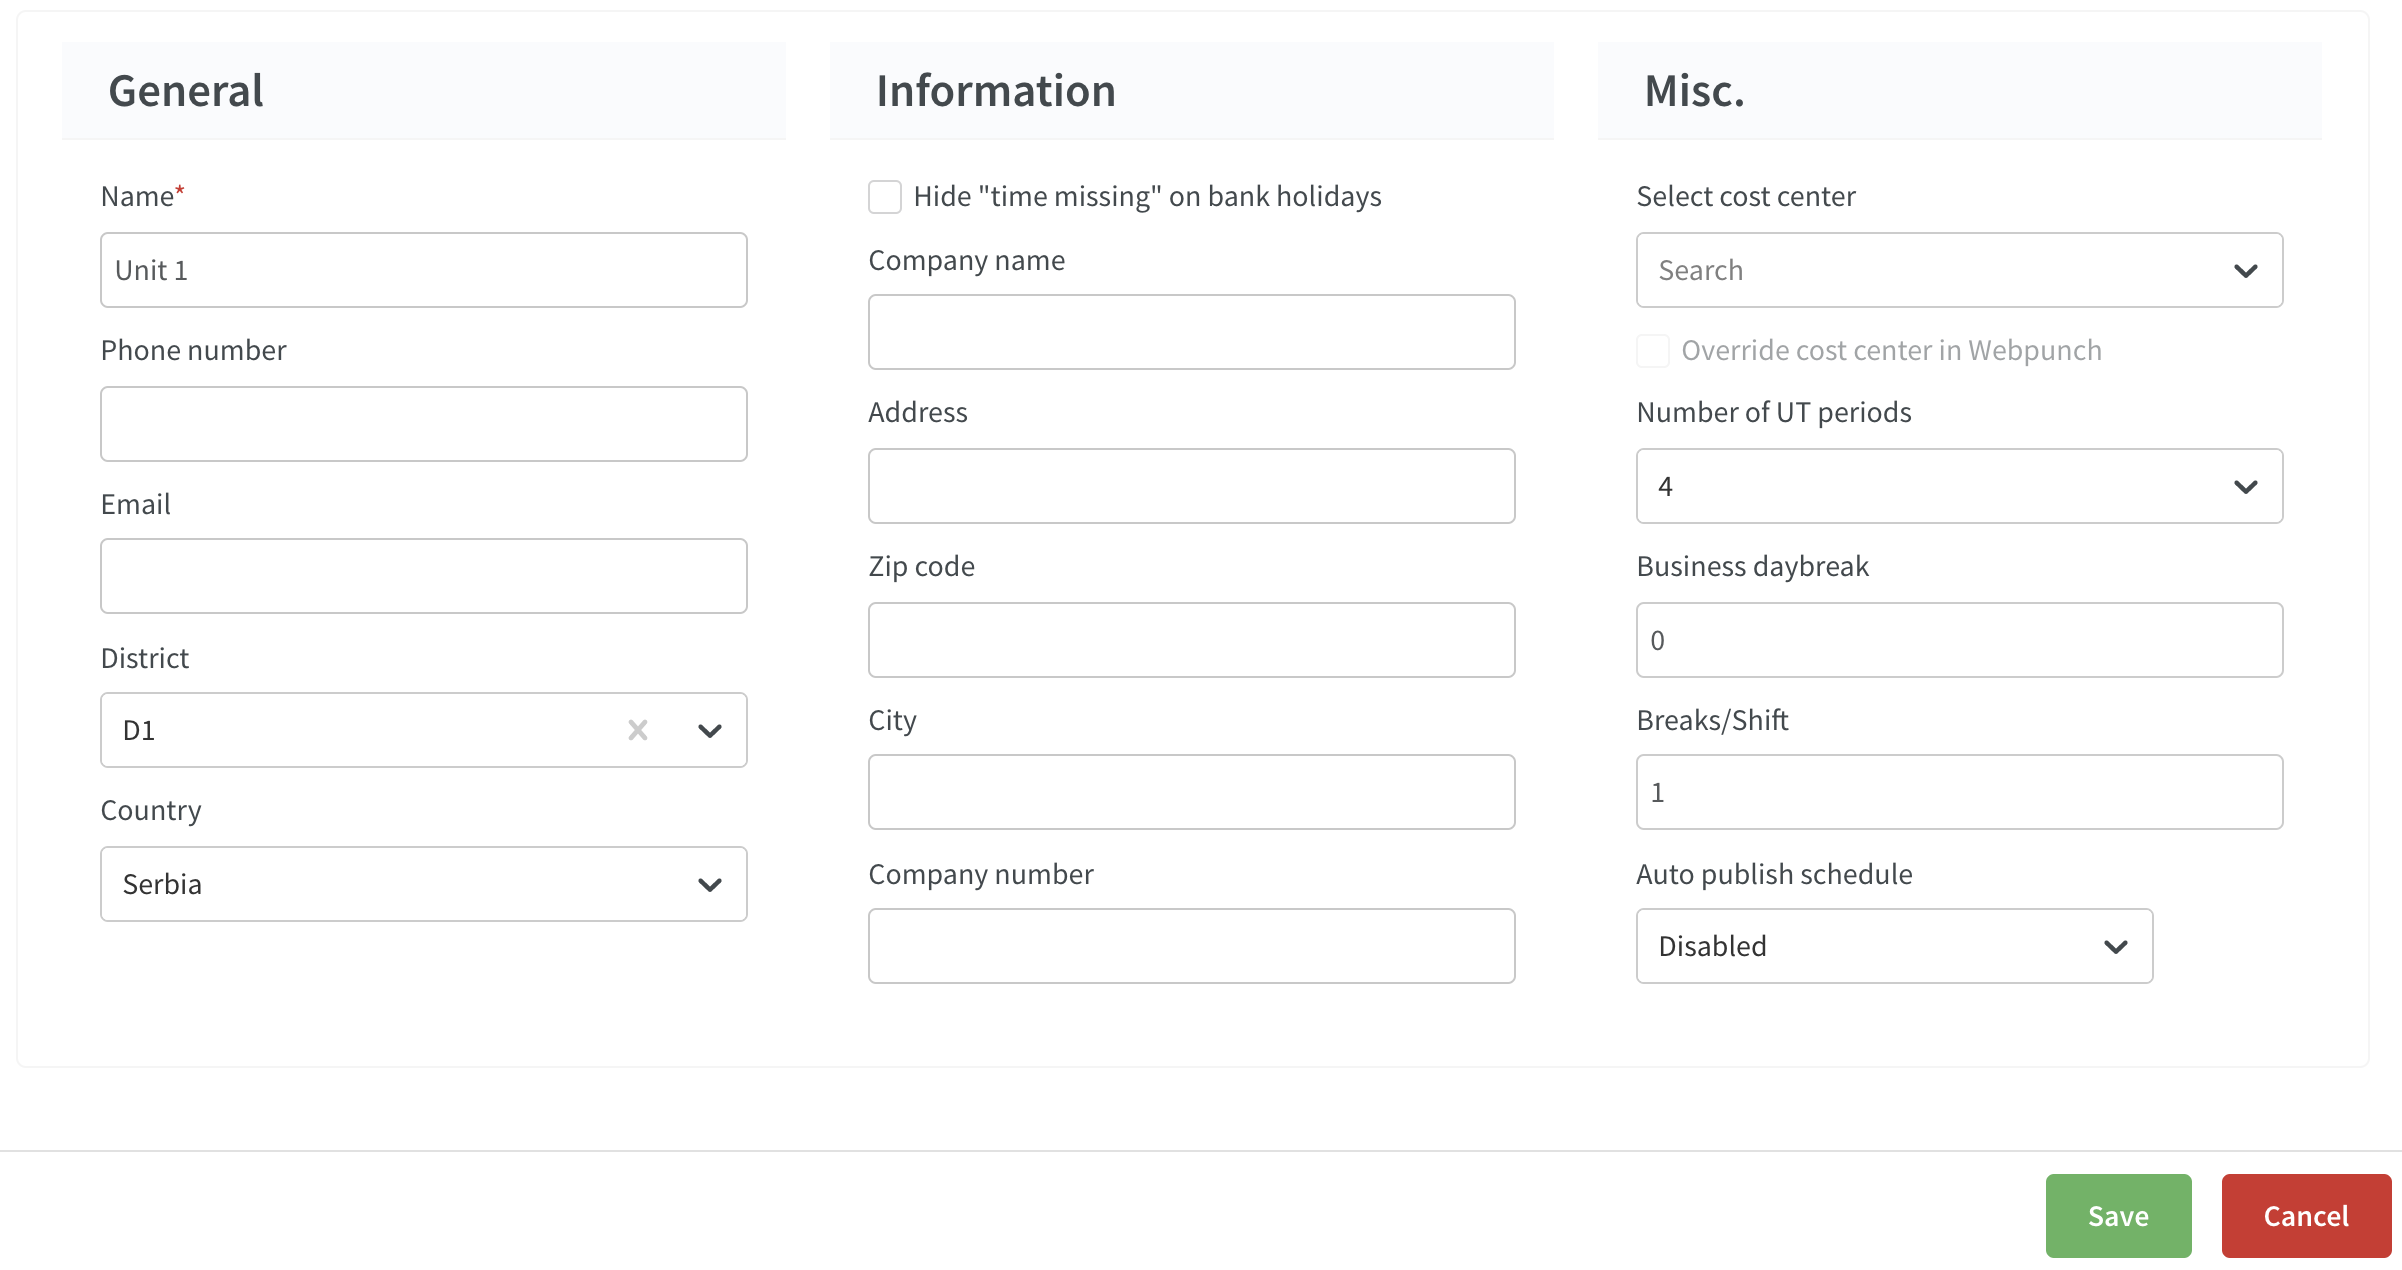
A full page form with all the settings available for the unit will open. Click Save when you are done changing the advanced unit settings:
Transfer to payroll
In version 0085, we released the new Time view as well as being able to generate preliminary payroll files. As of this release, you’re able to generate definitive payroll files.
Compared to running a preliminary payroll file, transferring to payroll will also:
- Lock any transferred payroll items from being edited by them being grayed out in Schedule.
- Update the transferred payroll items’ status from “Ready to transfer” to “Transferred to payroll”.
In order to run a definitive payroll file, follow the steps below:
- Make your selections in the Adjust view panel of the Time tab and ensure you select one and only one payroll file.
- Click "Apply" at the bottom of the panel.
- Wait while Quinyx processes your request.
- In the left-most column of the list that appears, tick the checkboxes of the employees you want to transfer to payroll. Use the header box if you want to select all employees.
- Click the "Create payroll file" button that appears next to the "Preliminary file" button as a result of you ticking a checkbox.
- In the modal that appears, a summary of what will be transferred appears:
- Number of payroll items that will be included in the file.
- Number of payroll items that will be ignored because they are missing employee and/or manager attest.
- Number of payroll items that will be ignored because they are missing a punch.
- Number of payroll items that will be ignored because they have already been transferred to payroll.
- Ticking the "Send me to file archive" checkbox will redirect you to the file archive upon clicking "OK".
- Once in the file archive, wait for the generation of your file to be complete.
- You currently can't lock the selected groups' schedules for the period you're running payroll for - we will make this possible in a soon-to-be release.
Time card
We continue to release Time card functionality.
Edit and delete shifts , punches, and/or absences
It’s now possible to edit or delete shifts (incl tasks), punches, and/or absences.
How to:
- Go to the schedule view.
- Hover on a cell (day and employee).
- Click on the date that will take you to the Time card.

- Click on the “three dots” icon on the right hand side of each schedule item row.

- Choose to edit or delete shift, punch or absence. Note that you edit/delete tasks through the shift detail panel.

- A side panel opens where you can edit the shift, punch or absence.
- Save.
Split punch on tasks
- Time> "punching in and out no breaks".
- Time > "Allow punching on tasks".
- Mobile punch flow > "Split punch on tasks".
If an employee is scheduled to work but for some reason cannot punch in and out of tasks during the day, the manager can now do this in Neo:
- Click on punch missing below the shift.

- Punches will be added based on the scheduled time on the shift and tasks; i.e.
- 10:00-11:00 - Punch on mother shift.
- 11:00-14:00 - Punch on task 1.
- 15:00-17:00 - Punch on task 2.
- 17:00-19:00 - Punch on mother shift.


Calculated variables
It's now possible to create calculated variables in Neo to allow for creating and viewing Key Performance Indicators (KPIs) that are relevant to your organization. This data can either be from Quinyx calculated data (standard variables) or as a combination of those together with Neo Forecast data.
Calculated variables are configured from Account settings > Forecast > Variable settings by clicking Add or editing an existing one.
Example of a calculated variable
Predicted sales per scheduled man hour is a commonly used KPI within many verticals.
To create such a variable, you must have Neo Forecast activated and configured in order to have a predicted sales value. Quinyx can auto-generate this prediction using AI - with you as an organization providing the actual sales. Read more about Algorithms and predictions here.
To add that variable, in the Add new variable dialogue under Account settings > Forecast > Variable settings:
- Primary Input: Predicted sales.
- Operator: Divided by.
- Secondary input: Scheduled hours.
In this example, we want them to be visible in both statistics and dashboard:
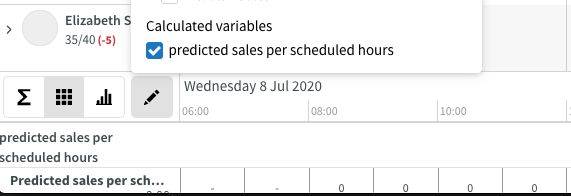
View calculated variables in schedule - statistics
A calculated variable is selected to be viewed in statistics the same way as a standard variable. Visibility settings can be made on an organizational level, meaning that all variables might not be used or configured to be viewed by your organization.
Read more about Statistics.
View calculated variables in the Dashboard
A calculated variable will have a separate graph in the Neo dashboard. It will still have the options for selecting current day, current week, and current month - the same way the existing widgets are in the dashboard is today.

Updates and performance improvements
- All salary types will now be unchecked when you create a new agreement template.
Bug fixes
- The employee KPIs in base schedule now take the "Count as scheduled hours" advanced setting into account.
- Absences with an underlying shift and absences without an underlying shift now display in uniform size on the calendar.
- When creating a shift, approving validation multiple times no longer creates multiple shifts.
- Fixed a bug that displayed a warning that a punch was longer than a shift even when the punch was without a shift.
- A punch now inherits both project and cost center from its mother shift.
- Minimum shift length now only accepts numeric values.
- Fixed a group management bug that allowed a user to delete a main unit.
- Fixed a group management bug that prevented the user from deleting a section or district.
- Adding a punch using Add-Punch now generates warnings without having to reload the web page.
REST API/Web services updates
None at this time.