Version 0101
 Updated
by
Leigh Hutchens
Updated
by
Leigh Hutchens
Release date February 10, 2021
New functionality
Analytics
With this release, we're adding a new filter option called "Include data for" in five reports reports under Analytics.
Include data for
The following five reports now have this new filter option:
- Salary details
- Punched hours
- Time cost
- Schedule cost
- Salary details per cost center
The predefined value in the filter will be "All time worked on unit". The two other options you can select are "People belonging to unit" and "Both".

- All time worked on unit: All employees that have data on the selected unit(s) for the selected period.
- People belonging to unit: All my employees and all of their data for the selected period, irrespective of the selected unit(s).
- Both: A combination of employees belonging to the unit and all time worked on the unit.
Audit logs
In this release, we're introducing the next part of audit logs. We're adding the log for Time. Please note that this is still the first version of audit logs, and in the coming releases we'll add more logs and more functionality!
Search logs
In this first version, the audit logs are only available if you have access to Account settings. You'll find the "Search logs" page at the bottom of the menu on the left-hand side in account settings. Click to open the page and start searching the logs.

Click search, and a side panel will open.
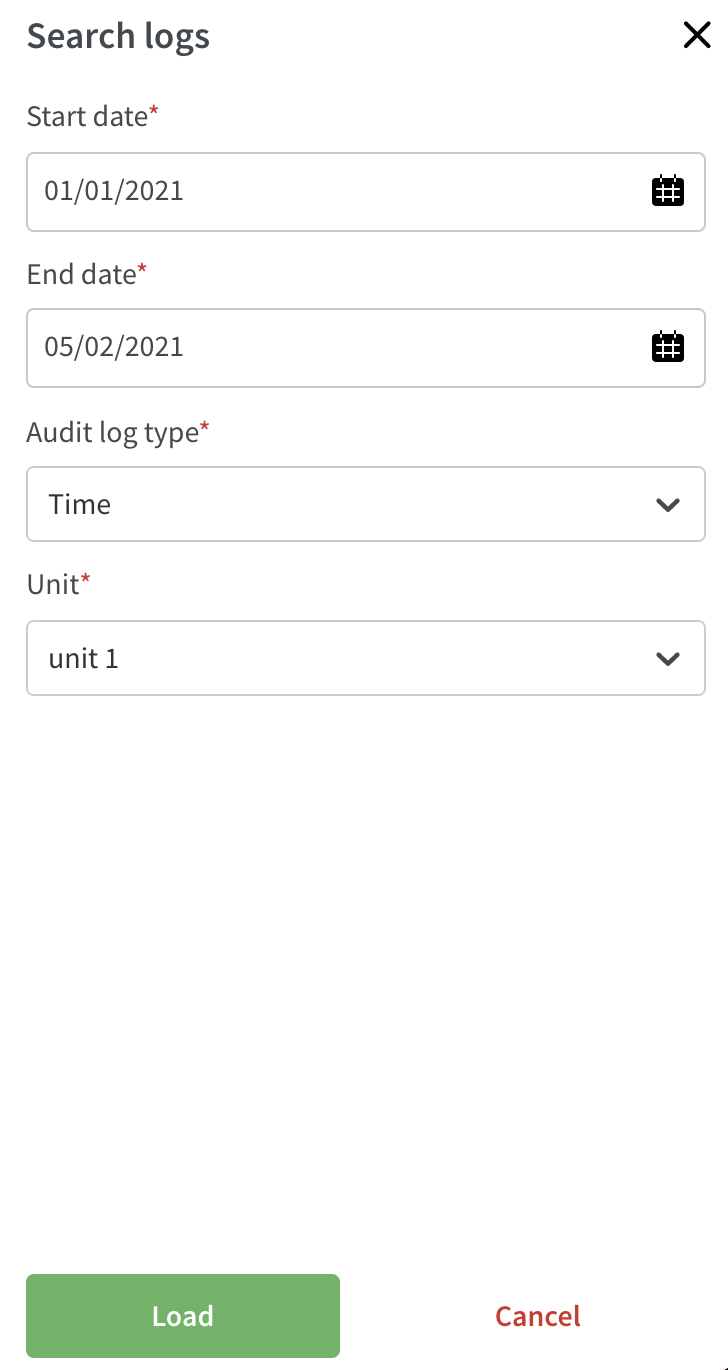
- Select the date range on which you want to search.
- Select what you want to search for in the time log.
- Select on which unit you want to search.
- Click load, and the side panel will close and the data will begin loading.
- Once the data has loaded, you'll see a list of all updates that have been done on time punches for the selected unit.
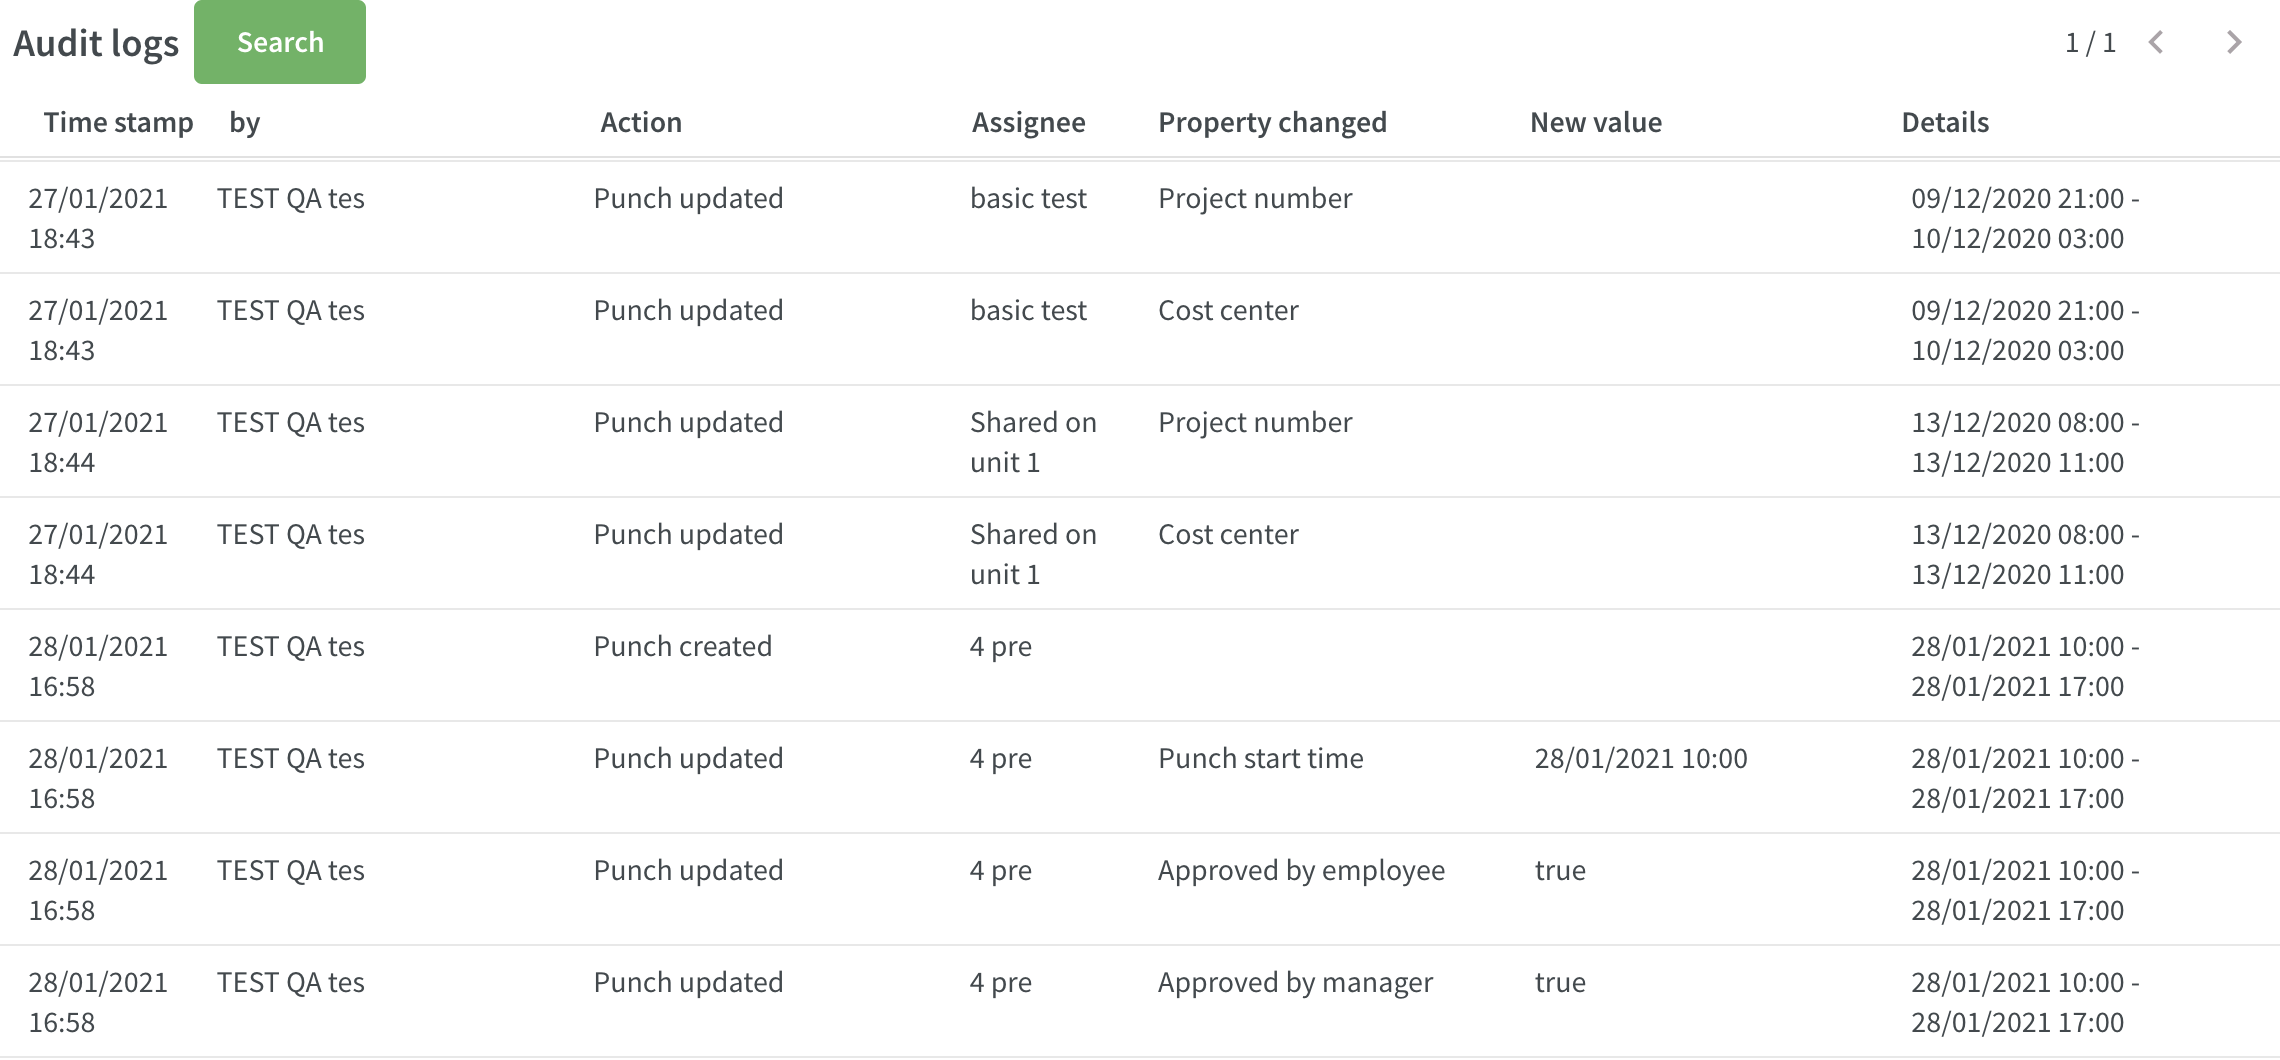
You can view the following columns and types of data:
- Time stamp: The date and time the change was made.
- By: Who made the change.
- Action: What type of action was performed (punch updated, created, deleted, etc.).
- Assignee: The name of the person to whom the punch is assigned.
- Property changed: The type of change that was made (punch start time, punch start date, cost center, approved by employee/manager, etc.).
- New value: What the value was changed to.
- Details: The date and time the time punch was changed.
Each page will display 100 items, and you can navigate among the pages by using the arrows in the top right-hand corner.
Cost centers
We're adding the possibility to view, create, and update cost centers.
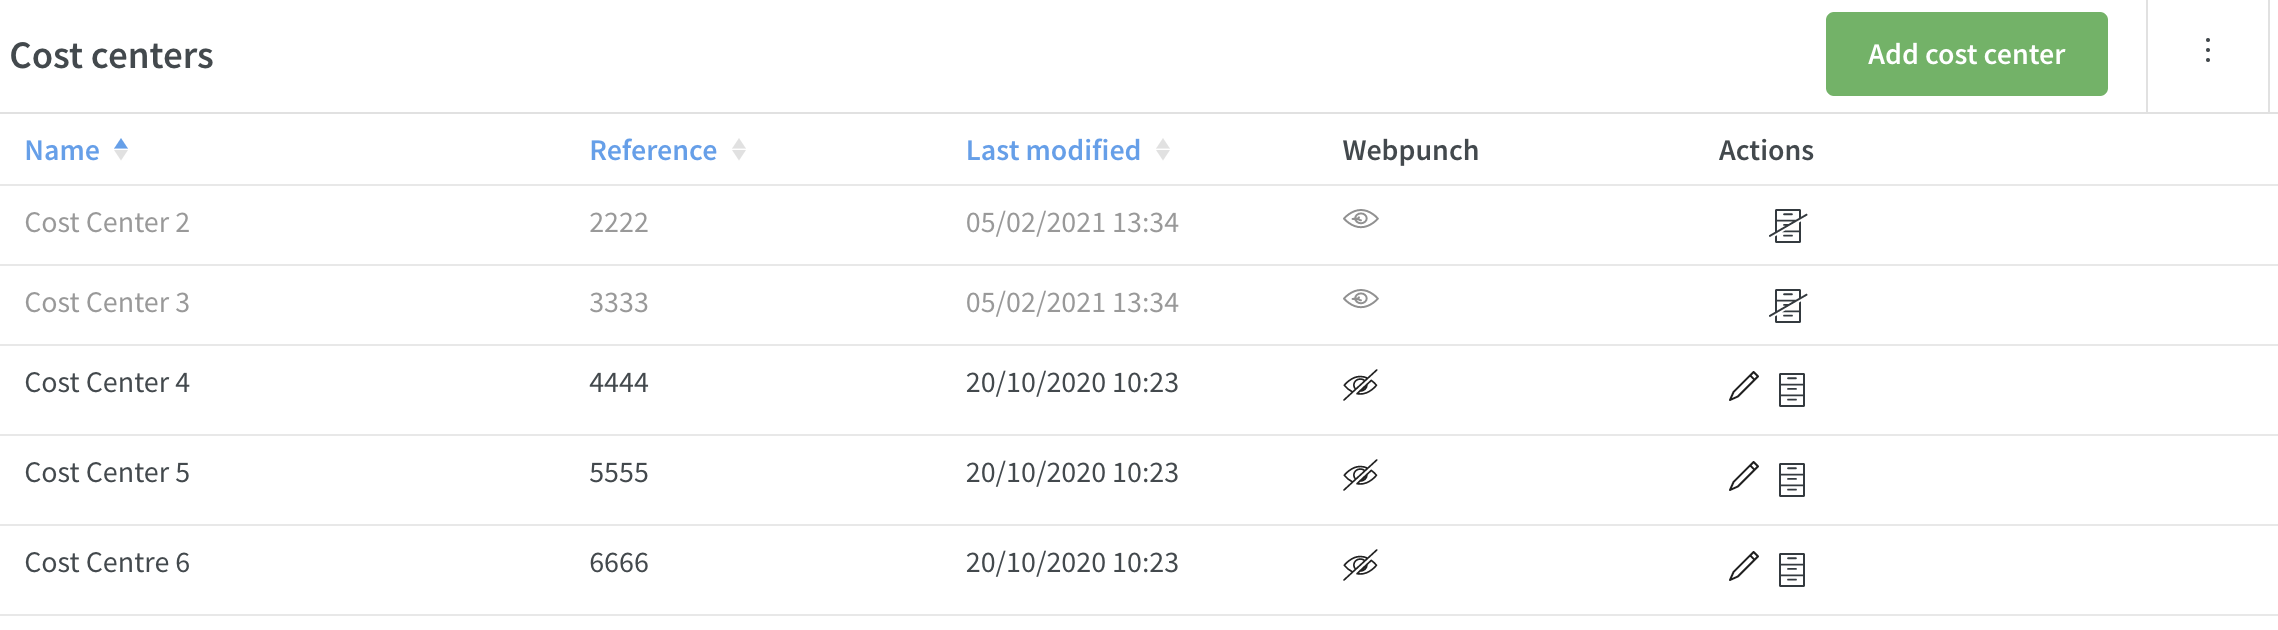
View cost centers
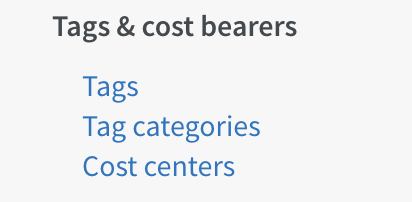
To view a list of all existing cost centers, navigate to account settings and click on "Cost centers" under the heading "Tags & cost bearers" in the menu on the left-hand side.
A new page will open, and you can see a list of all existing cost centers.
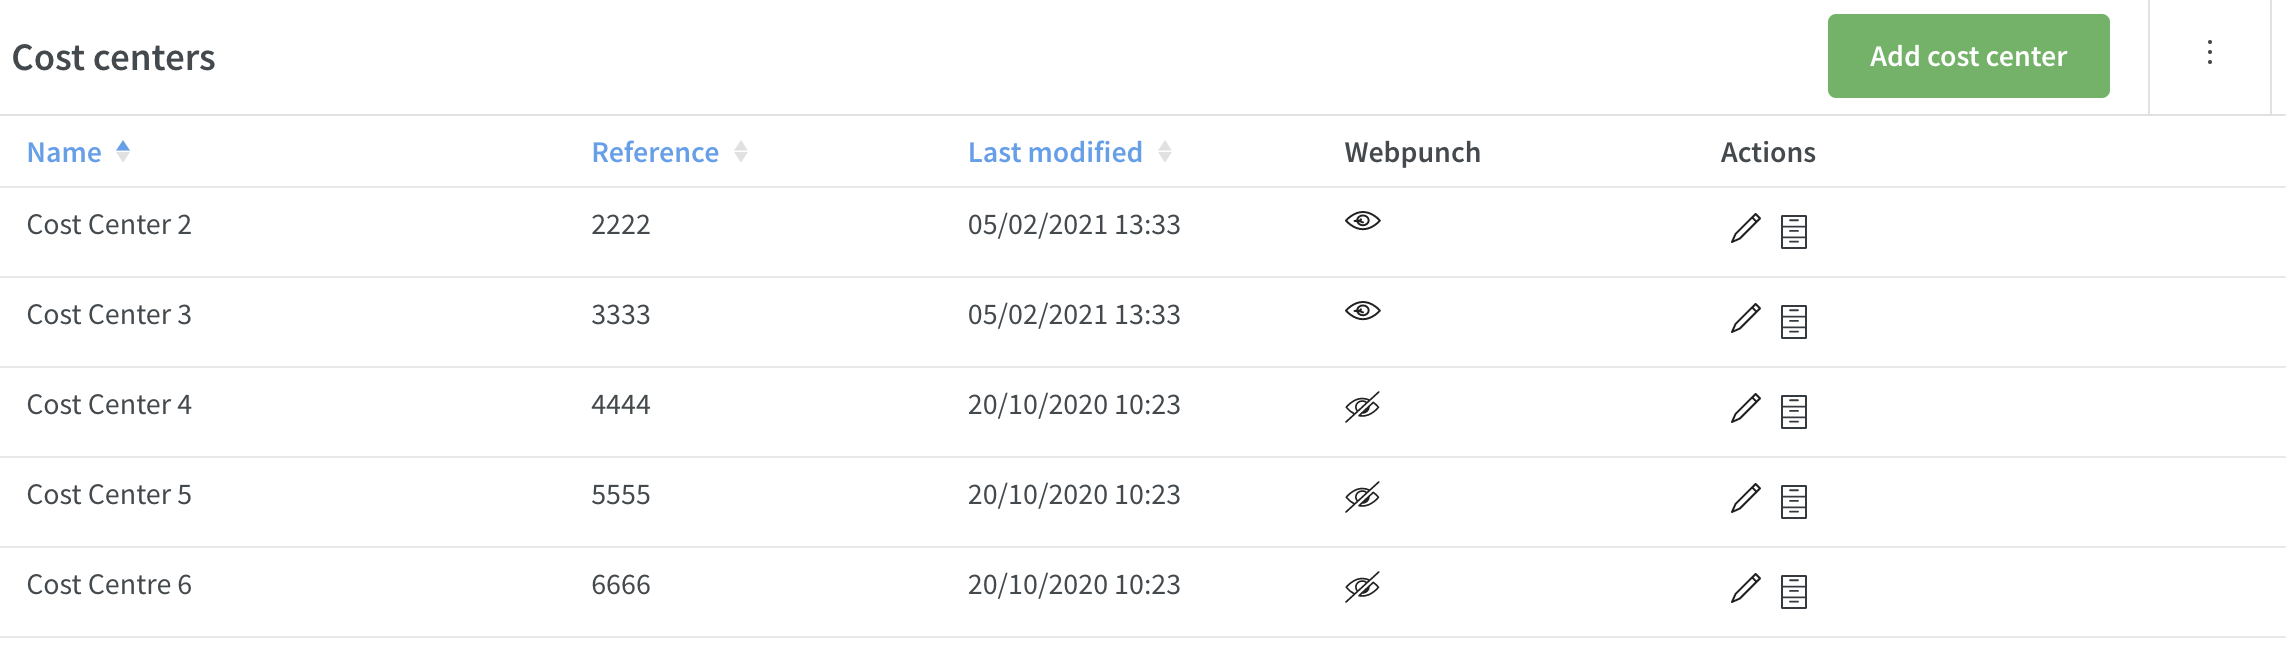
You'll be able to view the following columns:
- Name: Name of the cost center.
- Reference: Reference of the cost center.
- Last modified: Date and time for when the cost center was last modified.
- Webpunch: Whether the cost center is visible in Webpunch.
- Actions: Click to edit or archive the cost center.
It's possible to sort the list on name, reference, or last modified.
Edit cost centers
To edit an existing cost center, click on the pen icon under "Actions". A new pop-up will appear, allowing you to edit the name, reference, and whether the cost center should be visible in Webpunch.
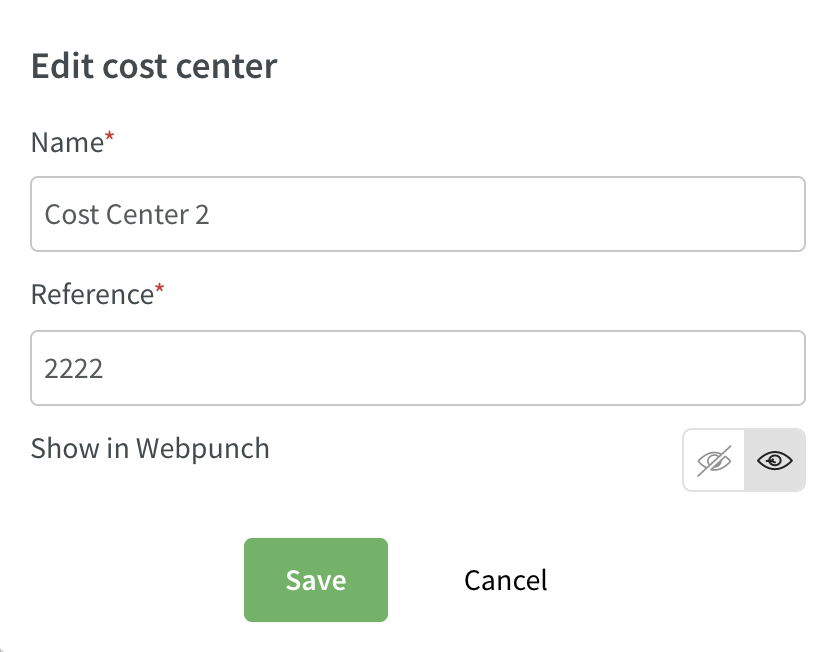
Click save when you're finished with your changes. The pop-up will close, and you'll see a success message in the top right-hand corner notifying you that the changes are saved.
Archive cost centers
If a cost center is no longer used, it's possible to archive it. This will hide the cost center from all selection menus inside the application and from the list of cost centers under account settings.
Click on the archive icon under actions, and the cost center will disappear from the list.
To view previously archived cost centers, click on the three dot menu in the top right-hand corner and click "Select view archived cost centers". The archived cost centers will then be displayed in the list. They will be greyed out and the archive icon crossed over so that you can easily see which cost centers have been archived
To unarchive the cost center, just click on the archive symbol, and the cost center will be active again.
If you no longer want to see archived cost centers in the list, go to the three dot menu again, and select "Hide archived cost centers".
Add cost centers
You can add new cost centers by clicking on the green "Add cost center" button. A new pop-up will appear, and you can start adding new cost centers.
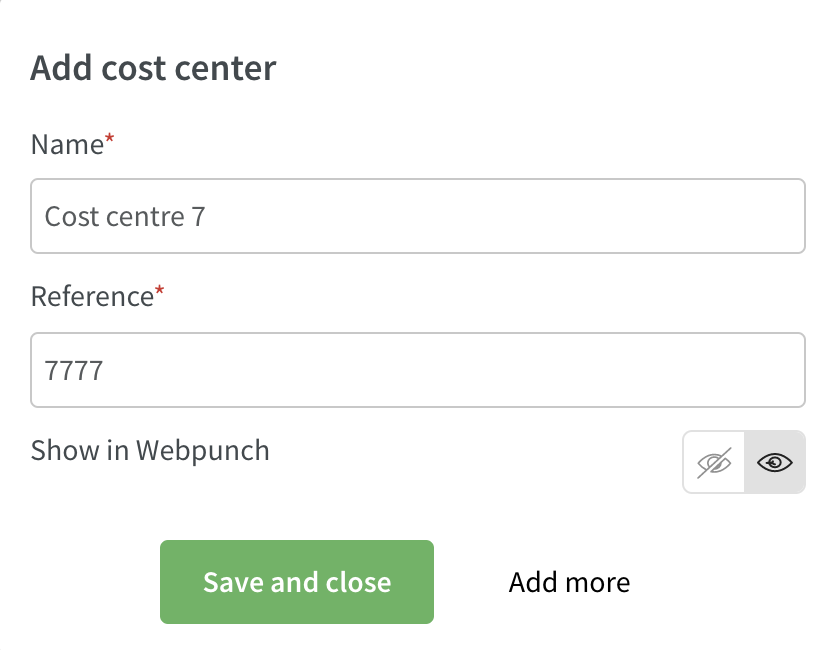
- Name: Enter a name for the cost center.
- Reference: Enter a reference for the cost center.
- Show in Webpunch: Select whether the cost center should be visible in Webpunch.
You have two options:
- Save and close: The pop-up will close, and you'll see a success message in the top right corner notifying you that the cost center has been saved.
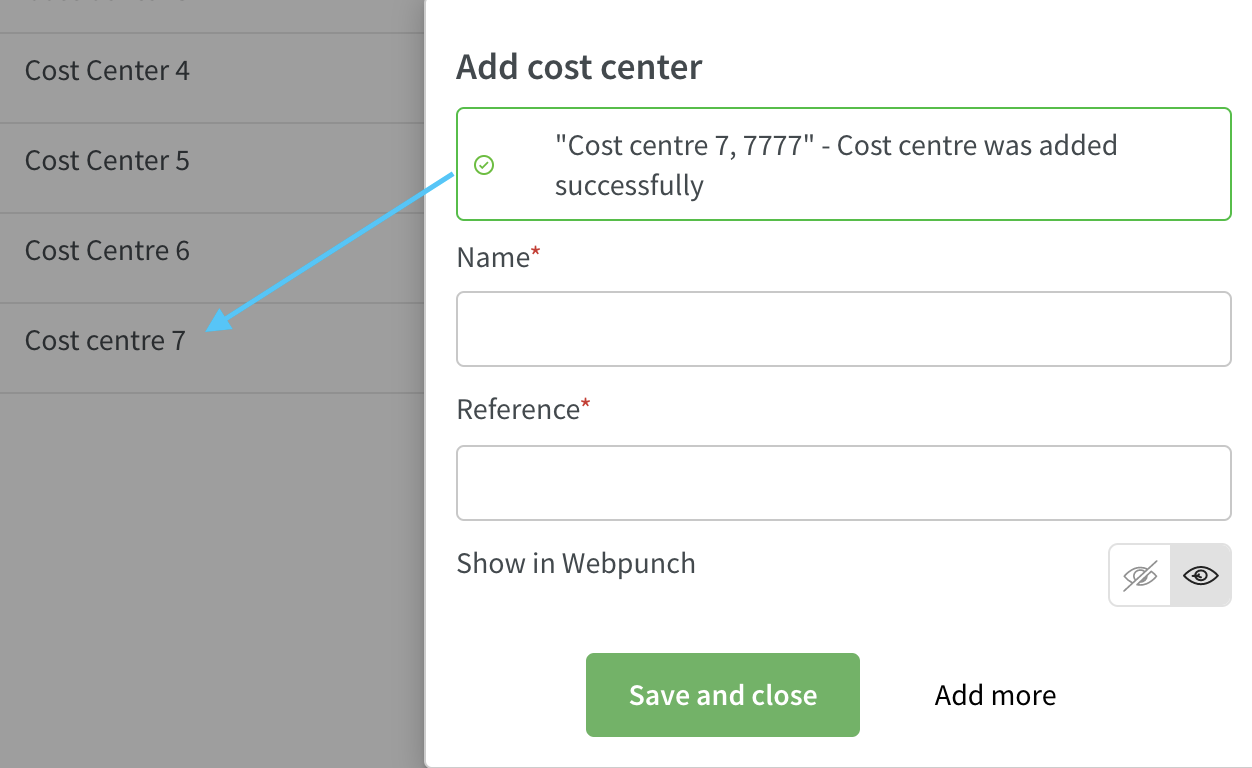
- Add more: The cost center will be saved and display in the list of cost centers immediately. You'll be notified with a success message inside the pop-up indicating the cost center was added. You can continue adding more cost centers by repeating the steps listed above.
Upcoming new logic for leave applications and shift booking notifications
We're currently developing a new logic for how leave application and shift booking notifications are sent. This functionality won't be released in version 0101 since it's currently in the development stage, but we want to share a description of how the new logic will work. We'll inform you when this logic will be released.
The mobile apps manager tab will follow the logic described below as well, meaning that if you receive a notification, you'll see the leave application or shift booking request in the manager tab.
Leave applications
If you don't have a reports to manager set, this is the logic the notification follows
- When an employee applies for leave, either from the mobile app or the Quinyx staff portal, the notification will go out to all managers on the employee's home unit (or section belonging to home unit) with a role level above the employee's highest role AND with write permission on "absences", looking upwards in role and group hierarchy, meaning:
- If there is no one with a manager role one level above the employee's highest role on the home unit (or section belonging to a home unit), we will look two levels up, three levels up, etc. in the current group.
- If there is no one with a manager role above the employee's highest role on the home unit (or section belonging to a home unit), we will look at the group one step above the current group, and look for a manager role that is above the employee's highest role one level above the employee, two levels above the employee, etc. If there is no one with a manager role in that group either, we will look at the group one step further up in the hierarchy and so forth.
- If there are two or three or ten managers with the same role on the same group, for example, three section managers, they will all receive the same leave notification.
- If an employee has no employee role on home unit (but, for instance, an employee role on district), we will still look for the highest role on the home unit.
- If an employee has role in multiple units or sections, we will look at the employee's home unit.
- If an employee has role employee and local manager on home unit, we will look for a manager one level above the highest role, in this case above the local manager role.
- Managers will not receive notifications if they have no access or read access on absence permission.
Reports to manager
- If you set a reports to manager in the employee card, the leave application will only go to that manager, and this setting will override the automatic logic described above.
- We keep the choice of which manager to send the leave application to, and the managers presented are ALL managers that have a direct role above the employee. The list will contain:
- All direct role managers with write on absence permission above the employee's highest role from home unit, and
- All direct role managers with write on absence permission above the employee's highest role from all groups above the employee's home unit/section, up to and including account level .
- Sorting
- Top of the list are managers with the closest role level above the employee on the home unit/section
Shift bookings
If you don't have a reports to manager set, this is the logic the notification follows:
- Shift bookings should follow the same logic described above for leave apps:
- When an employee applies to take a shift, the notification will go out to all managers on unit (or section) where the shift is located with a role above the employee's highest role AND with write on permission "scheduling", looking upwards in role and group hierarchy, meaning:
- If there is no one with a manager role one level above the employee's highest role in the unit/section where the shift is located, we will look two levels up, three levels up etc. in current group.
- If there is no one with a manager role above the employee's highest role in unit/section where the shift is located, we will look at the group one step above the current group, and look for a manager role that is above the employee's highest role one level above the employee, two levels above the employee etc. If there is no one with a manager role in that group either, we will look at the group one step further up in the hierarchy and so forth
- If there are two or three or ten managers with the same role on the same group, they will all receive the same shift booking notification.
- If employee has roles in multiple units or sections, we will look at the unit/section where the shift is located and send the notification to the managers there following the same hierarchical logic described above. If the employee applied for a shift in an away unit and has a reports to manager we will look at the unit/section where the shift is located and send the shift booking request notification to the managers there.
- if employee has role employee and local manager on unit/section where the shift is located, we will look for a manager one level above the highest role.
- if there are managers with no access or read access on schedule permission, we will exclude them from this logic.
Reports to manager
- If you set a reports to manager in the employee card, the shift bookings request will only go to that manager, and this setting will override the automated send to 1 role higher functionality.
Updates and performance improvements
- Changed logic for which managers you can select in "Reports to". In order to support the coming changes for notifications (mentioned above), we have now changed so that you will be able to select anyone with a manager role in the reports to drop-down (in People details).
- In base schedule, when you re-roll out a shift that now has an approved punch and you get the "Time punch for this shift is approved" warning, you now only get the option of not rolling out in the validations panel, whereas before you could also unassign it.
- In base schedule, when you re-roll out a shift that is now in a locked salary period, you now only get the option of not rolling out in the validations panel whereas before you could also unassign it.
Optimization
Improvements to CSV export from Forecast tab
Numbers displayed inside the Forecast tab, and those that are generated on CSV exports from this tab, will now be formatted based on the language setting in Quinyx.
Using the number ten thousand as an example, numbers will display as:
- English GB 10,000.00
- English US 10,000.00
- English CA 10,000.00
- Svenska 10 000,00
- Norsk 10 000,00
- Suomi 10 000,00
- Dansk 10.000,00
- Deutsch 10.000,00
- Francais 10 000,00
- Francais CA 10 000,00
- Portuges 10.000,00
- Spanish 10.000,00
- Italiano 10.000,00
- Nederlands 10.000,00
- 汉语 10,000.00
- 日本語 10,000.00
- 한국어 10,000.00
- Русский 10 000,00
- Polski 10 000,00
Other updates in Optimization
- Renamed "Auto man" functionality to "Auto Assign".
- Renamed "Sales input data" related to Classic to "Sales (Classic)" for clarity in forecast and variable settings pages.
Bug fixes
- Resolved a base schedule issue that caused task Information and advanced settings to be visible even though no agreement was selected.
- Resolved a base schedule issue that incorrectly created new shifts when a re-rollout for a period inside of a previous rollout period was performed.
- Resolved an issue with role management so that copying a role template now correctly copies only access right settings, not role level.
- Resolved an e-signing issue that caused an error message to display when initiating the e-signing process on both employee and section.
- Resolved an e-signing issue that produced an error message when a manager initiated the e-signing process on a section.
- Resolved an issue with punches that didn't allow a selection for Overtime/Additional time type.
- Resolved an issue that caused a weekly/daily rest period warning to display for free day shifts.
- In the absence detail panel, “Attest absence checkboxes” are now correctly automatically ticked if “Approve pay on absence” is enabled.
New HelpDocs articles
REST API / Web service updates
- Added new API end point for posting aggregated input data to Quinyx. This end point should be used when sending data that has already been bucketed into 5, 15, 30, or 60 min intervals and will result in an reduction in wait times between sending data to the API and seeing it presented in the GUI.
POST/aggregated-data
You can find more information here.
This update will result in the deprecation of POST/actual-data.
Soon, customers that send pre-aggregated data to POST/actual-data will be automatically redirected to POST/aggregated-data.
SOAP API / Web service updates
At Quinyx we have moved to HTTPS for all of our customers except a single endpoint for backwards compatibility. This endpoint is for WSDL integrations and only available on the address apiftp.quinyx.com. To ensure your customer data is safe and secure, this HTTP endpoint will be deprecated. The documented URL for Quinyx WSDL is https://api.quinyx.com/FlexForceWebServices.php
This is why on 1st of May 2021 on production environment, we will disable port 80 and only allow 443 (HTTPS) on the following endpoints:
apiftp.quinyx.com/FlexForceWebServices.php
How does this affect you?
If you're still pointing to this endpoints on port 80, you have to change these integrations to port 443, i.e. HTTPS. You can already do this and test that everything works as expected.
The following SOAP API endpoints will be discontinued and removed from Quinyx WFM August 2021.They are already now replaced with REST API endpoints for Neo Forecast. Read more about Neo Forecast and the improved functionality here and about the new REST APIs here.
- 6.2 wsdlGetForecasts
- 6.3 wsdlUpdateForecasts
- 6.6 wsdlUpdateForecastV2
- 6.8 wsdlUpdateForecastsV3
- 6.4 wsdlGetSalesData
- 6.9 wsdlGetSalesDataV2
- 6.7 wsdlGetOptimalStaffing