Version 0062
Analytics
With the release of Neo 0062 we are introducing three new reports that can now be generated and downloaded from Neo.
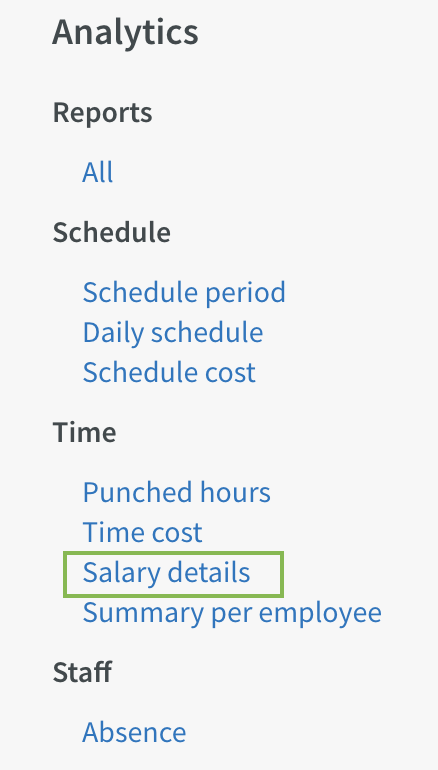
Salary details
To generate the "Salary details" report, click Salary details under Time in the menu on the left-hand side:
Click Create to open the dialog allowing you to create a new "Salary details" report:
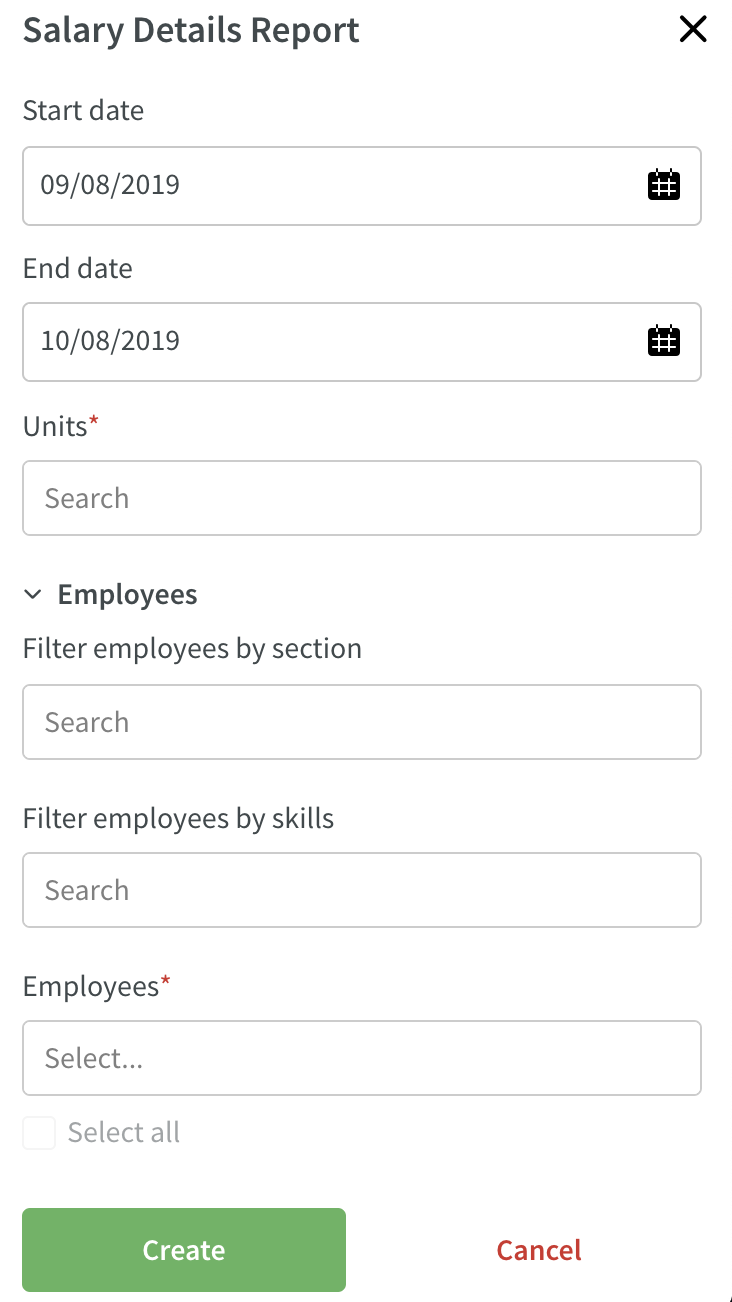
- Select the data you wish to use for the report (fields marked with * are required fields).
- Click Create.
- The dialog will now close and the status of your report will display.
- Once the status changes from "processing" to "download", you can click the blue text to download your report.
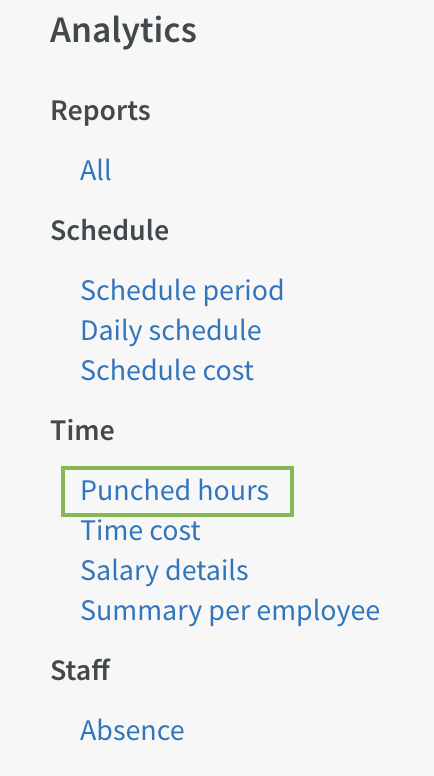
Punched hours
To generate the "Punched hours" report, click Punched hours under Time in the menu on the left-hand side:
Click Create to open the dialog allowing you to create a new "Punched hours" report:
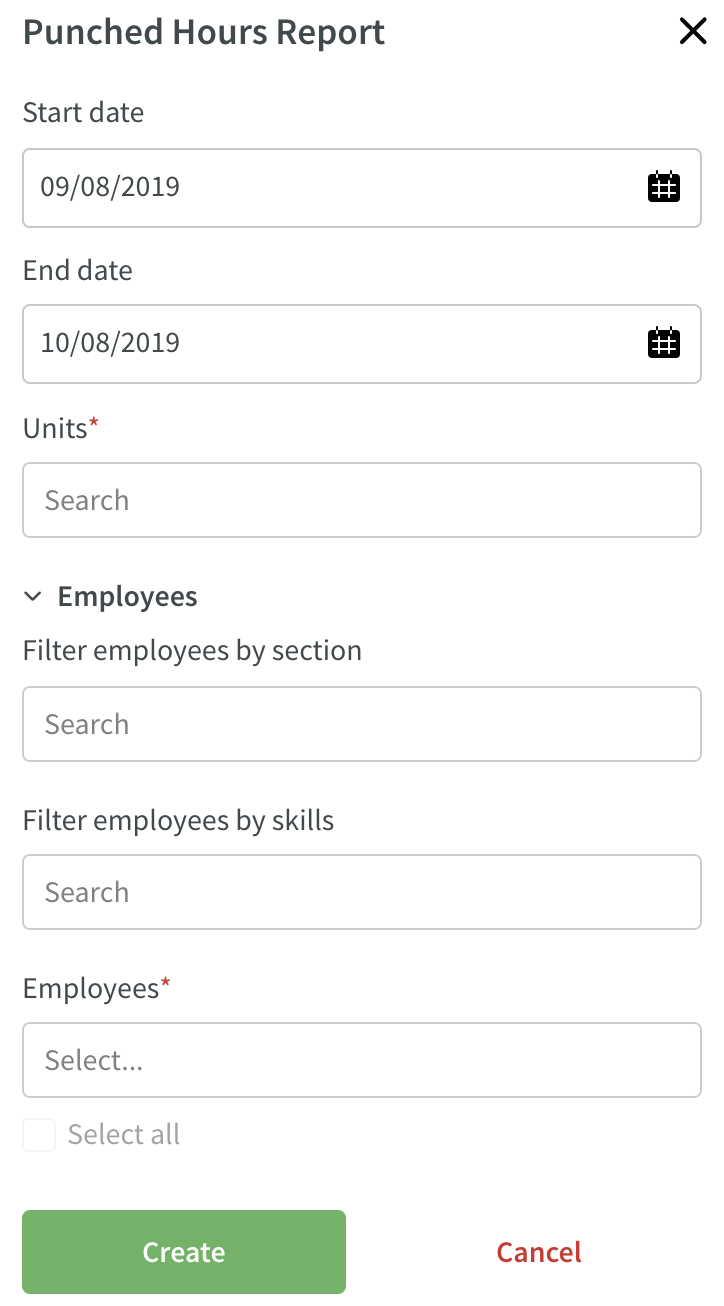
- Select the data you wish to use for the report (fields marked with * are required fields).
- Click "Create".
- The dialog will now close and the status of your report will display.
- Once the status changes from "processing" to "download", you can click the blue text to download your report.
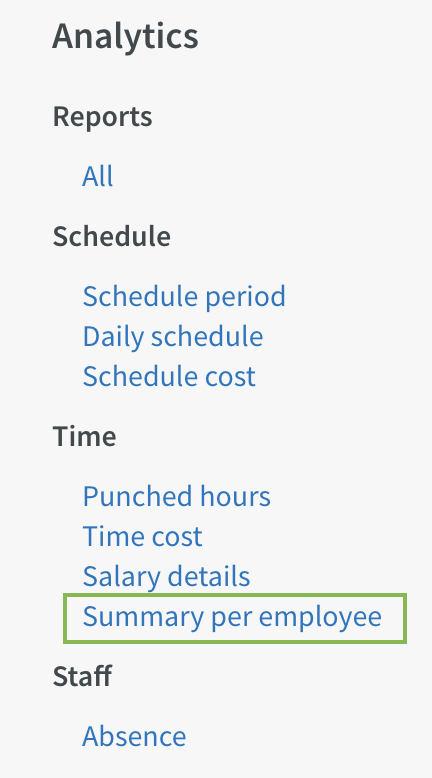
Summary per employee
To generate the "Summary per employee" report, click Summary per employee under Time in the menu on the left-hand side:
Click Create to open the dialog where you can create a new "Summary per employee" report:
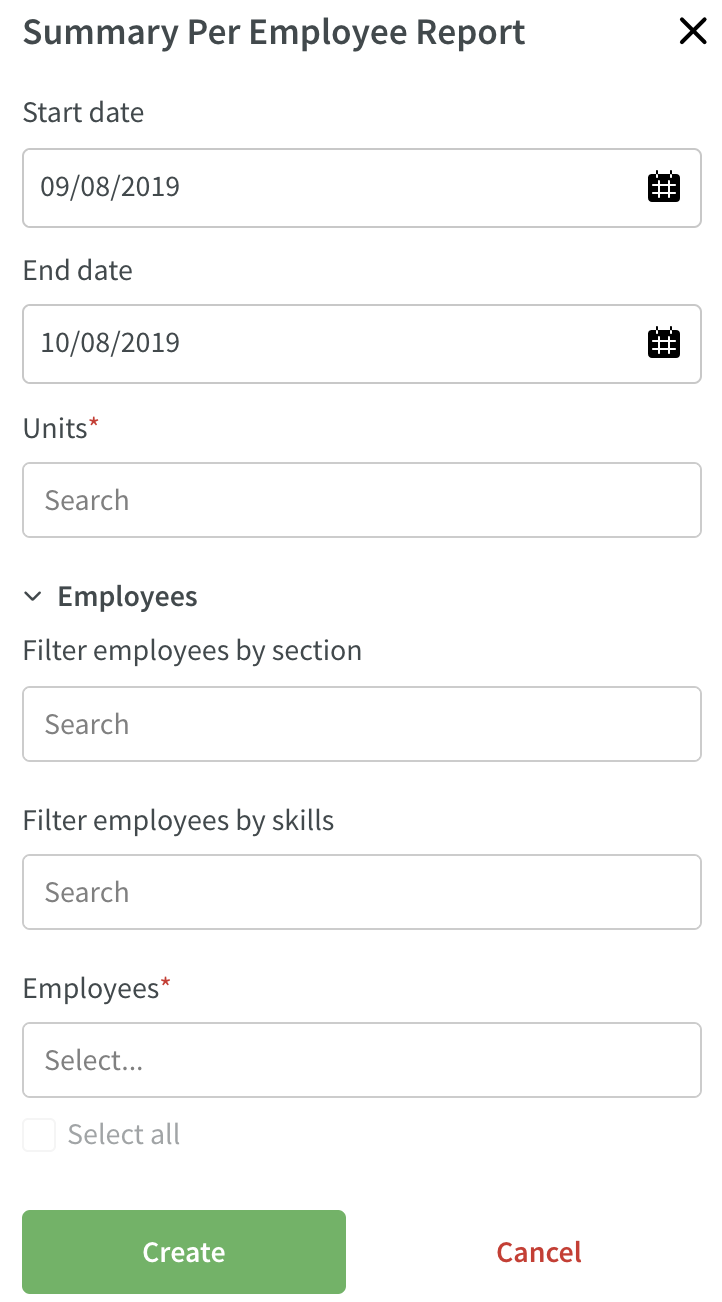
- Select the data you wish to use for the report (fields marked with * are required fields).
- Click "Create".
- The dialog will now close and the status of your report will display.
- Once the status changes from "processing" to "download", you can click the blue text to download your report.
Schedule & Time
Base Schedule
Continue rotation from previous rollout - How it works
As of Neo version 0062, it is possible to continue on the rotation of the previous rollout when rolling out a base schedule that has already been rolled out in the past. The benefit of this is that it greatly facilitates ensuring that your employees get the number of weekends off they're entitled to.
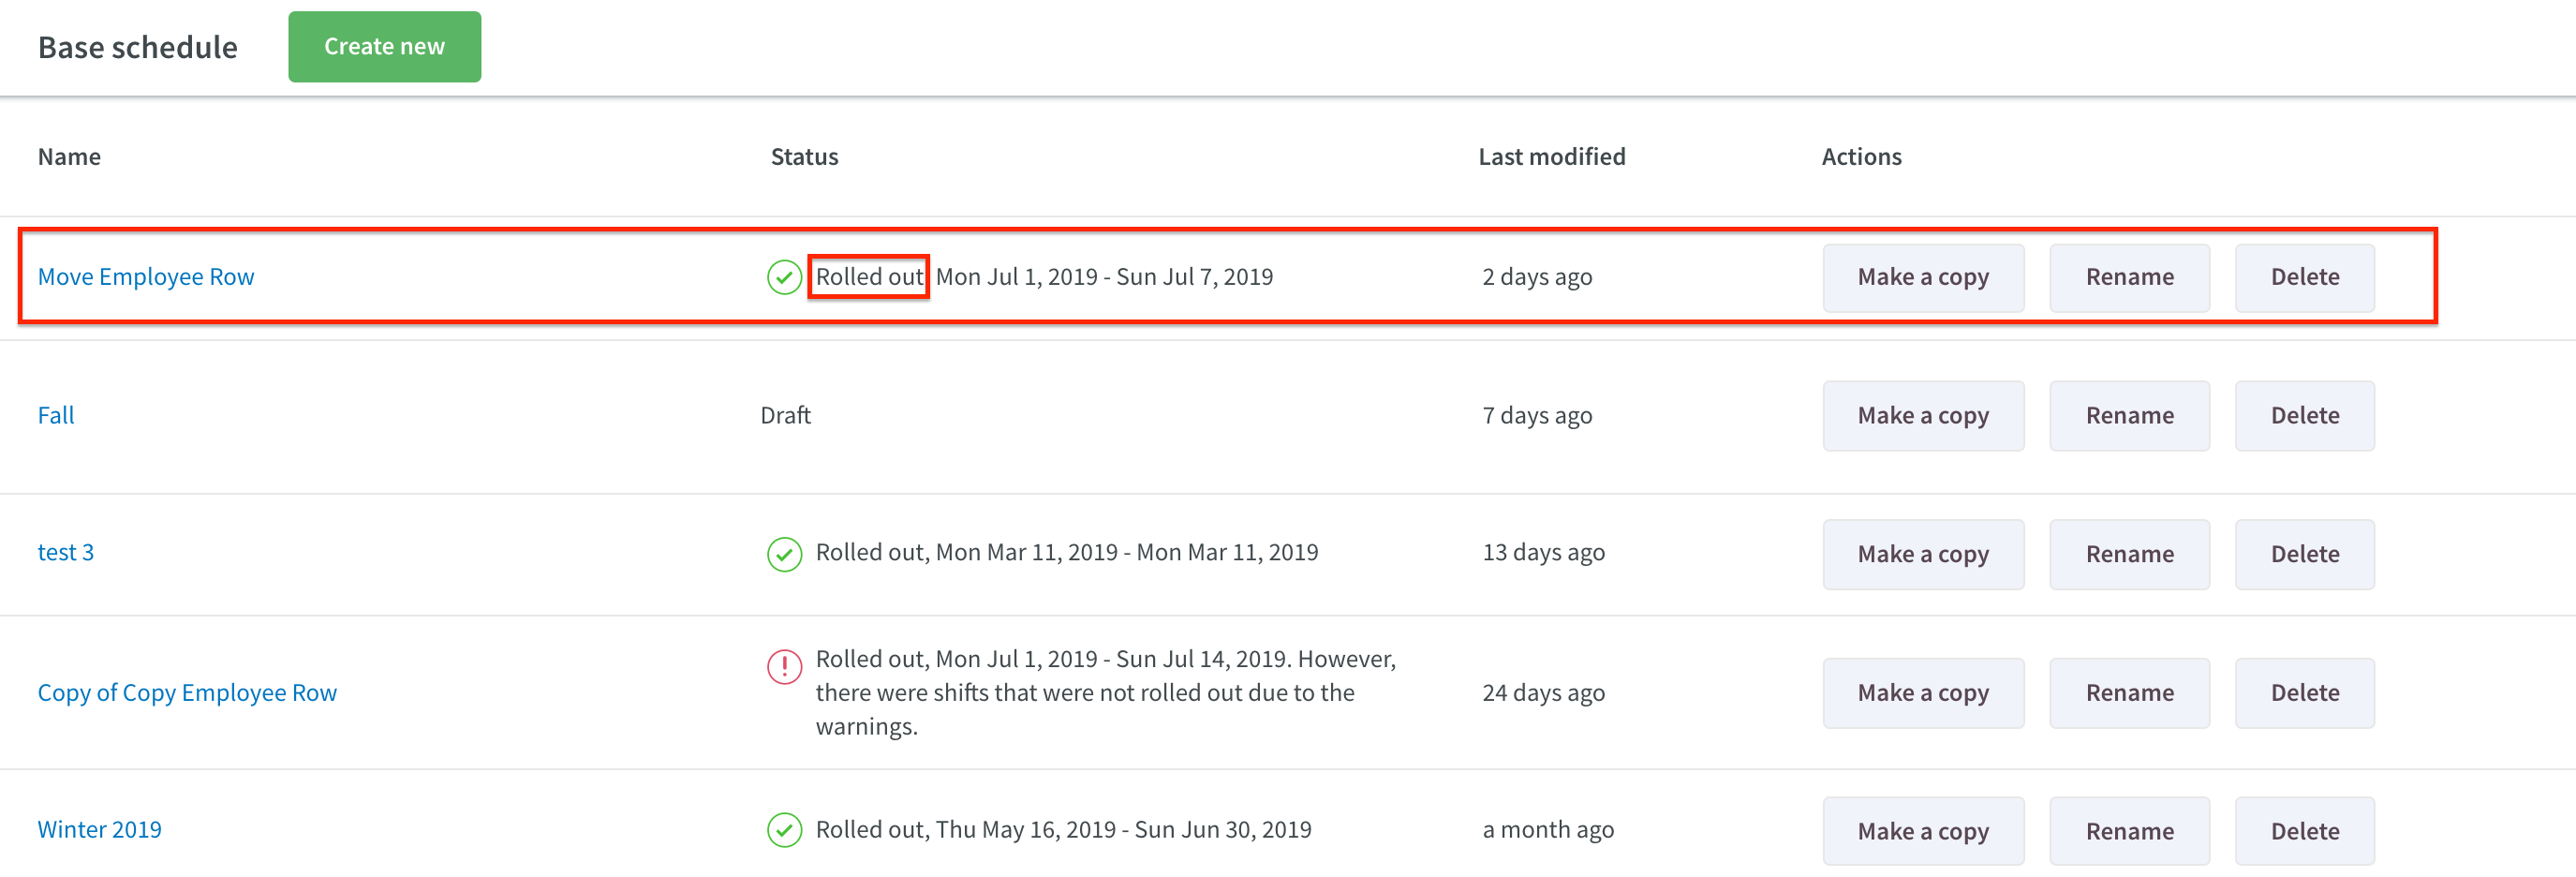
To use the function, navigate to a base schedule that has already been rolled out, i.e. a base schedule that doesn't have the "Draft" status:
Then click Roll out to bring out the roll out side panel:
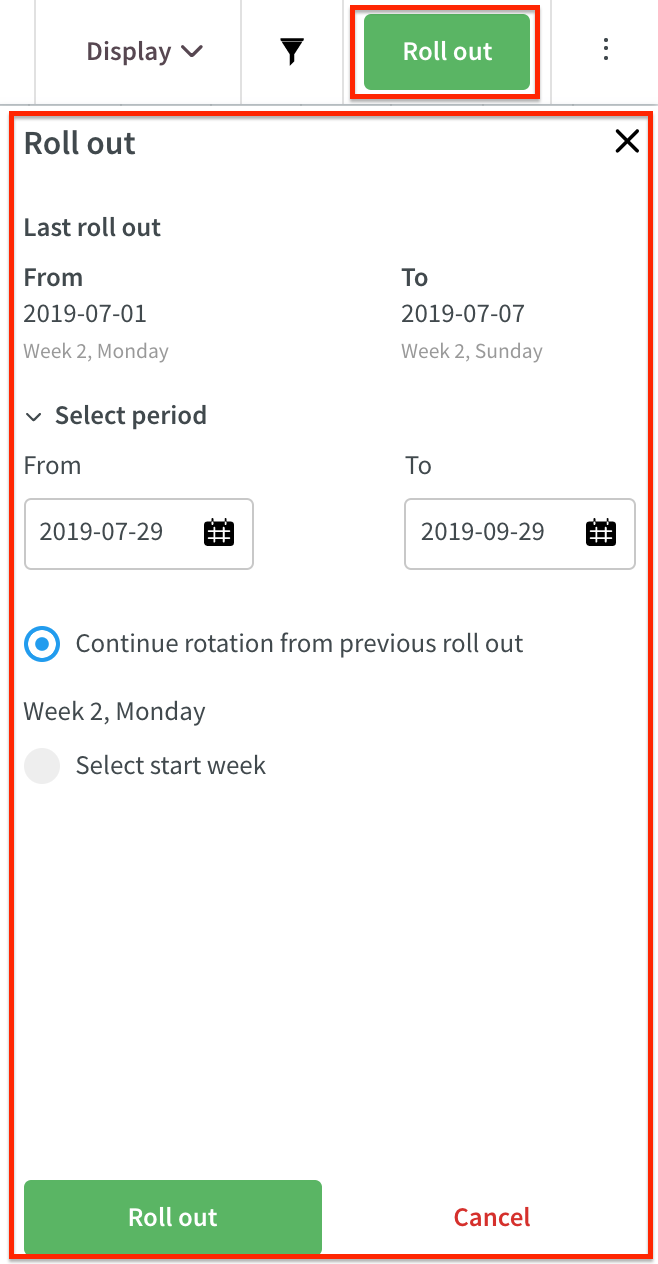
Our base schedule is based on a 4-week template period. As you can see from the above screenshot, the dates of the previous roll out feature at the top of the side bar, as do the base schedule week and day of the beginning (week 2, Monday) and end (week 2, Sunday) of that roll out. Further down, the option to Continue rotation from previous roll out is pre-selected and the base schedule week and day of the beginning of your new roll out appears under it (week 2, Monday). As you can see from the below table, our new roll out continues on the previous roll out's rotation:
Calendar Date and Day | Base Schedule Day and Week in Previous Roll Out's Rotation |
Sunday July 7 | week 2, Sunday |
Monday July 8 | week 3, Monday |
Monday July 15 | week 4, Monday |
Monday July 22 | week 1, Monday |
Monday July 29 | week 2, Monday |
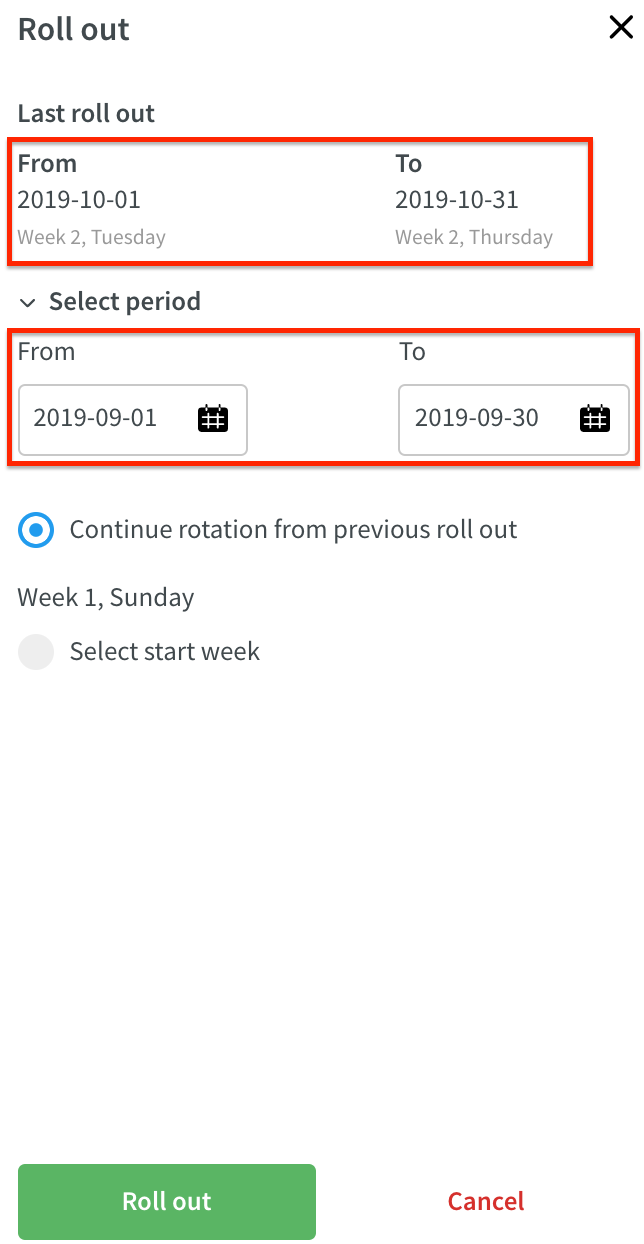
Continue rotation from previous rollout - Reversed order of roll outs
Neo also offers the possibility to continue on the rotation of the previous roll out when the start date of that previous roll out is after the end date of the new roll out. With the selection shown in the below screenshot, you would still ensure your employees get the number of free weekends they're entitled to at the September/October turn of the month:
Schedule
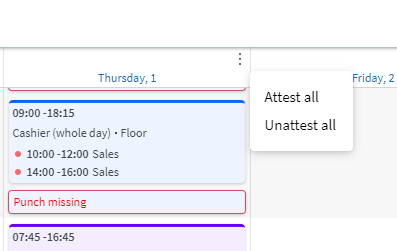
Attest / Unattest all per day
You now attest / unattest a day (all punches and absences that day) by clicking the ellipsis next to the day and selecting attest all or unattest all. Note that the ellipsis is only visible any of the schedule items called "Absences" or "Punches" are selected.
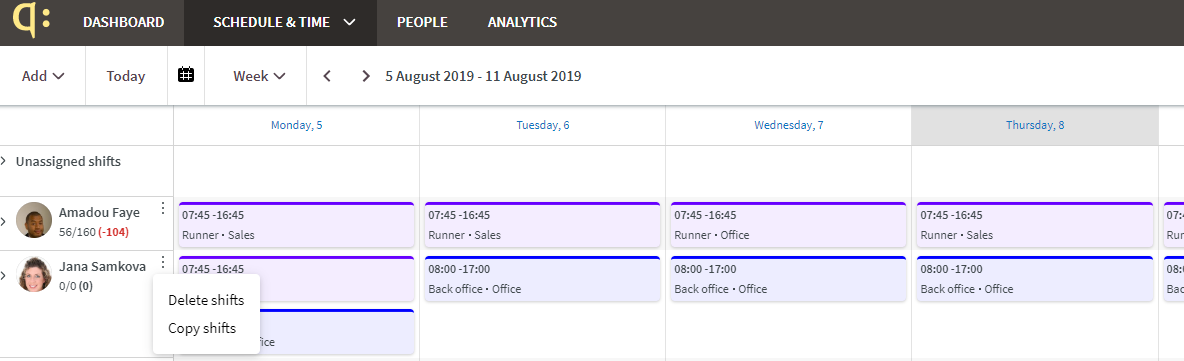
Copy employee row
As of this release, you are able to copy an employee's schedule row to one or multiple employees.
When viewing your schedule, click the ellipsis by the employee avatar and select the Copy shifts option. This will copy the visible days of the employee row, including the days on which there are no shifts - if you're in the daily view, only the viewed day's shifts will be copied. Likewise, being in the weekly view will copy the row of the viewed week for that employee.
In the modal that appears when you've clicked Copy shifts do the following to copy shifts:
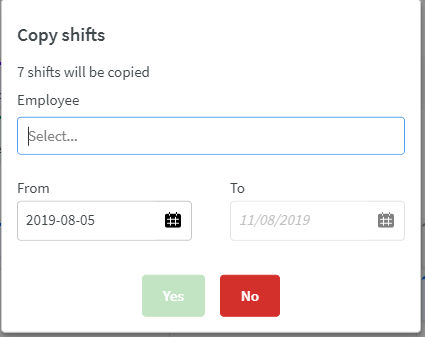
- Select the employee(s) you're copying shifts to. Note that it's also possible to copy to the person you're copying from.
- Select the from date of where you want to copy the shifts to. Note that the to date will update automatically based on the period you have selected to copy.
- Click Yes. A validation of the shifts will now be carried out by the system in the background.
- Choose whether shifts with warnings should be created or not, either by selecting all warnings in one go or one at a time.
- Save.
- Done!
Filter applied icon
A very requested feature from our users is to be able to see whether one or more filters has been applied to the schedule view. You will now be able to see that by looking at the number next to the filter icon. Enjoy!

Notifications
We have now renamed Shift control centre to Notifications and as well as changed the logic for what time range we display. Previously, we only showed items between the dates selected in the schedule view but we have now expanded the range. The applied logic is as follows:
- Leave requests are shown for back in time and for the future
- Unassigned shifts are shown for the future from today's date up until the last day of the published period
- Shift bookings are shown for the future from today's date
- Notices of interest are shown for the future from today's date
In order to navigate to the Notifications, click the bell icon in the schedule view, just like before. 
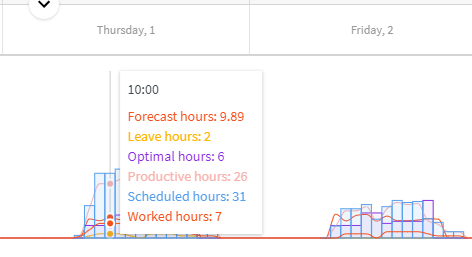
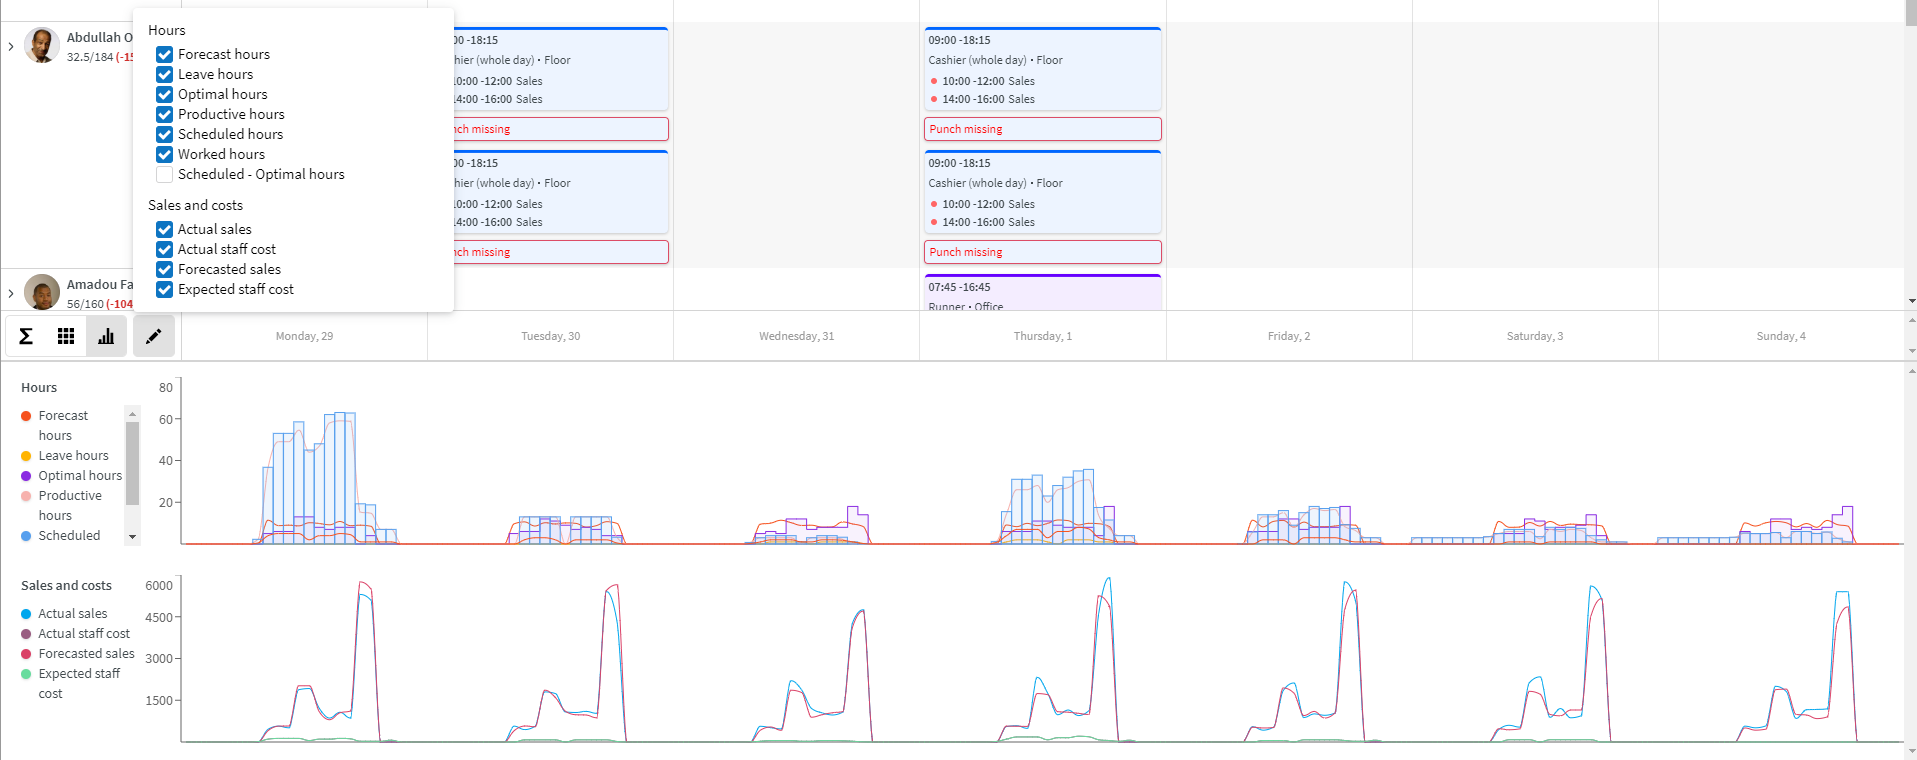
Statistics graph
As of this release it’s possible to see all current variables in the Statistics graph (previously you could only see optimal hours variables and scheduled hours).
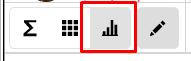
- Go to Display in the schedule view and select Statistics in the dropdown menu.
- Select the graph icon
Here we have divided the variables based on unit 1) hours and 2) sales and cost. Depending on which variables you have selected (pen), you will therefore be able to see variables in one or two graphs.
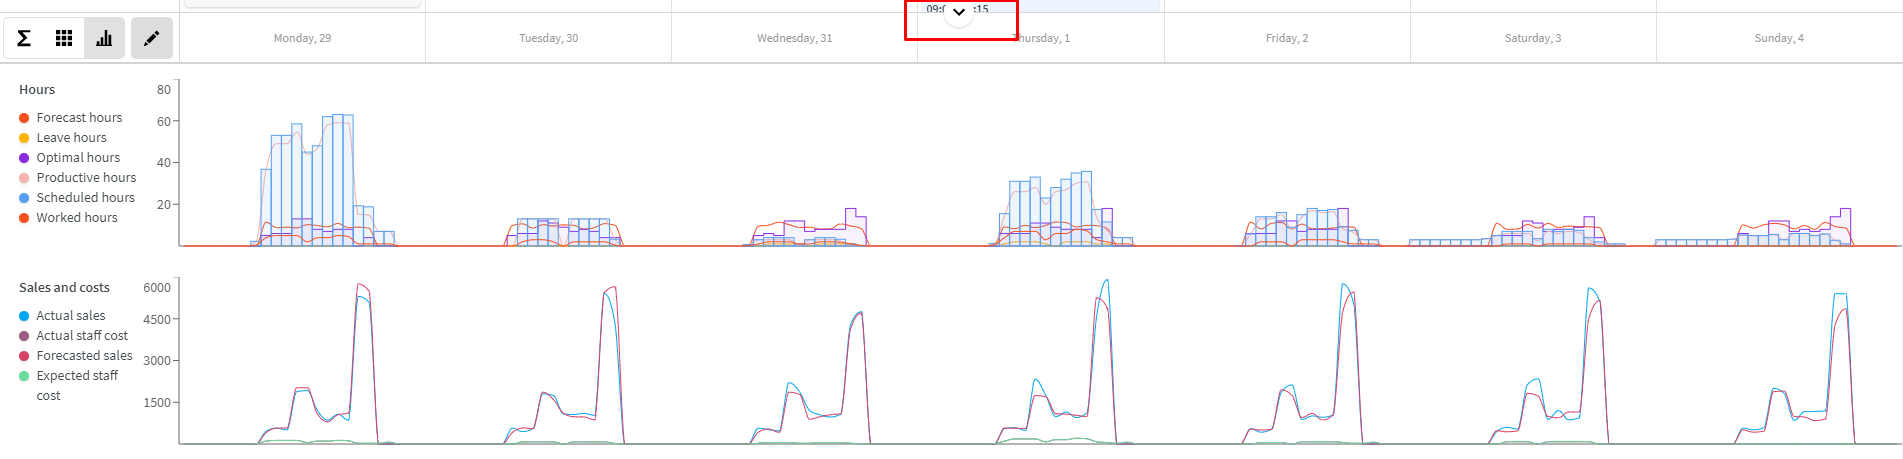
Note that if you use variables with both units, you can decrease the height of the statistics by clicking the "arrow" appearing at the top of the statistics as shown in the below screenshot. You will still be able to see both graphs, but you will have to scroll.
If you want to view more details, you can hover over the graphs and you see the data per variable and hour.