Group settings
 Updated
by
Daniel Sjögren
Updated
by
Daniel Sjögren
What is Group settings?
If you have any type of manager role in Quinyx, you will be able to access the "admin portal" for Quinyx WFM. However, not everyone within your organization might have top-level access, nor would you necessarily want that.
If you are a local manager, then you might only need access to your unit's settings and information. Same applies if you are a section manager. This is where Group settings come into play.
Through Group settings, you have the options to still make changes to roles of your employees, adding local shift types specially made for your group, or setting up static rules for your forecasts etc.
What are the main differences between Account settings vs Group settings?
Account settings lets you make changes to essentially your whole organization given that any of your roles has access to it. For this reason, access to Account settings is usually quite limited to a few people, most often to the Account owners/Support contacts.
Group settings however, is available to anyone with a manager role that has the Settings access right enabled to read or write-permission.
Compared to eachother, Group settings is more limited in terms of functionality, with its focus being on a specific, or a set of groups rather than the whole organization.
Access rights
Besides the Account Settings, there is also the option to add, edit or delete roles from Group settings > Organization. This is can be quite useful if you don't have access to Account settings, but still wish to make any changes to roles in your group (Unit, Section).
In addition, from Group settings > Access rights > Devices you can decide whether a mobile device should be considered authorized or not.
Organization
Add role
To add a role to one of your employees in your group, do the following:
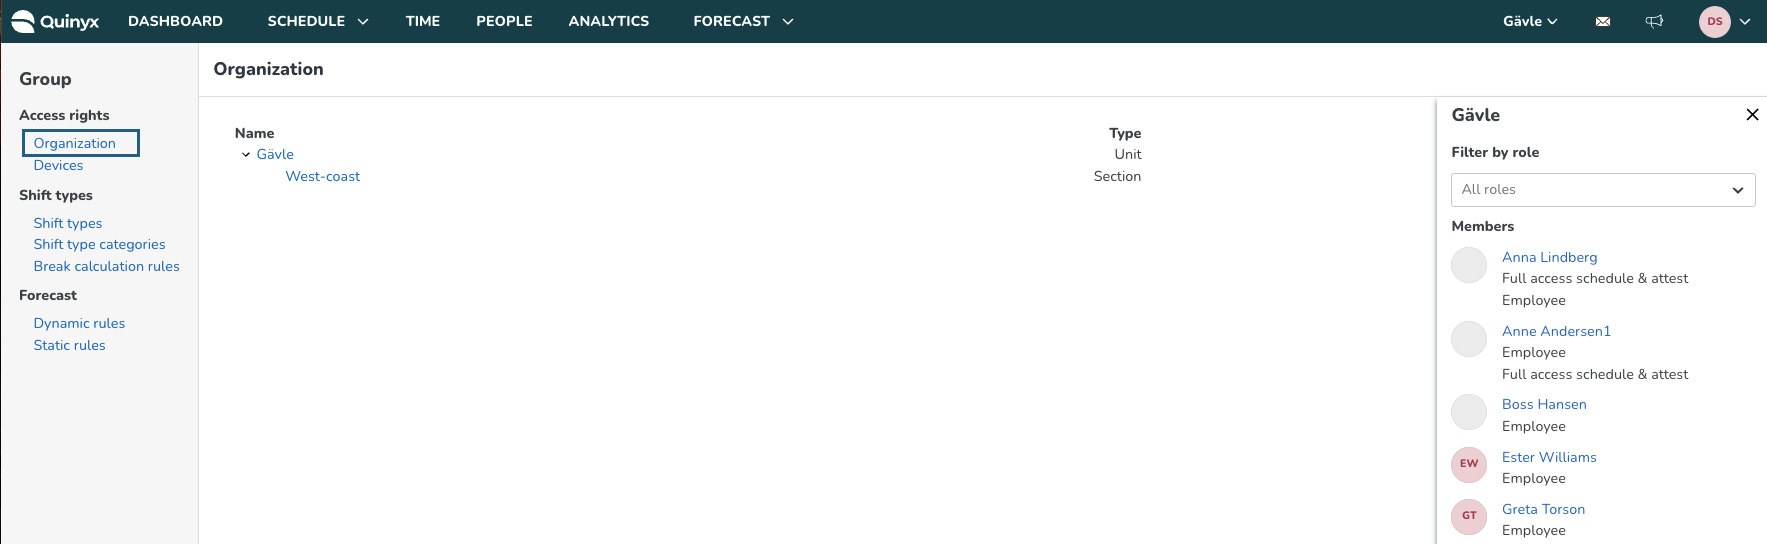
- Navigate to Group settings in the top-right corner menu > Access rights > Organization.
- Click the group in the organization tree that you wish to make changes to. Depending on your role(s), you may have access to one or more groups.
- If the user already belongs to the group, press the name of the employee > Click Add role and select what role, and start/end date.
- Click OK and you're done!
Edit role
To edit the role(s) of your employees in your group, do the following:
- Navigate to Group settings in the top-right corner menu > Access rights > Organization.
- Click the group in the organization tree that you wish to make changes to. Depending on your role(s), you may have access to one or more groups.
- From the list of employees, click the name of the employee whose current role(s) you wish to make changes to.
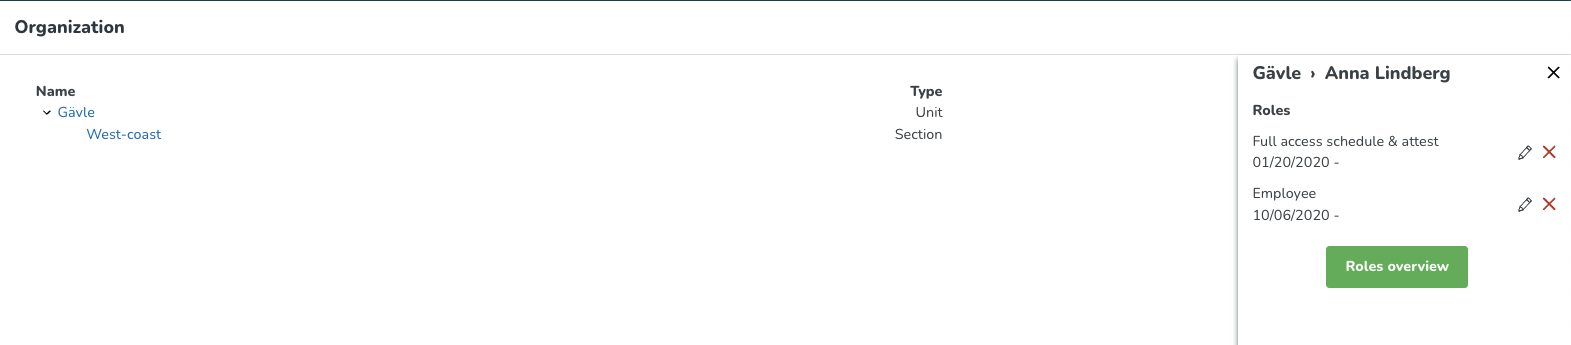
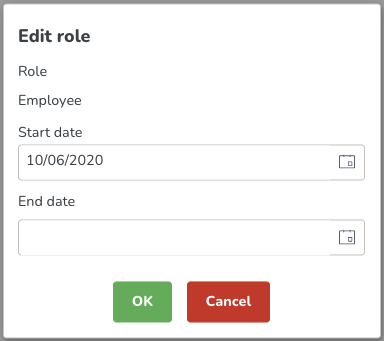
- Press the pen icon to make changes to a specific role. When you're done, press OK.
Delete role
To delete the role(s) of your employees in your group, do the following:
- Navigate to Group settings in the top-right corner menu > Access rights > Organization.
- Click the group in the organization tree that you wish to make changes to. Depending on your role(s), you may have access to one or more groups.
- From the list of employees, click the name of the employee whose current role(s) you wish to delete. Click the red X next to the pen icon to delete the desired role.
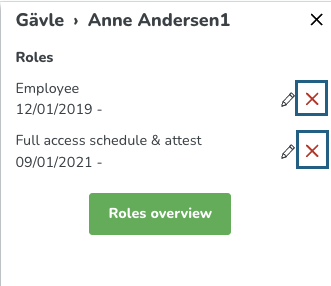
- A confirmation pop-up will show. Click OK if you wish to delete the desired role.

- You're done! The role will now be deleted by the following day.
Devices
When a user logs into the mobile app and clicks on the Punch in button in the Punch in-tab for the first time, their device will be logged under Group settings > Access rights > Devices. If you decide to mark it as authorized, the user will be able to punch in/out.
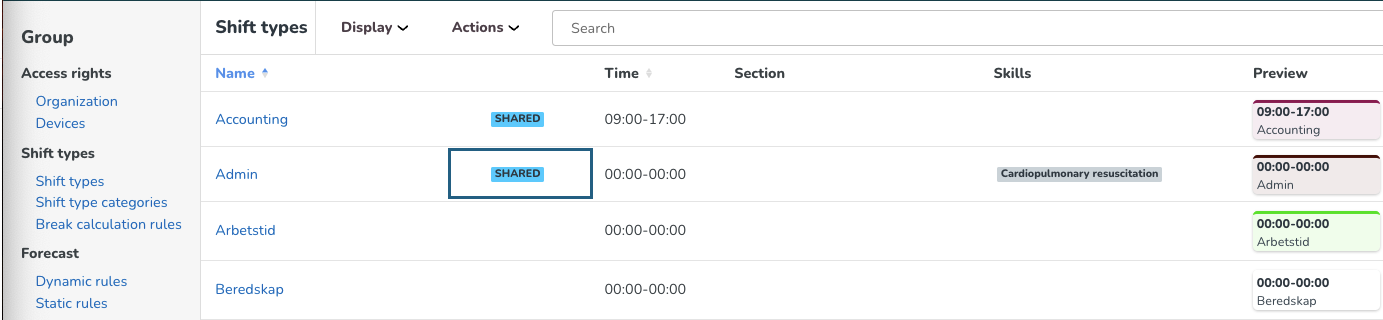
Shift types
Shift types
Shift types can either be created at a global level under Account settings > Shift types or at a local level under Group settings > Shifttypes. You can tell whether a shift type is global by the blue Shared label next to the Time column.
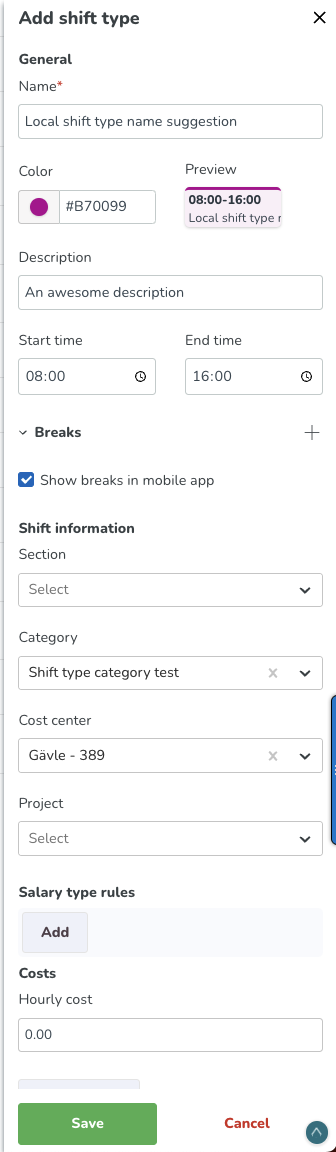
To create shift types local to your unit or section, do the following:
- Navigate to Group settings > Shift types > Click Add in the top-right corner.
- In the right side menu, fill in any shift type information relevant to you. When you're done, click Save.
Shift type categories
You can use shift type categories to group different type of shift types into one category. Just like with shift types, there are two places in Quinyx where you can create shift type categories:
- Account settings
- Group settings
To access your group's shift type categories, or to create new ones simply go to Group settings > Shift types > Shift type categories.

Break calculation rules
Under Break calculation rules, you can define the amount of time that must be worked before an employee is to have a break, how long the break should be, at what point in the shift it should be scheduled, and the day of the week on which this rule applies.
Forecast
Dynamic rules
Dynamic rules is one option in creating a staffing guide or "optimal staffing" within Quinyx. Dynamic rules can be configured for one or more variables.
Static rules
Static rules is one option in creating a staffing guide or "optimal staffing" within Quinyx. Static rules is configured per unit and will be applied regardless if dynamic rules are in effect or forecast data exists