Meal breaks

Quinyx has the functionality to support meal breaks. The meal break functionality mainly exists to accommodate the labor laws in the US. However, you can, of course, use it even if you're not located in the US. In a very condensed sense, these labor laws guard employees’ work hours, which take rest and meal breaks into account to effectively support employees with a fair work-life balance.
You can configure time control of meal breaks, Webpunch changes to support punching correctly on meal breaks, and you also have the possibility to waive your meal on a shift basis.
Activate meal breaks
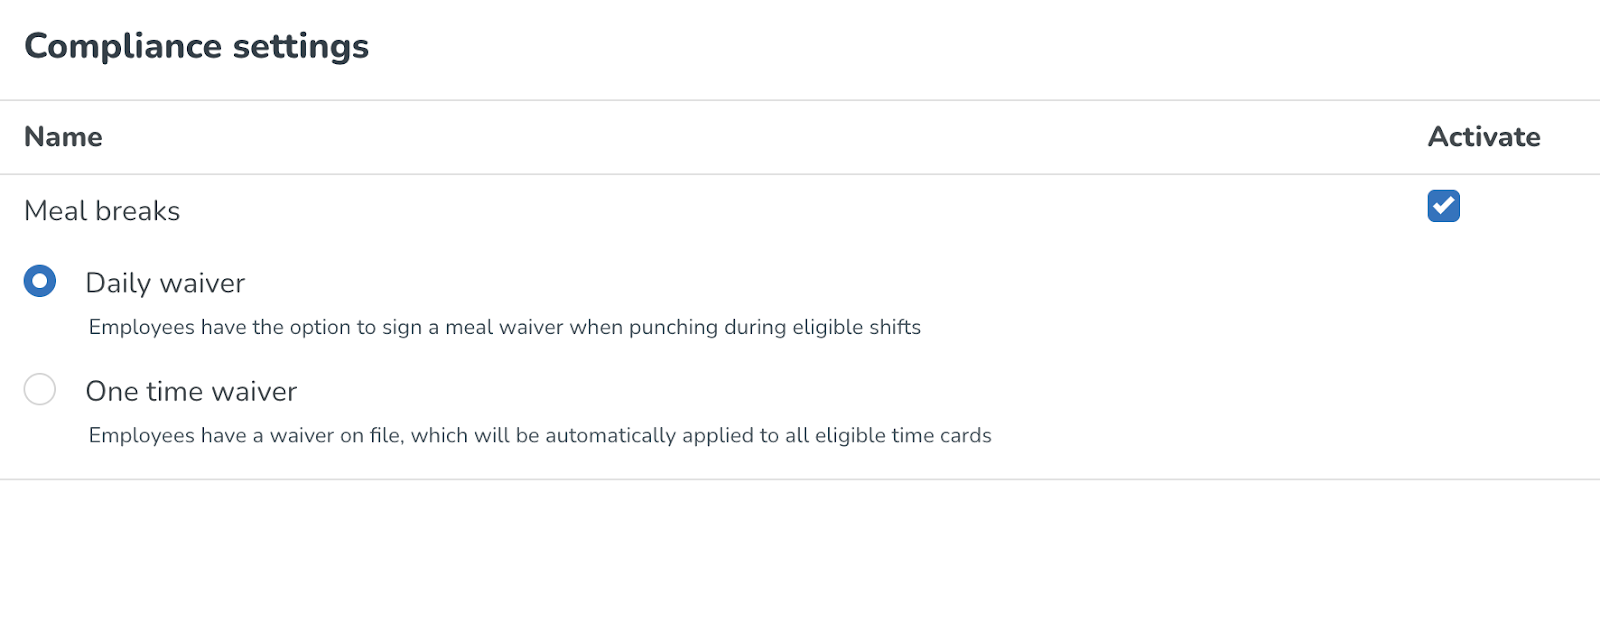
To activate functionality related to meal breaks, go to Account > Compliance settings - which is a new menu created to support market-specific use cases. Activate the checkbox for meal breaks.

Here you will be able to choose whether to work with “daily waivers” versus “one time waivers”. If you do not work with waivers, it will not matter which one that you choose.
Two things to consider are:
1 - All meal break rules, as well as corresponding configuration in the agreement templates, are removed when switching between one time waiver and daily waiver options.
2 - All meal break rules, as well as corresponding configuration in the agreement templates, are deleted when turning the Meal breaks checkbox in Compliance settings “on” and “off”. In order to prevent this from happening as a result of a mistake, there is a warning message that gives the user an indication of the implications of turning the Meal breaks' checkbox status to “off”.
Configure meal breaks
There are four parts of the configuration for meal breaks.
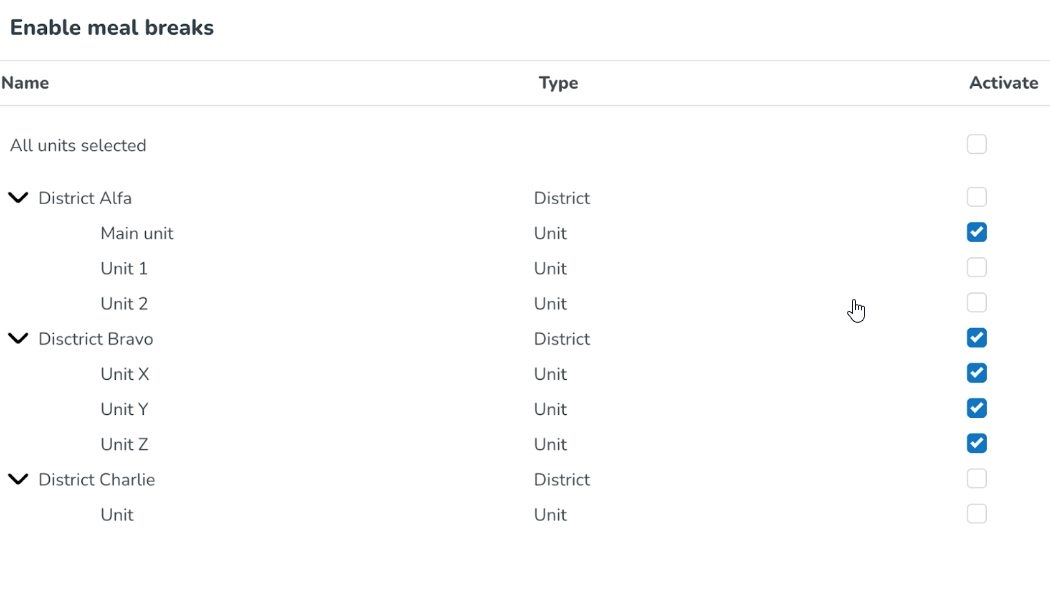
Enable meal breaks
Choose where to enable meal break functionality. You can choose to activate it for the whole account, per district, or per unit.
Meal break rules
In the meal break rules, you can add a Punch in rule or a Compensation rule.
Punch rule
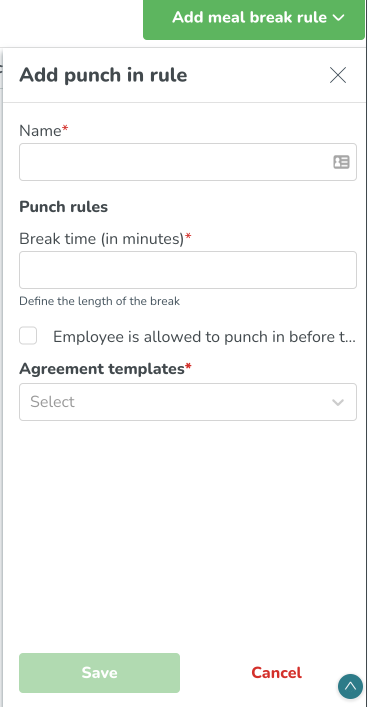
A Punch rule defines the length and related logic for meal breaks. In the name, you can specify a definition of the rule. For instance, “30 min meal break, the employee is not allowed to punch in before the end of break”. In Punch rules, you choose the minimum meal break duration. Make sure to define the length in minutes. Example: half an hour of meal break is defined as 30 minutes.
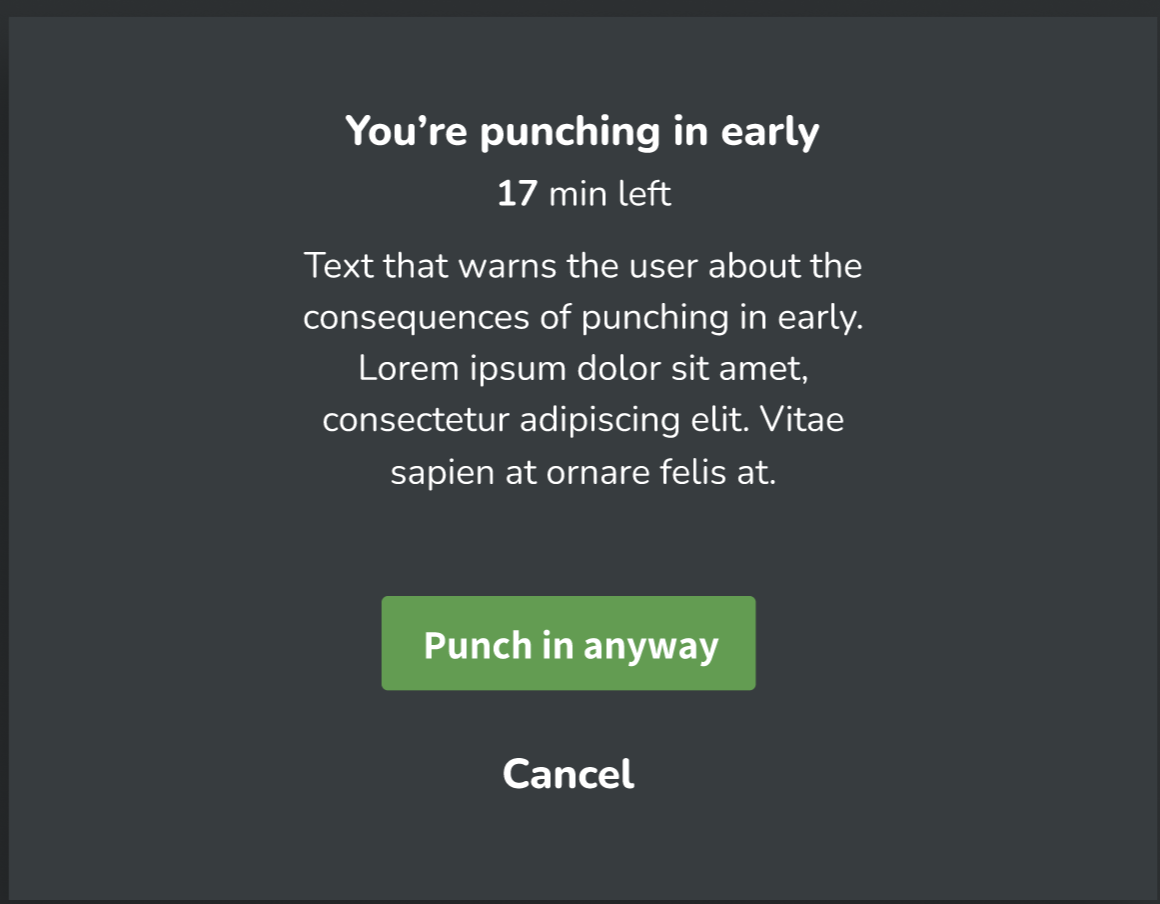
The next step is to choose whether the employee should be able to punch back into the shift before the minimum meal break duration has elapsed. The employee is, by default, prevented from punching back in. If you have defined the minimum meal break duration as 30 minutes, this means that the employee will not be able to punch in unless the 30 minutes have elapsed. If you want your employees to be able to punch in even if the minimum break duration has not been met, then you can activate the checkbox Employee is allowed to punch in before the meal break ends. If the checkbox is activated, another panel with information named Warnings text will be displayed beneath the checkbox. This warning is configurable in the third step.
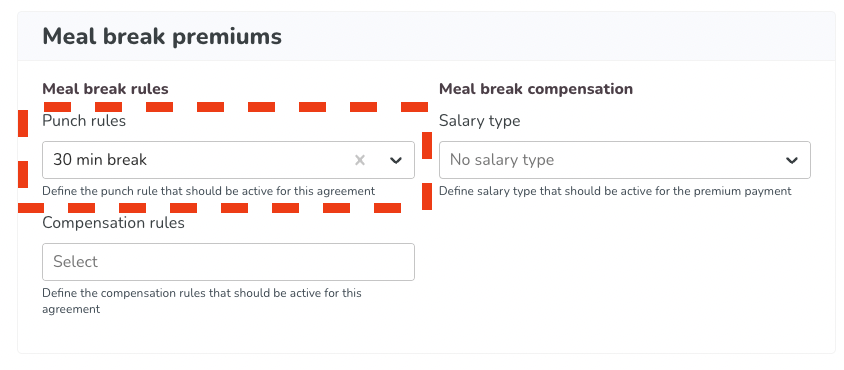
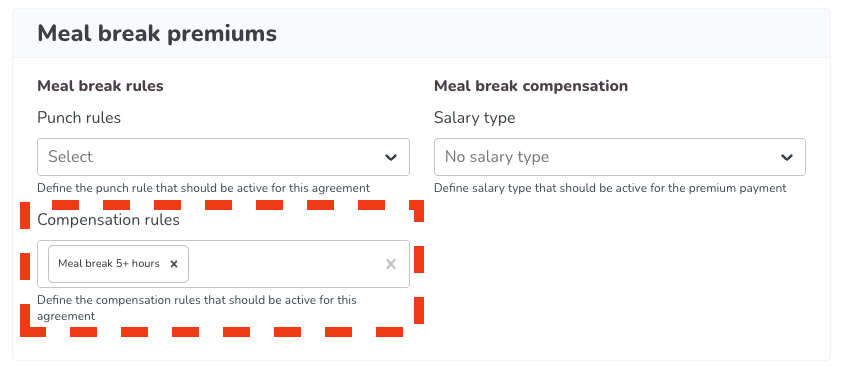
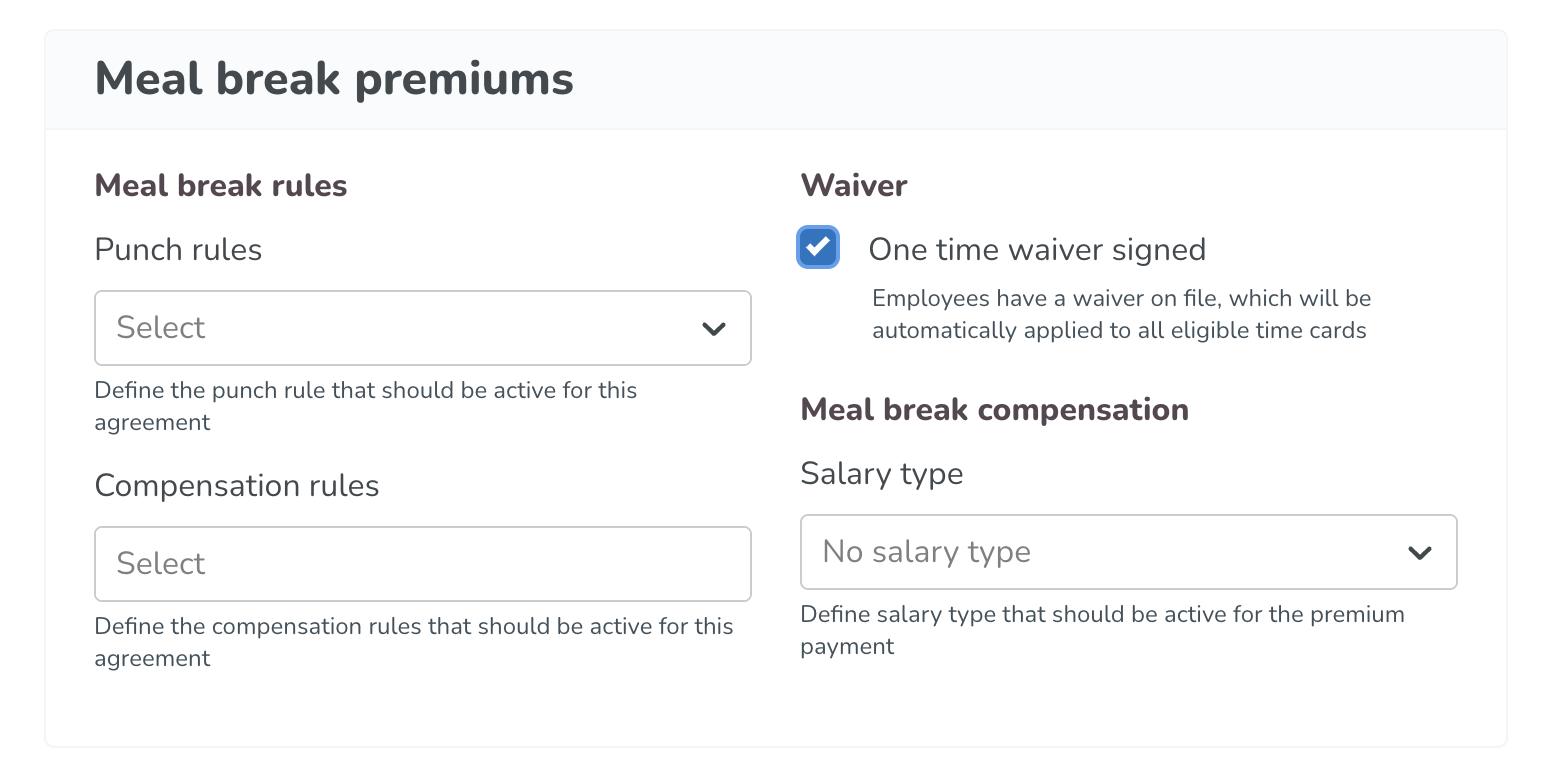
Lastly, make sure to apply the rules in the agreement templates in Account settings > Agreement templates > Meal break premium > choose the correct Punch rule in the drop-down named Punch rules.
Compensation rule
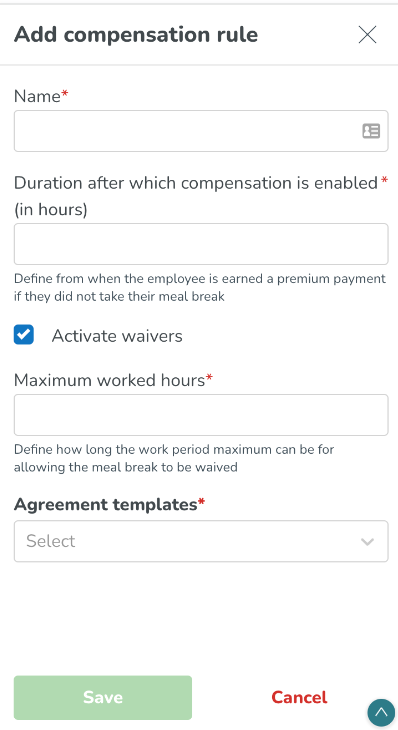
Start with adding a description of the meal break rule. For instance, “My employee needs to take a meal break within 5 hours from start of shift”.
The second step is to add the duration after which compensation is enabled. The time added here counts all worked time from the first punch when starting a new shift. So for the example above, this parameter would be set to 5 (hours). If you want to set it to something more or less than a full hour, please use a . (dot) and not a comma.
If you want to activate the waiver functionality, check the box named Activate waivers. As a result, a field named Maximum worked hours will be enabled. Here you need to define the waiver limitation time, which is more than the Duration after which compensation is enabled (in hours). Following the same example, if we put “6” in here, then the waiver will be active between hours 5 and 6.
Lastly, make sure to apply the rules in the agreement templates in Account settings > Agreement templates > Meal break premium > choose the correct Compensation rule in the drop-down named Compensation rules.
Meal waiver
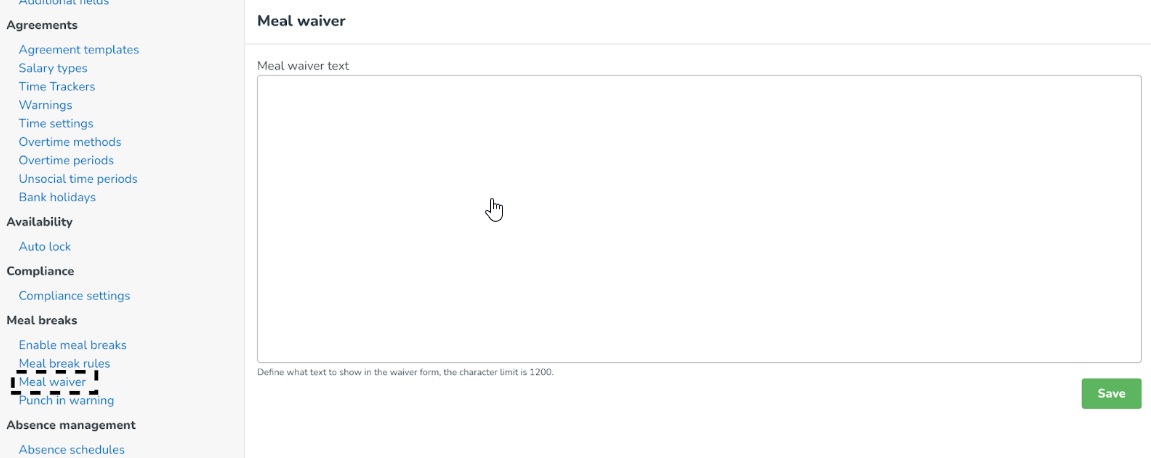
Now that you have activated the waiver in the previous step, you can define a text that will be visible in Webpunch for your employees.
One time meal waiver
As opposed to the daily meal break waiver option, the “one time meal waiver” is only required to be signed once by the employee - in advance. In Quinyx, you can configure which employee should have the possibility of using a one time waiver when applicable.
What is the difference between daily waivers and one time waivers?
With the daily waiver solution, employees sign their waiver manually by choosing this option through WebPunch. For a one time waiver, this has already been pre-set, and as soon as a meal break breaks a rule that has been set up, as a result, a one time waiver will be shown on the time card as well as the corresponding premium payment.
How to activate one time waivers
In order to activate the one time waiver, go to Advanced settings > Compliance settings and choose One time waiver.
The settings that differ here from the daily waiver are the “Meal break rules” as well as the information in the agreement template.
If you want to set up a compensation rule, which is, of course, a prerequisite for the one time waiver to work, you will see that the “waiver activation” is absent as opposed to the daily waiver option.
If you want the waiver to be activated, you need to confirm this by going to Agreement templates > Meal break premiums > Waiver, and activate it through the checkbox.
Punch in warning
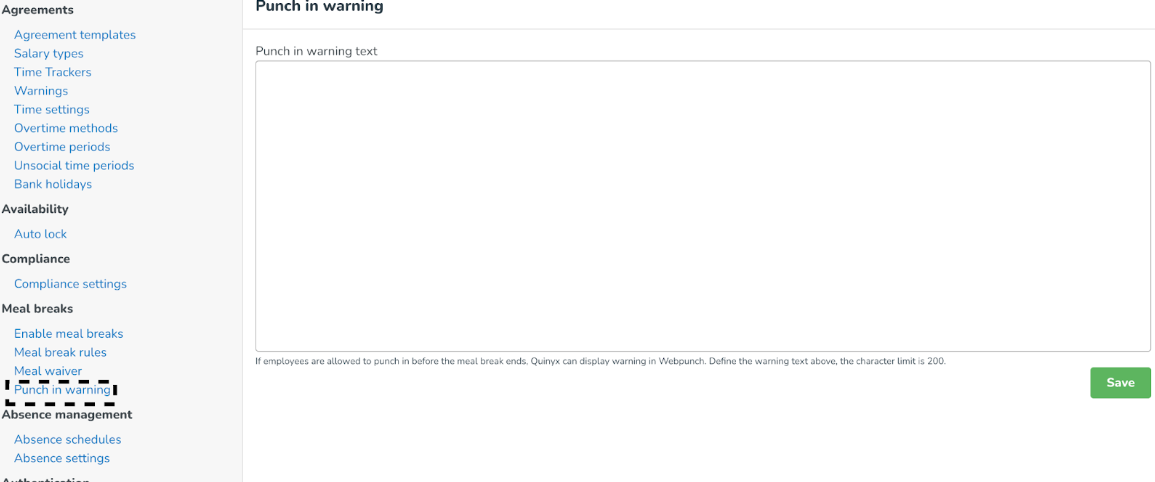
If your employees are allowed to punch in before the full meal break time is taken, then you can define a message here that will be shown in Webpunch when your employees punch in early. You can also leave this empty.
Webpunch
Punching out on a meal break
Webpunch is the only punching option available for meal breaks. Hence the punching and waiving functionality will not be available on mobile. The employee will punch out on a meal break, instead of a break, when going on a meal break.

This will in turn activate the corresponding actions. If an employee punches out for a break instead of punching out on a meal break, then this has to be corrected manually later.
Punching back into the shift from a break
When the employee comes back from a break, there are a couple of things that can happen based on the chosen settings.
As mentioned above, if the Punch in rule (checkbox) Employee is allowed to punch in before the meal break ends is activated then the previously set-up warning will show.
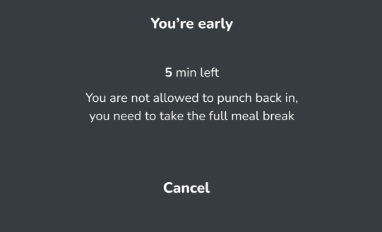
If the checkbox is not activated, the employee will not be able to punch in before their full meal break has been taken, and they will have to wait. In WebPunch, they will receive the following message with the remaining time of the break.
Meal waiver in Webpunch
If the setting Activate waiver is set in the Compensation rule, then the employee will have the option to waive their meal breaks. The waiver will be displayed in Webpunch in the following way.
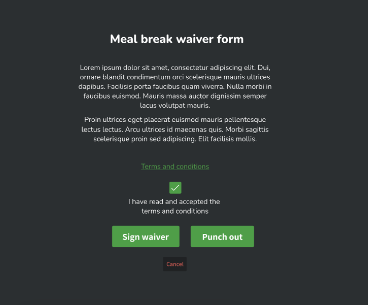
The employee can here choose to sign the waiver or to punch out.
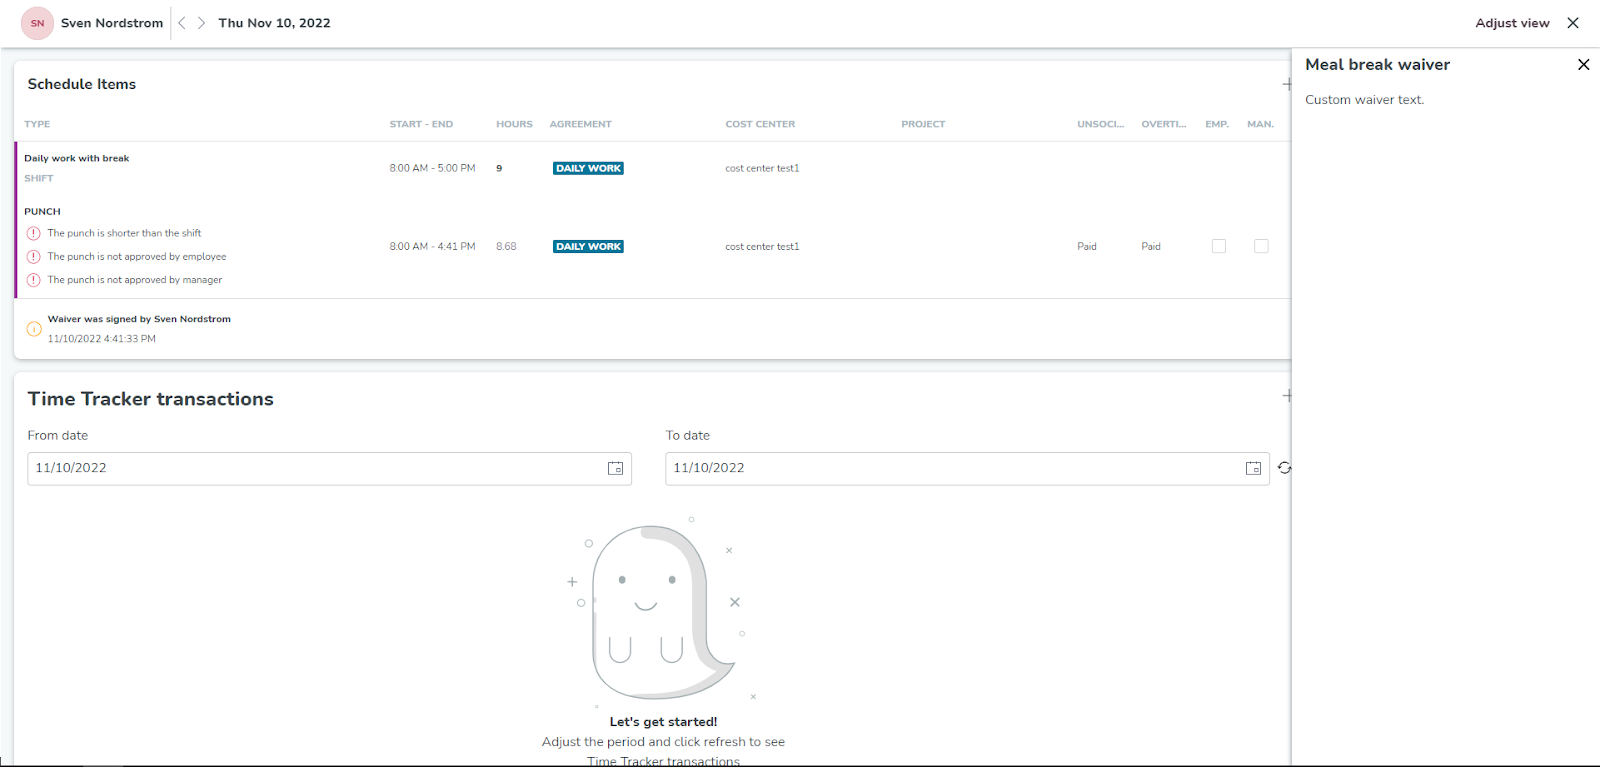
Timecard
If your employee has used a waiver, it will be shown in the time card corresponding to the punch. This will be an indication of whether the compensation should be paid out or not.
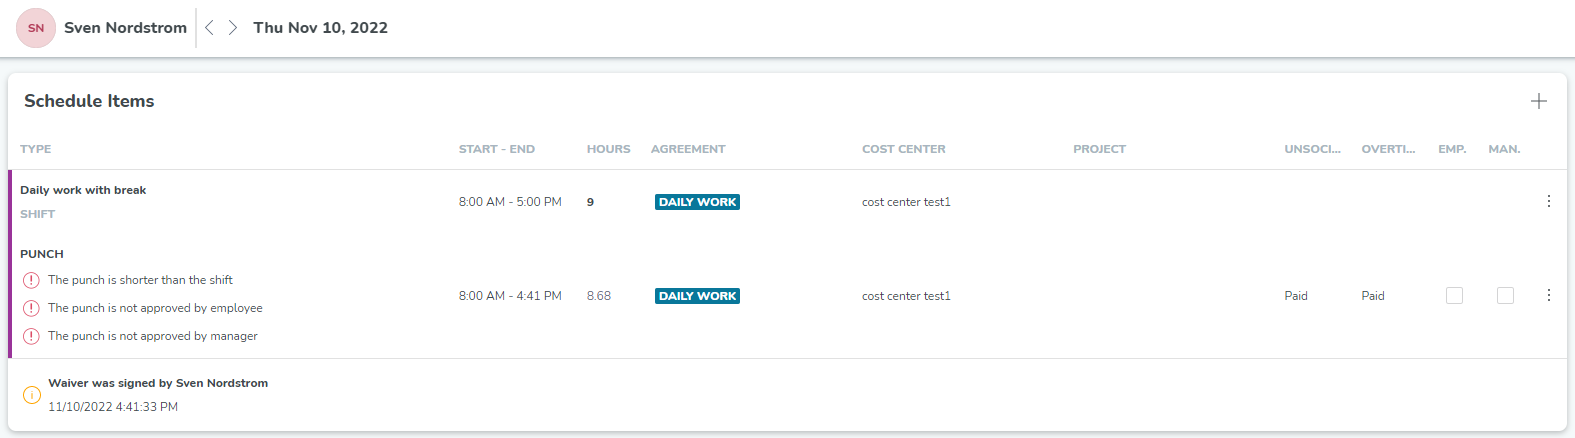
If you click somewhere within the waiver icon area, a waiver description added to the Compensation rules will be visible in a panel to the right.