Version 0063
Analytics
With the release of Neo 0063 we are introducing two new reports that can now be generated and downloaded from Neo.
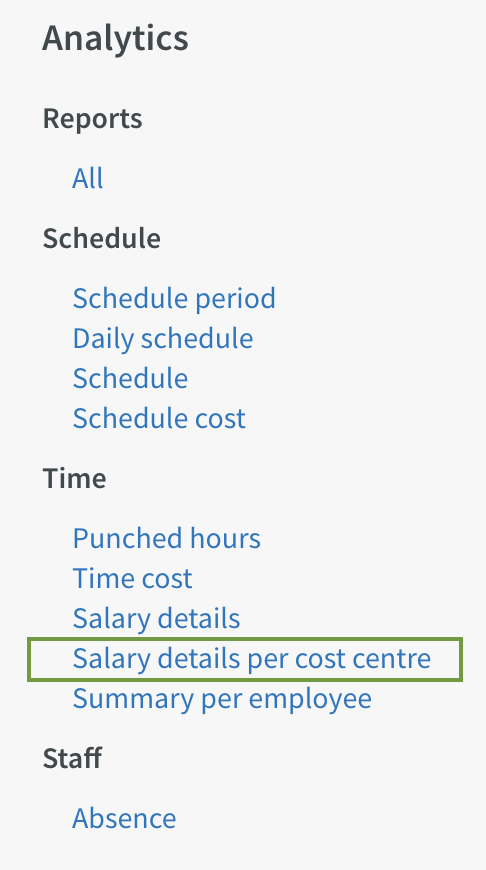
Salary details per cost center report
To generate the "Salary details per cost center" report, click Salary details per cost center under Time in the menu on the left-hand side:
Click Create to open the dialogue allowing you to create a new "Salary details per cost center" report:
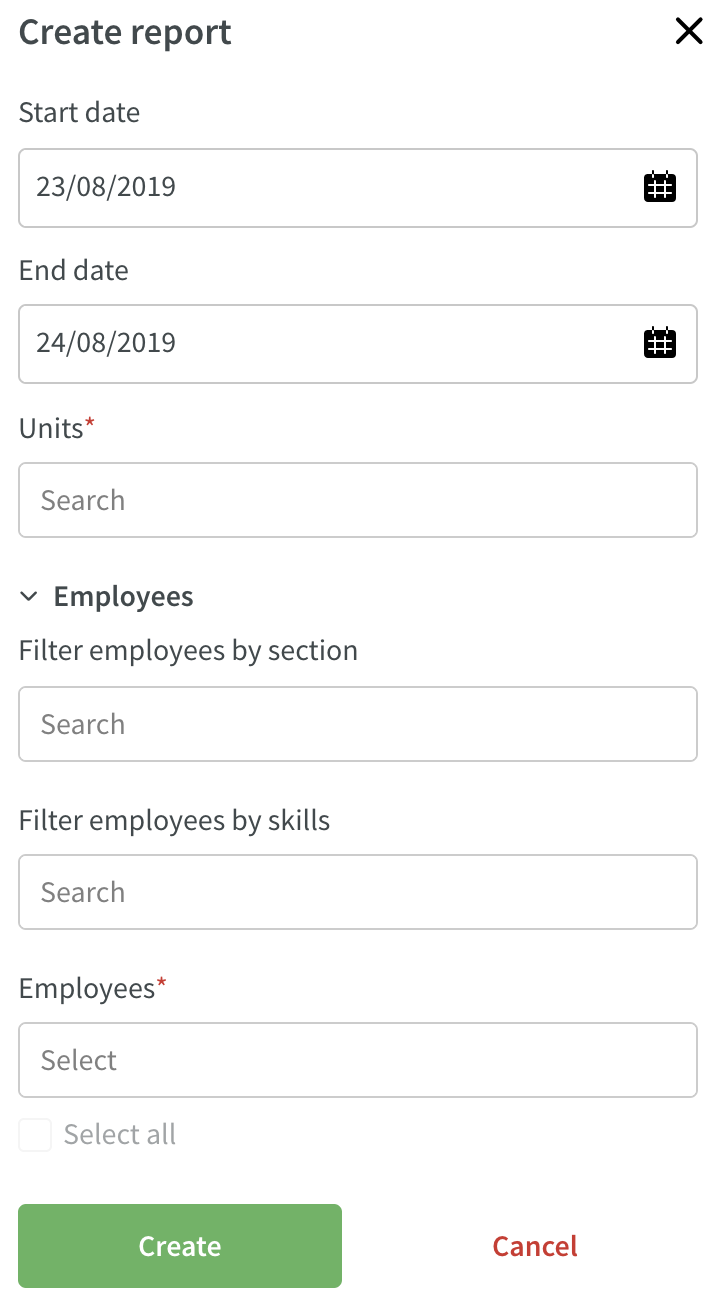
- Select the data you wish to use for the report (fields marked with * are required fields).
- Click Create.
- The dialog will now close and the status of your report will display.
- Once the status changes from "processing" to "download", you can click the blue text to download your report.
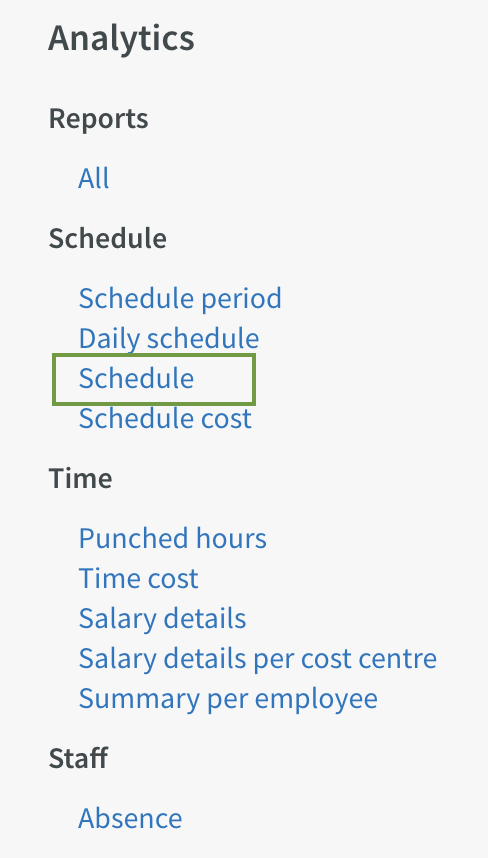
Schedule report
To generate the "Schedule" report, click Schedule under Schedule in the menu on the left-hand side:
Click Create to open the dialogue allowing you to create a new "Schedule" report:
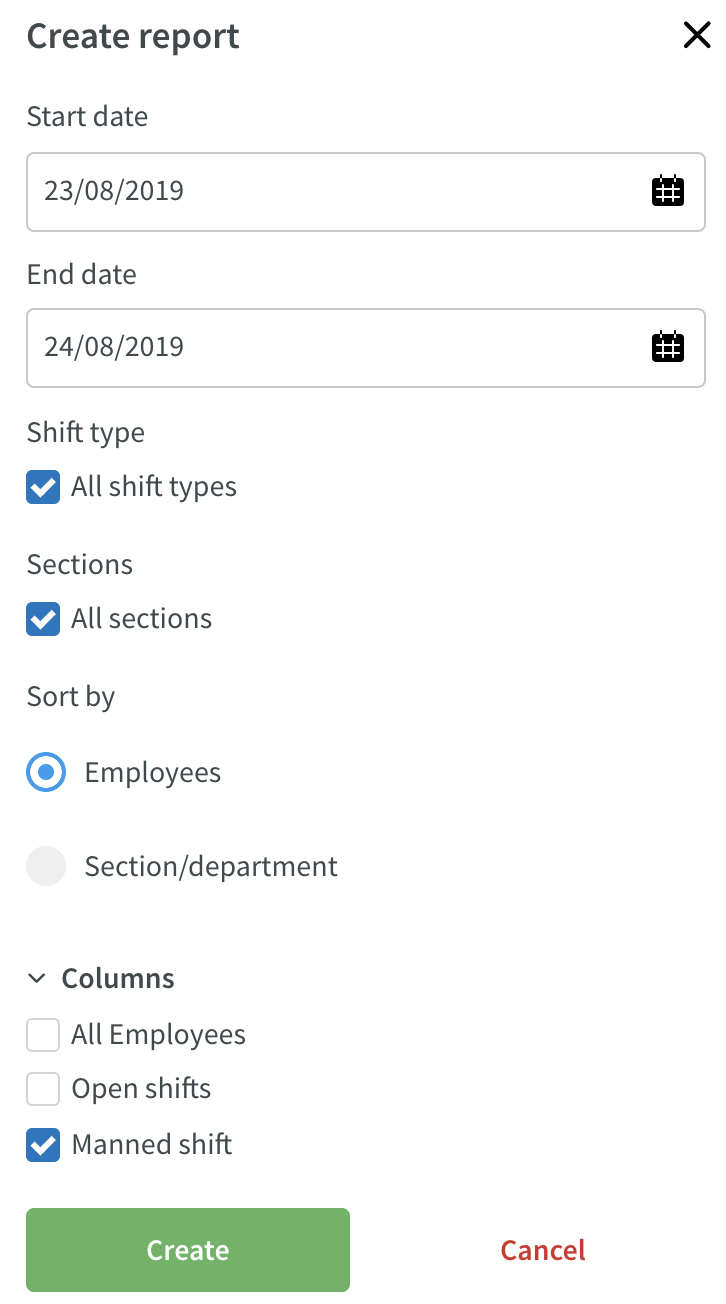
- Select the data you wish to use for the report (fields marked with * are required fields).
- Click Create.
- The dialog will now close and the status of your report will display.
- Once the status changes from "processing" to "download", you can click the blue text to download your report.
Role Management
Role overview
As of this release you will be able to in an easy way see what roles an employee has and on what groups they have those roles.
When clicking an employee within the organisation tree under account settings, you will now see a button called "role overview". When clicking that button, a popup will appear where you can see the name of the role(s) and where the role(s) are assigned. You will also see whether the role is added to a specific group or whether it's an inherited role:
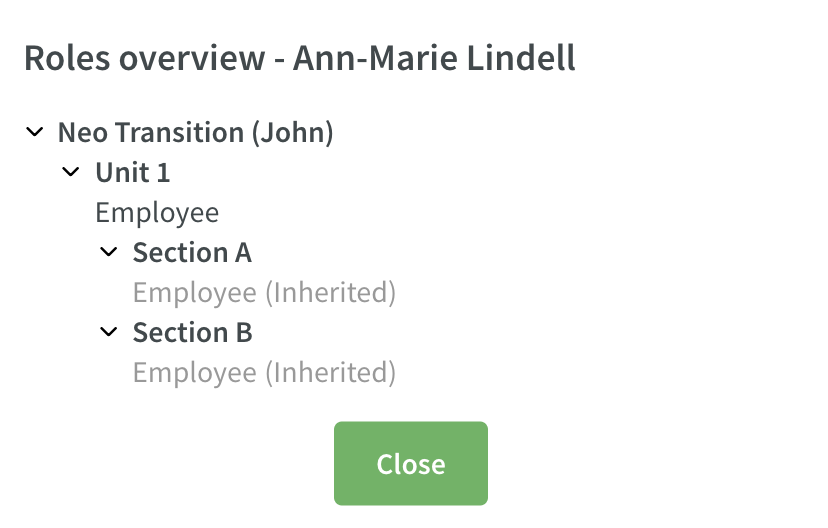
The same popup with the same information can also be accessed by clicking on the role name next to the employee under "People":

Schedule
All day absence
It's now easier to add how many days an absence should cover. An All day checkbox is selected by default and means that you will be adding absences for full day(s). In the example below, the user has is about to add one day's absence.

If you want to add a part time absence, untick the All day checkbox and specify the hours of the absence.

Duration of absences
You can now easily see how many days, hours and minutes you have added an absence for.

Move employee row
As of this release, you will be able to move an employee's schedule row to another employee.
When viewing your schedule, click the ellipsis by the employee avatar and select the Move shifts option. This will move the visible days of the employee row, including the days on which there are no shifts - if you're in the daily view, only the viewed day's shifts will be moved. Likewise, being in the weekly view will move the row of the viewed week for that employee.

In the modal that appears when you've clicked Move shifts, do the following to move shifts:

- Select the employee you're moving shifts to under To employee
- Select the to date of where you want to move the shifts to under To period
- Click Save. A validation of the shifts will now be carried out by the system in the background.
- Choose whether shifts with warnings should be created or not, either by selecting all warnings in one go or one at a time.
- Save.
- Done!