Connect tags to shift types and tasks
 Updated
by
Leigh Hutchens
Updated
by
Leigh Hutchens
You can use tags to track time on internal projects, cost centers, physical resources, and so forth by setting them on shift type, task, or both. Read more about Tag categories and Tags and tag content so you can learn how to set up your tags to start using them. Note that only managers can assign tags.
Adding tags to a shift type
You might want to add a tag to a shift type, for instance, so you can track time on that shift to a granular level using the Tags follow up view. Or, you might want to add a tag to a shift type so you can track a budget or allotment of hours. There are all kinds of possibilities. For more information about why you might want to use tags, read about Example use cases for tags.
Once you have created tag categories and defined your tags, you can add them to a shift:
- Click Account settings.
- Click Shift types.
- Add a new or edit an existing shift type.
- Add your tag to the tags field.
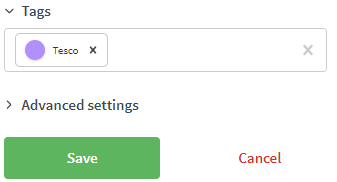
- Save
You can define an unlimited number of custom fields on a tag.
You can assign multiple tags as long as they are different tag categories.
You can have multiple tags on a task.
Adding tags to tasks
You can add tags to tasks to increase your task management capability. For instance, you might want to add a tag to a task if an employee is working across multiple customers during one shift. Each task can be connected to one or more tags, for example, one for service contract and one for service provided.
You can create a task just as you do a shift and add a tag to it:
- Click Account settings.
- Click Shift types.
- Add a new subshift (task) type.
- Add your predefined tag to the tags field.
- Save

Now, when you assign a task to a shift, that task contains a tag that is useful when viewing your data in the Tags follow up view.
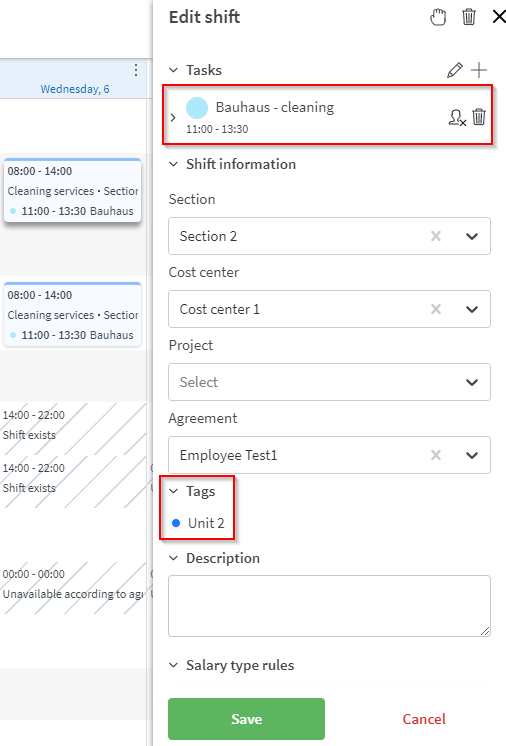
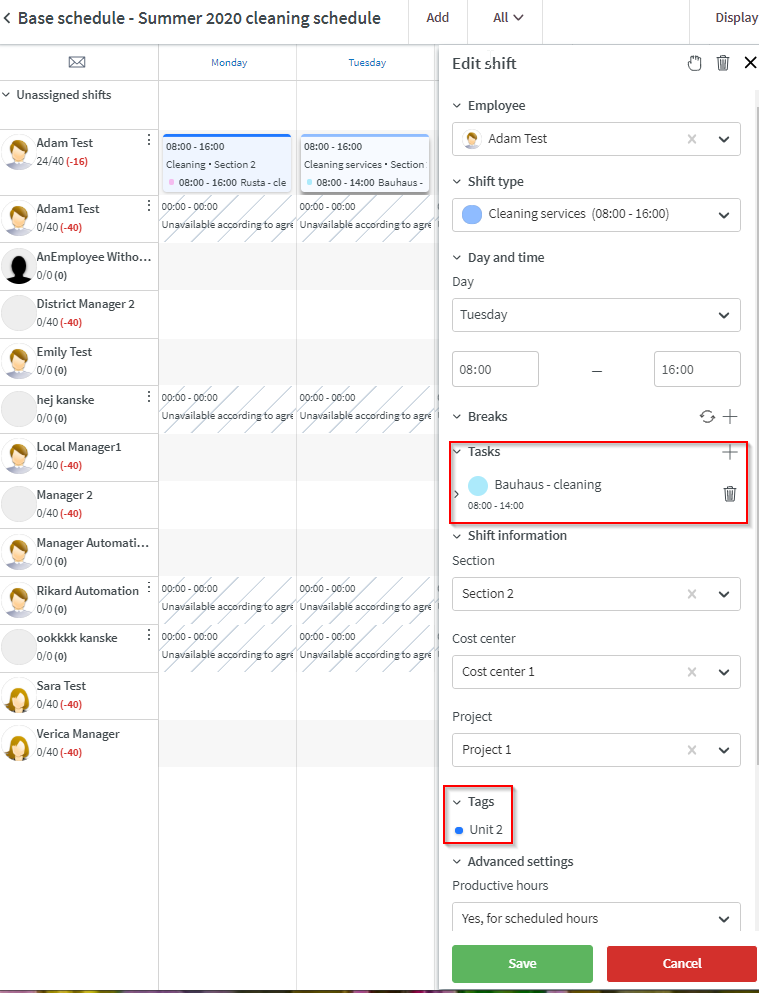
Viewing tags in schedule and base schedule
Once you've connected a tag to a shift type, you can view the shift type and task with tags in either schedule or base schedule. Read more about Schedule View and how to Create your base schedule.
Schedule view
In schedule view, you can only view tag information when you click on an existing shift and select more options.
From this view, you can't see the tag assigned to the task, but you can view the tag assigned to the shift type, in this case Unit 2:
Base schedule view
In base schedule view, you can only view tag information when you click on an existing shift and select more options. From this view, you can't see the tag assigned to the task, but you can view the tag assigned to the shift type, in this case Unit 2:
Tag validation checks
Tags are validated within both the schedule and base schedule.
When adding or editing a shift or task within the schedule, Neo checks that the period date set against the tag is valid. The period is set under the Period header in Account Settings > Tags > Add a new tag and in the same location when editing an existing tag.
If the shift you're adding is outside the date range set for the tag’s period, you'll receive a warning indicating that the shift or task is outside of the validity period of the tag with the option to continue with the save or cancel the change.
Tags follow up view
Once you have connected a tag to a shift type, task, or both, you can track budgeted, scheduled, and punched hours in the Tags follow up report under Analytics. Read more about Tags follow up view.
