SSO configuration using Azure
 Updated
by
Leigh Hutchens
Updated
by
Leigh Hutchens
You can configure SSO using Microsoft Azure.
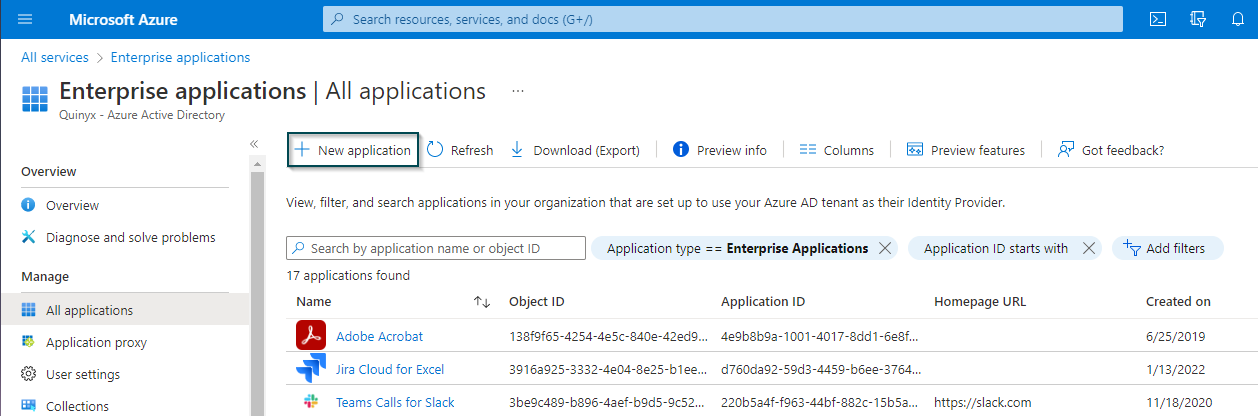
- Log in to portal.azure.com.
- Under the heading Azure services, click Enterprise Applications. (If Enterprise Applications is not visible click All services, then under the heading Identity click Enterprise Applications)
- Click +New application to create a new application.
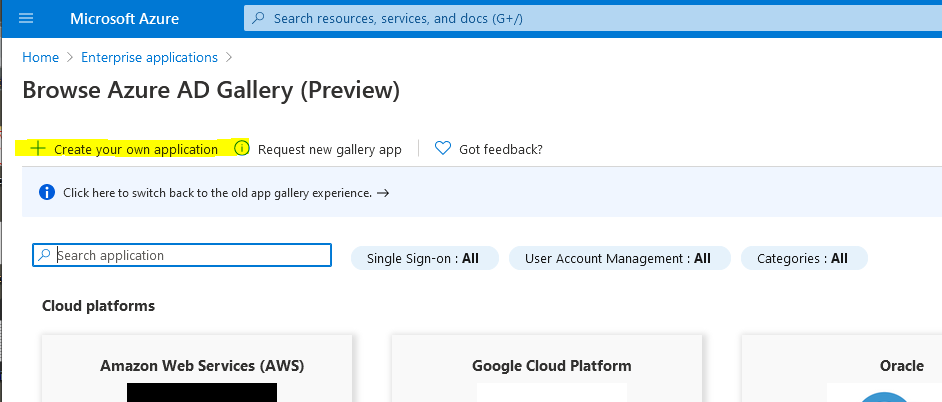
- Click +Create your own application.
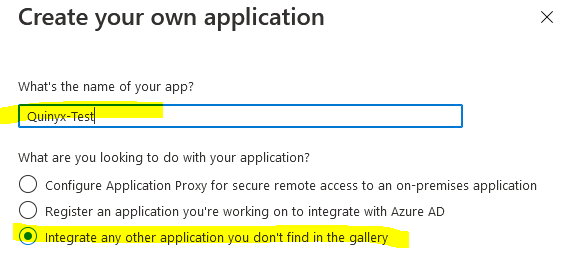
- Give the application a name, then select Integrate any other application you don't find in the gallery and click Create at the bottom of the page.
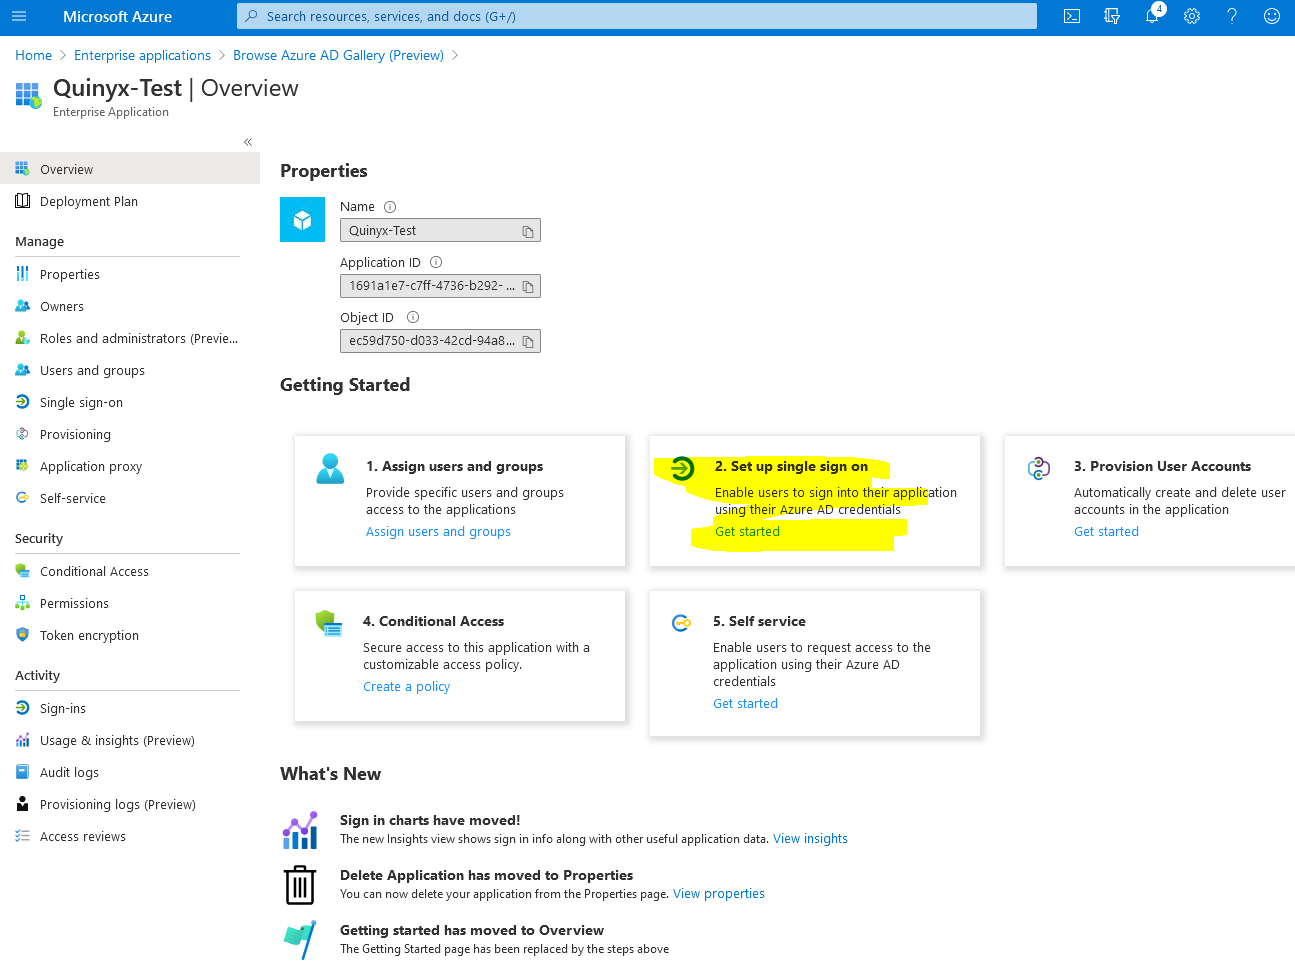
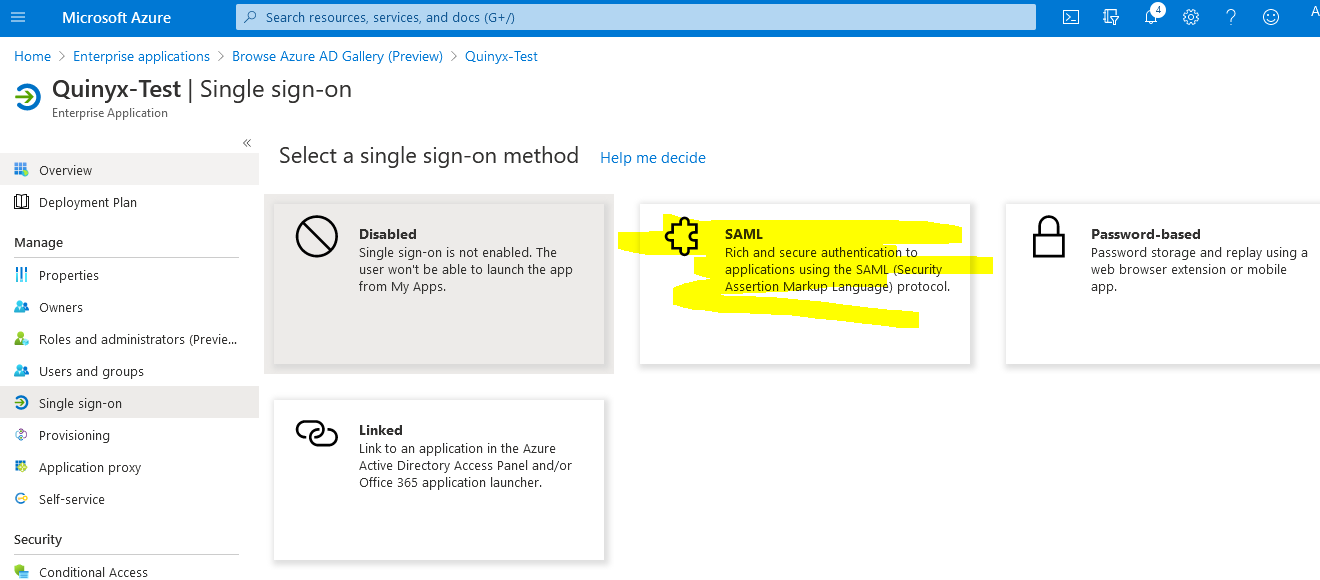
- Click Set up single sign on.
- Click SAML.
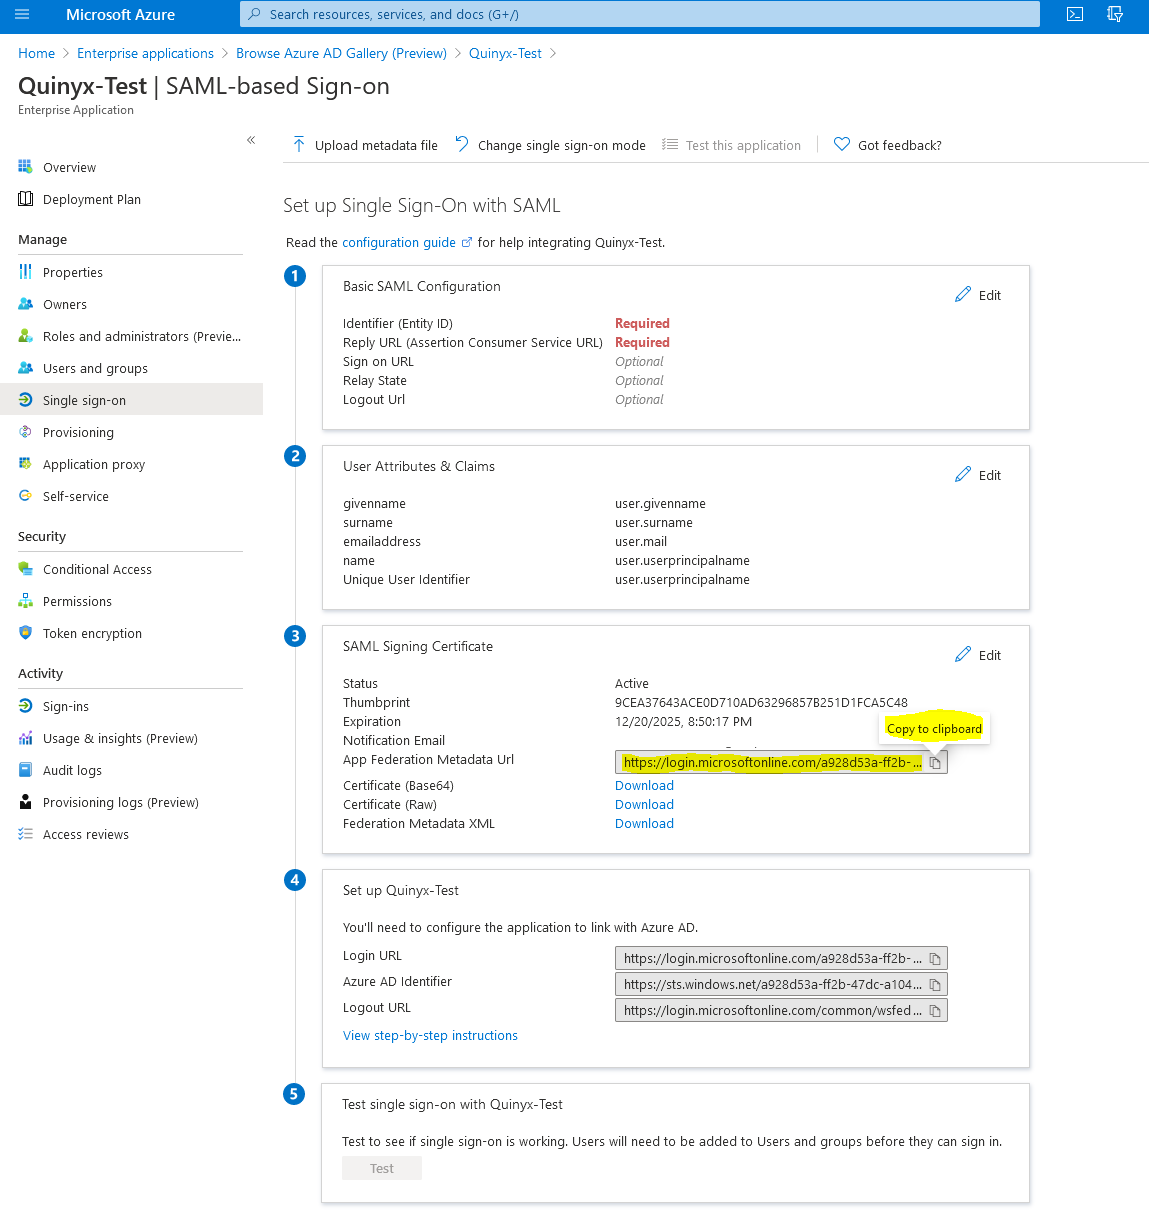
- Copy App Federation Metadata Url and paste the URL into Quinyx.
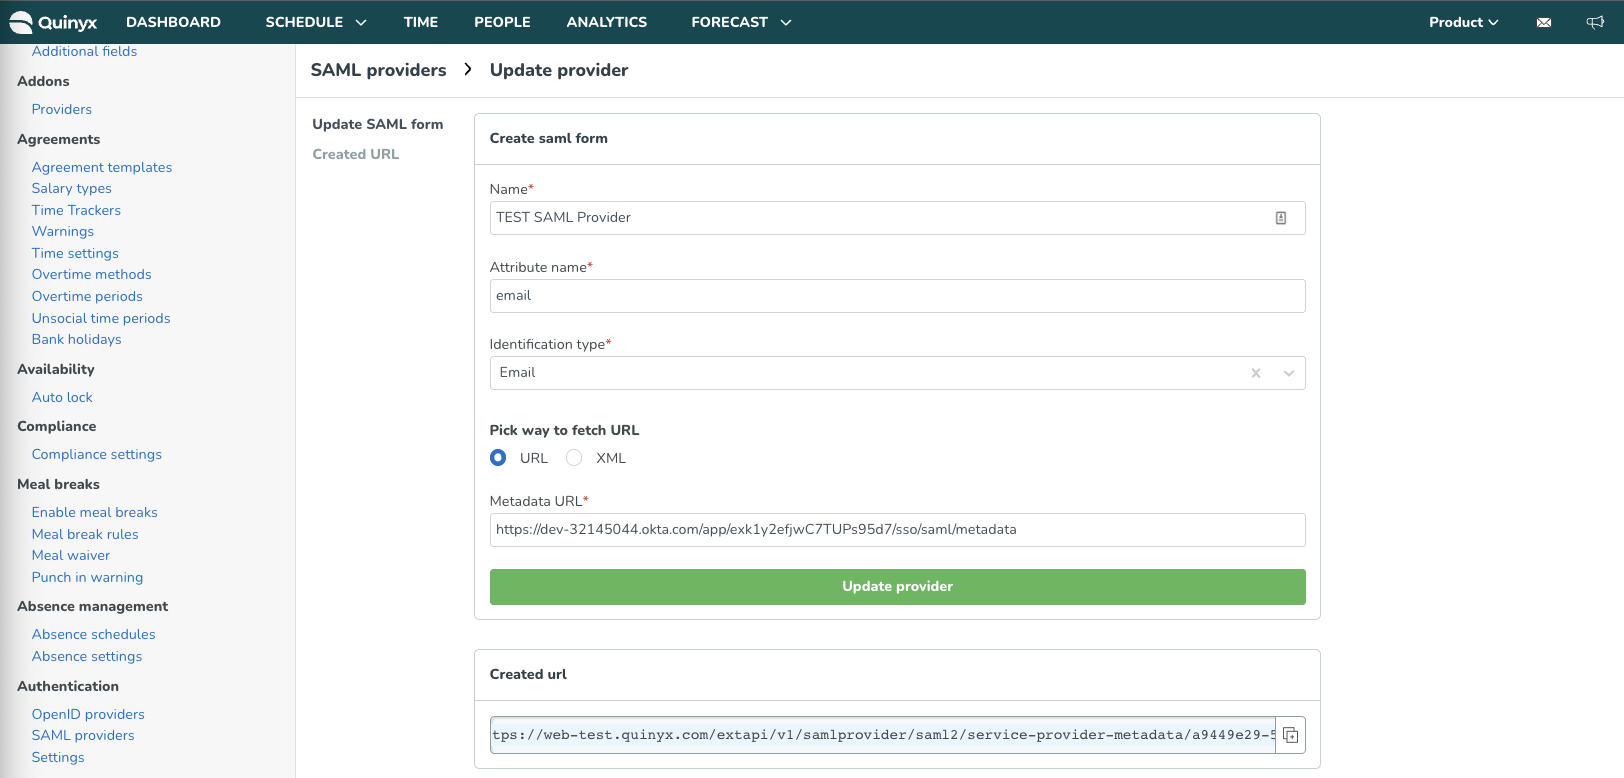
- Add the provided Metadata URL from Azure to the SSO configuration page in the Metadata URL field. Click the Update provider button and copy the URL from the Created URL field into your browser to fetch metadata.
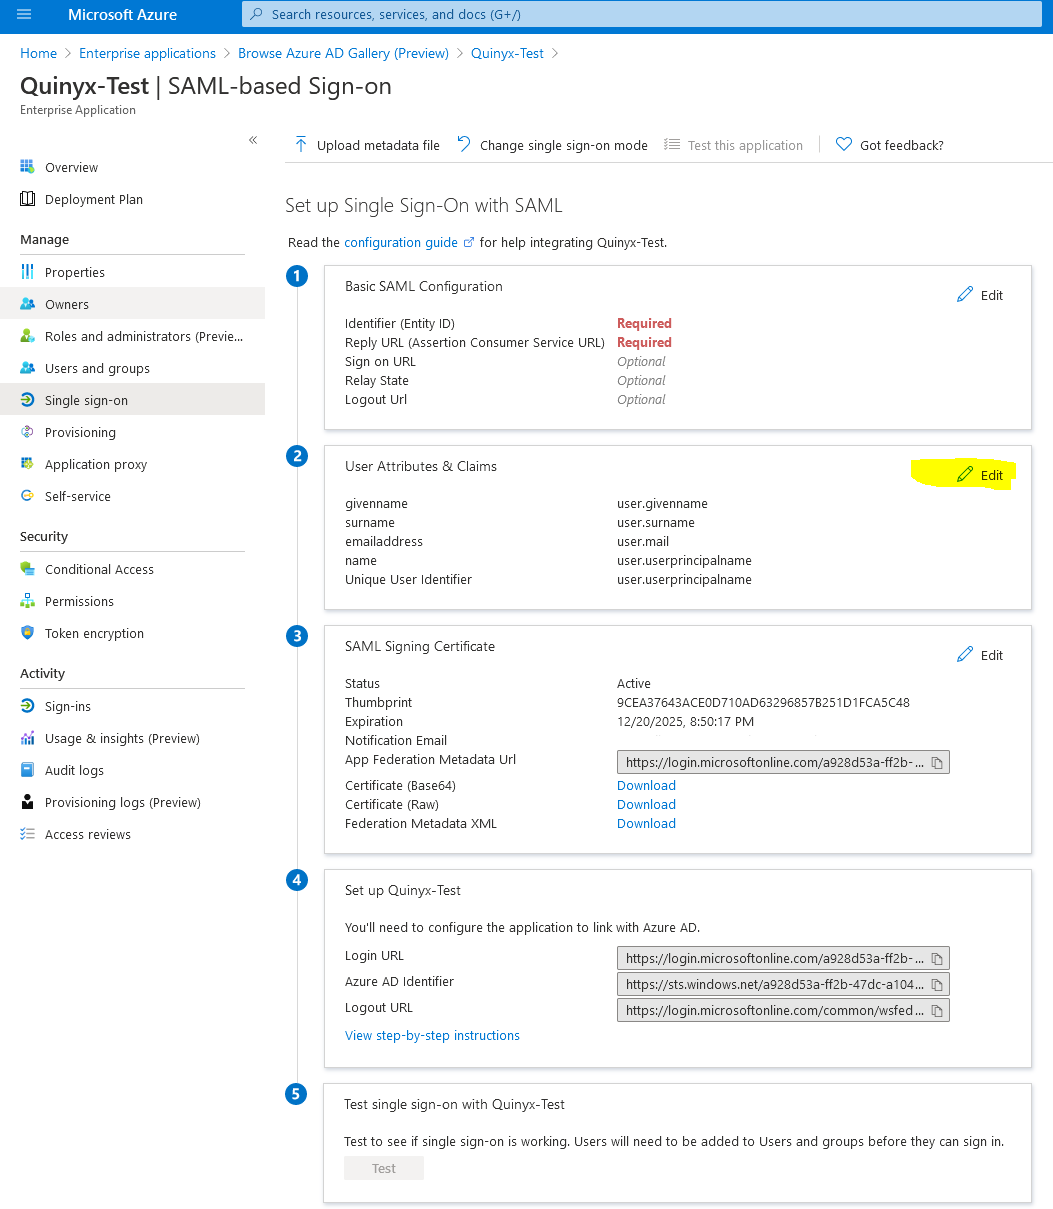
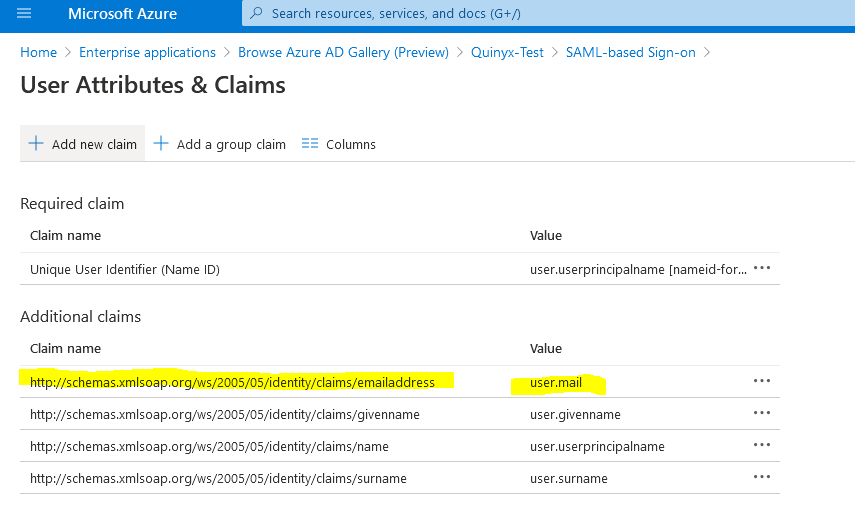
- In the User Attributes & Claims section, click on Edit to confirm the required SSO link name. Also confirm the claim type the SSO uses to match Quinyx users to Azure. If using the UPN (email address), this is likely to be: http://schemas.xmlsoap.org/ws/2005/05/identity/claims/emailaddress.
- Complete the remaining essential fields (SSO route, SSO authentication type and SSO attribute from step 10), then click Save. This will auto-populate the remaining samlldp field. Then click Generate SP metadata.
- Under Additional claims the claim name for user.mail is the line needed (if matching against email). If you are using another claim than email, choose the relevant claim name.
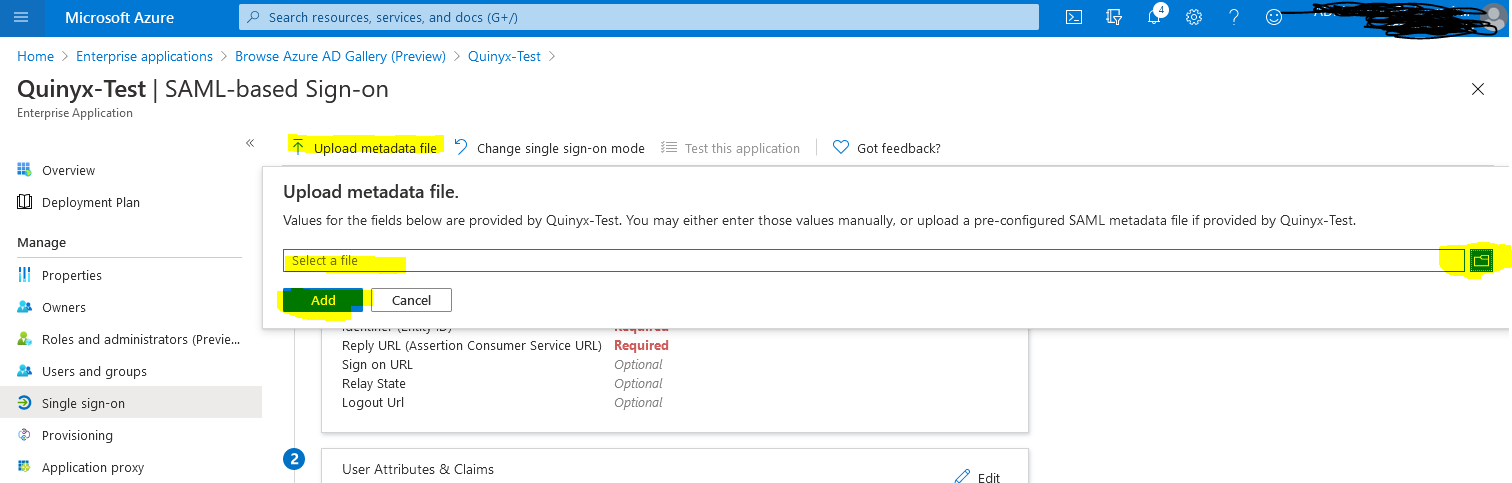
- Click Upload metadata file > Select a file > Add to upload the SP metadata file from Quinyx. The details in this file will populate the Basic SAML configuration values at the top of the page.
- The configuration is complete.
Continue the configuration in Quinyx by following the instructions here.