Payroll actions
 Updated
by
Daniel Sjögren
Updated
by
Daniel Sjögren
In the Time view, each employee features a checkbox. Depending on the Transfer only fully approved times parameter setting on the actual status of an employee, you're able to tick a given checkbox which will enable the below payroll actions. Read more about the Time tab.
Preliminary file
The preliminary file allows you to do a "dry run" of your payroll file to ensure no issues arise once the file reaches your payroll system. That way, if a problem arises, you're able to address this in Quinyx and run the same file again. For this reason, a preliminary file doesn't lock the actual items transferred, meaning you're still able to edit those items in Schedule even after you've run the preliminary file (unless if the schedule period is locked, of course).
In order to run a preliminary payroll file, follow the steps below:
- Make your selections in the Adjust view panel of the Time tab and ensure you select one and only one payroll file.
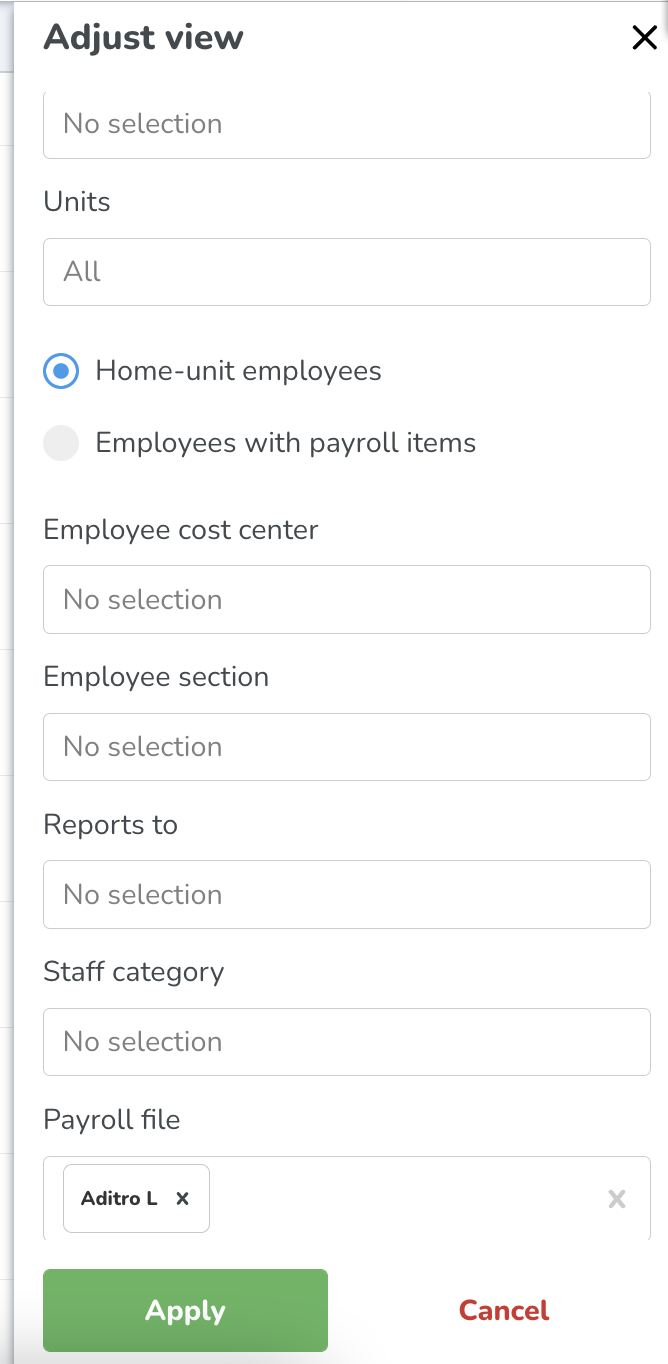
- Click Apply at the bottom of the panel.
- Wait while Quinyx processes your request.
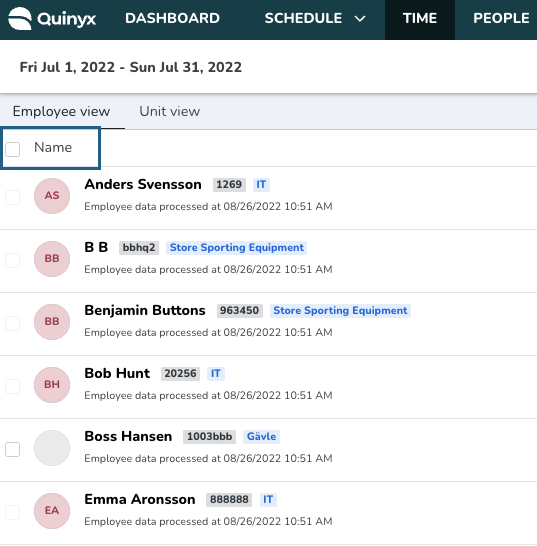
- In the left-most column of the list that appears, tick the checkboxes of the employees you want to transfer to payroll. Use the header box if you want to select all employees - this will select all employees fetched by your request, in other words, you don't need to scroll to display all employees for the select all checkbox to include all employees.
- Click the Preliminary file button that appears next to the Adjust view button as a result of you ticking a checkbox.

- In the modal that appears, a summary of what will be transferred appears:
- Number of payroll items that will be included in the file.
- Number of payroll items that will be ignored because they are missing employee and/or manager attest.
- Number of payroll items that will be ignored because they are missing punch.
- Number of payroll items that will be ignored because they are ready for payroll but the employee isn't (note that this row only appears if you’ve selected employees ready for payroll in combination with at least one employee who's not ready but has at least one item that’s already been transferred to payroll).
- Number of payroll items that will be ignored because they have already been transferred to payroll.
- Ticking the Lock schedule up until and including checkbox means that, as you proceed with the file generation, the schedule will lock until the stated date for all units and sections of which at least one payroll item is being transferred to payroll.

Note that:
- The option of locking the groups’ schedule is not available if the “To date” you’ve selected in the Adjust view panel is set to today’s date or later. This is consistent with the lock schedule feature in Schedule.
- The schedule won’t be locked for any group for which the current schedule lock date is later than the “To date” of the selected period. The purpose of this is for users to not accidentally unlock dates that they have purposely locked from Schedule.
In terms of permissions, you need write access on the Lock schedule permission in order to do this. If you have no access and/or read access on any of the units or sections for which you’re transferring at least one payroll item to payroll, an error message will display stating you don’t have access to perform this action for all selected groups.
- Ticking the Send me to file archive checkbox will redirect you to the file archive upon clicking OK.
- Once in the file archive, wait for the generation of your file to be complete.

Create payroll file
The payroll file definitively runs payroll for the selected groups and employees.
Compared to running a preliminary payroll file, transferring to payroll will also:
- Lock any transferred payroll items from being edited by them being grayed out in Schedule - only by reversing can you edit those items again.
- Update the transferred payroll items’ status from Ready to transfer to Transferred to payroll.
In order to run a definitive payroll file, follow the same steps as for the preliminary file (see above), but once you've selected the employees you want to transfer, click the Create payroll file button that appears next to the Preliminary file button once at least one checkbox is ticked. The rest of the process works the same as for the preliminary file.

Transferring the file to your sFTP server
Customers with an sFTP server set up on their Quinyx account are able to transfer a payroll file to that sFTP server in addition to it being transferred to the file archive.
When clicking the Create payroll file button that appears after having checked at least one checkbox, the modal that displays will have two additional options if you have an sFTP server set up:
- Upload file to file archive.
- This is the default and only behavior for accounts without an sFTP server set up.
- Upload file to file archive and to sFTP server
Salary details report
You can run a salary details report from the Time view.
If you tick at least one checkbox in Time, a Salary details report button will appear. Just like when you’ve clicked the button for running a preliminary or definitive payroll file, a modal will now appear listing the number of payroll items that will be included, ignored because they’re missing attest, ignored because they’re missing punch, and ignored because they have already been transferred to payroll.

The same option of locking the schedule is available here as for preliminary and definitive files - see further up for a detailed description of this feature. You may also choose to be redirected to the file archive using the checkbox for that purpose.
The Only approved time punches, Only totals, and Include salary types that are not transferred to payroll options available in the Analytics interface are all set to false/unticked when you run this report from the Time interface.
Revert
As described above, when you create a definitive payroll file (using the Create payroll file button), the payroll items included in that file will have their status updated to “Transferred to payroll” in Time, and those items will be locked from being edited in Schedule. Reverting the items changes their status back to “Ready for payroll” and enables them to be edited in Schedule again.
You can revert any transferred payroll item. Just tick the employee of your choice who has at least one payroll item. Among the multiple buttons appearing in the top-right corner of the view, there's one called Revert.

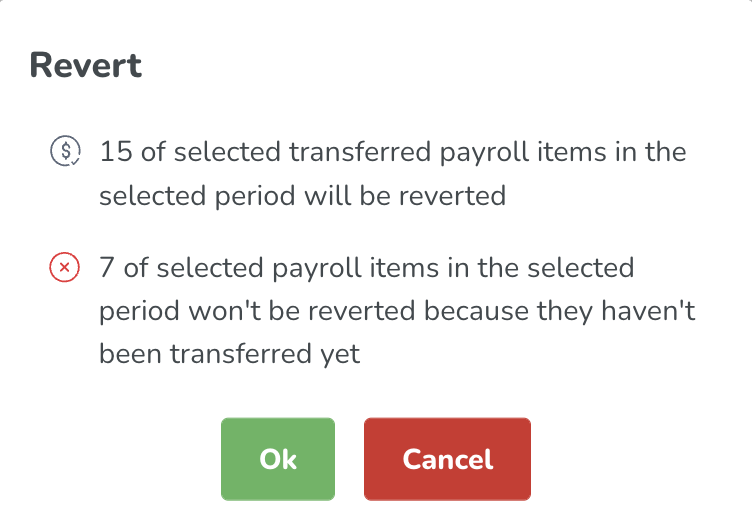
Clicking the revert button will bring up a modal summarizing the number of selected items about to be reverted, as well as which ones won’t be since they haven’t been transferred yet. If you select an employee who's ready for payroll but who has no transferred items, the Revert button will still display, but the summary in the modal will state that 0 items will be reverted. If you want to revert only a subset of a given employee’s items, do make use of the Adjust view panel’s filter options to specifically load only those items for that employee in the view.
Proceeding to actually revert items displays a progress bar while your request is being processed. While this request is running, the Adjust view panel will close and functionality within the Time view will be disabled, but you can leave the view while the request is running and come back later.
Once your request is done, you will land in the same view, with the same data as before. You can now enter Schedule and edit the reverted items. If you want to display the current status of the reverted items, click Apply in the Adjust view panel.
What's being transferred?
The following applies in Quinyx:
- If you've made changes in the system upon adjusting the view, those changes will be taken into account when you transfer to payroll.
- If an actual payroll item doesn't generate a salary, for instance, because the salary type generated by the item isn't ticked in the employee's agreement template, then that item will display in the Time tab but won't be included in the payroll file.
- When you click Apply in the Adjust view panel in Time, Quinyx fetches payroll items whose start time is within the daybreak limits of the selected dates as defined in:
Account settings > Group management > [Insert unit] > Advanced unit settings > Rules for hours > Daybreak.
However, when transferring to payroll, Quinyx considers the daybreak of the current unit only. So, if the daybreak of the current unit differs from that of one or more of the units of the selected payroll items, then that might impact which payroll items are included in your payroll file.
Virtual shifts and payroll
- A single virtual transaction cannot be reversed, but it will be reversed when reversing other transactions for employees or units.
- A virtual shift cannot be attested or unattested, they are always in the attest state.
See more information about virtual shifts here.
File statuses
After you have selected to create either a preliminary, definitive payroll file or payroll report, you are taken to the file archive. While waiting for your file to be ready for download there will be different payroll statuses. Below you will find the different statuses:
Status | Description |
In queue | Your file is in the queue and is waiting to be created. |
Processing | Your file is being created. |
Transaction lock | Your file is already generated and the outcome is correct. You can download it, but the process of salaries being locked in the database is still ongoing. |
Download | Your file is done and ready to be downloaded. |
Failed | Your file failed. This could be caused by various reasons such as missing data, PHP errors, etc. If this happens, please try generating it again, and if it still fails, contact our Customer support team if you are a support contact. |