Version 0164
 Updated
by
Daniel Sjögren
Updated
by
Daniel Sjögren
- New Functionality
- Picking people
- Add people to an audience
- Add more people to an audience list that already contains people
- Deselect all selected people
- Select all people
- Filtering
- Select people via the Location Picker
- Clear selected locations
- Picking Groups
- Add stores to an audience
- Select all in location using the Select all in this location checkbox
- Clicking the Clear all option to clear the entire audience
- Frontline Portal bug fixes
- New Frontline Portal HelpDocs articles
Release date July 12, 2023
Release summaryShort on time and want a high-level summary? Quinyx web app Version 0164 New functionality
Updates and performance improvements
Bug fixes
Important information
Frontline Portal Version 0164 New functionality
Updates and performance improvements
Bug fixes
SOAP API / Webservice updates
|
Important information
End of life of the Notice of Interest functionality December 2023
We've decided that our legacy functionality called Notice of Interest will be discontinued at the end of December 2023. Therefore, we urge all our customers to use the Availability functionality instead of Notice of Interest as soon as possible. The availability functionality is more user-friendly and supports more use cases than the Notice of Interest functionality.
One function that availability supports is converting an availability item into a shift in the Schedule view of the Quinyx web app. Quinyx also supports sections with availability and multi-selection of both units and sections when creating availability as a user. We've implemented the possibility for users to see, create, edit, and delete their own availability hours in our mobile apps.
Advanced Analytics, scheduled downtime
Just adding a small note to say that on July 24th we have a planned downtime for our Advanced Analytics modules. This is just for a scheduled system upgrade, to ensure the best performance and support for all your analytics needs moving forward.
This does mean, though, that Advanced Analytics will unfortunately not be available that day - though it'll be back up and running again in no time!
Quinyx web app Version 0164
New functionality
Option for work days in Multiply quota by days ratio
In Version 0163, we added support to calculate Overtime methods (Overtime, Additional time, and Minus time) even if your employee changes their agreement during the schedule period!
In this release, we're adding the possibility to use 5 or 7 days as “work days” when you use the Multiply quota by days ratio calculation. The reason for having these two options specifically is that they are among the most used number of worked days.
Connecting variables to groups
Until now, variables and display groups were visible within all units and sections even in cases where there was no data for that variable, or for all the variables in the display group, for those units or sections. This has resulted in schedule statistics and forecasts being more difficult to maintain in cases where a lot of variables exist in the organization.
With this release, we've added a check to visualize only variables within groups where data exists on that variable. That means, if you don't see a newly added variable on a group, make sure to upload relevant data for that variable to make it visible.
Updates and performance improvements
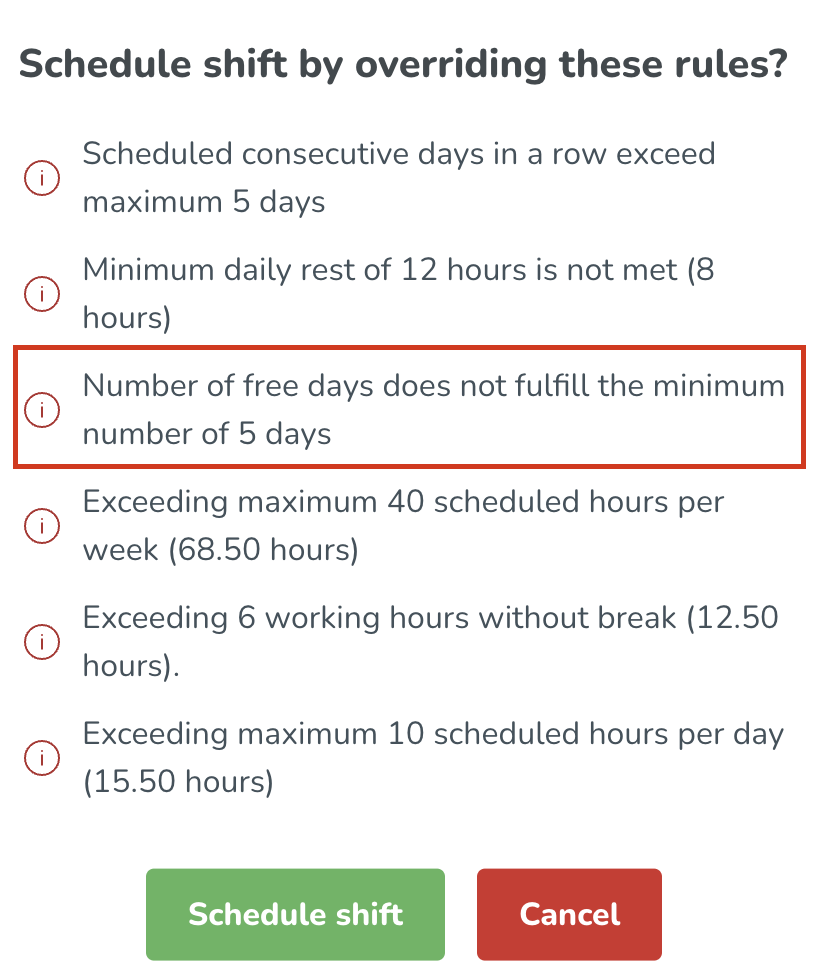
Scheduling warning
The scheduling warning about the number of free days that an employee is entitled to by employee agreement has been updated to now reflect the actual values causing the warning to be triggered. For technical reasons for this rule, we are able to present only agreement value.
Example
UI update
For a better user experience and a better understanding of the logic behind agreement set up for an employee's minimum daily rest, we've added an explanation under the agreement settings. The logic behind the calculation has not changed.
Quinyx web app bug fixes
- Resolved an issue that caused shifts not to be restored correctly when deleting a part-time absence.
- Resolved an issue where users with a manager role but no employee role were unable to get access to the mobile apps functions. We now look at the specific manager's staff category permissions to determine which functions in mobile the user has access to.
- Resolved an issue with one of our external SOAP APIs: wsdlUpdateShiftTypes erroneously did not support updating/changing existing shiftTypeExtId.
New HelpDocs articles
- None at this time.
Frontline Portal Version 0164
New Functionality
Picking people
We've made some changes to the look and feel of the basic picking of people when creating an audience. This means the people picker is now more intuitive and easier for resource creators to use.
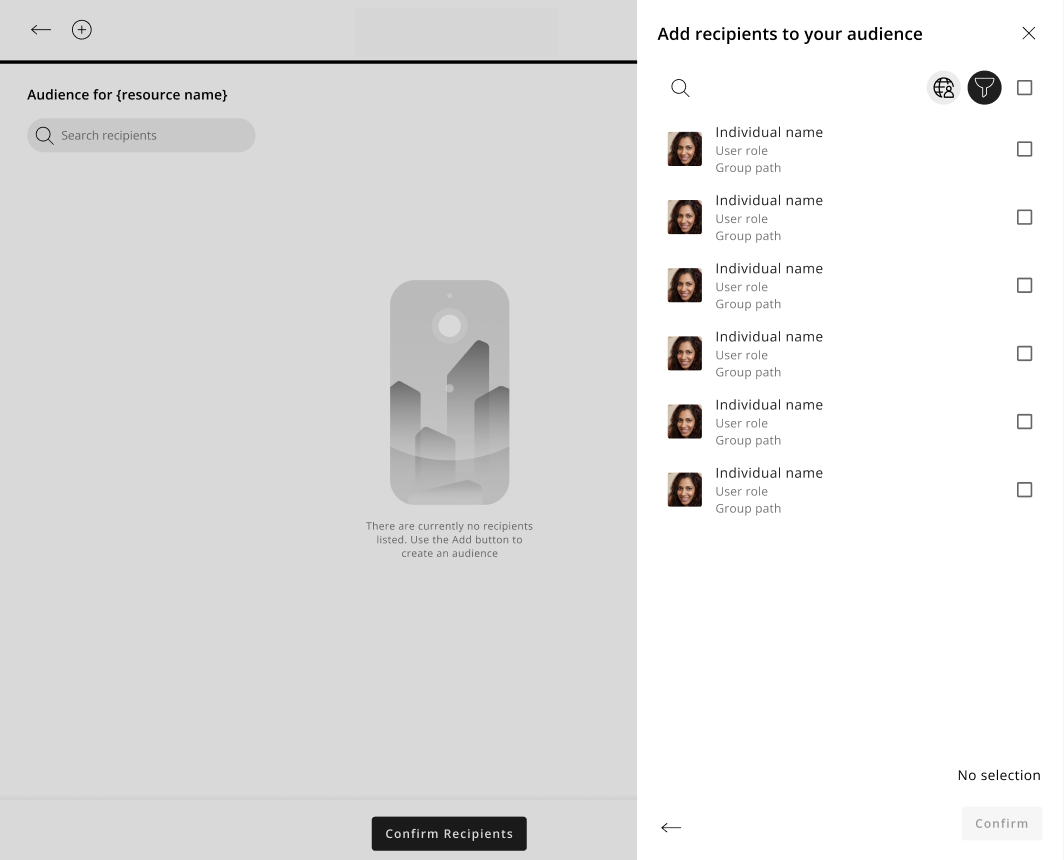
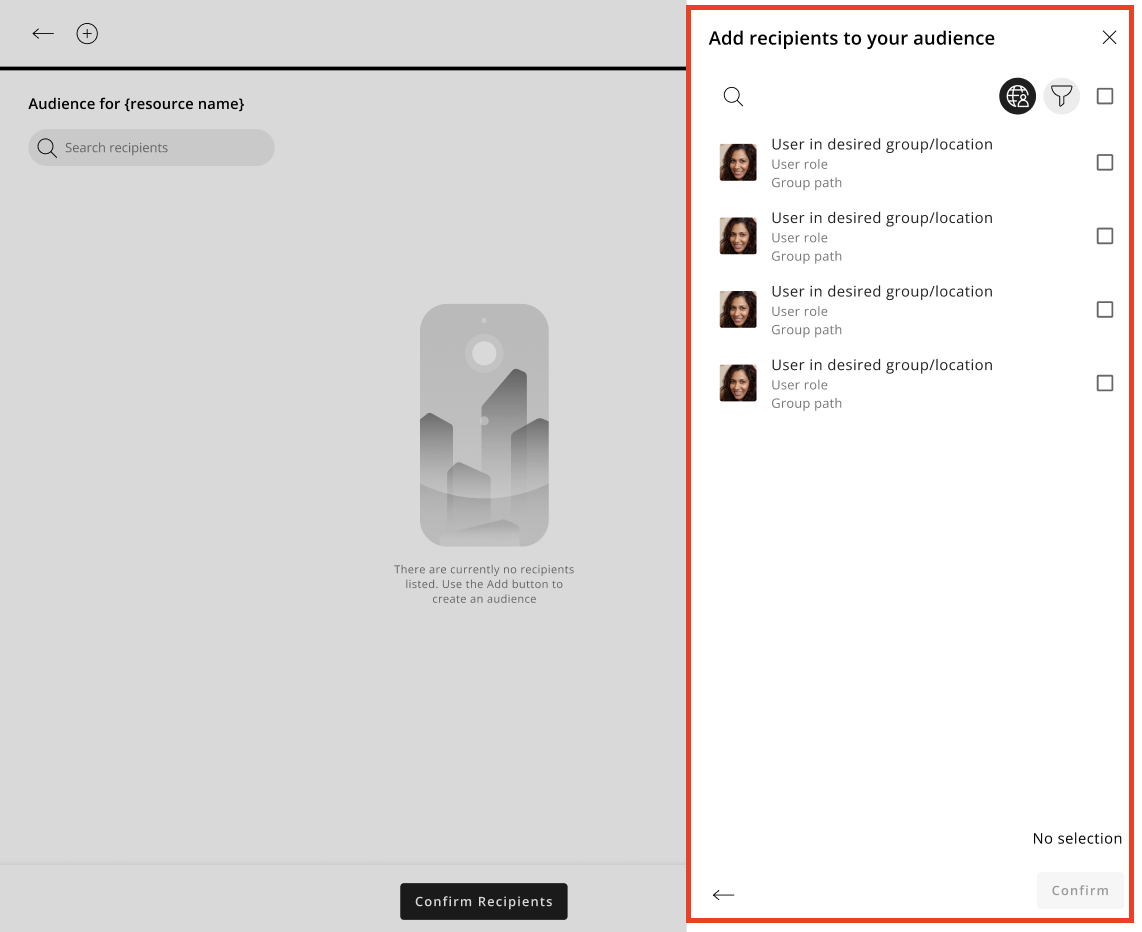
Add people to an audience
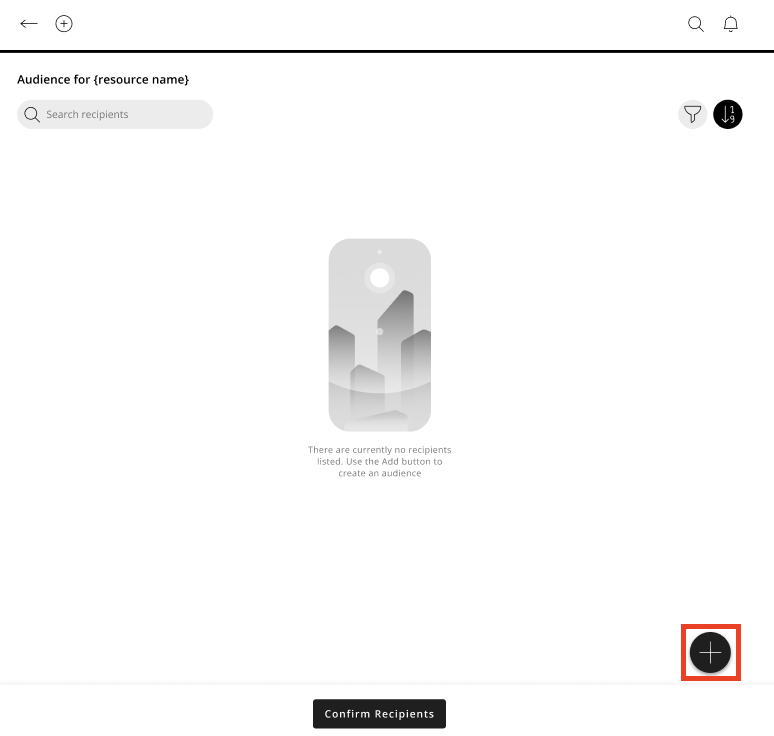
You can add people to an audience.
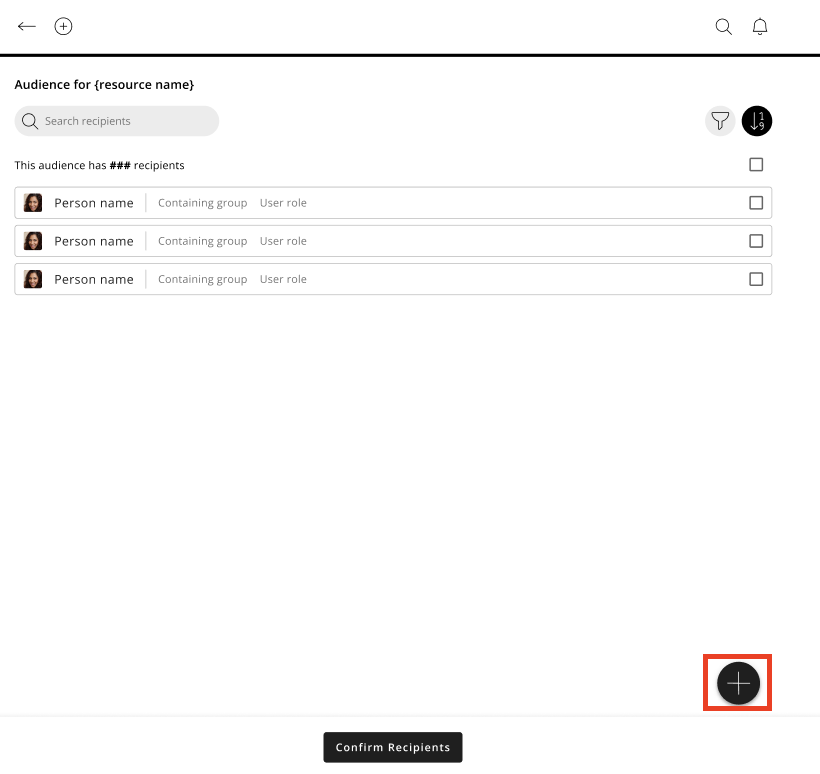
- Click the add button (+) on the Audience Viewer page.

- Click Add, and a sidebar will open.
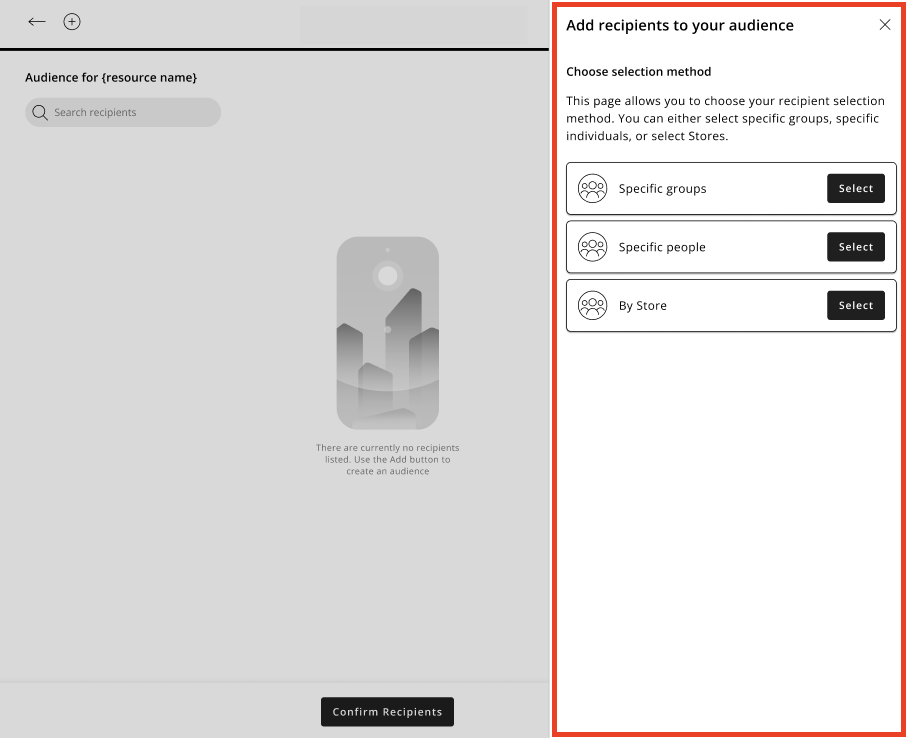
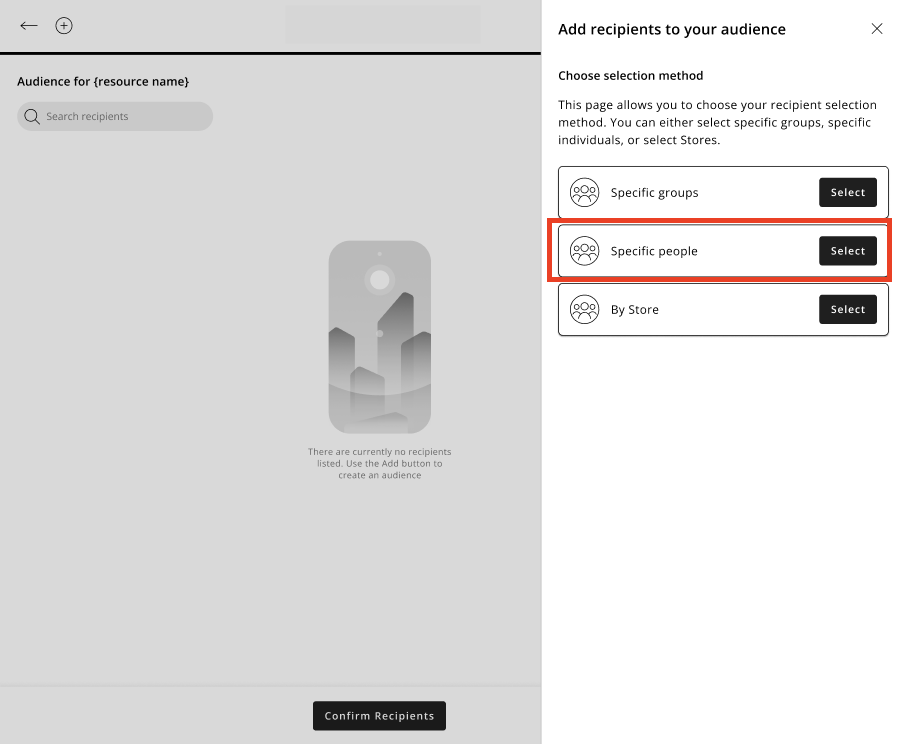
- Select the Specific people selection method.
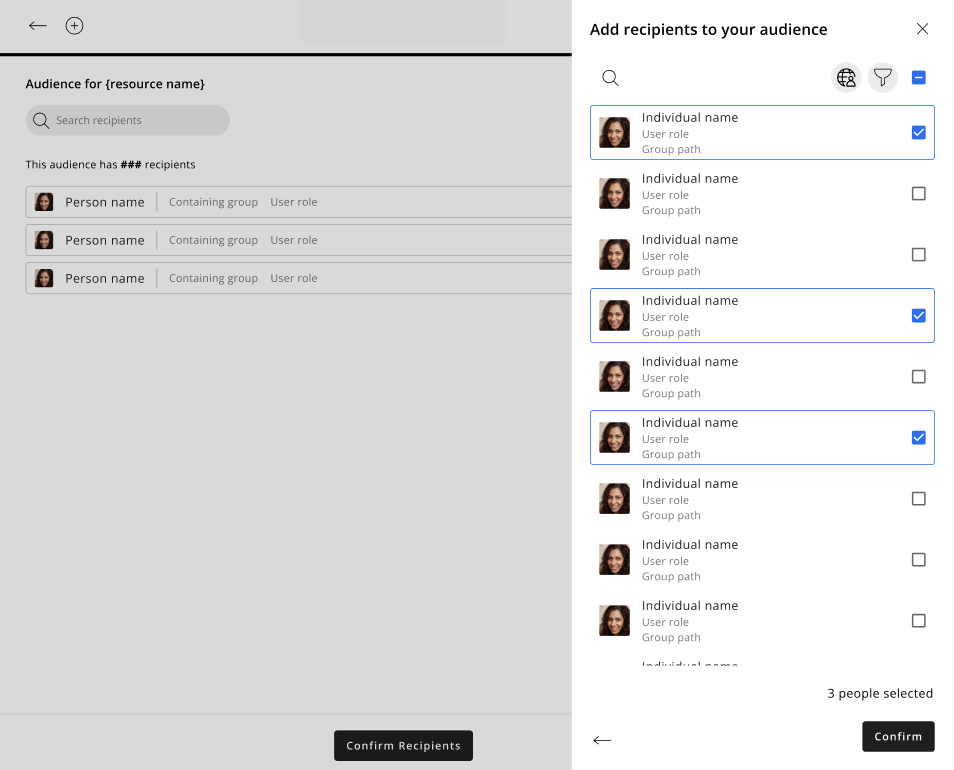
- The People Picker sidebar opens, and you can select people. Click Confirm once you are happy with your selection.
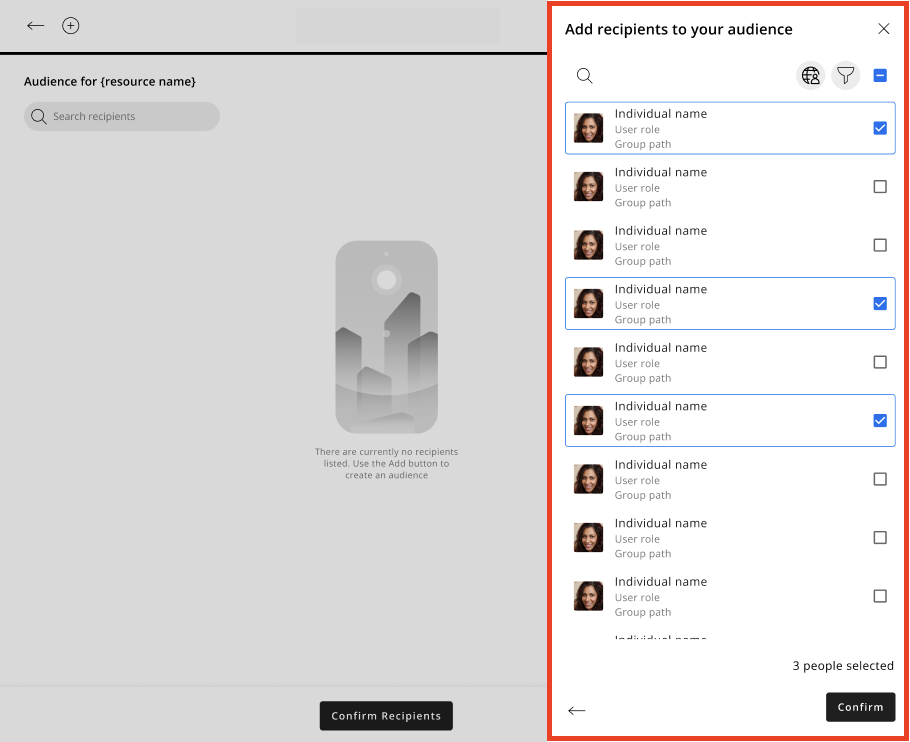
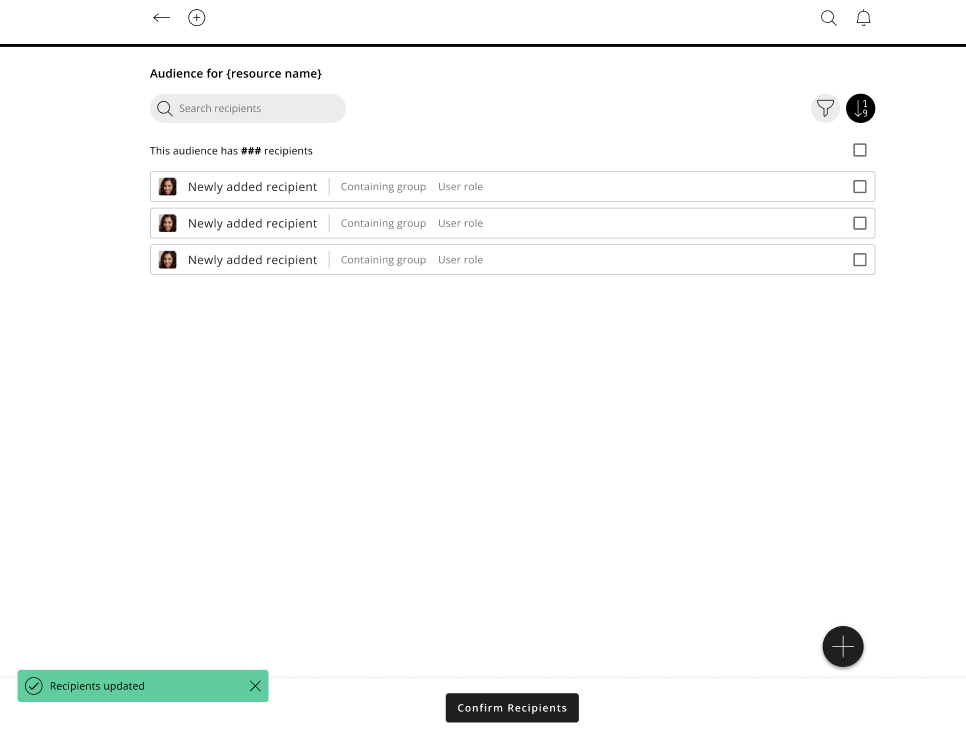
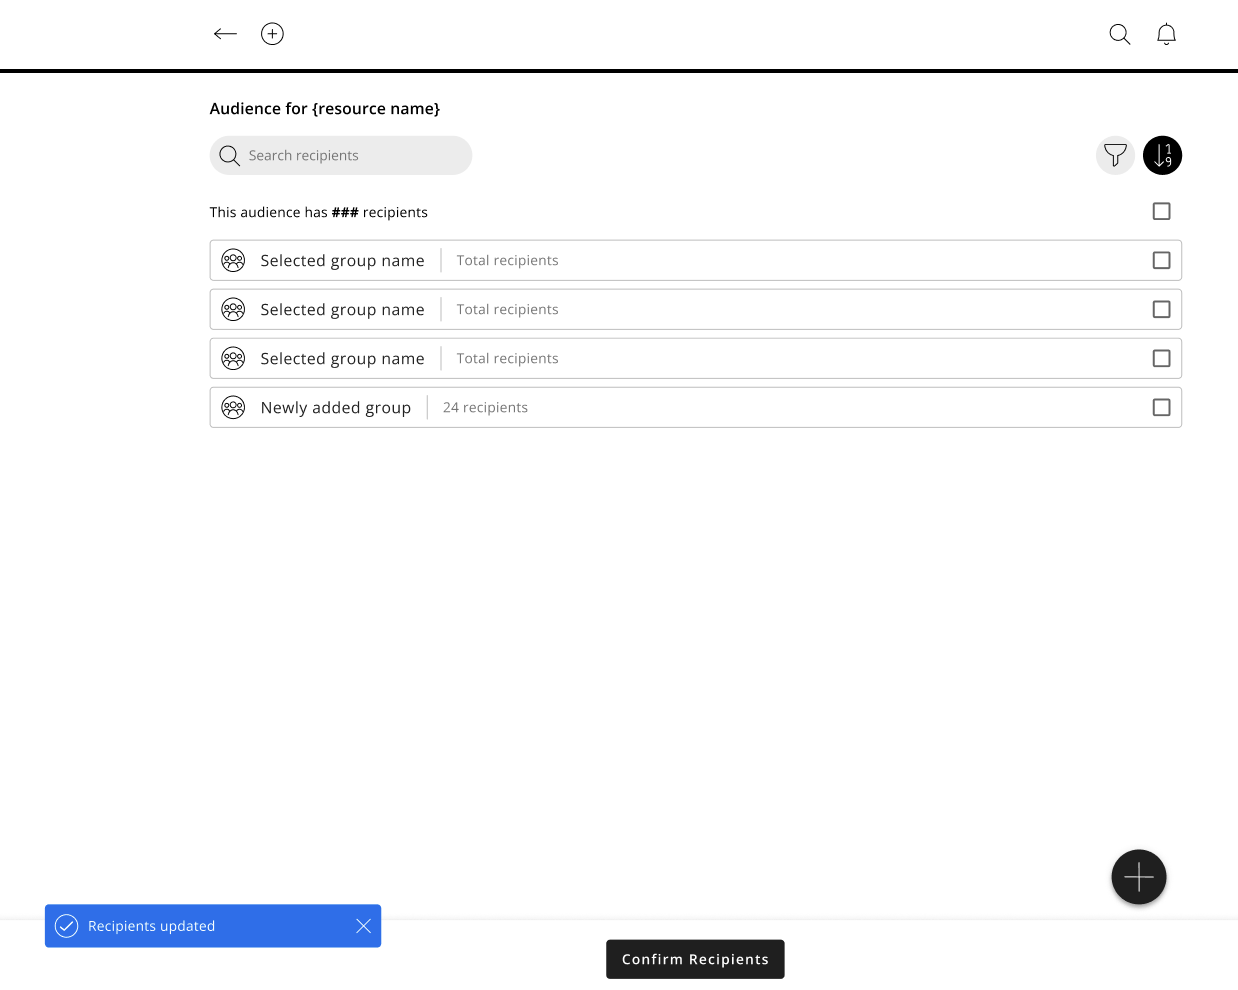
- You will be taken back to the Audience Viewer page with your audience populated; a toast message will confirm your audience has been updated with the recipients selected.
Add more people to an audience list that already contains people
You can add more people to a list you have already created containing people as follows:
- Click the add button (+) on the Audience Viewer page.
- The People Picker sidebar will open, and the people you have selected previously will be shown as selected.
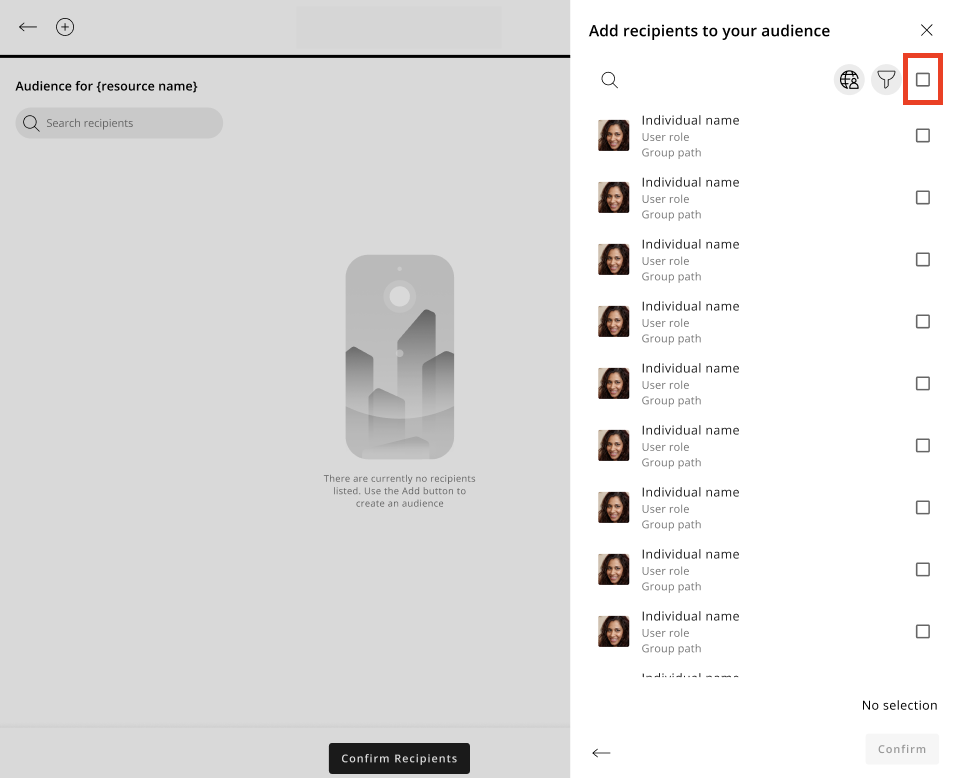
Deselect all selected people
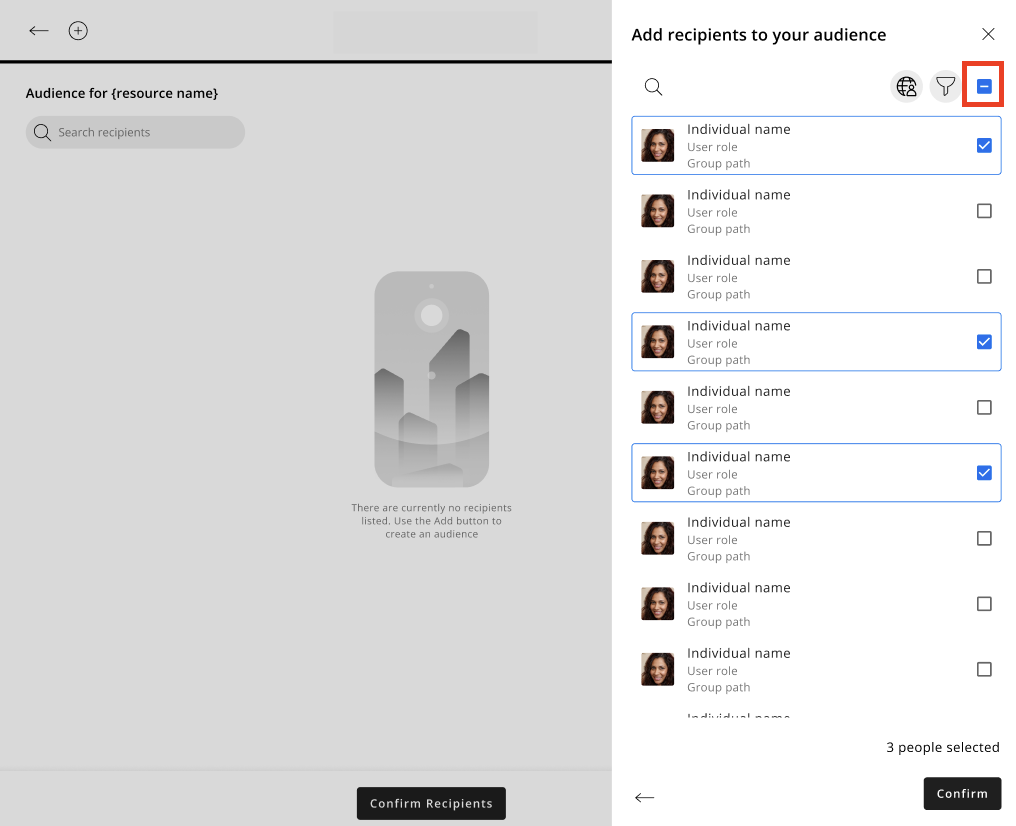
- You can deselect all selected people using the indeterminate selector.
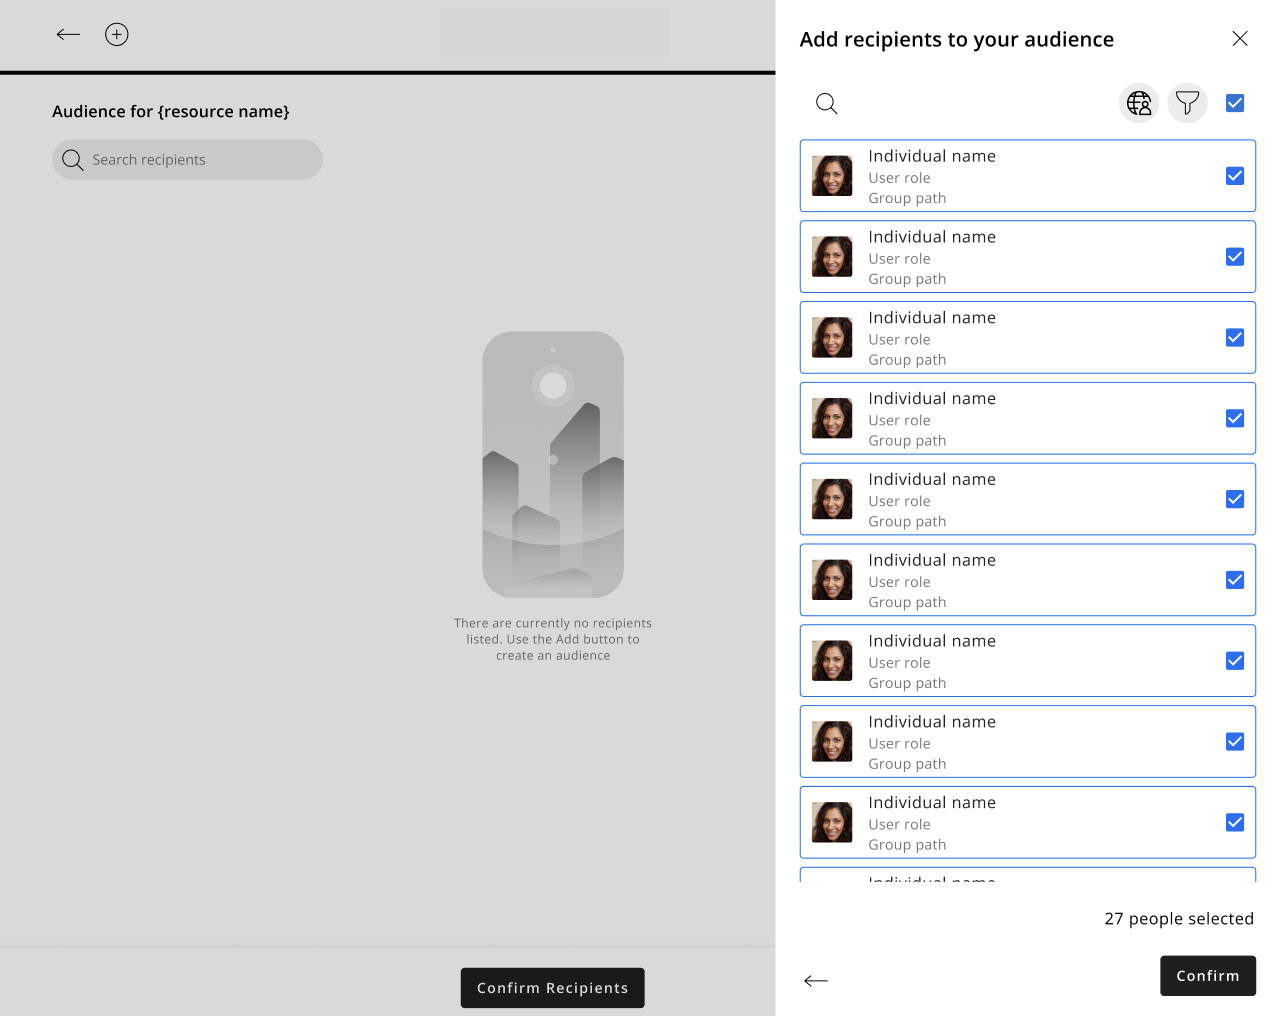
Select all people
- You can select all people using the Select all checkbox.
Filtering
Filter people within the People Picker
You can filter the list of people in the People Picker.
- Select the filter icon.
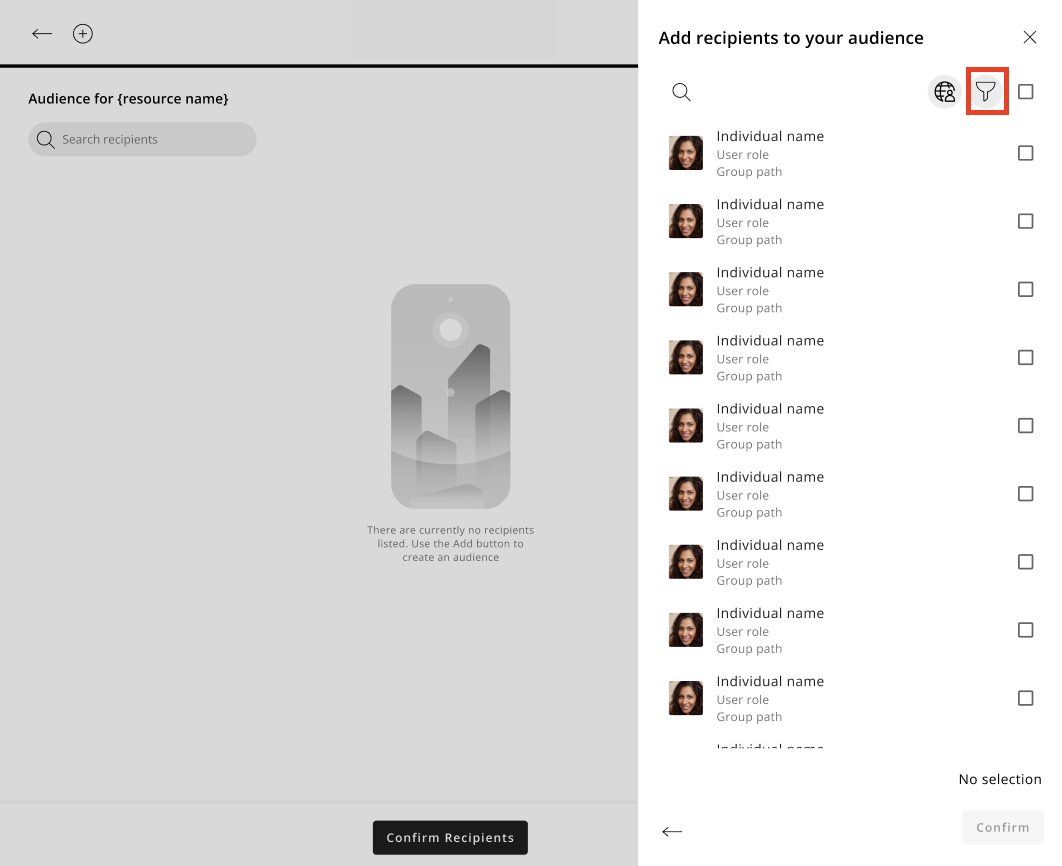
- The filter sidebar will open.
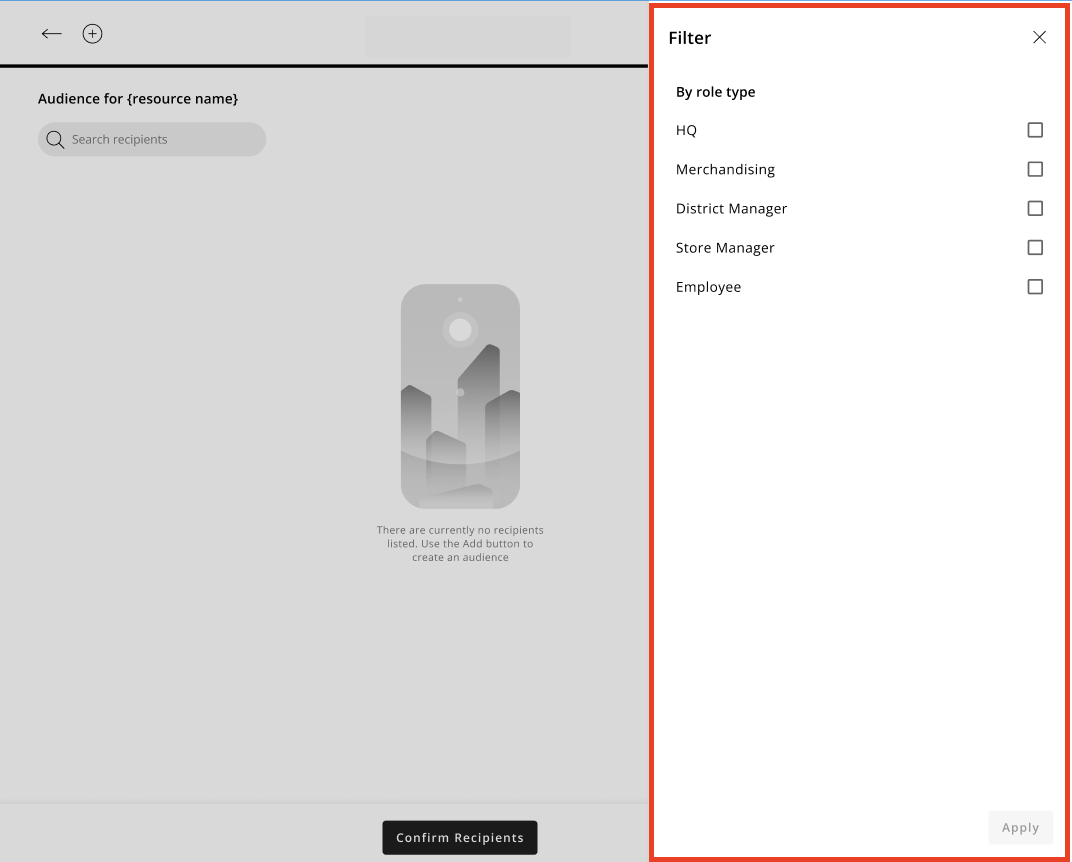
- Select the filter options you want, and click Apply.
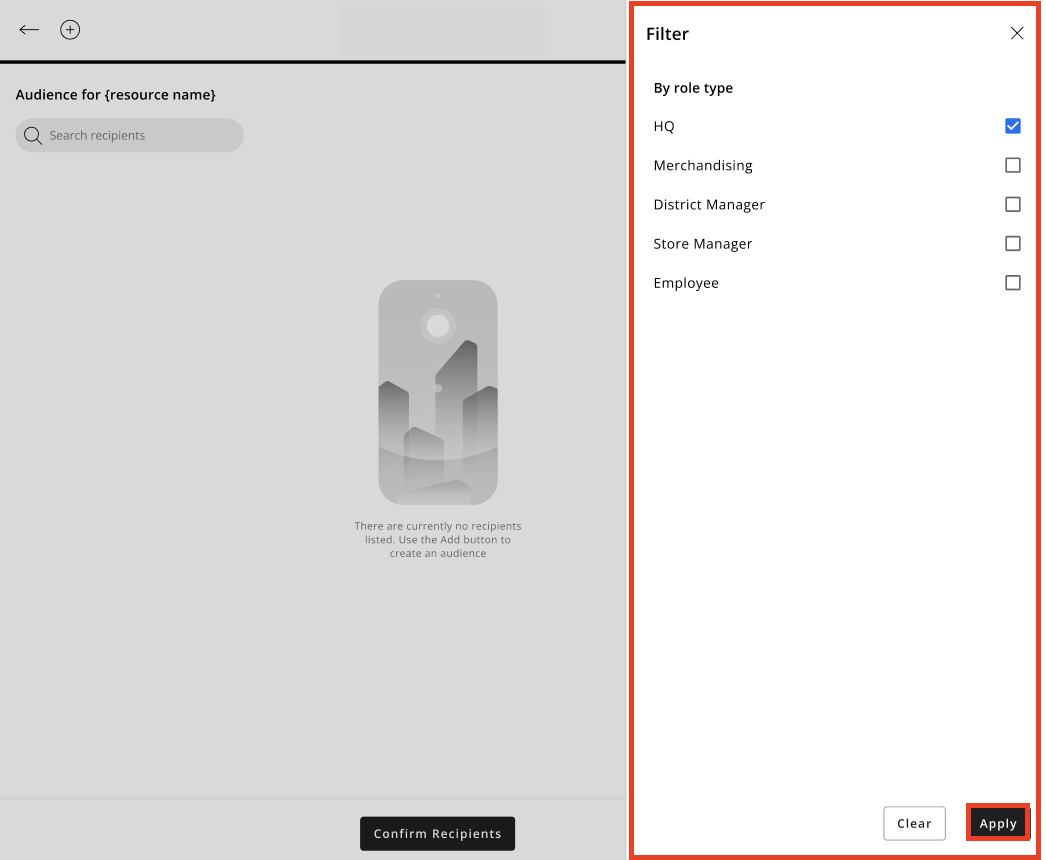
- The filter sidebar will close, and you'll be returned to the People Picker sidebar with your chosen filters applied.
Select people via the Location Picker
You can add people to an audience via the Location Picker.
- Select the Location Picker icon.
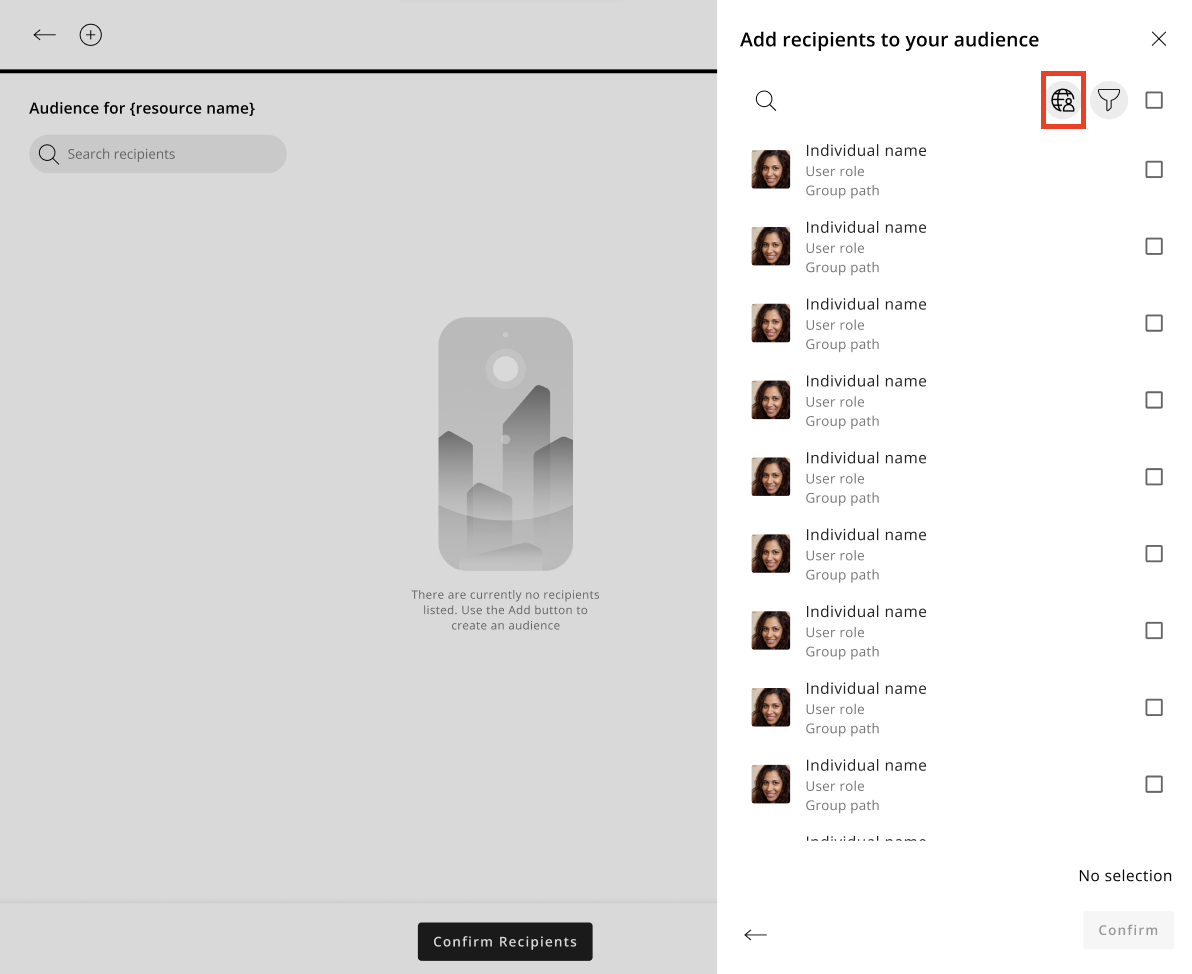
- The Location Picker sidebar will open.
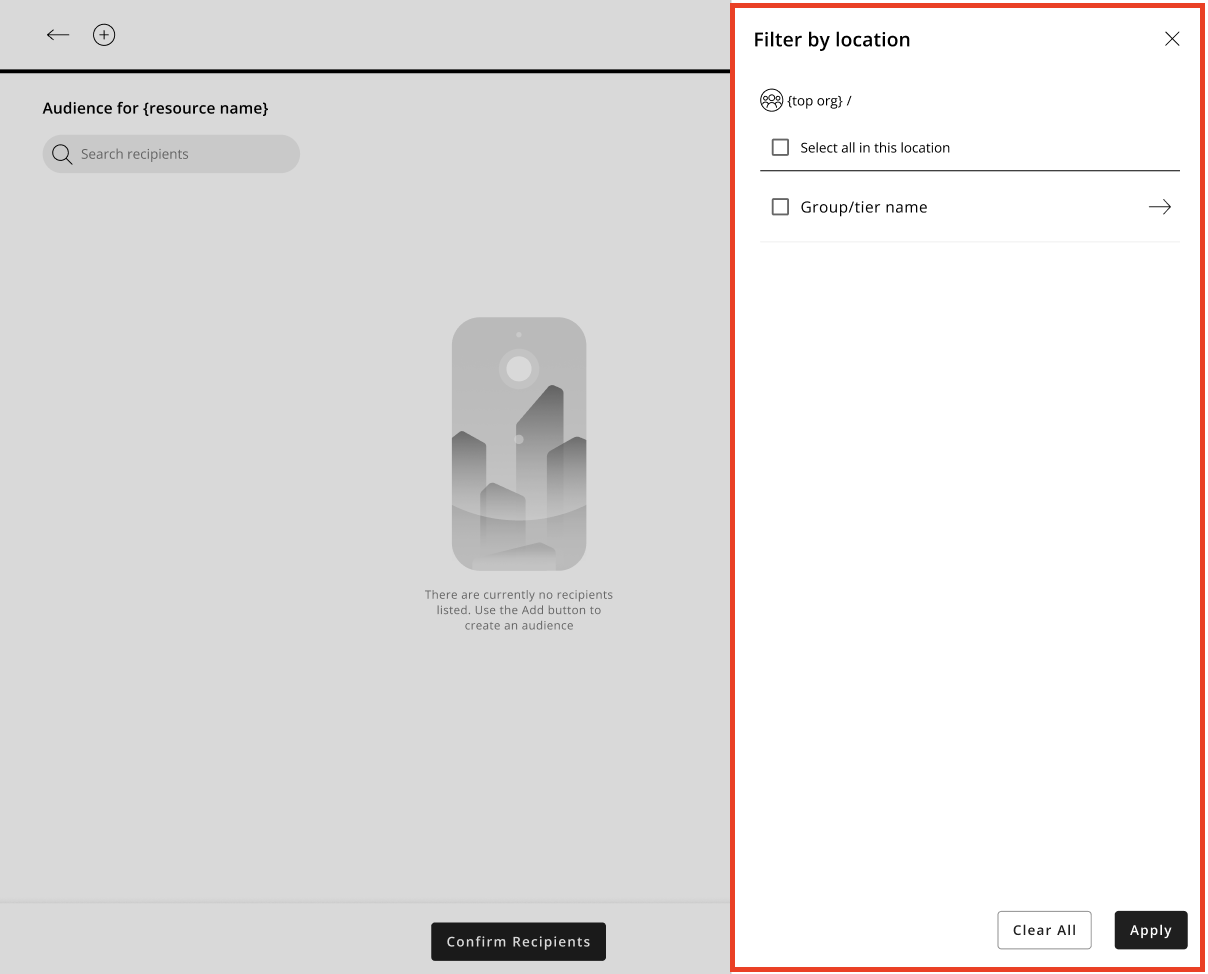
- Navigate to your desired location and make a selection and click Apply.
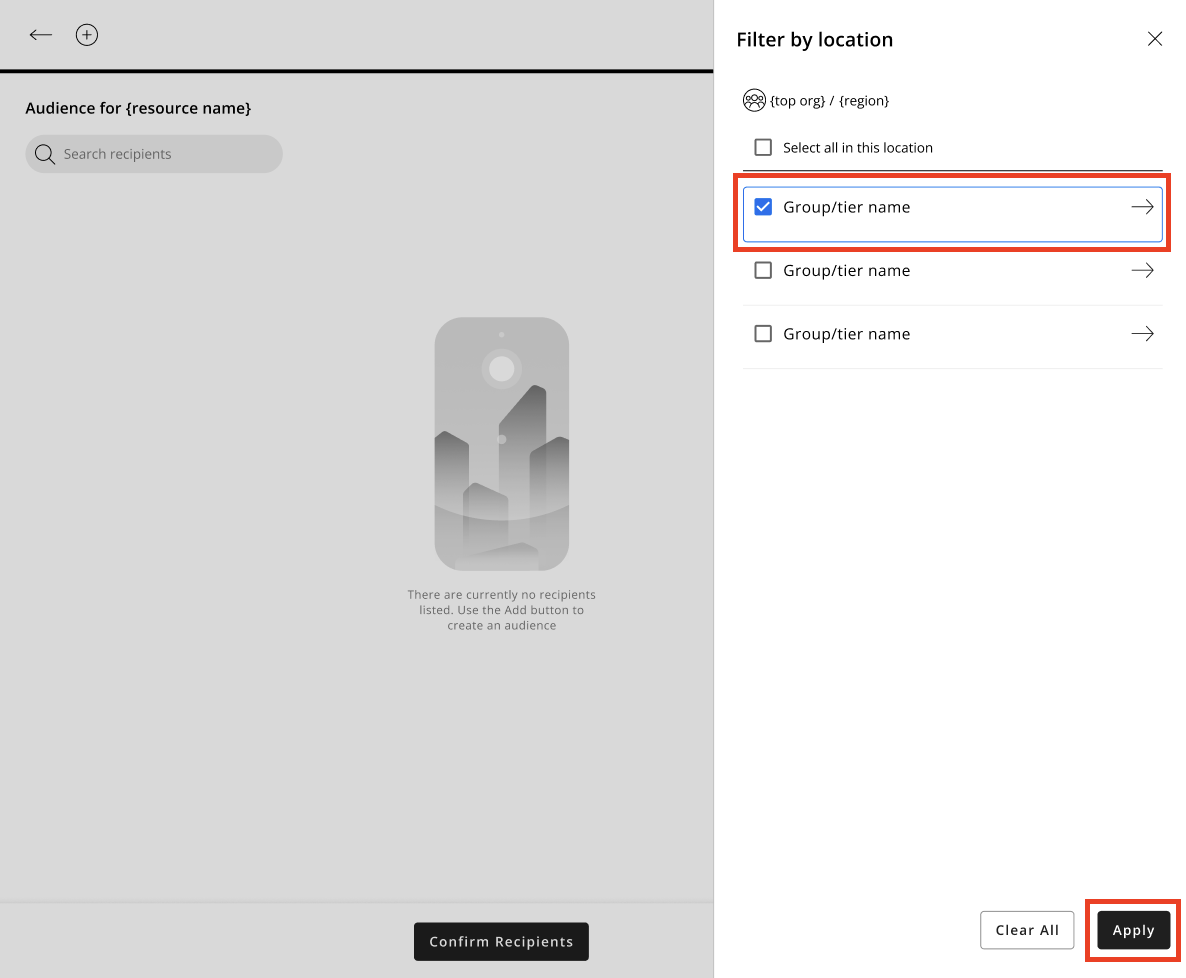
- All people belonging to the location you've selected will display in the People Picker sidebar.
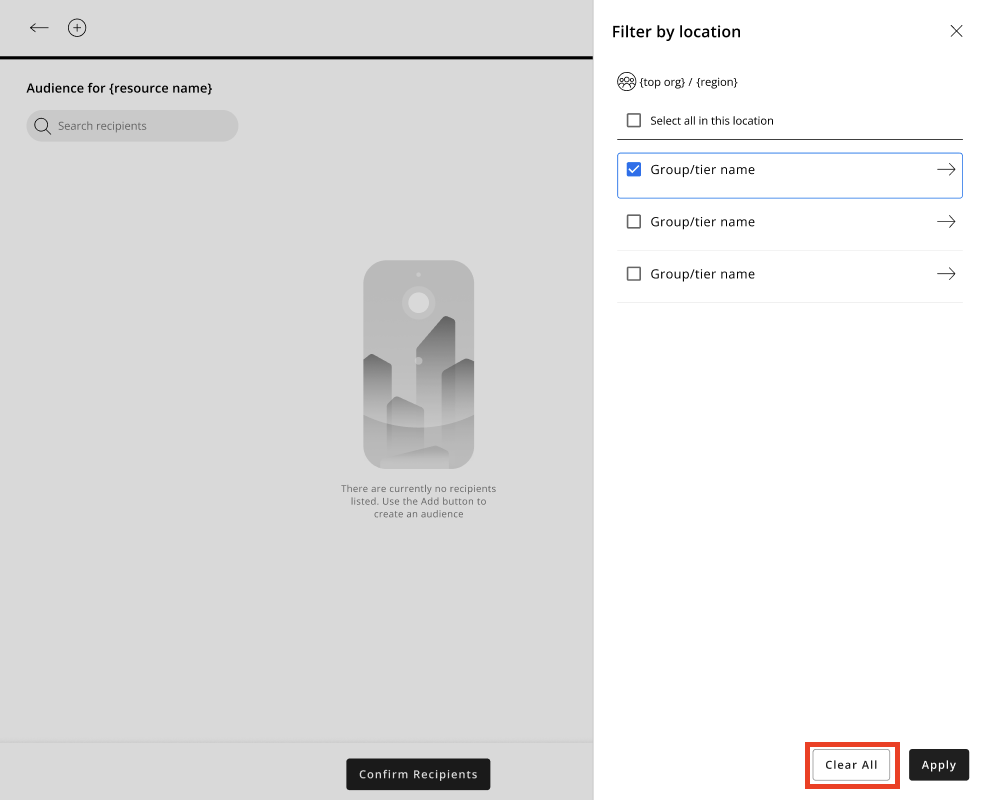
Clear selected locations
You can clear your selection when adding people via the Location Picker as follows:
- Select the Clear all button, and all selected locations will be cleared, and the Location Picker sidebar will close automatically.
Picking Groups
We've also made some changes to the look and feel of the basic picking of groups/stores when creating an audience; this means the group/store picker is now more intuitive and easier to use for resource creators.
Add groups to an audience
You can now add groups to an audience as follows:
- Click the add button (+) on the Audience Viewer page.

- The Add sidebar will open.

- Select the Specific groups selection method.
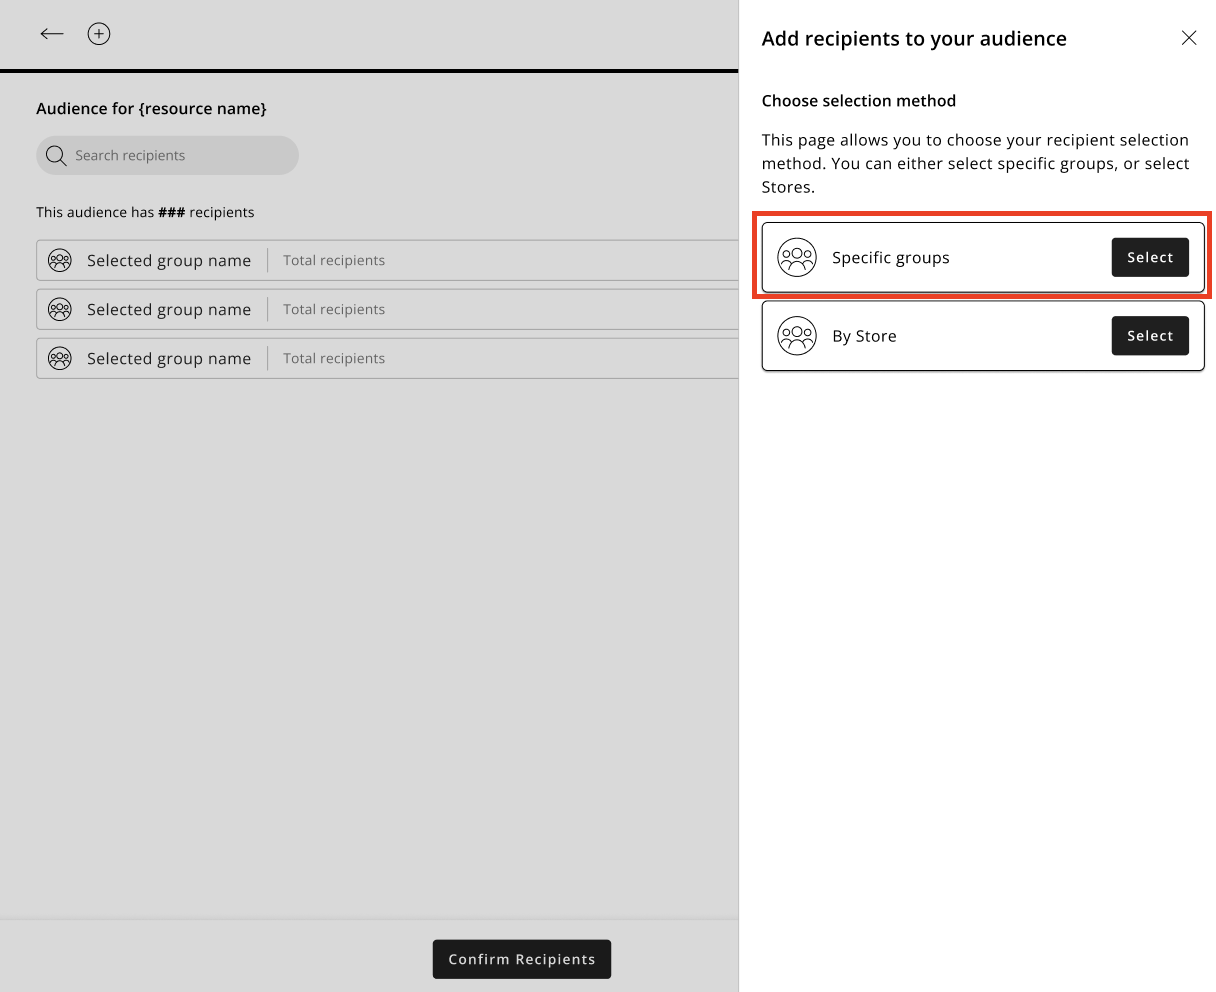
- The group picker sidebar opens, and you can select groups, click Confirm once you are happy with your selection.
- You will be taken back to the Audience Viewer page with your audience populated, and a toast message will confirm your audience has been updated with the recipients selected.

Add stores to an audience
You can now add stores to an audience as follows:
- Click the add button (+) on the Audience Viewer page.
- The Add sidebar will open.

- Select the By store selection method.
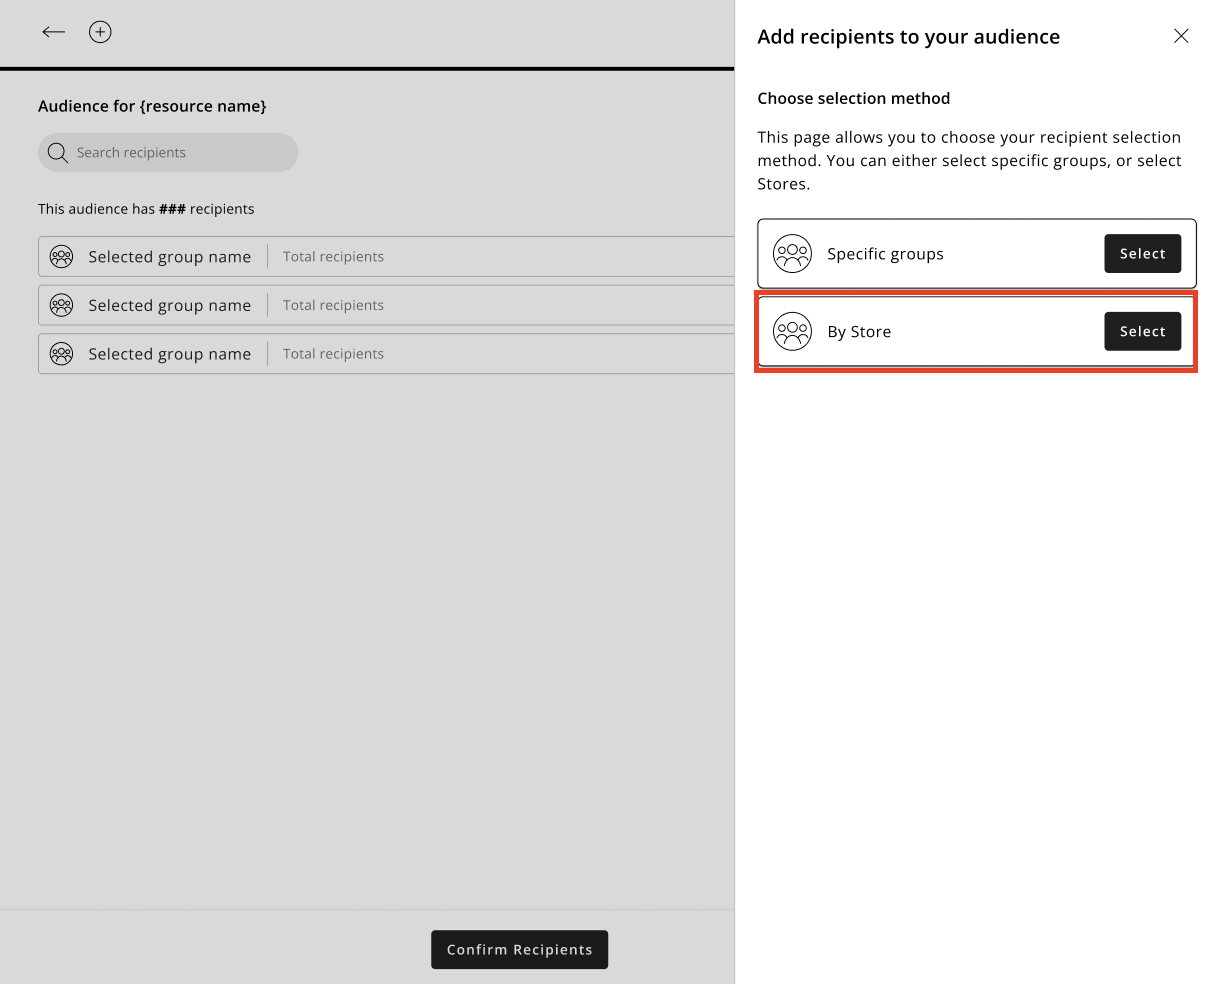
- Click Confirm.
- The Group Picker sidebar opens, and you can select groups. Click Confirm once you're happy with your selection.

- You will be taken back to the Audience Viewer page with your audience populated, and a toast message will confirm your audience has been updated with the recipients selected.
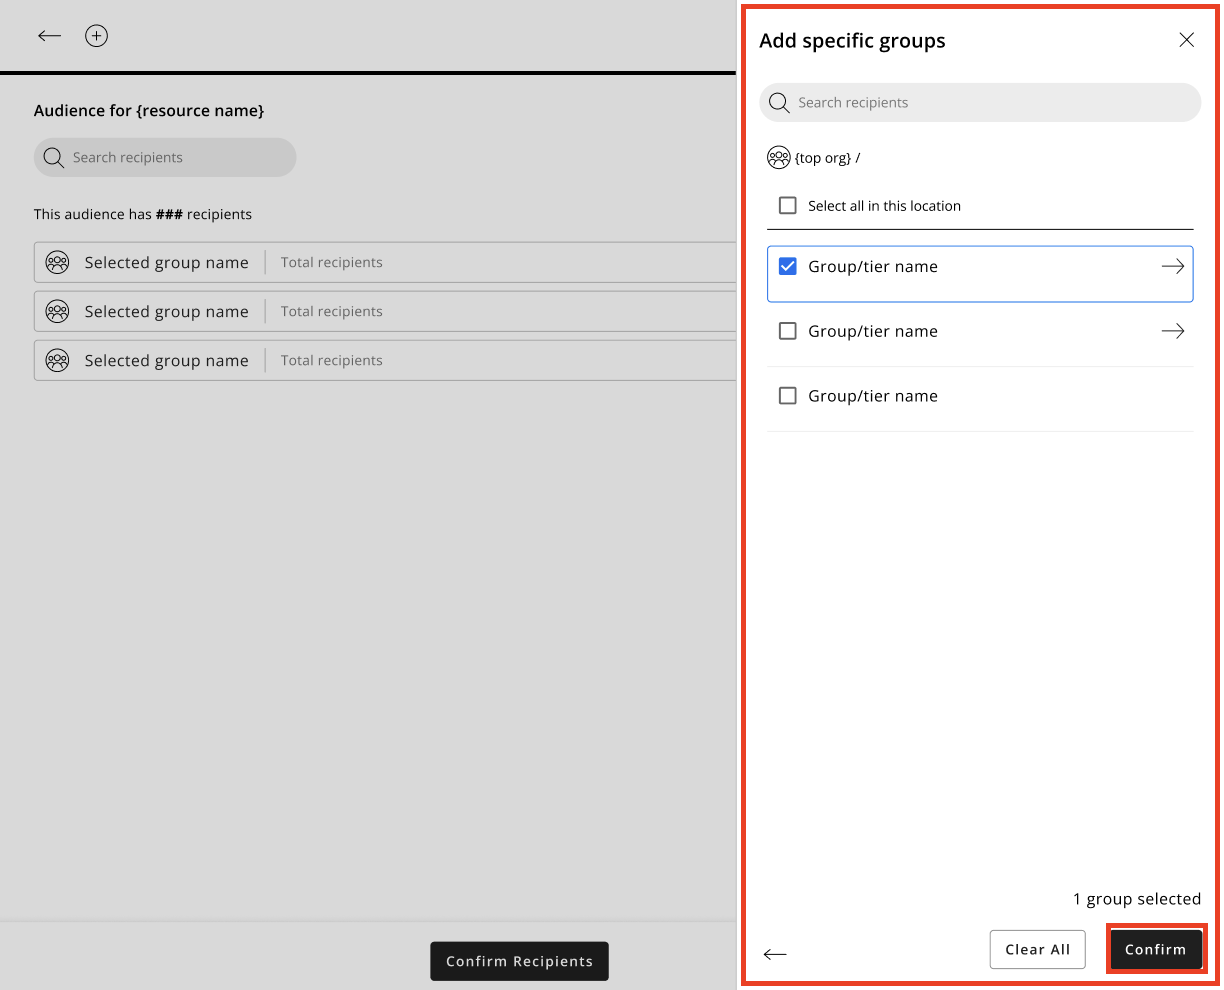
Select all in location using the Select all in this location checkbox
You can now select all groups in a location as follows:
- Select the Select all in location checkbox, and all groups in the list will be selected.
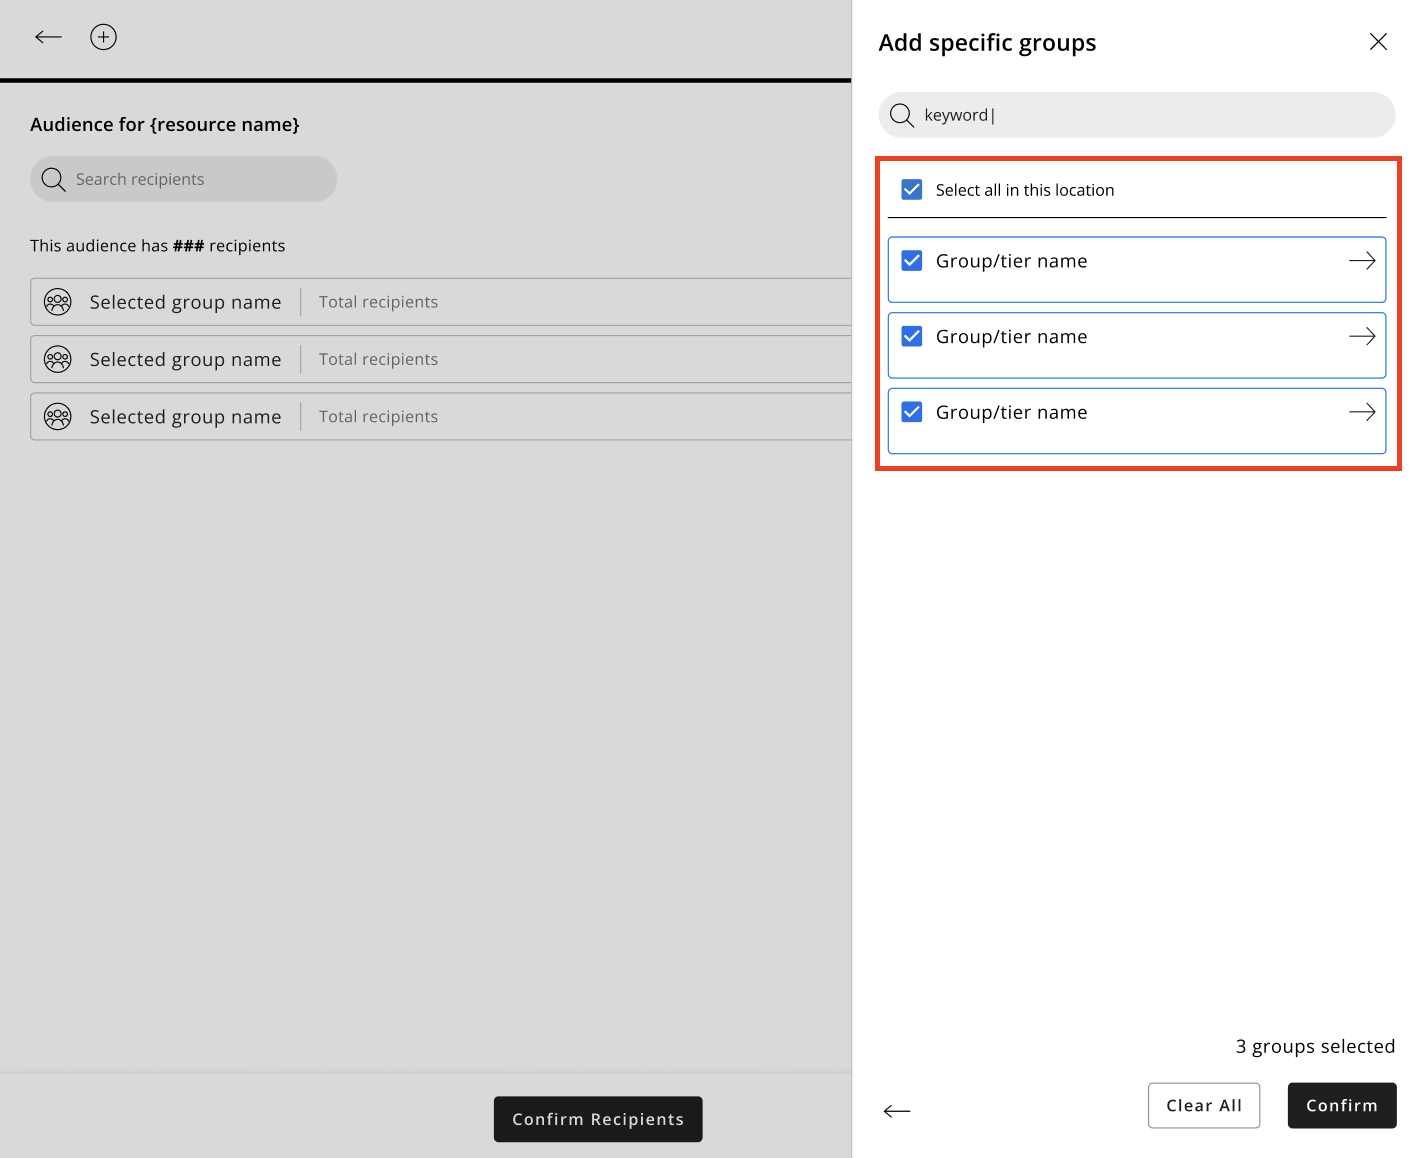
- Click Confirm once you are happy with your selection.
- You'll be taken back to the Audience Viewer page with your audience populated, and a toast message will confirm your audience has been updated with the recipients selected.
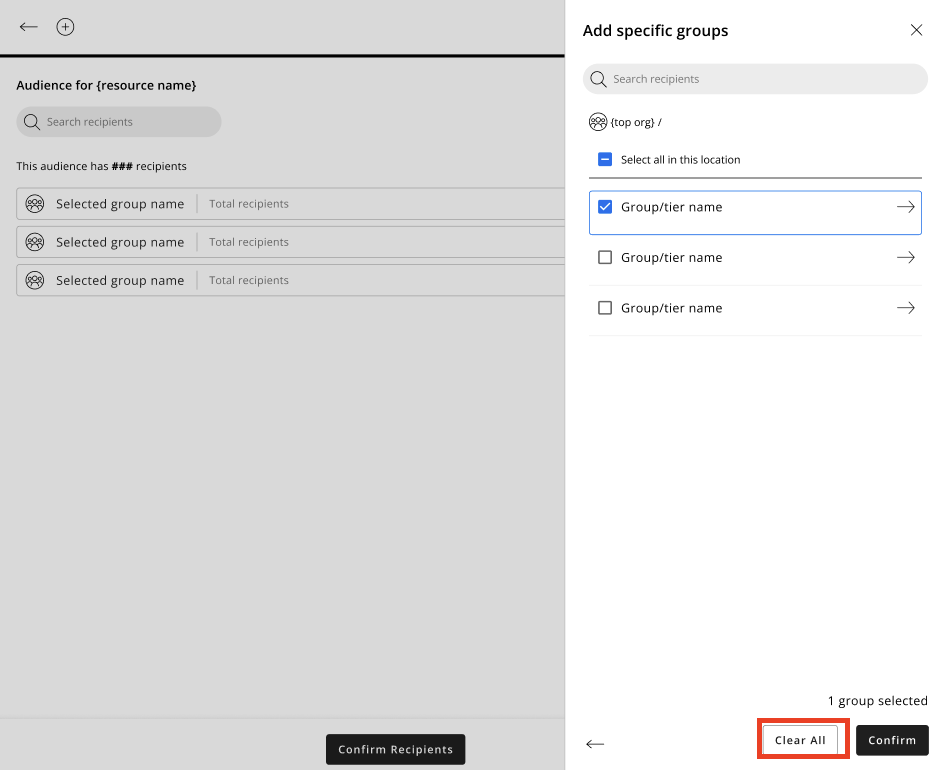
Clicking the Clear all option to clear the entire audience
You can clear your audience completely as follows:
- Select the Clear all button, and you will be prompted to confirm your intention to clear all. Click Clear to confirm.
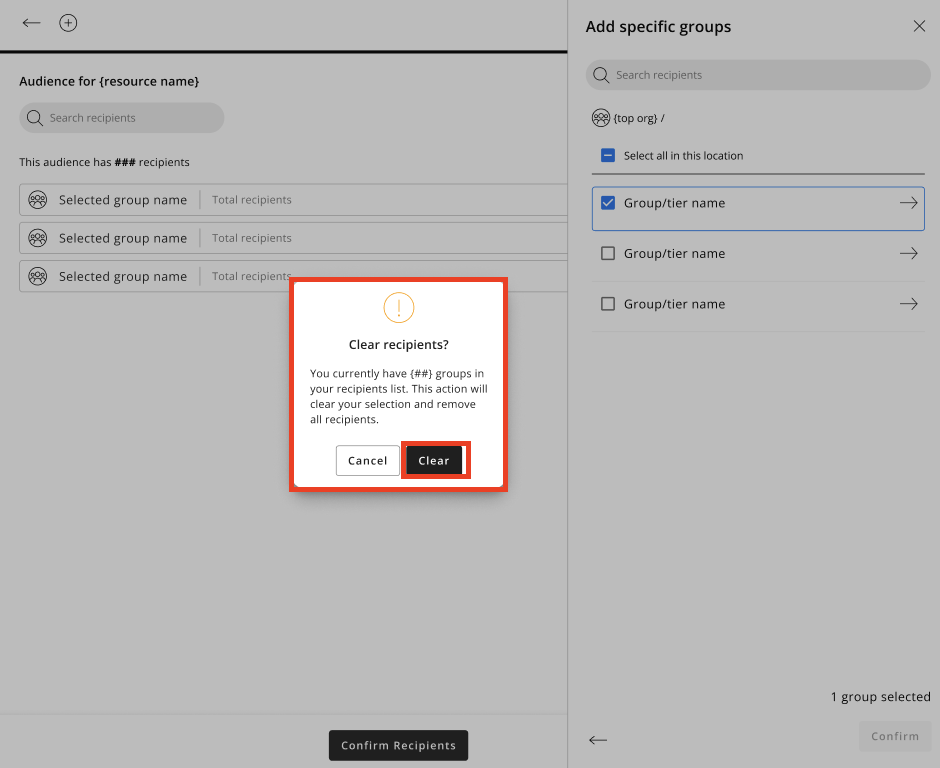
- The sidebar will close automatically, and you'll be taken back to an empty Audience Viewer. All recipients previously selected will have been removed.
Frontline Portal bug fixes
- None at this time.
New Frontline Portal HelpDocs articles
SOAP API / Webservice updates
With this release, we have introduced new fields in 2 Web Services. Affected Web Services are:
- wsdlGetSchedulesV3
- wsdlGetAgreementsV2
Inside the response body for the wsdlGetSchedulesV3 we have added 2 new fields to provide additional shift information that was missing before: countAsWorkedHours (boolean) and isFreeDay (boolean). You can find more information in our HelpDocs here.
Inside the response body for the wsdlGetAgreementsV2 we have added 1 new field to support recently released functionality - Rolling 7 Day period minimum consecutive rest validation. This field is called weeklyRestType (boolean) and provides information about the setup in the agreement template. You can find more information in HelpDocs here.
Please make sure to forward this information to the party within your company responsible for integrations.