Agreement templates - Bank holidays

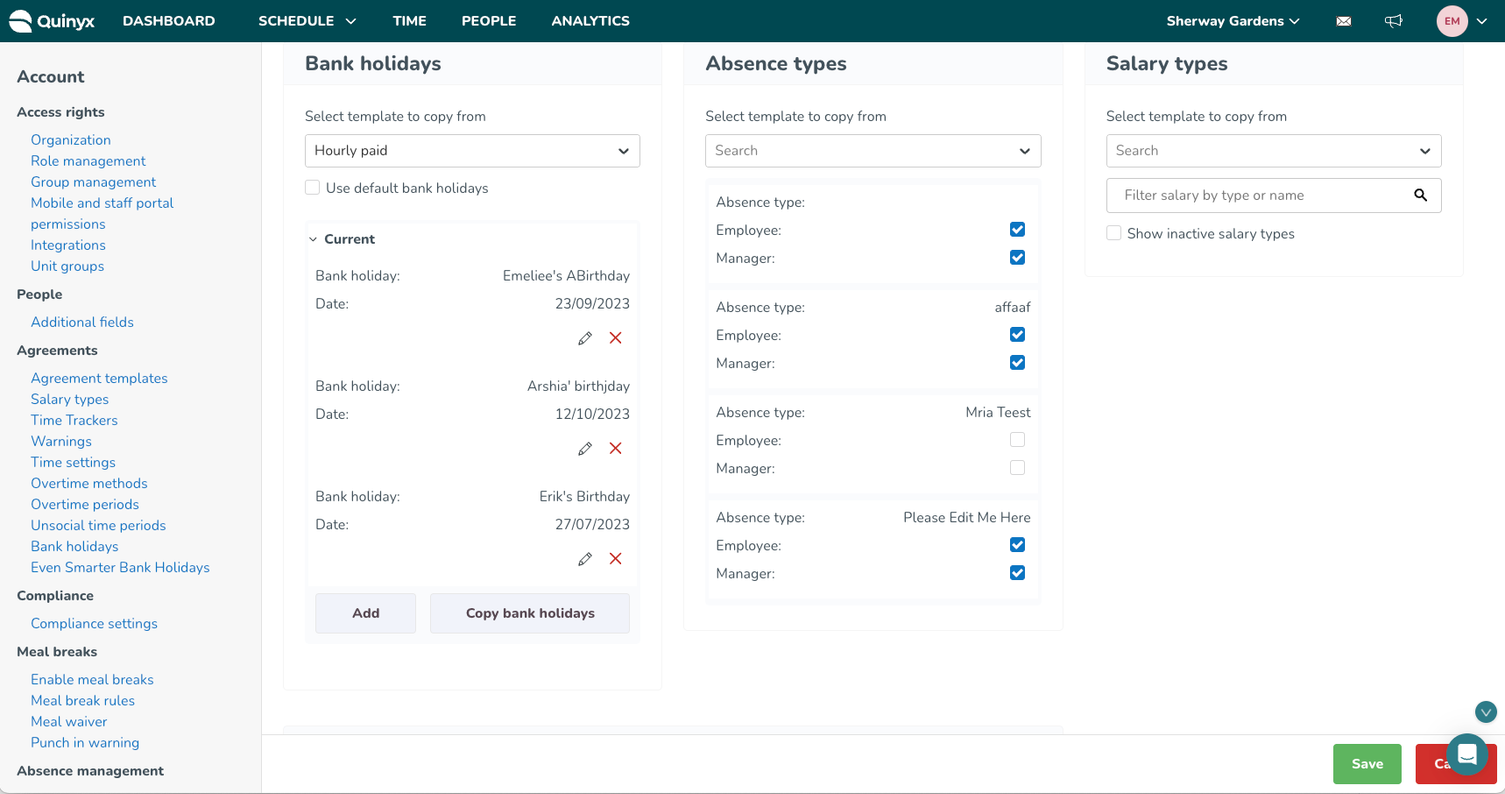
You can configure bank holidays in the agreement template Bank holidays section.
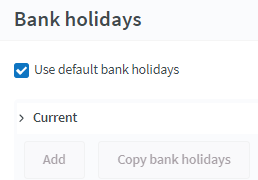
Use default bank holidays
The "Use default bank holidays box" appears in the Bank holidays section of the agreement template and is generally checked. This means that the agreement template inherits the global settings for bank holidays with their respective unsocial hours and overtime periods, as well as any reduction in nominal time, which are inserted in the submenu Unsocial hours/Overtime/Bank holidays under the Time and Settings tabs.
If you want to apply other rules for bank holidays to the agreement template, the "Use default bank holidays" checkbox must be unchecked.
Copy bank holidays
On your specific agreement template, if you set up bank holidays in previous years, you can select Copy bank holidays to the current year.
- Click on an agreement template and scroll down to the Bank holidays section.
- Click on Copy bank holidays.
- Select the year you want to copy from.
- Select one or multiple bank holidays that you want to copy.
- Under each bank holiday, you will see a Copy to date field (the same date one year ahead is automatically set).
- Go through the dates and make sure they are set to the date you want them to be copied to.
- Click Save.
Now, the selected bank holidays will be copied to the selected dates with the exact same settings as the bank holiday they were copied from. You can see the upcoming bank holidays by expanding the Coming menu in the list of bank holidays.
Copy bank holidays across agreement templates
You can select another agreement template you’d like to copy bank holidays from, and they will automatically be shared with your new agreement template to make the management of bank holidays quicker and easier.
- De-select the Use default bank holidays checkbox to allow the use of custom holidays.
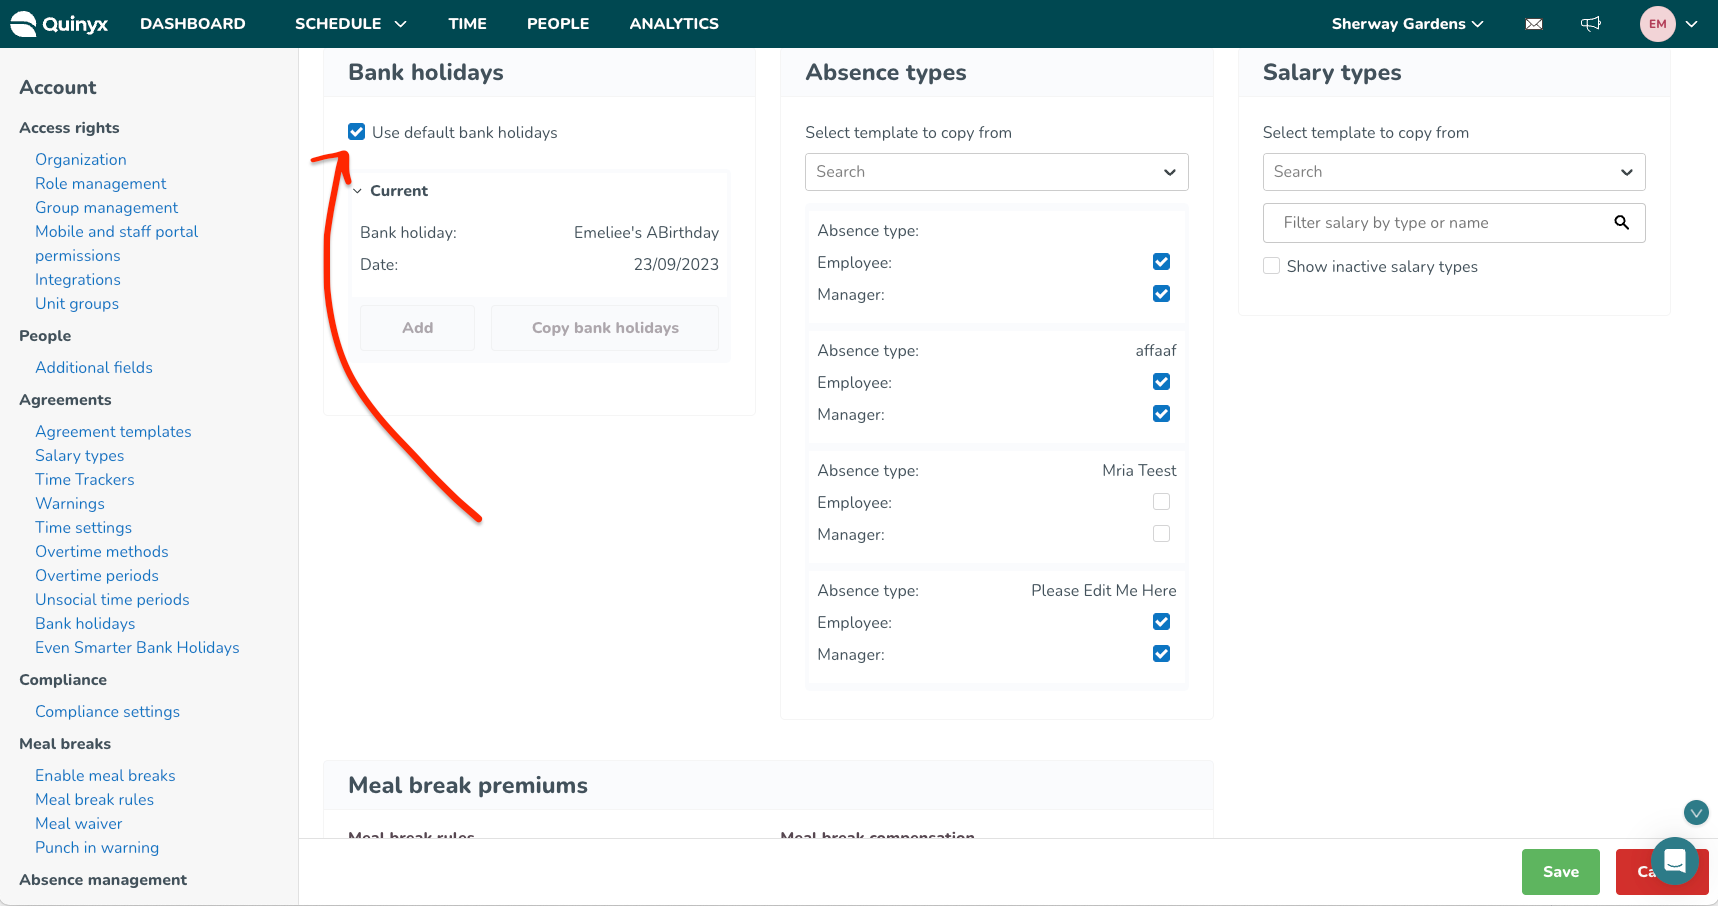
- Select which agreement template you want to copy existing Bank Holidays from.
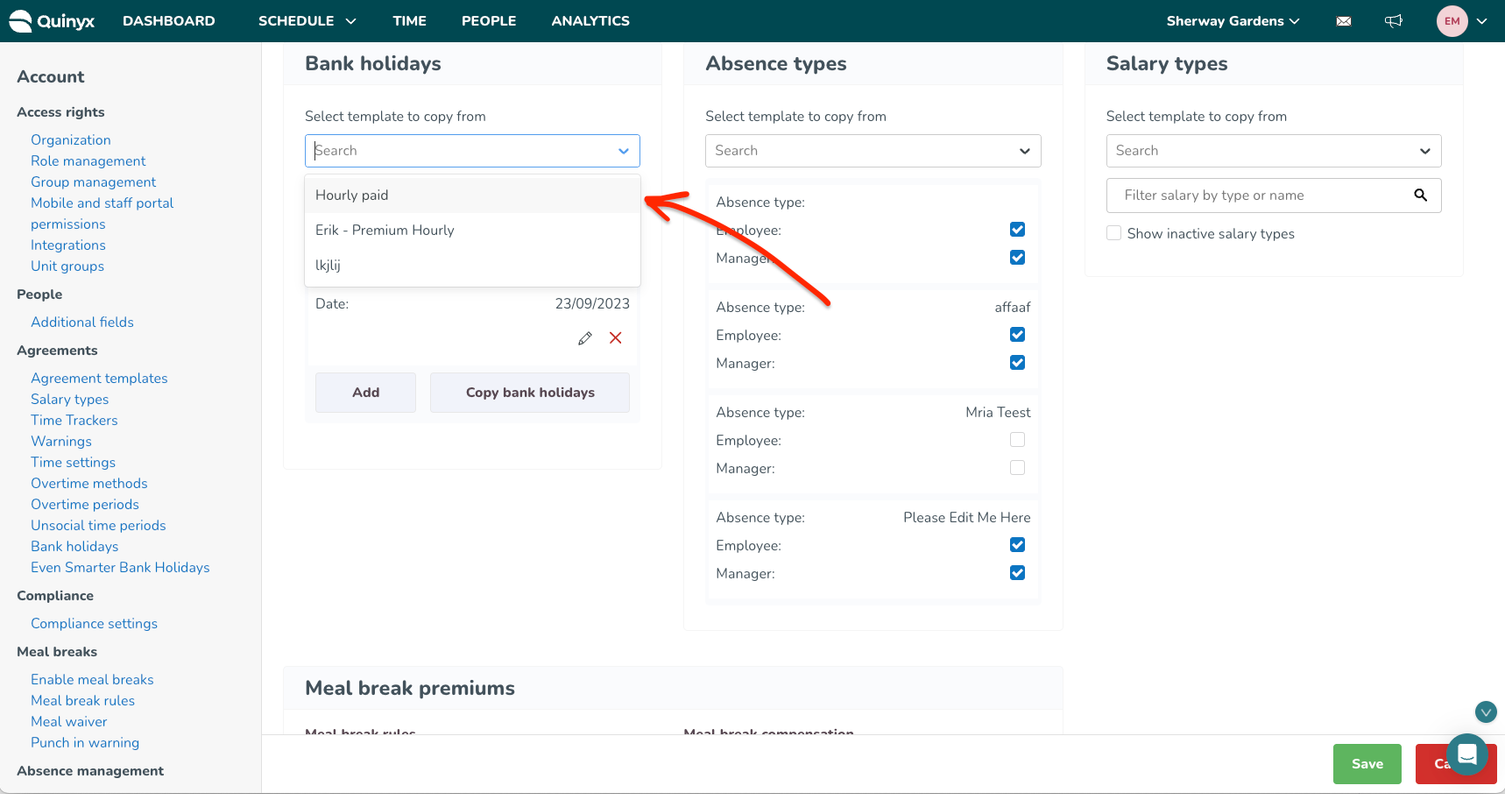
- Select which holidays you’d like to copy (if there are any conflicts, this will be flagged so you don’t overwrite anything accidentally).
- Done! Hit the green Save button at the bottom to save the changes to your agreement template.
Add a bank holiday
You can configure any number of organization-specific bank holidays. To do this, just click Add.
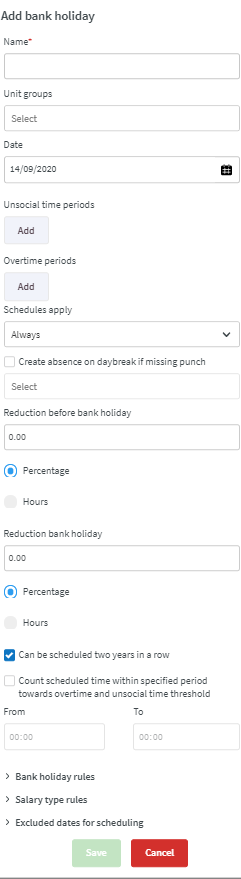
- Name: Give the bank holiday a name.
- Unit groups: Select one or more unit groups that this bank holiday will apply to.
- Date: Date of bank holiday.
- Unsocial time periods: Define any bank holiday-specific unsocial time periods
- Overtime periods: Define any bank holiday-specific overtime periods
- Schedules apply: controls when the bank holiday's unsocial time and overtime period rules kick in based on shift start time:
- Always: All shifts on the bank holiday, regardless of start time
- If shift starts on this calendar day: Only shifts that start on the bank holiday
- If shift starts on prior calendar day: Only shifts that started the day before (e.g. night shifts)
- If shift starts on this or prior calendar day: Both of the above
- Create absence on daybreak if missing punch: Check this box so that an absence is created on daybreak if missing a punch.Note that in order for the absence to be created when a punch is missing, a shift must exist.
- Reduction before bank holiday: You can configure the percentage or number of hours you want the nominal hours to be reduced.
- Can be scheduled two years in a row: Check this box if it's ok for the employee to work on this bank holiday for two years in in a row. If not checked then you will get a warning when trying to schedule an employee for two years in a row.
- Count schedule time within specified period towards overtime and unsocial time threshold:
Add a bank holiday rule
Days with deviating rules for unsocial hours and/or overtime are set up under Bank holidays. These days will be marked in red in Quinyx.
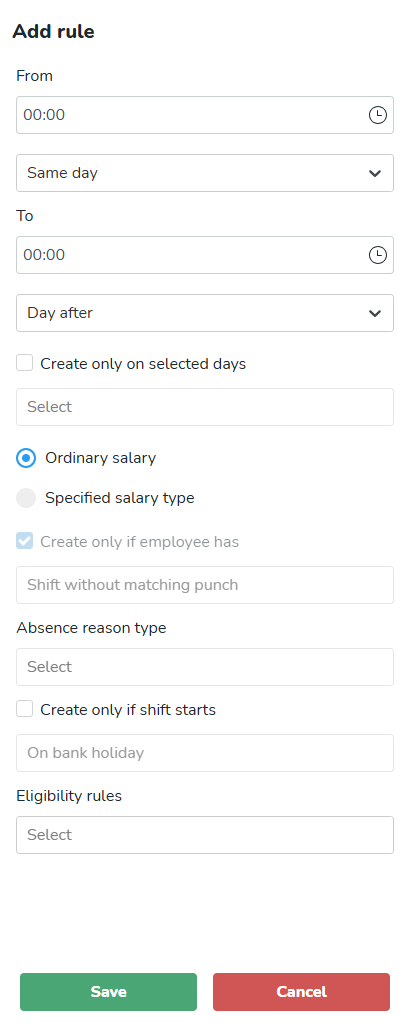
- From: The time from which the rule applies. Select same day, day before, day after.
- To: The time to which the rule applies. Select same day, day before, day after.
- Create only on selected days: Select specific weekdays on which the bank holiday rule should be applied.
- Ordinary salary/Specified salary type: Select whether the rule applies to an ordinary salary type or specify a specific one.
- Create only if employee has: Select Punch with matching shift, Punch without matching shift, Shift without matching punch, Approved vacation, Approved sick leave, Time off, or Specified absence type.
- Absence reason type: Reason for the absence.
- Create only if shift starts: Select On bank holiday, Day before bank holiday, or One day before bank holiday.
- Replace base salaries: Check the box to replace base salaries.
- Replace unsocial time salaries: Check the box to replace unsocial time salaries.
- Replace additional time: Check the box to place additional time.
- Replace additional overtime salary type: Check the box to replace additional overtime salary type.
- Replace sickness salary types: Check the box to replace sickness salary types.
Salary type rules
Salary type rules allow you to define rules for extra salary types to be generated when an employee punches time on a specific shift. These rules can be defined on individual shifts in Schedule (but not in Base Schedule) as well as on shift type. In the salary type overview, you’re able to identify salary types added as a result of these rules. They are denoted by an orange square.
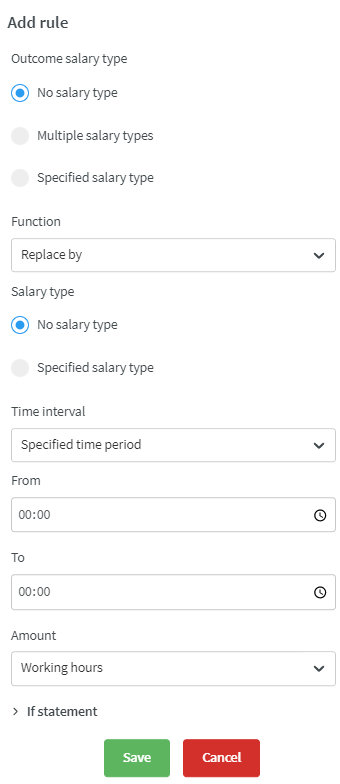
You begin by selecting the outcome salary type, which we’ll refer to as “salary type X” for the remainder of this article. You have three options here:
- No salary type: The rule will only be applied if the punch doesn’t have any salary type outcome.
- Multiple salary types: The rule will only be applied if a salary type in the selected group of salary types occurs on the punch. Click here for a list of which standard salary types are part of which categories.
- Specific salary type: The rule will only be applied if that salary type occurs on the punch. Note that for a salary type to be visible in this drop-down on an assigned shift requires it to be selected on the assignee’s agreement template. For unassigned shifts, the salary type needs to be selected in global settings.
You may choose between the four following options:
- Replace by: removes salary type X and replaces it with salary type Y.
- Add: salary type Y is generated in addition to salary type X.
- Multiply by: when selecting this function, an additional field appears where you’re required to enter a multiplication factor. This factor multiplies the amount of salary type Y by that of salary type X. For instance, if there are 4 hours of Hourly salary on the punch, you select multiply by 1.5 and Extra on-call compensation, then the punch will have 4 hours of Hourly salary and 8 hours of Extra on-call compensation.
- Replaced completely: this function removes the salary type X from the punch altogether regardless of the time interval set below, but adds salary type Y only to that specific time interval.
You then select the salary type that this function should be applied to. We’ll refer to this salary type as “salary type Y” for the remainder of this article. You have two options here:
- No salary type
- Specific salary type: Note that for a salary type to be visible in this drop-down it needs to be selected on the assignee’s agreement template for assigned shifts and in global settings for unassigned shifts.
The next step is to set which time interval the rule should be applied to. You have five options here:
- Specified time period: the rule should only be applied within the specified time period. Selecting this option adds two additional fields allowing you to specify “From” and “To” time of the time period.
- Within schedule: the rule should only be applied for hours on the punch worked within the scheduled shift.
- Outside schedule: the rule should only be applied for hours on the punch worked outside the scheduled shift.
- Generated hours: the rule should be applied for all hours on the punch generating salary type X.
- Punched hours: the rule should only apply if the amount of hours punched hours is within a specific span (NB: there is limited support for this option at the moment as the minimum and maximum fields used to set the span for this will be added in a soon-to-be-release).
Next up is defining the amount of hours of salary type Y that should be generated by the rule in question. The following options are available:
- Working hours: salary type Y should be generated by the same amount as the number of punched hours on this shift and as defined in the “Time interval” section.
- Exactly: an exact amount of salary type Y should be created. An additional field allowing to specify that amount appears if you select this option.
- Minimum: salary type Y should be generated for the same amount of hours that has been worked and as defined in the “Time interval” section, but a minimum amount will be generated if the amount of worked hours are less than that. That minimum amount is specified in an additional field that appears if I select this option.
- Maximum: salary type Y should be generated for the same amount of hours that has been worked and as defined in the “Time interval” section, but a maximum amount will be generated if the amount of worked hours are less than that. That maximum amount is specified in an additional field that appears if I select this option.
When setting up a salary type rule, you may also make use of an if-statement that allows you to specify an additional criteria that needs to be met in order for the rule to apply in the first place:
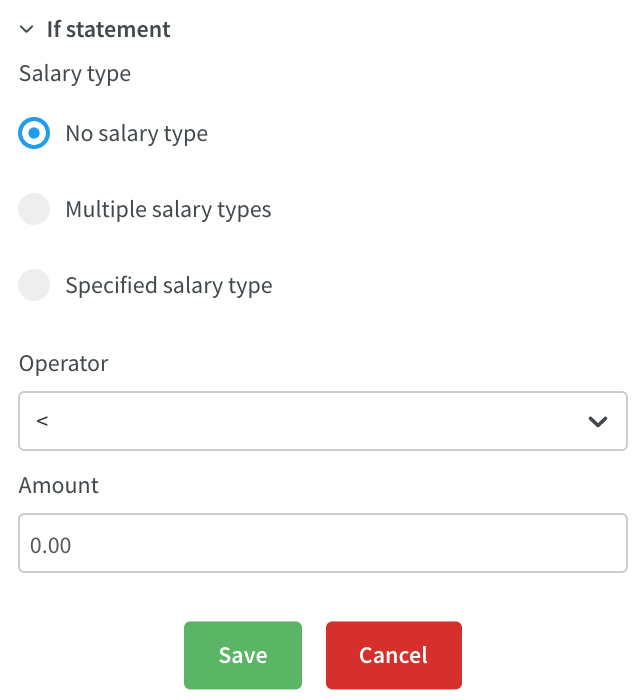
This if-statement, too, checks whether a certain salary type exists on the punch in question. Just as for salary type X on the rule itself, you have three options here:
- No salary type: The rule will only be applied if the punch doesn’t have any salary type outcome.
- Multiple salary types: The rule will only be applied if a salary type in the selected group of salary types occurs on the punch. Click here for a list of which standard salary types are part of which categories.
- Specific salary type: The rule will only be applied if that salary type occurs on the punch. Note that for a salary type to be visible in this drop-down on an assigned shift requires it to be selected on the assignee’s agreement template. For unassigned shifts, the salary type needs to be selected in global settings.
The following criteria options are then available:
- <: the salary type you select in this if statement has been generated for fewer hours on the punch than what’s been defined in the if statement’s “Amount” field.
- >: the salary type you select in this if statement has been generated for more hours on the punch than what’s been defined in the if statement’s “Amount” field.
- =: the salary type you select in this if statement has been generated for exactly as many hours on the punch as what’s been defined in the if statement’s “Amount” field.
Inheriting rule from shift type
When applying a shift type on which a salary type rule is set up to a shift in the Schedule, Quinyx will apply that shift type’s salary type rule to your shift. This goes for when you’re creating a new shift as well as for when you’re editing an existing shift. The inherited rule will appear under the "Salary type rules" section of "Edit shift" form.
If the shift type salary type rule contains a salary type that isn’t available, the salary will not appear on the rule. Likewise, if the salary type isn’t available this will in turn affect the salary outcome on the punch. As mentioned above, whether a salary type is available or not is set on the assignee’s agreement template for assigned shifts and in global settings for unassigned shifts.
An important example is if the agreement template is to cover a staff group that has a different reduction in nominal time in the added bank holidays. When the Use default bank holidays box is unchecked, new bank holidays can be configured using the Add button. See the Bank Holidays chapter for instructions on how to add bank holidays and determine whether there should be a reduction in the nominal time for bank holidays or not.
Excluded dates for scheduling
You can configure whether you would like to exclude one or more dates for scheduling. This can be useful if you f.ex. have employees who are scheduled to work during Christmas Eve, but then shouldn't be working during New Year's Eve.
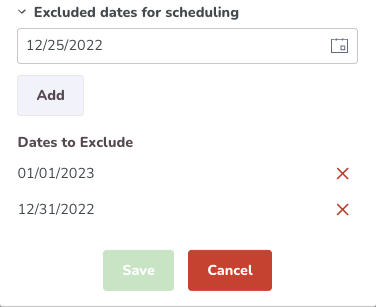
You can set up excluded days on your agreement templates in Account settings > Agreement templates > [insert desired agreement template] > Bank holidays > Excluded dates for scheduling.
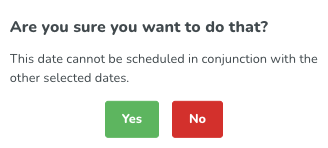
If you do schedule someone on an excluded date, you will receive the following warning in Quinyx.