Edit a person's details
 Updated
by
Daniel Sjögren
Updated
by
Daniel Sjögren
You can easily edit an employee's information. Click People and navigate to the employee for whom you want to edit information.

At the top of People details you can add/edit the employee's most important information, as well as manage their password.
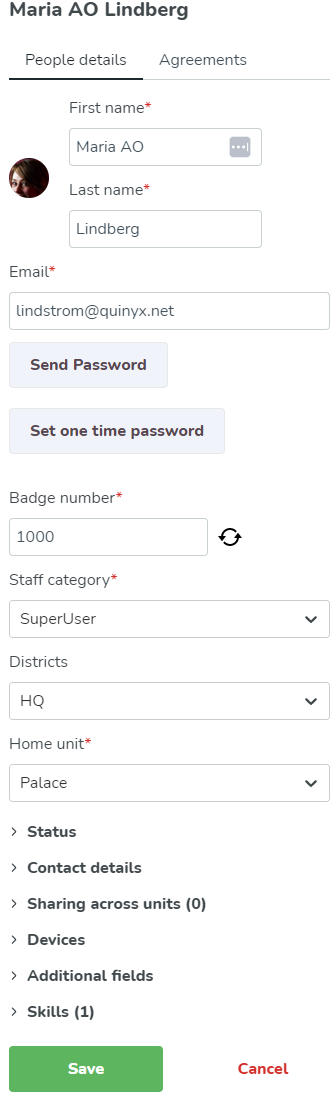
The following information is available:
- First name: The first name of the employee.
- Last name: The last name of the employee.
- Email: The email address/user name of the employee.
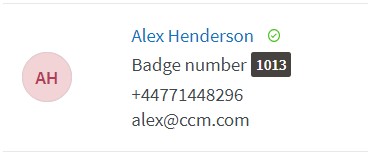
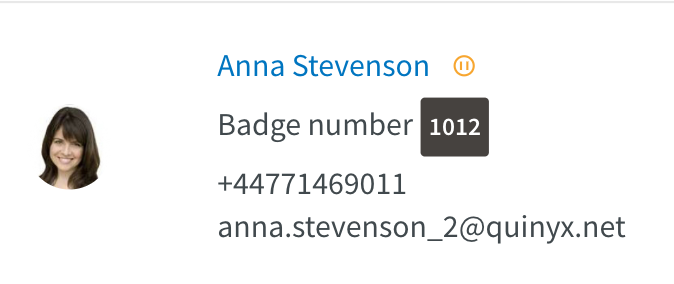
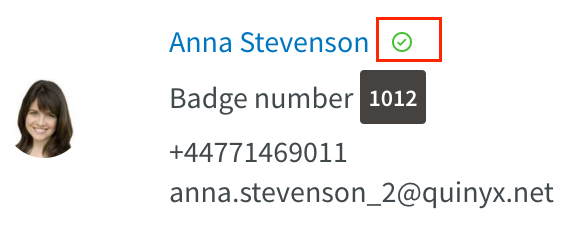
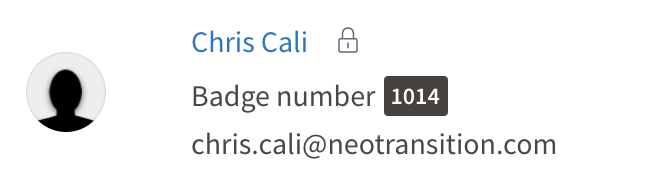
- Badge number: The employee's designated badge no. This is sometimes also used as a way to clock in/out in Webpunch or QClock.
- Staff category: The employee's staff category decides what permissions are available to them in the Staff portal or mobile apps. Read more here.
- Districts: Displays which district (if applicable) the employee belongs to in the organization. This is governed by the home unit of the employee.
- Home unit: Displays the primary unit the employee belongs to. The unit affects the reporting hierarchy to managers, scheduling and more. If districts are used in the organizational hierarchy, the unit belonging to a specific district will govern which district the employee belongs to. Read more here.
Initials in employee picture
If the employee hasn't uploaded a picture, we'll display the initials of that employee in the employee picture. The initials are based on the first, and last name of the employee.
Status
This tab allows you to set the employee status of a user in Quinyx as well as the start/end date of their employment. The following statuses are available:
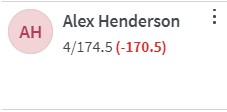
- Passive: Tick this box if this person should be kept in the system, but inactive in scheduling and removed from all lists. The employee does not personally have access to Quinyx while he/she is flagged as Passive. This may be relevant when people are on parental leave or for summer temps, for example. If you tick Passive, a yellow pause symbol will be displayed next to the employee name:
- Employed: Tick this box if this is a current employee that should be available in scheduling and lists and have personal access to Quinyx. If you tick Employed, solely the green tick symbol will be shown next to the employee name:
- Locked: Tick this box if this person should be locked out of the system. If a user enters the wrong password multiple times when trying to log in, the account will be locked and a manager will have to unlock the account. A user account can also be locked manually if the user is no longer allowed to log in. If you tick Locked, a padlock symbol will be displayed next to the employee name:
Contact details
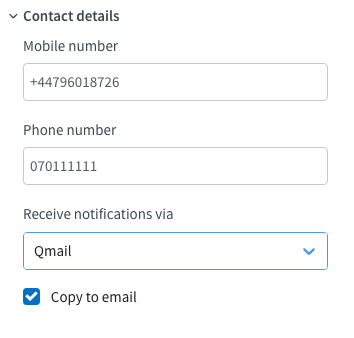
This tab allows you to save phone numbers to a person's profile and to set additional communications settings:
- Receive notifications via: Select by what means the user should receive notifications regarding shift changes, absence request approvals, etc. Possible values are Email address, SMS, and Qmail.
- Copy to email: Tick this box if Qmails should be copied to the user's email address. Please note this checkbox will only generate a copy to the user's email if the value "Qmail" has been selected in the Receive notifications via drop-down menu above.
Sharing across units
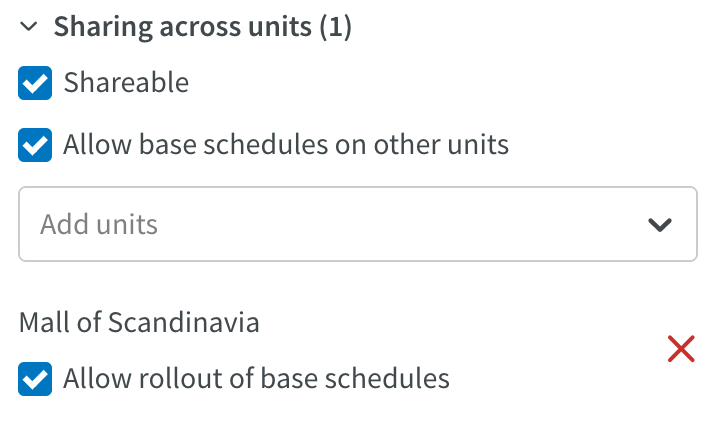
In the tab Sharing across units you can choose to share people to several units when the person needs to be available for scheduling and to work at other units than his/her home unit.
- Shareable: Tick the Shareable box to enable the person to see the schedule and work at other units. Then, select the relevant unit or units by clicking Add unit and choosing from the list. You can multi-select units here if needed. If the "Shareable" box is checked, but there are no units selected, this means that the person is shared with all the units in the list on the right.
- Allow base schedules on other units: To ensure that the person is able to have a base schedule (i.e. not just shared to take ad hoc shifts) for these units, the Allow base schedules on other units checkbox needs to be ticked.
- Allow rollout of base schedules: If the administrators for the selected units need to be able to roll out the base schedules for people, tick this box. Otherwise, permission is only granted to create the base schedules.
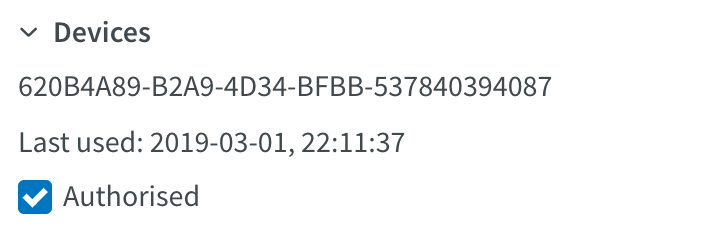
Devices
The Devices tab is blank by default. However, the first time an employee logs in to the Quinyx mobile app, a system-generated key is placed in this tab. The tab also contains information on the last time the employee in question used the app.
Authorized: You need to check Authorized for the person to be able to punch in/out via the mobile app on a specific device. This is to avoid buddy punching. For example, Billy goes to work, and when he is within the required range of the workplace to punch in, in addition to punching himself in logs in to the Quinyx app using his work buddy Sarah's account and punches her in as well.
Additional fields
Any additional fields created in the Additional fields tab in the Agreements tab of this side panel are displayed here. Click here to view the manual article describing the Agreements tab.
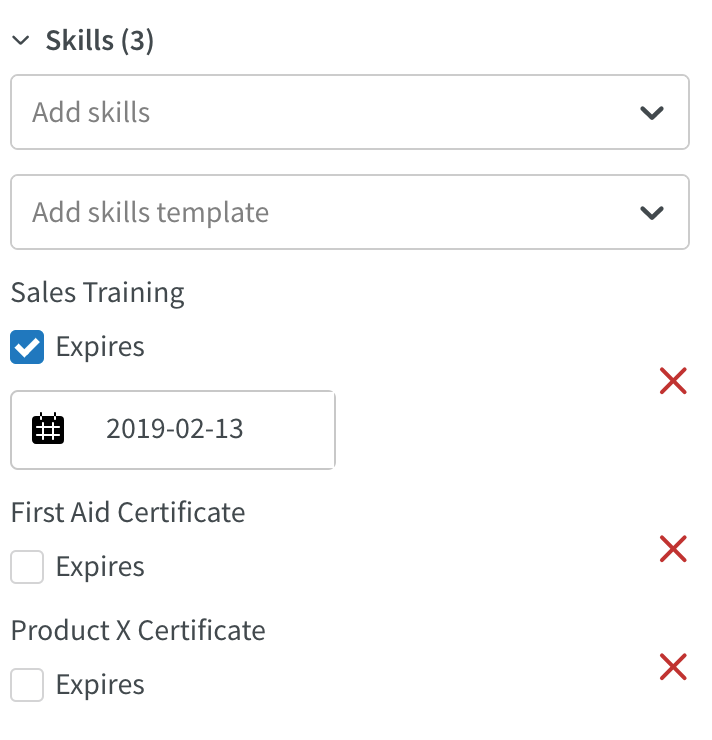
Skills
This tab allows you to link skills to a person. Skills and skill categories can be created in Account settings > Skills/Skill categories.
- Add skills: Select skills that reflect the employee's skill set. In our example below, we have added "Till Training" to our employee since our employee has the competence needed to train other employees on how to work their store's till.
- Expires: Once a skill has been added, it can be configured to expire on a certain date. For this to apply, tick the "Expires" checkbox and select the skill's expiry date in the date field that appears.
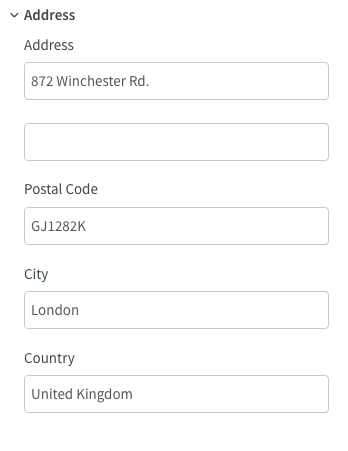
Address
In the tab Address it is possible to set the following options:
- Address
- Postal code
- City
- Country
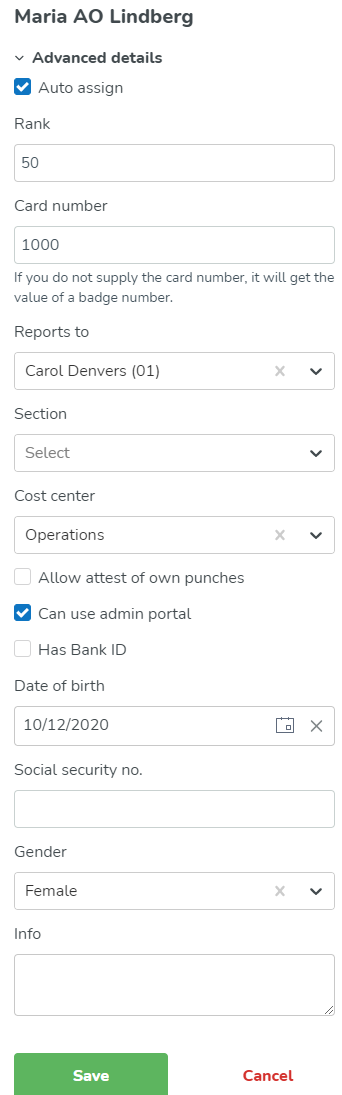
Advanced details
In the Advanced details tab, you can find the following options:
- Auto assign: Select to include this person when auto-assigning shifts.
- Rank: Select a ranking used for auto-assigning. The highest-ranked people (higher number) are scheduled first.
- Card number: The person's card number.
- Reports to: You can choose here which administrator will receive a Qmail when the person has sent a leave application. You can select anyone with a manager role in the reports to drop-down.
- Section: Link the person to a specific section.
- Cost center: You can link a person to a specific cost center if necessary.
- Allow attest of own punches: You can choose whether the person will be able to approve his/her own time punches as a manager.
- Can use admin portal: Currently the option Can use admin portal does not impact any other settings in Quinyx, and will soon be removed from our product view
- Has BankID: Choose whether the person has a BankID to verify their identity when attesting time punches.
- Date of birth: Set the person's date of birth. This field is not required.
- Social security number: Set the person's social security number.
- Gender: Select the gender of the employee. This field is not required.
- Info: Possible to write general information about the person.
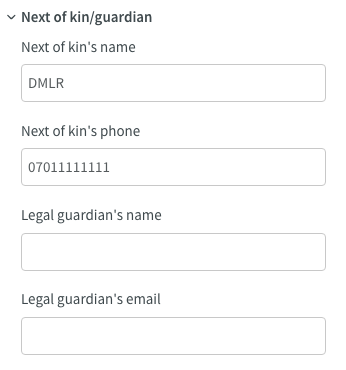
Next of kin/guardian
In the tab Next of kin/guardian you have the possibility to enter the following information about the person:
- Next of kin's name
- Next of kin's phone
- Legal guardian's name
- Legal guardian's email
Attachments
It's possible to add attachments for an employee in People details. This allows you to associate any documentation relevant for that employee, for example, an employment contract, a certification, etc.