Adding an absence
 Updated
by
Victor Jespersen
Updated
by
Victor Jespersen
Creating Absences in the Quinyx Schedule View
Creating absences in the Quinyx Schedule view is easy, and this article will guide you through the process.
Accessing the Absence Side Panel
To add an absence, you need to open the Add Absence side panel. You can do this in two ways:
- Click the + icon > Absence.
- Click an employee’s shift in the schedule, then select More Options > Add Absence.
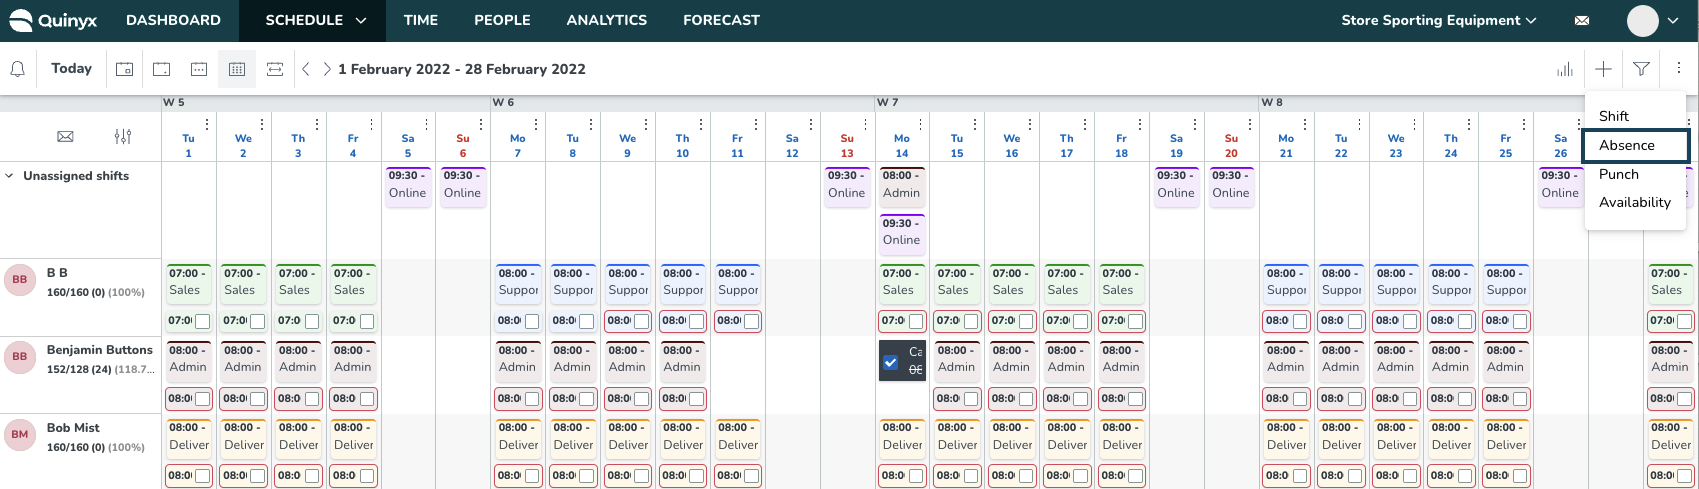
Both methods open the Add Absence panel, where you can enter all relevant absence details.
Adding an Absence
To add an absence, follow these steps:
- Select the employee for whom you want to add an absence.
Add the date and times of the absence. Tick the All day box if the absence is for one entire day, 24 hours. The All day checkbox will be:
- Ticked when you enter the Add absence panel from clicking a cell in the schedule.
- Ticked when you enter the Add absence panel by clicking the + in the top right-hand corner of the schedule.
- Unticked when you enter the Add absence panel from the button at the bottom of the Edit shift panel.
In cases 1 and 2 above, if the same date is selected as the start and end date, for instance, 2022-04-25, the start and end date will remain the same when you untick the checkbox, whereas the start and end times of the absence will be a one-hour interval. Said one-hour interval occurs 12 hours after your business daybreak, so if the business daybreak configured in your unit settings is 2 am, then the default absence times would be 2 pm-3 pm.
In cases 1 and 2 above, if multiple dates are selected as start and end dates, for instance, 2022-04-25 - 2022-04-30, those same dates will remain the same when you untick the checkbox, whereas the start and end times of the absence will be the business daybreak to business daybreak. By means of example, if the business daybreak configured in your unit settings is 2 am, then the default absence times would be 2 am - 2 am.
In case 3 above, nothing has changed from before; the default dates and times will reflect the shift you’re entering the absence from.
- Enter the absence date and times. Tick the All day box if it lasts 24 hours.
- Select an Absence type.
- Choose whether the absence requires approval from the employee, manager, or both.
- View the employee’s Time Tracker balance.
- Enter an optional comment.
- Click Save.
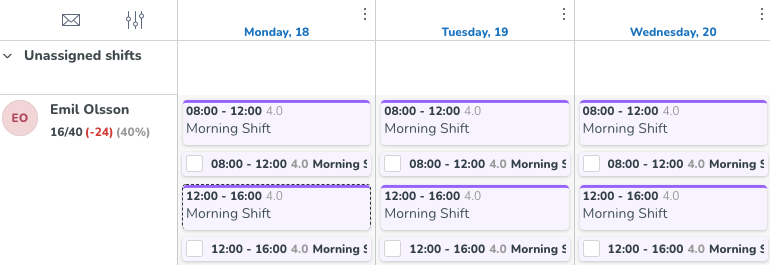
Part-Time Absences
When selecting a part-time absence, Quinyx offers two options for handling shifts:
Split Per Shift
This option applies the absence to specific shifts.

Split Per Day
This option applies the absence consistently across multiple days.
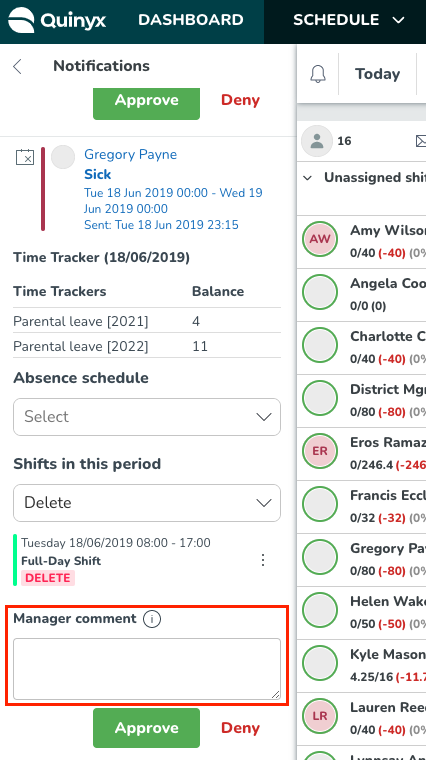
Approving or Denying Absence Requests
Employee Comment
Managers can view any comments employees add to their absence requests.
Manager Comment
Managers can add comments when approving or denying requests. Approved comments remain in the absence history.
Absence Visibility in Schedule
Absences appear differently depending on shift status:
- With an absence shift: The schedule shows both the absence and original shift.
- Without an absence shift: Only the absence type is displayed.Hovering over the absence will show the full name of the away unit if the absence is on another unit than where the manager is looking.
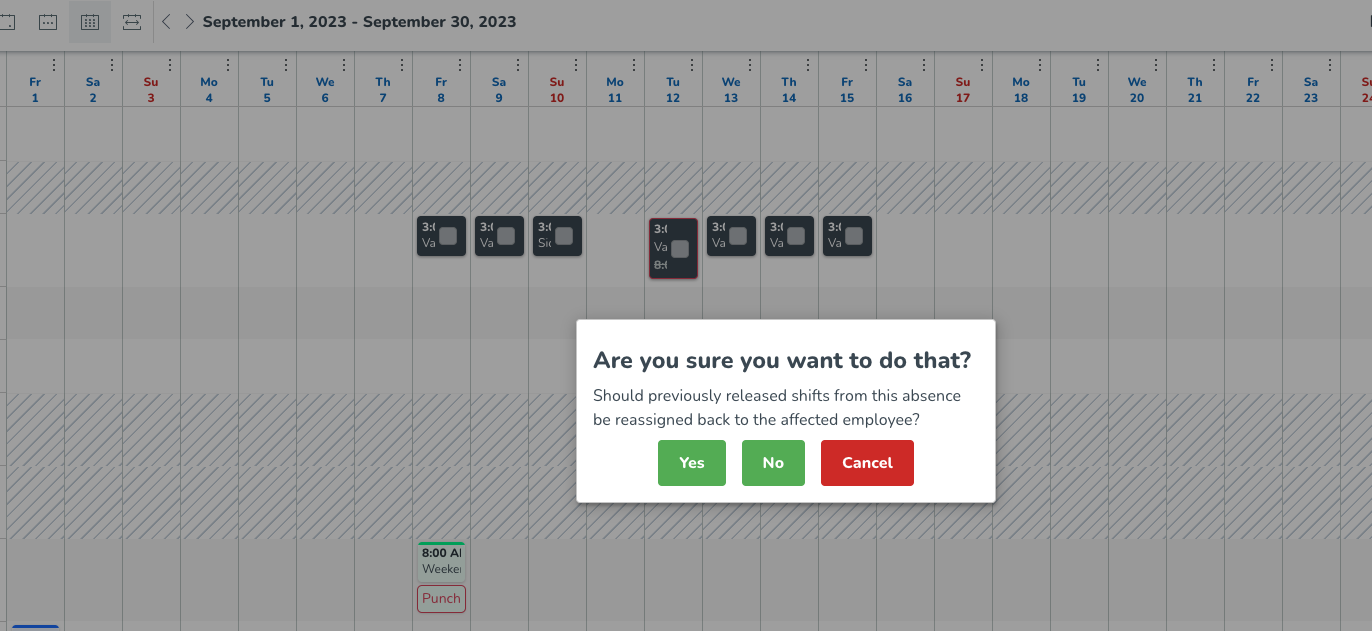
Deleting an Absence
To delete an absence:
- Hover over the absence.
- Click the bin icon.
- Select Delete.