Employee Hub - Single Sign On Azure AD
 Updated
by
Leigh Hutchens
Updated
by
Leigh Hutchens
In this article, we’ll assume that a new App registration has already been created from Azure Active Directory > App registrations and that the Client ID and Secret (an Application (client) ID is automatically assigned to the app registration upon creation; a secret can be added or removed at any time from the Certificate & secrets menu for the app have been shared with Employee Hub, or will be shared along with the information highlighted in this guide.
At the moment, SSO configuration in Employee Hub is not self-serve. Customers provide the Employee Hub team with the necessary information so they can do the configuration. In the future, the SSO solution will be consolidated into the Quinyx platform, in other words, if a customer has SSO, it will be set up in Quinyx and not the old Employee Hub platform. Read more about Quinyx and SSO here.
Authentication Configuration
From the Azure Active Directory > App registrations > <your application> page, click on the Authentication menu item in the left navigation pane.
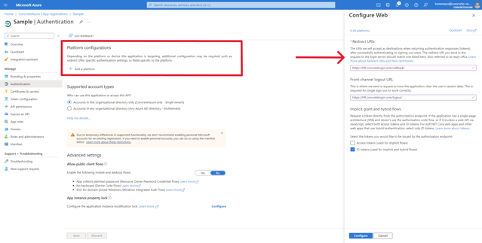
Here you can configure which platforms (Web, iOS, Android, etc.) are allowed to use the Azure app for authentication and which URIs are allowed to exchange information with Azure AD.
Employee Hub supports Web, iOS, and Android platforms, and these need to be configured if they are to be enabled for SSO. To add a new platform click on the Add a platform button, under Platform configurations as shown in the image below.

Web platform
After clicking Add platform, select Web on the right-hand side of the page.
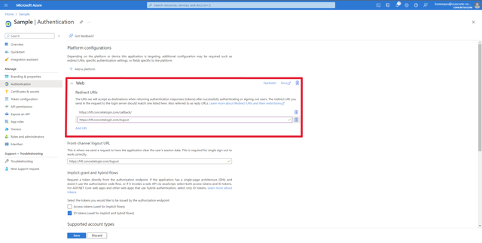
Navigate back to the main screen, and click on Add URI under the Web section. Add the logout URI as shown in the image below.
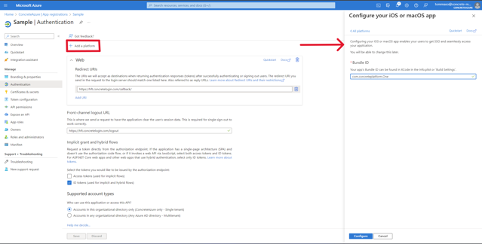
iOS Platform
After clicking on Add platform, select iOS / macOS on the right sidebar to configure the iOS platform; fill in the details as shown in the image below, and click the Configure button.
The Bundle ID value must be: com.concreteplatform.One
Android platform
After clicking on Add platform, select Android on the right sidebar to configure the Android platform; fill in the details as shown below (there was no image directly below this statement in the doc), and click the Configure button.
The Package name value must be: com.concreteplatform.one
Signature hash value must be: lvGC0B4SWYU8tNPHg/bdMjQinZQ=
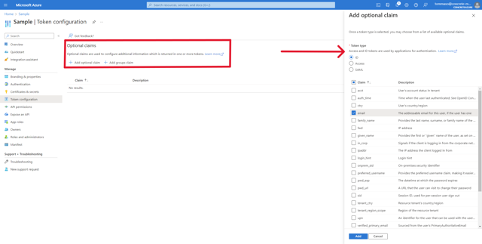
Token Configuration
In order for Employee Hub to be able to match users attempting to authenticate through Azure AD, the right OpenID Connect claim (email or user identifier shared with Employee Hub) needs to be configured for the ID tokens that Azure AD will return to Employee Hub upon successful authentication (for those familiar with SAML, these are equivalent to the claims that can be configured on a SAML assertion token).
From the Azure Active Directory > App registrations > <your application> page, click on the Token configuration menu item in the left-hand navigation. Clicking on the Add optional claim button under Optional claims will open a sidebar from which various claims can be selected; select the appropriate claims (typically email or upn). The claim used needs to be shared with Employee Hub.
OpenID Connect Metadata Document
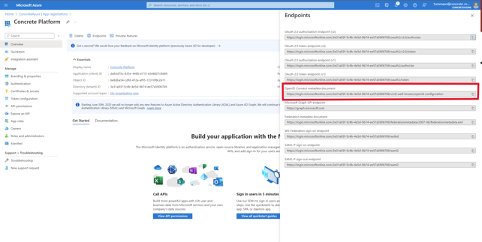
Every app registration in Azure AD is provided a publicly accessible endpoint that serves its OpenID Connect configuration document. This is a standard OpenID Connect feature and clients can use the metadata in this JSON document to discover the URLs and other configuration parameters to use for authentication.
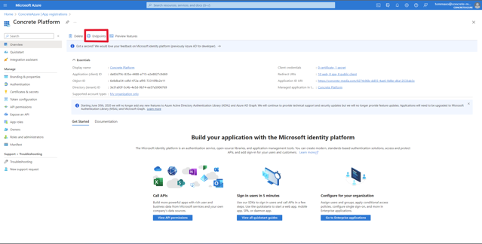
To find the OpenID Connect metadata document endpoint from Azure Active Directory > App registrations > <your application> page. Click on Overview and then on the Endpoints button at the top of the page, as shown in the images below.