Qmail
 Updated
by
Leigh Hutchens
Updated
by
Leigh Hutchens
Think of Qmail as a Quinyx in-app email system. You can use Qmails in both the web app and the mobile app to communicate with your colleagues and managers.
Qmail configuration
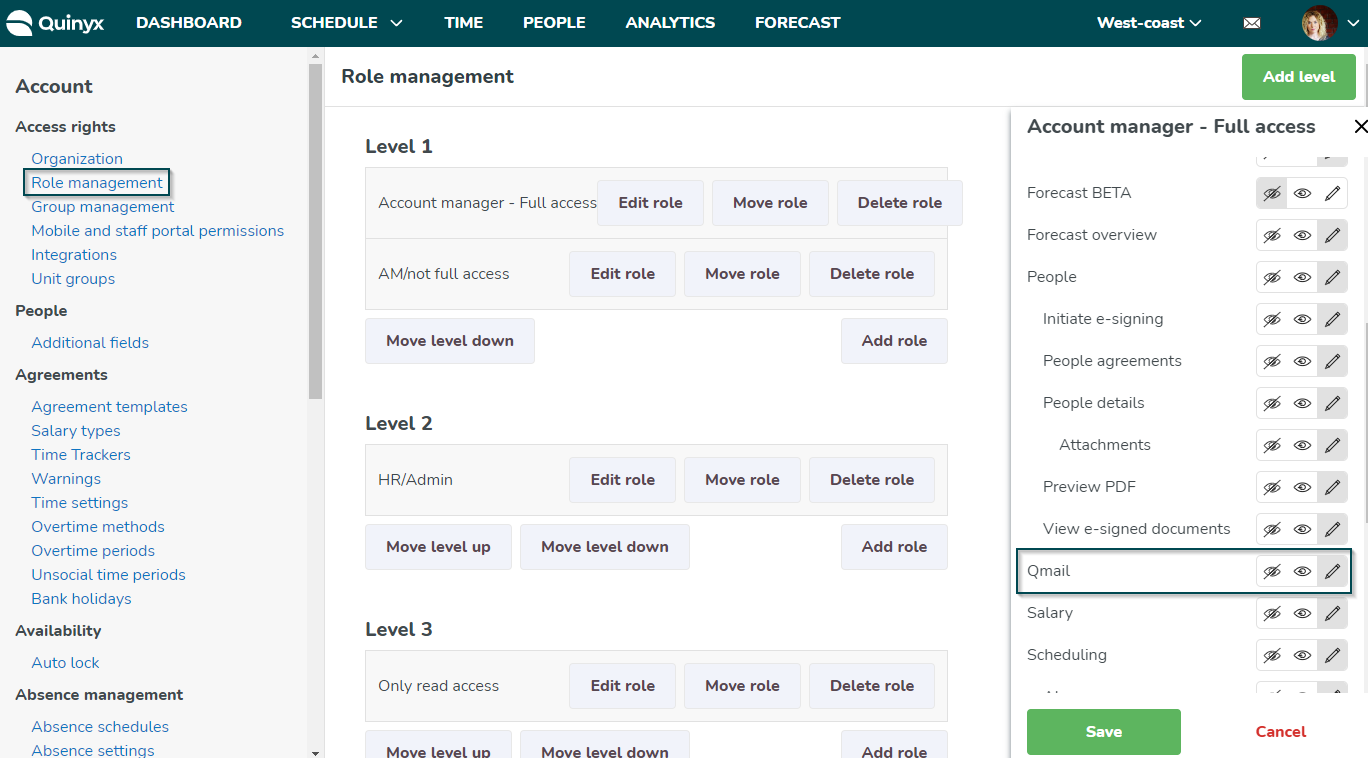
You can configure Qmail access under Role management > the selected level > Qmail. Options are No access, Read access, and Write access.
Using Qmail
Viewing Qmails
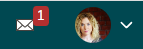
If you've received a Qmail, you will see a notification. You can click the envelope icon on the top-right of your screen to view the Qmails you've received.
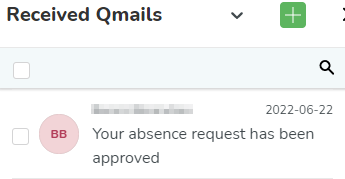
Clicking the envelope icon takes you to the Qmail overview. This view appears in a side panel so that you can still view the schedule or other parts of the app while writing a Qmail. This view allows you to:
- View received and sent Qmails (received Qmails are shown by default).
- See when a Qmail was received or sent.
- Filter Qmails by read or unread.
- Search among your Qmails. The search can be made on recipient/sender, subject and text in the message.
- Select one, multiple, or all Qmails shown in the view and take action on your selection of Qmails. Possible actions include deleting, marking as unread, and marking as read.
If you've received or sent more than 100 Qmails, the bottom of the side panel will include arrows enabling you to navigate between older and newer Qmails.
In the Qmail tab, you can find all of the Qmails that have been sent to you and that you've sent to colleagues. The Qmails you receive can be both auto-generated messages regarding shift time changes, new shifts assigned to you, or leave application updates, as well as personal Qmails sent from your manager.
Sending Qmails
You can send Qmails three different ways.
Sending Qmails from the taskbar
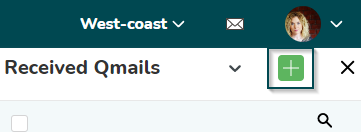
- Click the envelope icon on the top-right of your screen.

- Click the + icon to create a new Qmail.
- Choose whether to send a direct or group message.
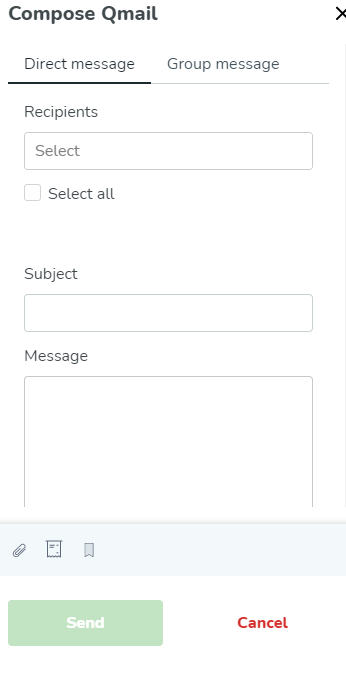
- Enter Qmail recipients, the subject, message, and add any necessary attachments
- Click Send.
Additional information
The Direct message tab is pre-selected. In this view, you can select one, multiple, or all members of the group currently selected in the group selector as recipients of your Qmail. This includes members shared to these groups, as well as inherited members.
In the Group message tab, you can choose to send a message to one, multiple, or all units where you are a member, irrespective of the group currently selected in the group selector. Here, any units selected will include members shared from other groups but won't include inherited members. When you send a group message, you can select specific units, but you can't exclude specific employees.
 | You can add an attachment to your Qmail. Quinyx supports attachment names of a maximum of 80 characters and a file size of a maximum of 20 megabytes. |
 | You can select to receive a read receipt. This will trigger an automatic Qmail being sent to you when your recipient opens your Qmail. If you've selected multiple recipients, you'll get one read receipt for each recipient that opens your Qmail. For each "handmade" Qmail that you send, you will have to select this option. Automated Qmail notifications do not have the option available. |
 | You can select to mark your Qmail as important. If you mark a Qmail as important, your employees will see the Qmail as a pop-up upon logging in to the Quinyx mobile app. For employees using web-punch, the Qmail appears the next time they punch in. |
After adding the text and making the selections you want, click Send to send your Qmail.
Sending Qmails from the schedule
- Click the envelope icon above the list of employees in the schedule to automatically create a Qmail to all employees in the schedule.
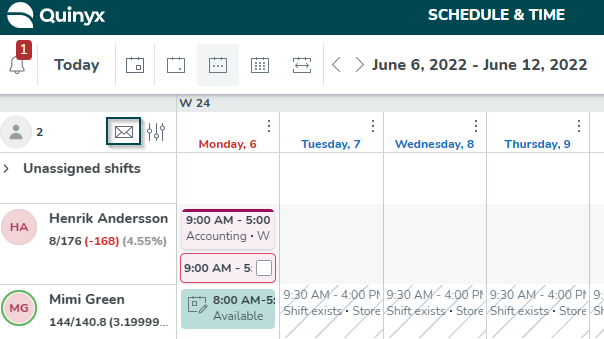
- Select and deselect employees, as needed.
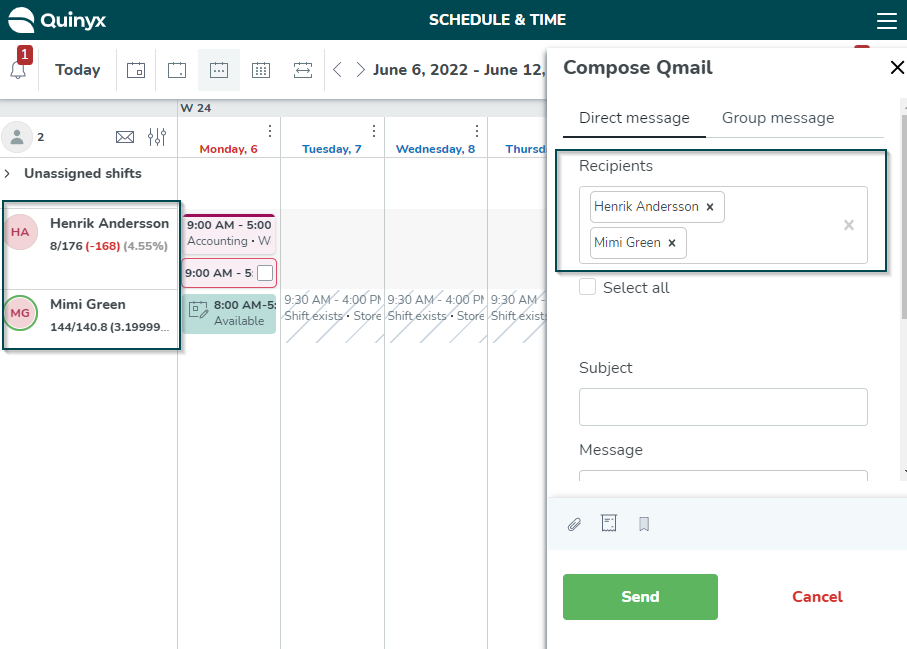
- Enter recipients, the subject and the message, and add any necessary attachments.
- Click Send.
Sending Qmails from an assigned shift
If you're viewing a shift that is currently assigned to an employee, you can send an email to that specific employee.
- Click the envelope icon to the right of the employee's name.
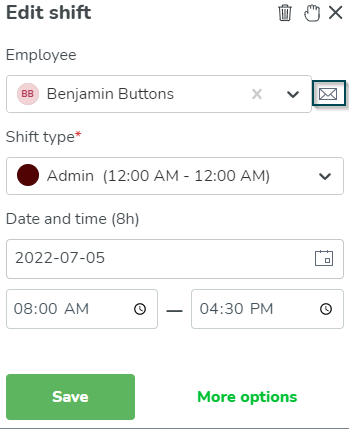
- Enter the subject and the message, and add any necessary attachments.
- Click Send.
Sending Qmails from an unassigned shift
If you're viewing a shift that currently doesn't have an employee assigned to it, you can send a Qmail to one or multiple employees to see if they are interested in taking the shift.
- Click the envelope icon to the right of the employee field in the Edit shift dialog.
- Choose from a list of all employees in the unit who are available for the shift. You can select multiple employees.
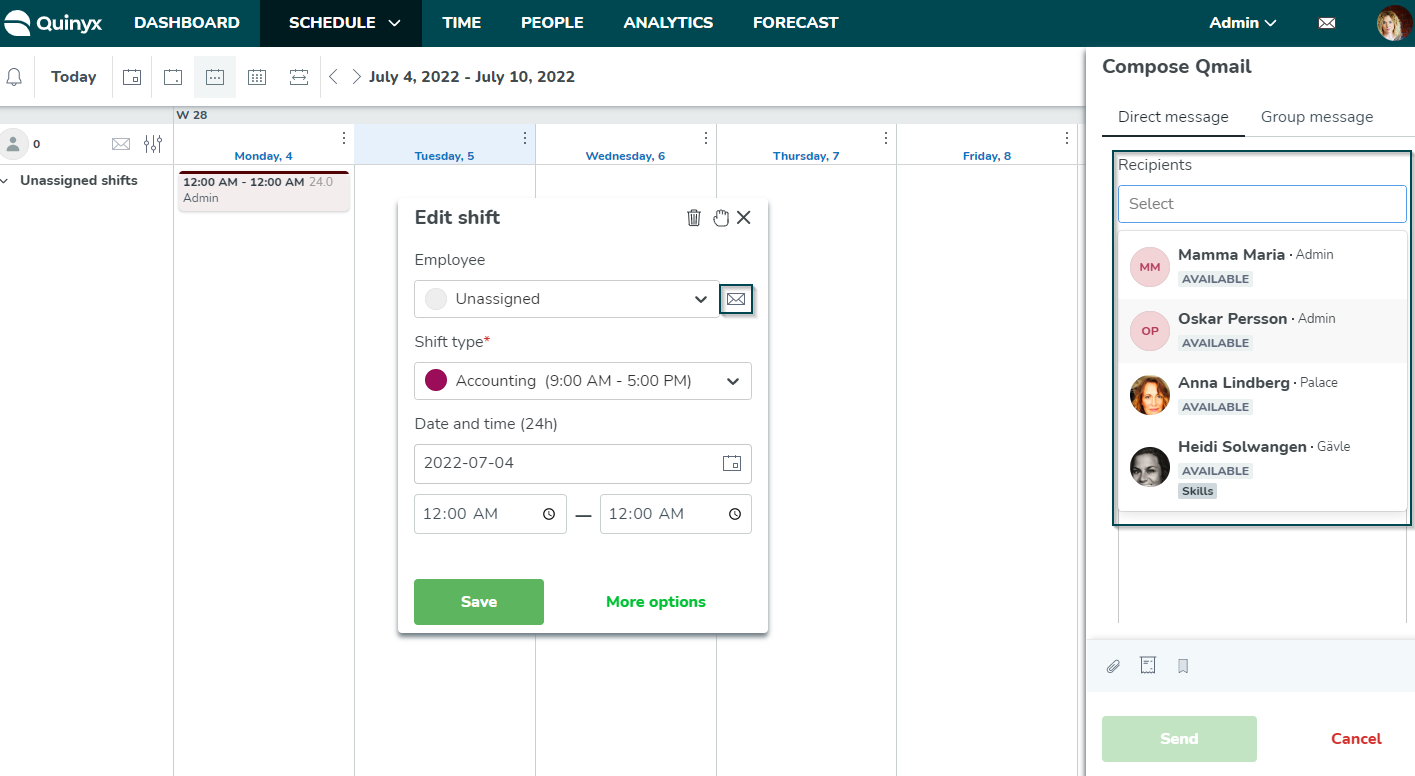
- Since you're contacting employees about an unassigned shift, the subject and message fields are automatically pre-populated, encouraging the recipients to take the unassigned shift. Accessing the same dialogue from an Assigned shift will lead to blank subject and message fields.
- If necessary, add relevant attachments.
- Click Send.
Sending Qmails to filtered employees
You can use filters in the schedule to send a Qmail to a specific subset of users in Quinyx. Just follow these steps:
- Make your choice of filter values in Schedule, for instance, Sales, in this case.
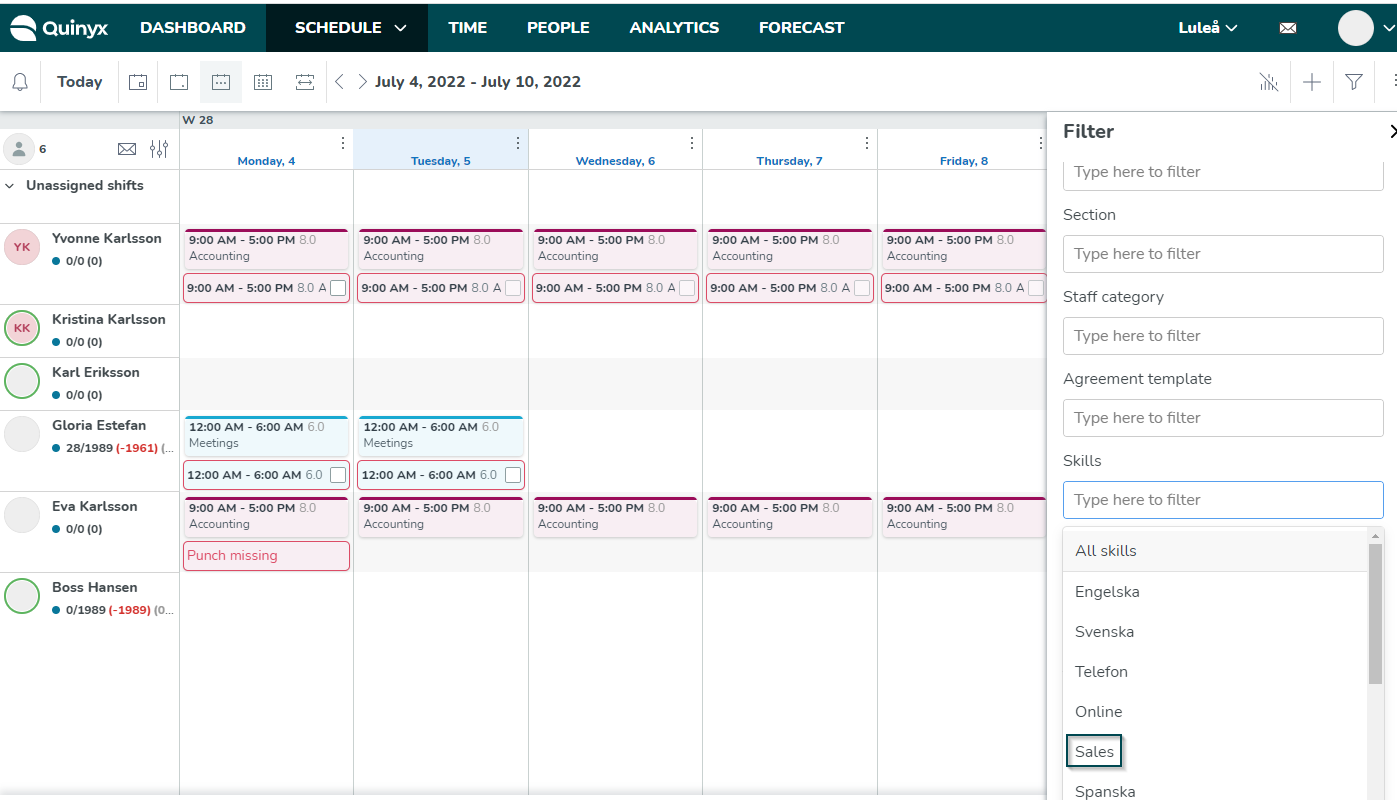
- In the fitlered view, click the envelope icon to send a Qmail to the one person in the schedule, Eva Karlsson, who has the skill Sales.
- Since you're contacting employees about an unassigned shift, the subject and message fields are automatically pre-populated, encouraging the recipients to take the unassigned shift. Accessing the same dialogue from an assigned shift will lead to blank subject and message fields.
- If necessary, add relevant attachments, and click Send.