View, add, edit, and archive projects
 Updated
by
Leigh Hutchens
Updated
by
Leigh Hutchens
You can view, add, edit, and archive projects.
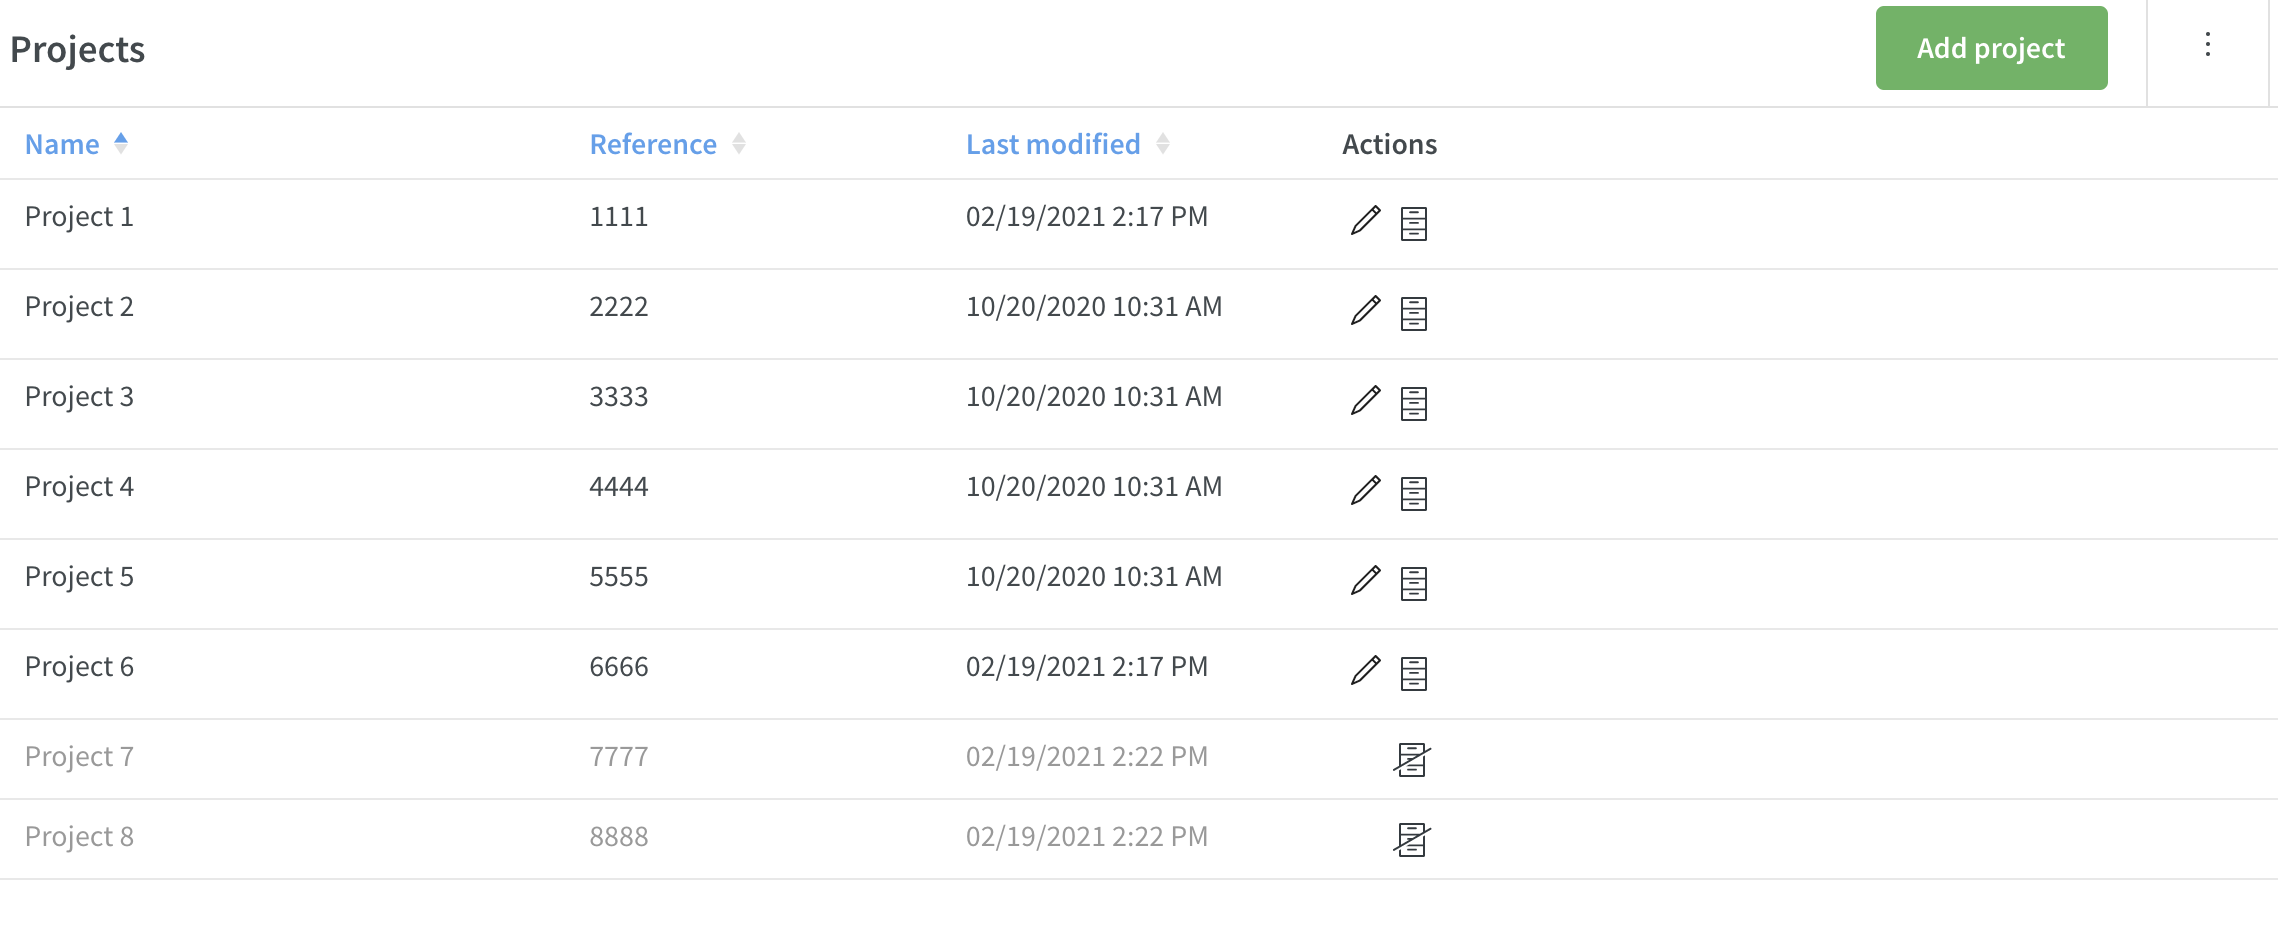
View projects
To view a list of all existing projects, navigate to account settings and click "Projects" under the heading "Tags & cost bearers" in the menu on the left-hand side.

A new page will open, and you can see a list of all existing projects.
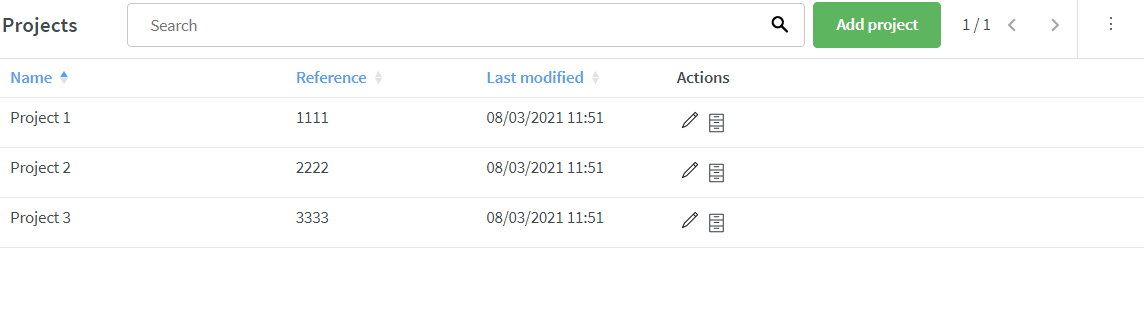
You'll be able to view the following columns:
- Name: Name of the project.
- Reference: Reference of the project.
- Last modified: Date and time for when the project was last modified.
- Actions: Click to edit or archive the project.
It's possible to sort the list on name, reference, or last modified.
Search
As you begin typing your search word, the list will be narrowed down, and the search result will be highlighted in yellow:

Pagination
Quinyx displays 100 items per page for projects. If you have more than 100 items, you'll see the number of pages in the top-right corner, and you can use the arrows to jump between pages:

Add projects
You can add new projects by clicking on the green "Add project" button. A new pop-up will appear, and you can start adding new projects.
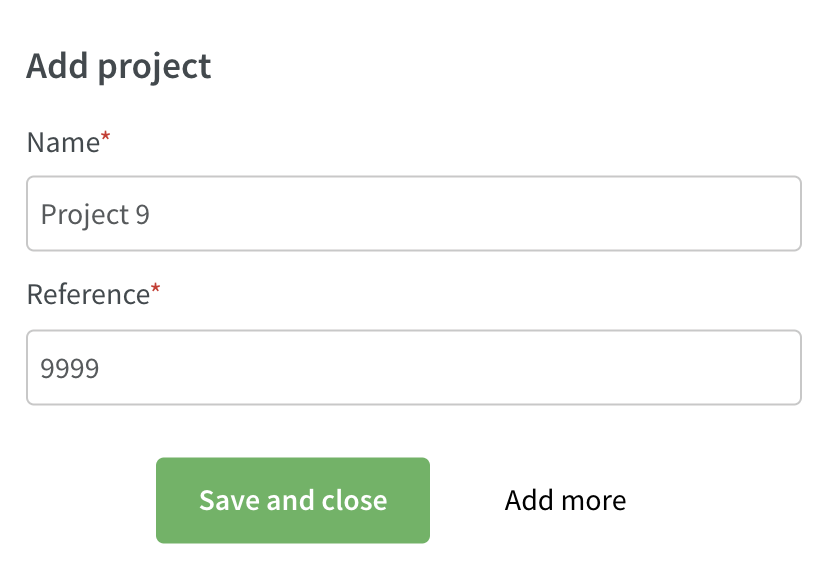
- Name: Enter a name for the project.
- Reference: Enter a reference for the project.
You have two options:
- Save and close: The pop-up will close, and you'll see a success message in the top right corner notifying you that the project has been saved.
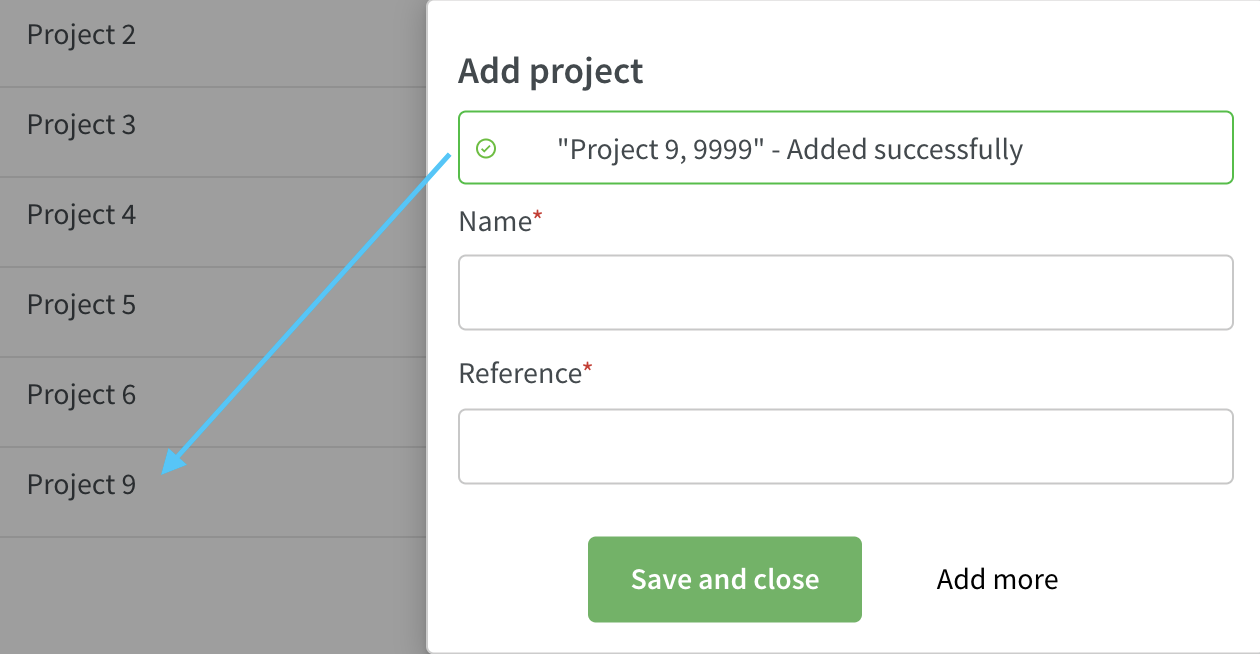
- Add more: The project will be saved and displayed in the list of projects immediately. You'll be notified with a success message inside the pop-up indicating the project was added. You can continue adding more projects by repeating the steps listed above.
Edit projects
To edit an existing project, click on the pen icon under "Actions". A new pop-up will appear, allowing you to edit the name and reference.
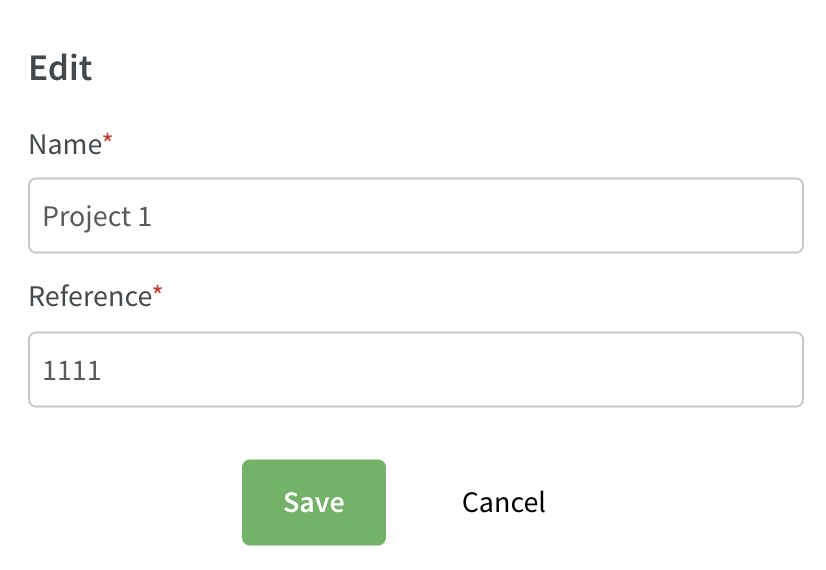
Click save when you're finished with your changes. The pop-up will close, and you'll see a success message in the top right-hand corner notifying you that the changes are saved.
Archive projects
If a project is no longer used, it's possible to archive it. This will hide the project from all selection menus inside the application and from the list of projects under account settings.
Click on the archive icon under actions, and the project will disappear from the list.
To view previously archived projects, click on the three dot menu in the top right-hand corner and click "View archived projects". The archived projects will then be displayed in the list. They will be greyed out and the archive icon crossed over so that you can easily see which projects have been archived
To unarchive the project, just click on the archive symbol, and the project will be active again.
If you no longer want to see archived projects in the list, go to the three dot menu again, and select "Hide archived projects".