Scheduling KPIs
 Updated
by
Leigh Hutchens
Updated
by
Leigh Hutchens
What is the purpose of scheduling KPIs?
Scheduling KPIs are the first step toward an improved schedule. They aim to help store managers verify the quality of their schedules during the creation phase and review already worked schedules using key metrics. These KPIs are single metrics that are easily accessible and configurable on an organizational level, ensuring your store managers look at the right data when scheduling.
The available types of Scheduling KPIs include Productivity and Labour Cost or Hours.
Productivity KPIs
What are Productivity KPIs?
Productivity metrics are an important KPI for verifying whether you have scheduled a good balance of resources against expected demand (like revenue or transactions) in both the future and the past. You need to ensure you don't schedule too many resources (which hurts profitability) or too few resources (which can overburden employees).
How can you configure Productivity KPIs?
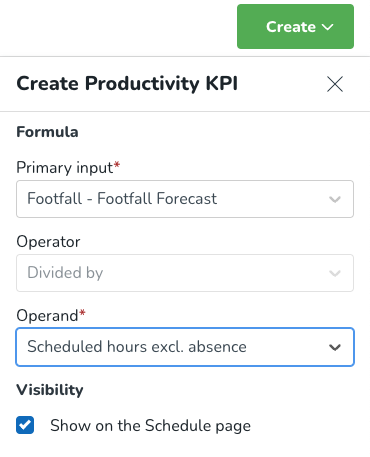
Productivity KPIs can be configured in Optimization Settings > Scheduling KPIs (new section). Productivity KPIs are configured similarly to calculated variables where you define a primary input (this can be a forecast configuration variable or an input data variable) which will be divided by an operand (here you can choose between productive hours, scheduled hours or worked hours).
Example: I want to consider footfall per labor hour as a productivity metric to consider when creating an improved schedule.
Therefore, I will set up two different productivity KPIs:
- Forecasted footfall per scheduled hours.
- Actual footfall per worked hours.
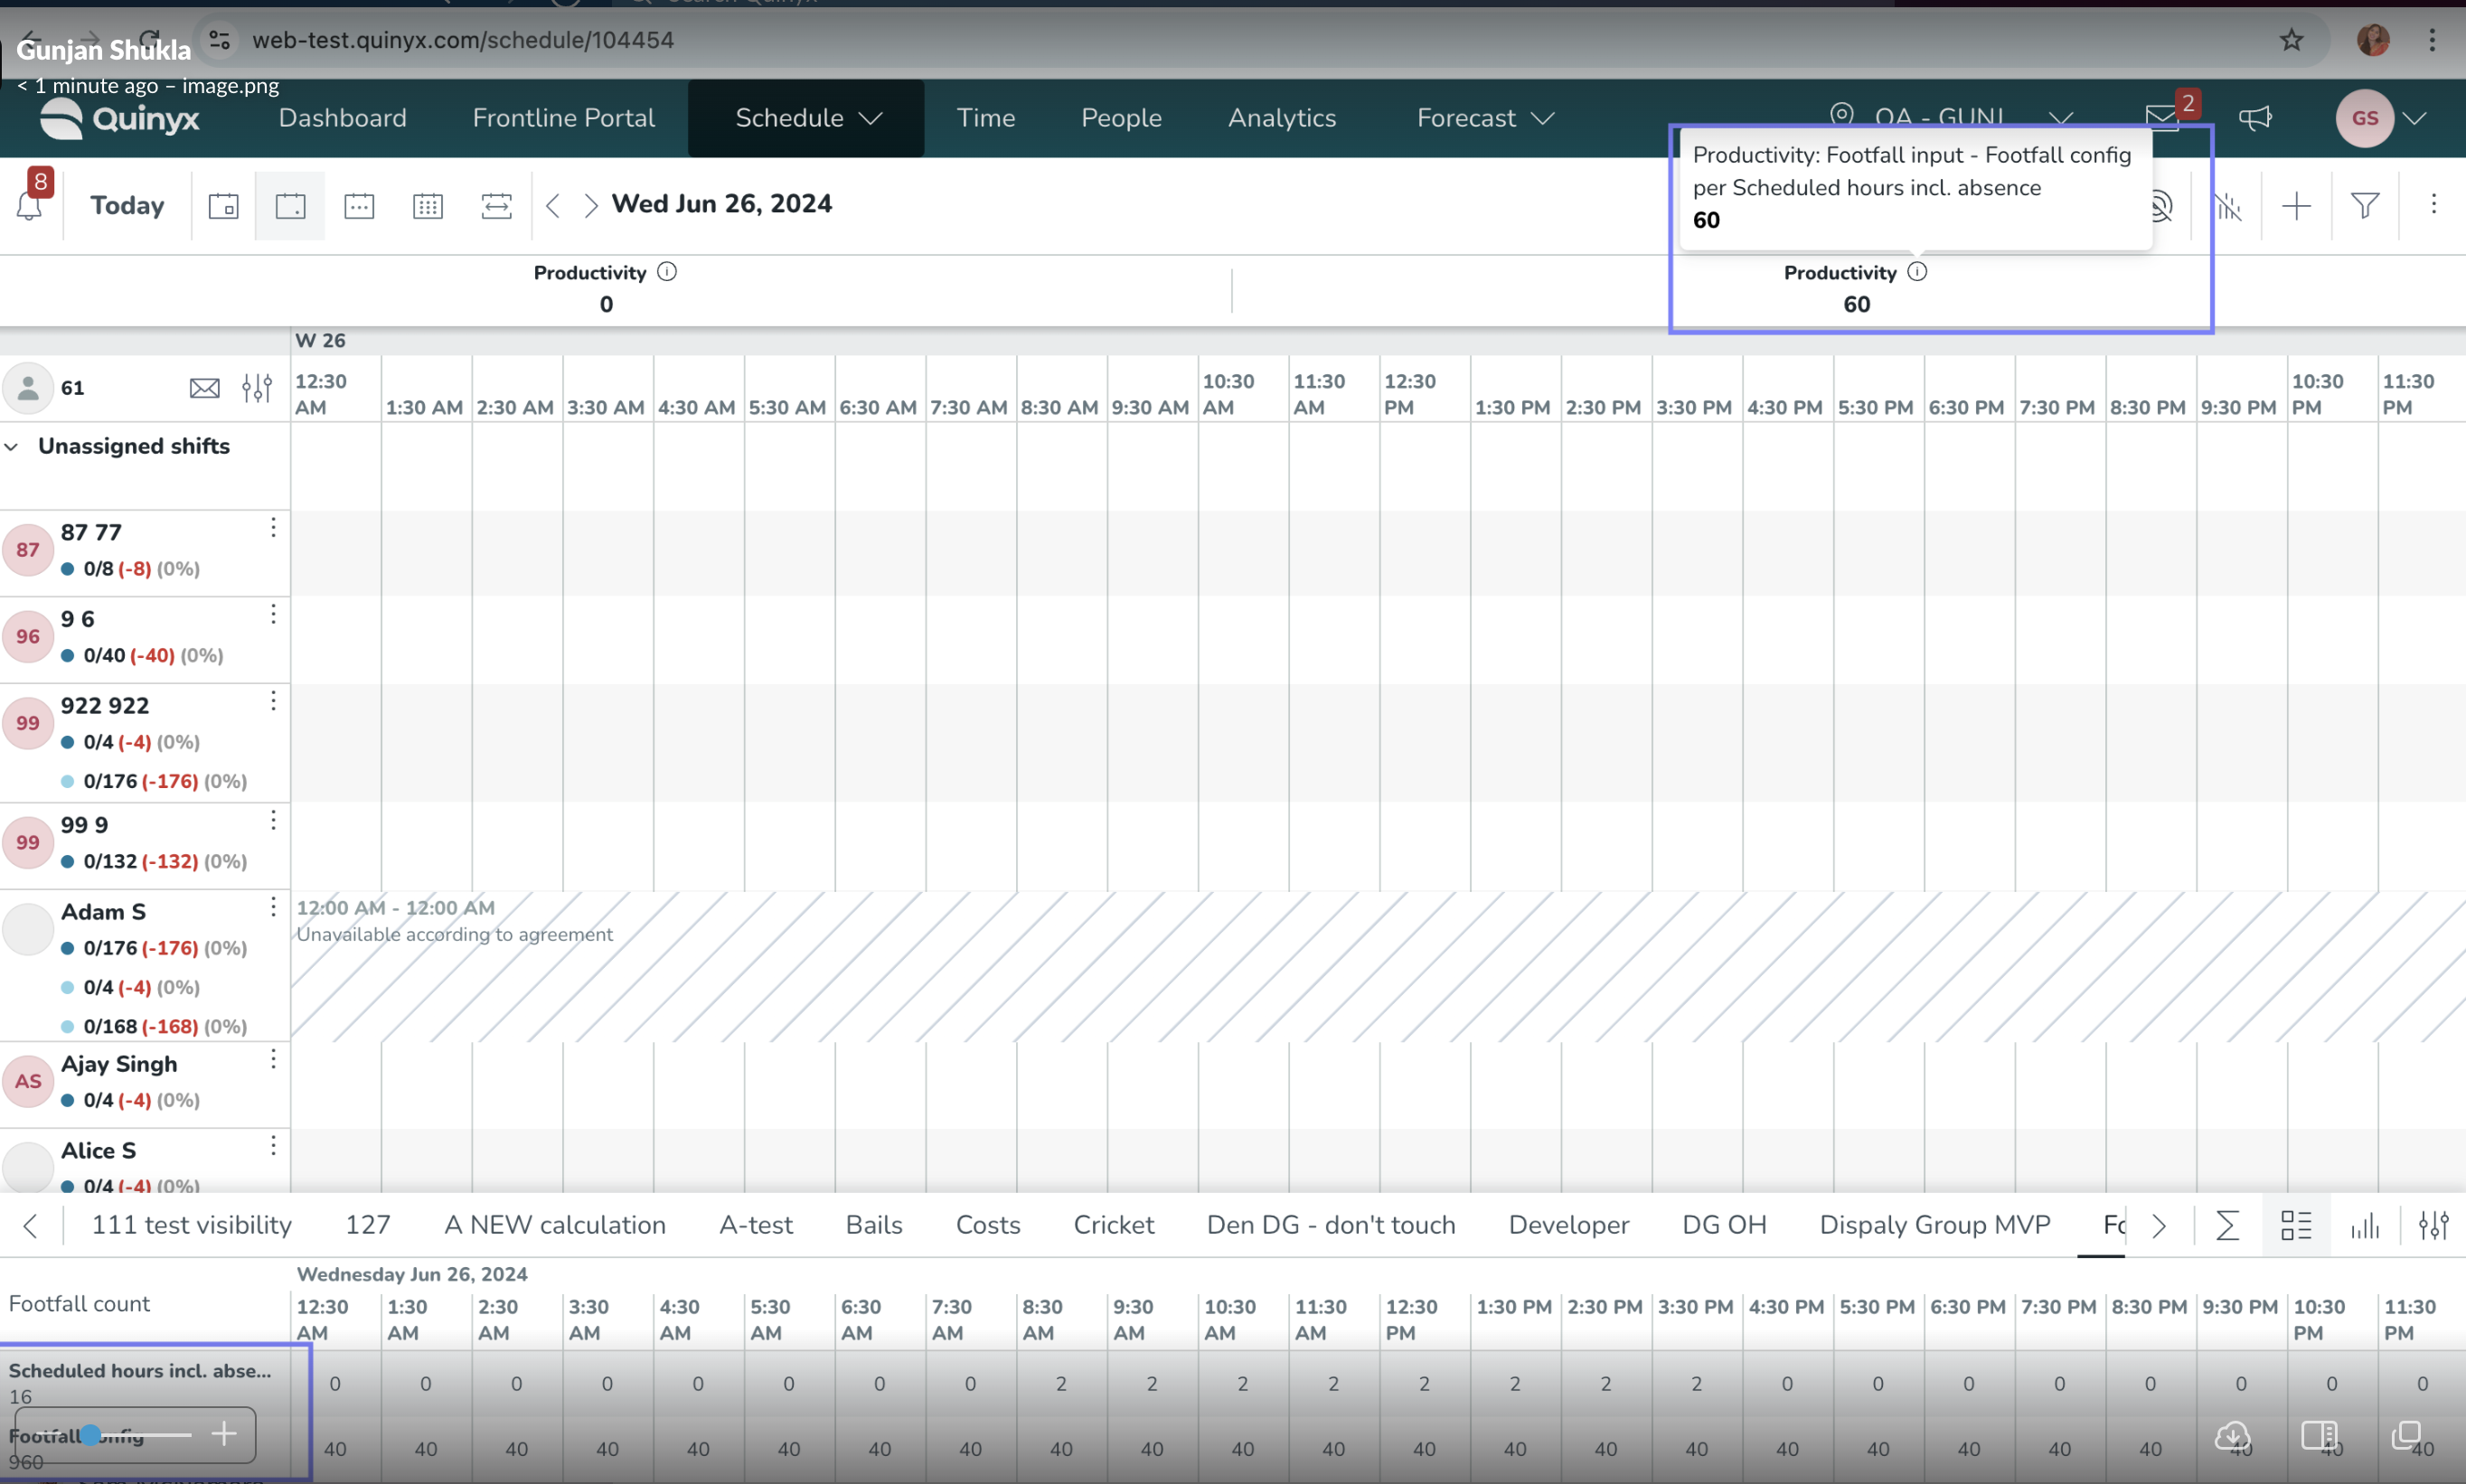
If the KPI is selected to be shown on the schedule page, selecting the target icon in the schedule view will display this KPI alongside any others you have added. Hovering over the information icon next to the KPI name will give details about how that productivity KPI is calculated.
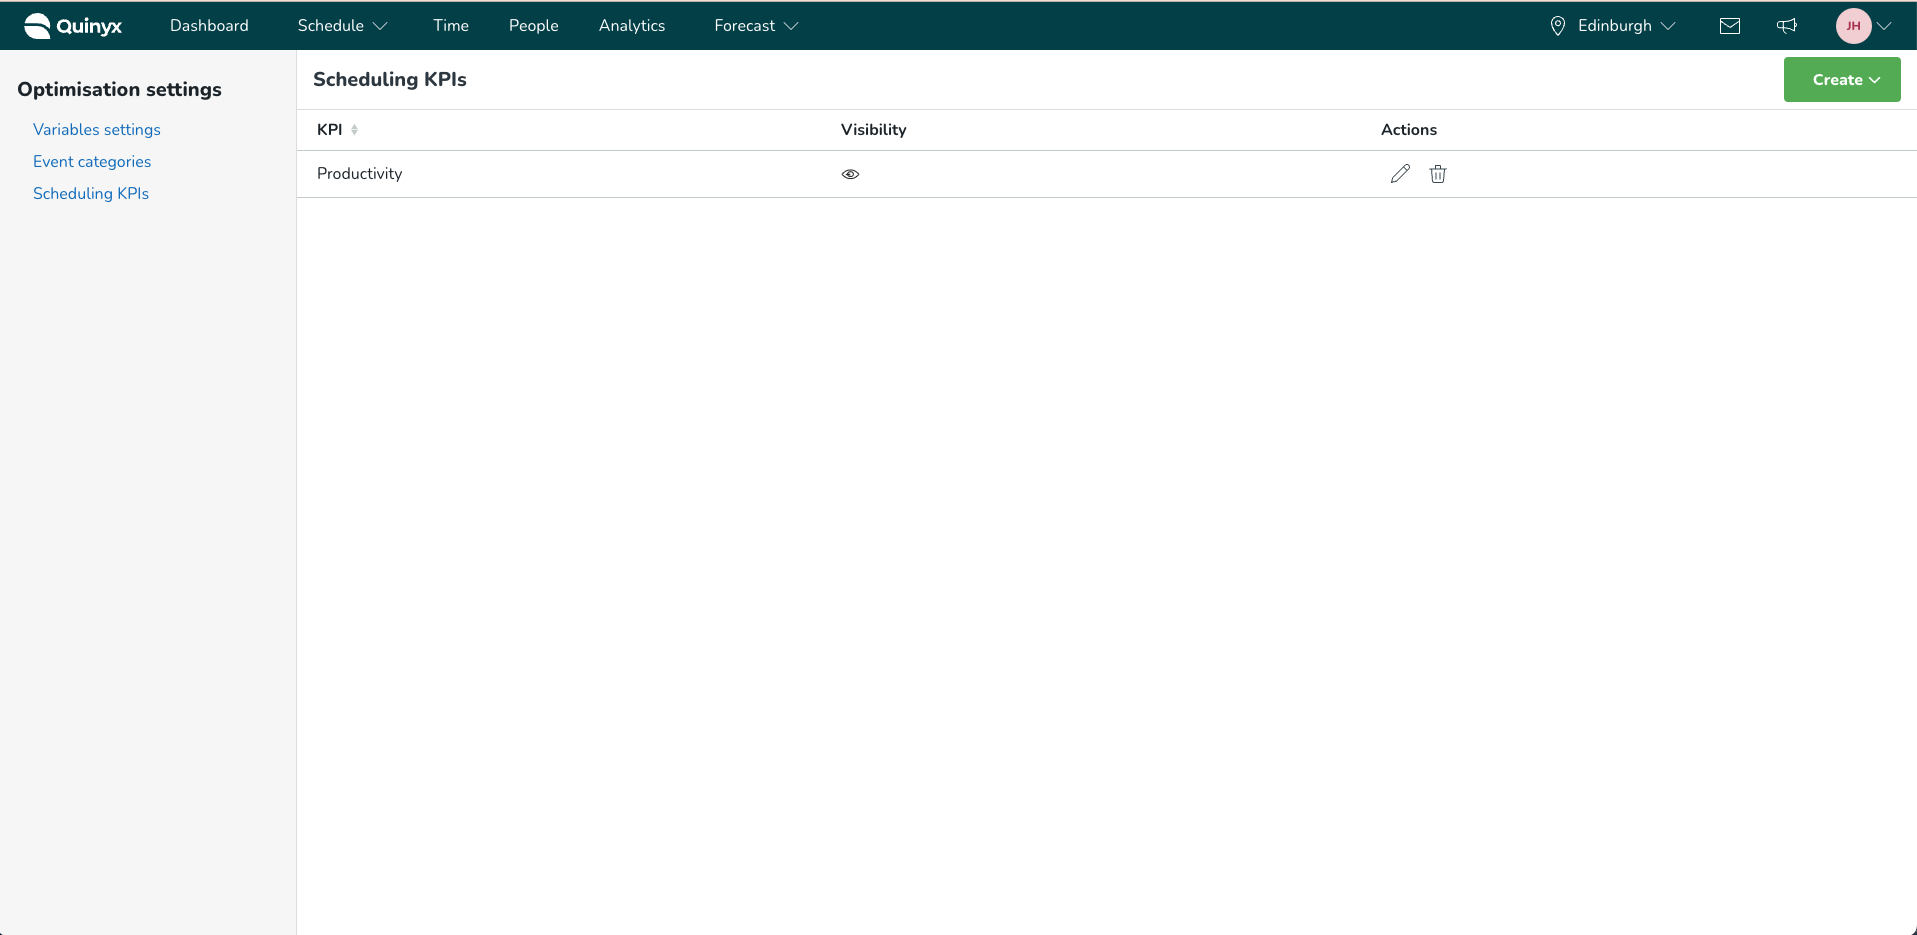
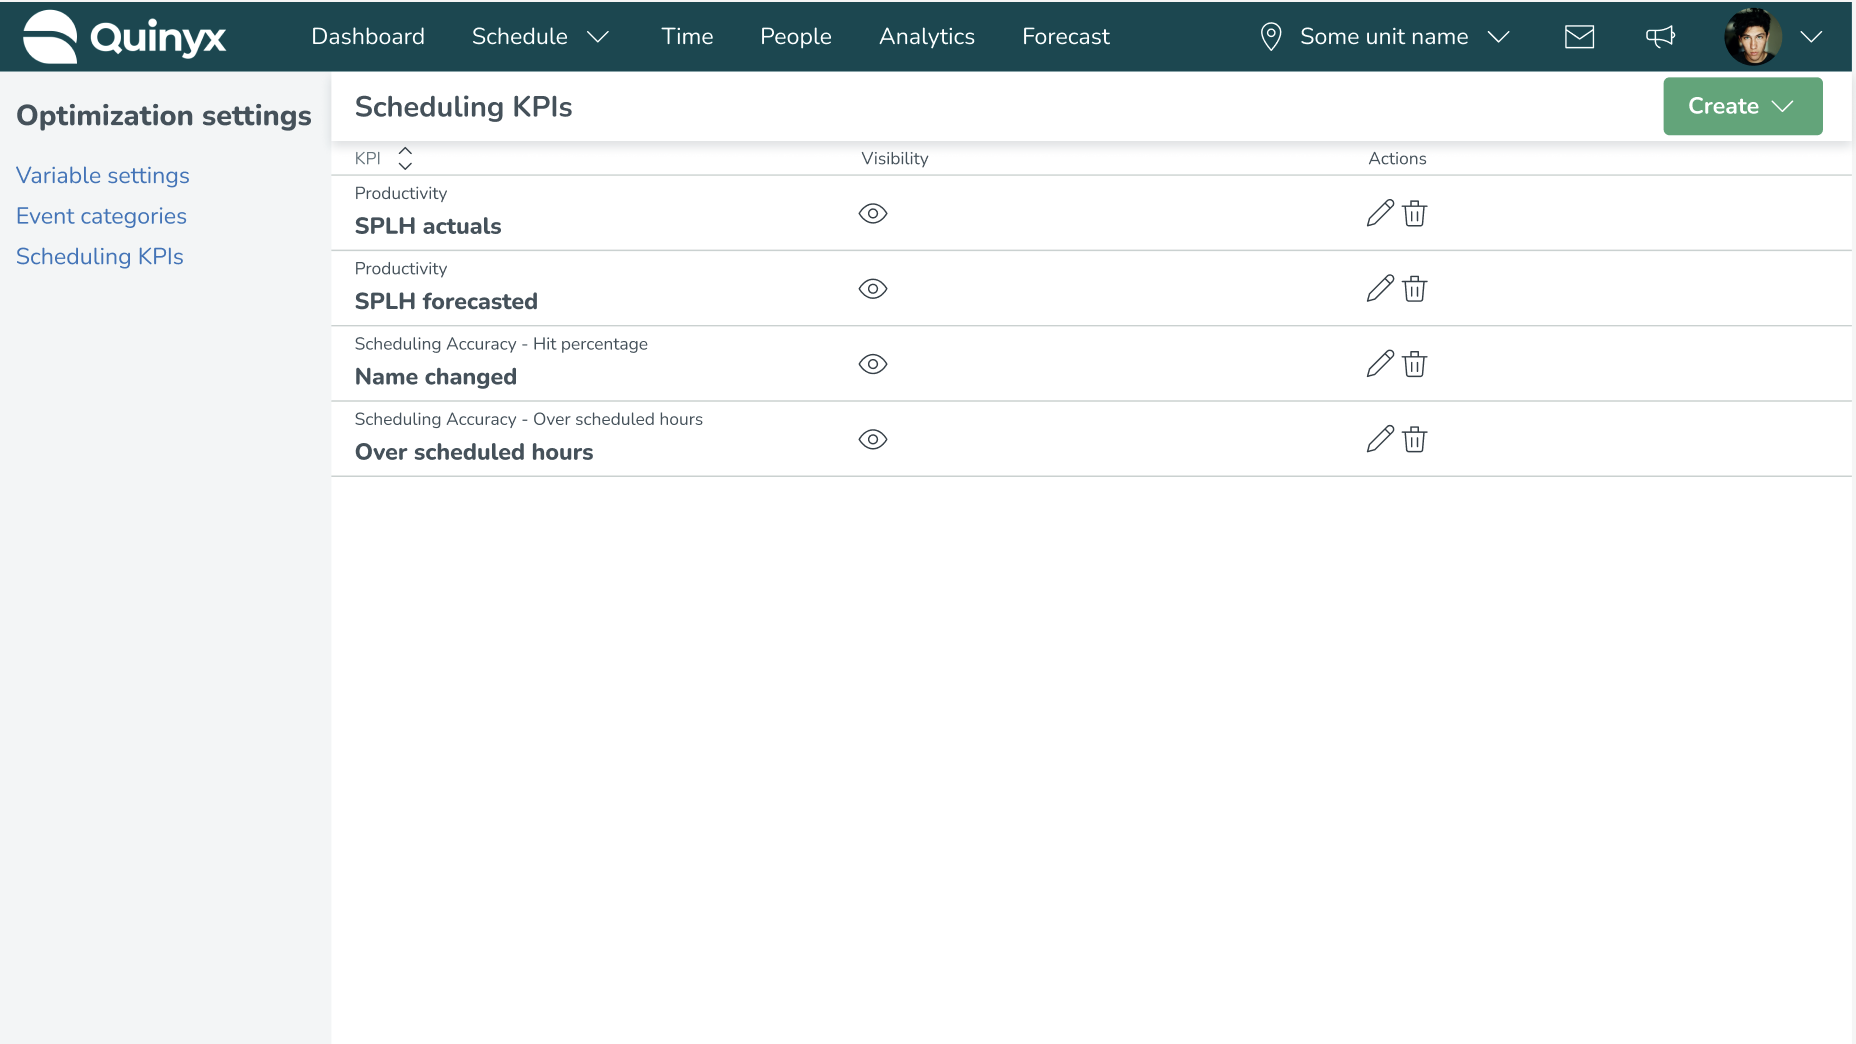
Once the KPI has been saved, you can see it in your Scheduling KPIs table.
If the KPI has been selected to be shown on the schedule page, you will now, when selecting the target icon in the schedule view, see the newly added KPI together with all other productivity KPIs you have added.
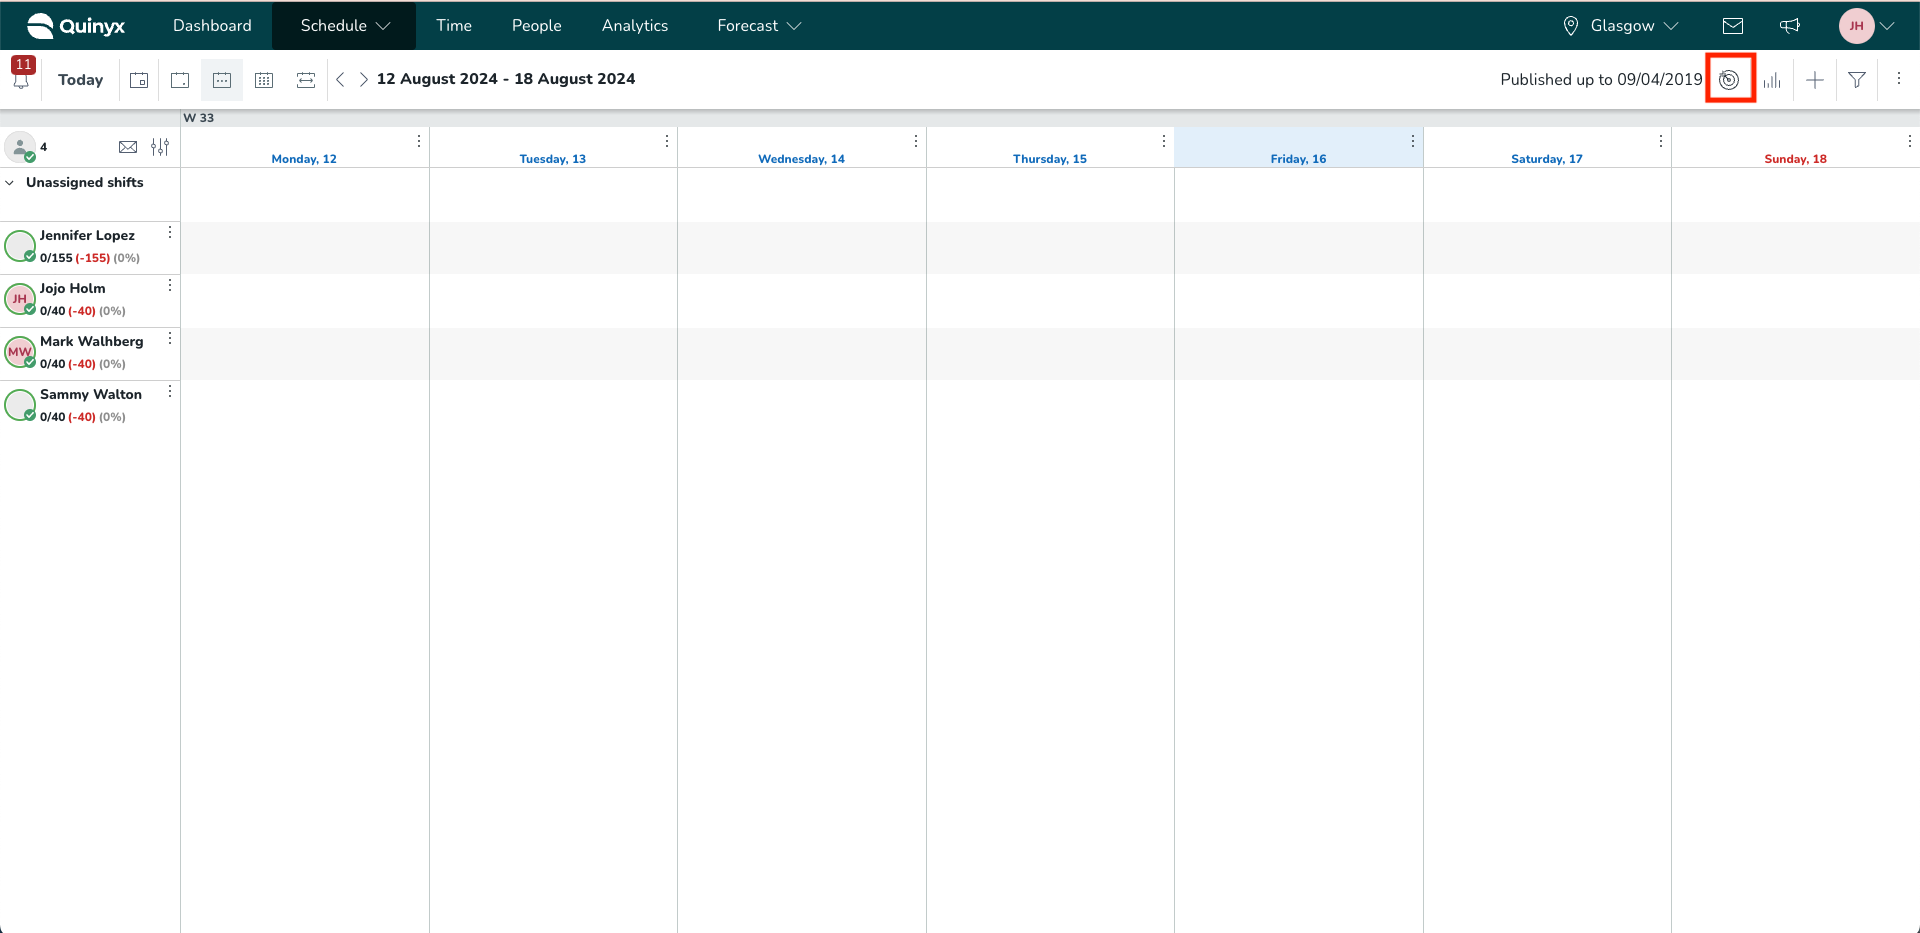
Hovering over the information icon next to the KPI name will give details about how that productivity KPI is calculated.
Importing productivity KPIs
You can import daily productivity targets via API and view them directly on the schedule page next to the productivity KPI.
To define your targets in your external system, specify:
- The units or sections the targets apply to.
- Whether the target is to reach an exact value, stay below, stay above, or be between two values.
- The actual target daily value.
- The period the target applies to (the same daily value can be applied to a longer period than a single day).
In Quinyx, first go to the productivity KPI and choose to create targets for it. Then, set the External ID to enable the integration. Last, push the data using our public endpoint. Endpoint details are explained here: Swagger UI.
Once the data is imported, scheduling managers will see productivity targets on the schedule page, alongside the productivity KPI, with clear indicators showing whether targets are being met.
Total labour cost and hours KPI
You can use a scheduling KPI that allows you to see total labour cost and hours for the period you are previewing in the schedule.
Previously, it was possible to preview Labour cost and Labour hours in the cost or hours display group, but the totals were limited:
- On the daily schedule, values were summed per hour.
- On a multi-day view, values were summed per day.
This meant that users could never see the true total labour cost or hours for the entire schedule period.
With this update, the new Scheduling KPI sums labour cost and hours for the full preview period, giving a clear and accurate total. This makes it easier to monitor and manage labour usage and costs across the schedule.
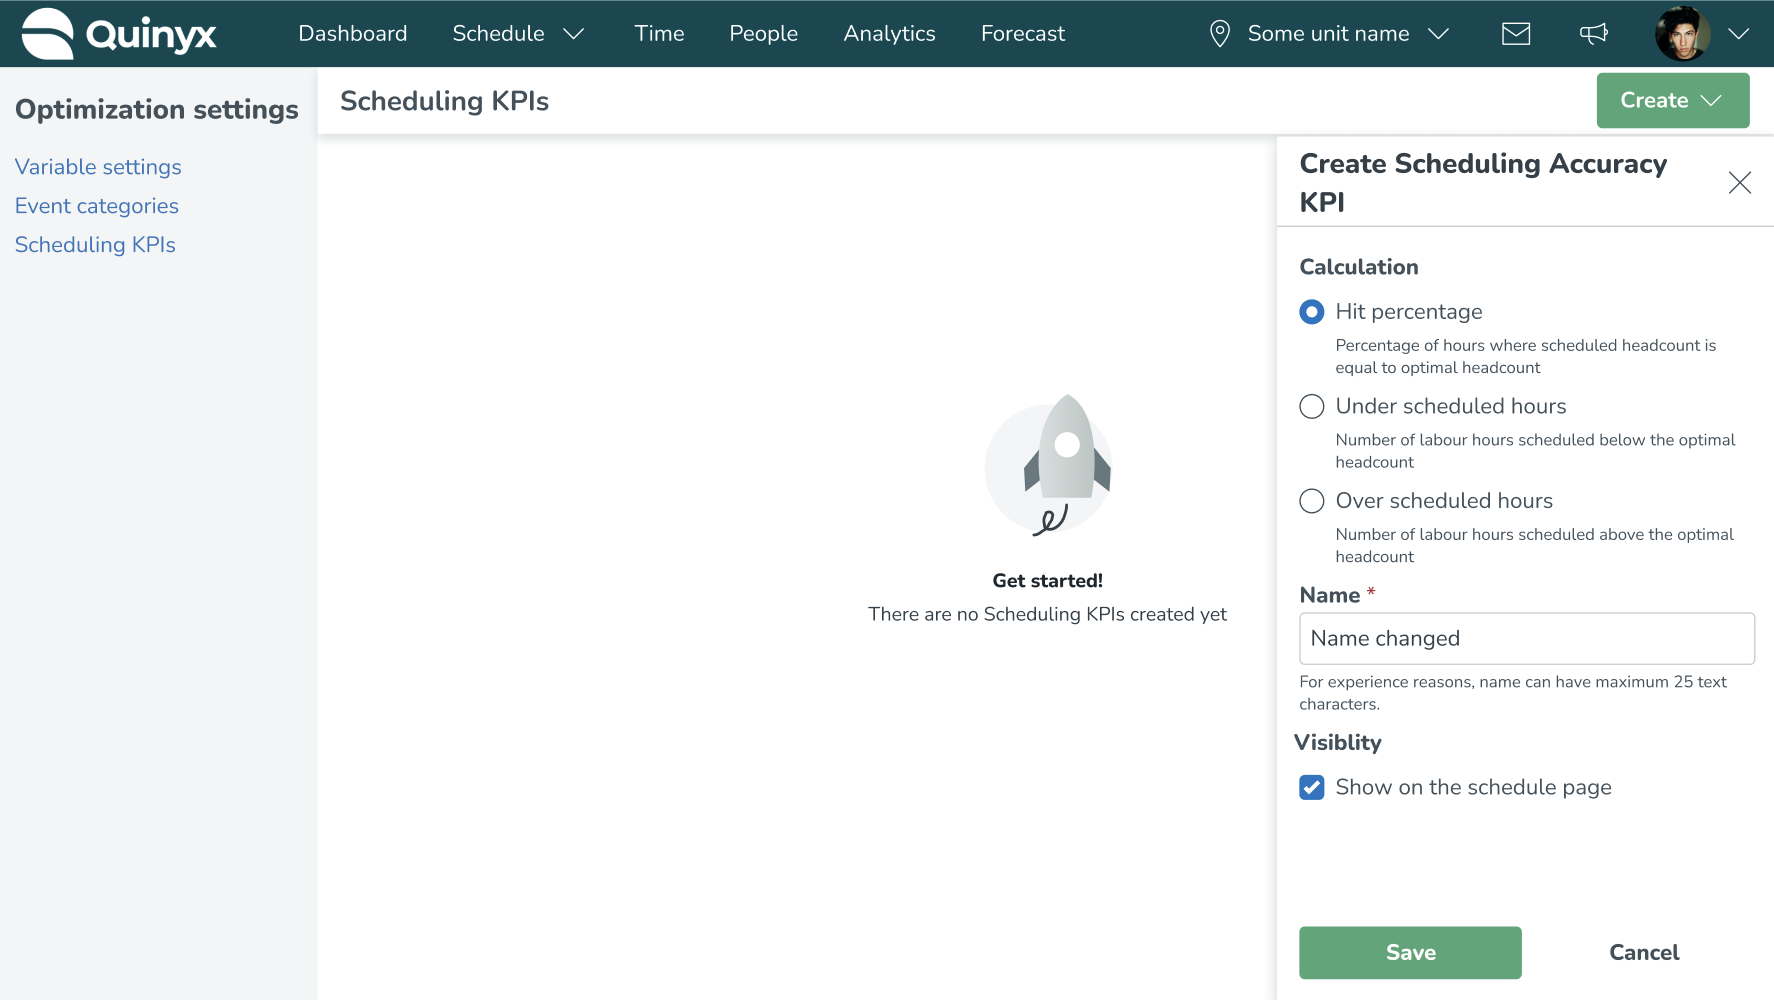
Customizing Scheduling KPI names
You can add custom names to your scheduling KPIs. The name can be changed in the edit panel of the specific KPI you want to change the name of, and your selected name will be visualized for that specific KPI on the scheduling page.
- Change the name of the KPI you want to call differently than the default name.
- View the changed name in the table.
- Notice how the new name is visualized on the scheduling page for all your units.

Additional Information
- Productivity KPIs can be added based on actual data (input data) and forecast data (forecast configurations).
- You can add multiple productivity KPIs.
- The productivity KPIs are calculated based on the timeframe you're looking at in the schedule view. If you're looking at a single day, the KPI is calculated only for that day, while the weekly view would show the KPI based on data from that whole week.
- The productivity KPI is impacted by filters in the schedule view.
- Since the forecast and actual data doesn't change based on filters, the variable that will be adjusted is the scheduled and worked hours.
- Filters such as shift type, employee, and unassigned shifts are examples of filters that impact the scheduled/worked hours and therefore result in a change in the KPI value.
- The productivity KPIs are recalculated quickly after the changes are made (you don't have to click somewhere to manually recalculate them).