Schedule printout
 Updated
by
Leigh Hutchens
Updated
by
Leigh Hutchens
In the Quinyx Manager portal, you can print schedules. This feature mainly provides employees with a paper copy of their schedules, especially if they cannot or prefer not to use their personal digital devices to view them.
To print the schedule:
- Navigate to Schedule and click the ellipsis in the top right corner of the view.
- Click Print schedule. If you prefer, you may also click your keyboard’s CTRL + P buttons if you’re using a PC and COMMAND + P if you’re using a Mac.
Clicking Print schedule or performing the above keyboard shortcut will bring up your browser’s print dialog, where you can make use of the various options this dialog offers, including whether to print a paper format of the pre-view or rather save it as PDF.
The printout will differ slightly from the graphical user interface to ensure the information is readable, whether you save it as a PDF or print it on paper. This is because some information is only available on hover in Quinyx. As mentioned above, the printout allows employees to view their work schedule. In contrast, users of the manager portal are managers rather than employees by definition.
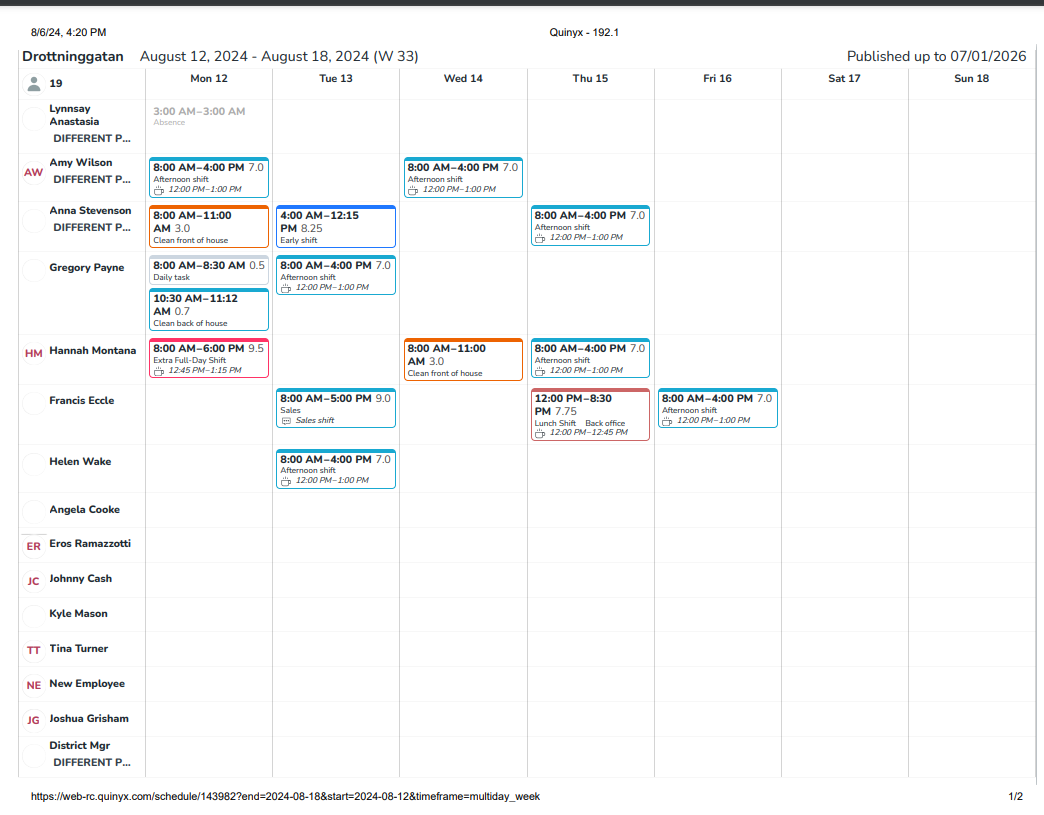
The printout reflects your Schedule selections, such as those made in display options and filters, like the Business view/ Employee view to allow you to include only the information most relevant to you and your team in the printout.
The following lists graphical elements that are different in the printout compared to when you’re viewing the Schedule in Quinyx:
- View mode: If you display a calendar month in Quinyx when printing, the printout will be one calendar week per sheet. In cases where the information in the Schedule doesn’t fit vertically on one sheet, the printout will print all sheets for the first calendar week of said month before doing the same for the remaining calendar weeks of said calendar month.
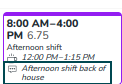
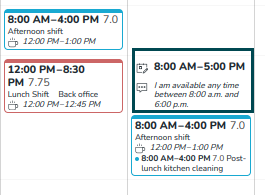
- Breaks: These are indicated using a coffee cup on the shift, followed by the break start and end times for shift types where the “Show breaks in the mobile app” is enabled. For shift types where the setting is disabled, the break duration is displayed instead of the break start and end times.
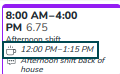
- Shift comments: The full comment is displayed in the printout, even if it entails a line break. Note that long words won’t wrap and might, therefore, extend into the next day’s column.
- Availability comments: The full comment is displayed in the printout, even if it entails one or various line breaks.
- Shift type name: In the Add/Edit shift type panel in Account settings > Shift types and in Group settings > Shift types, there’s a field called “Abbreviation” which supports a maximum of 10 characters. When the shift type name is too long to fit in the printout and the shift type in question has an abbreviation, the abbreviation will be used instead.

In cases where the shift type name is too long to fit on the same line and no abbreviation exists, these will display using line breaks.
- Absences: The schedule printout does not include the absence type name information. All absence occasions are displayed as "Absence".
- Statistics: These are currently not reflected in the printout to be consistent with the information available to employees using Quinyx's mobile app.
- Employee metrics: Some managers have expressed concerns about employee metrics containing information that employees prefer to keep private from their colleagues, so the schedule printout does not reflect employee metrics.
- Unavailability: Due to technical constraints, the printout doesn’t reflect unavailability information. This is something we aim to enable - subject to Schedule filter configuration - in the medium term.
- Various interactive elements: Things like the envelope button for Qmail, the entry point to Display options, the entry point to filters, the entry point to statistics, the “waving hand” indicating shift bookings, and so on, aren’t reflected in the printout in an attempt to only include information valuable to the employees.