How to configure reminders
 Updated
by
Daniel Sjögren
Updated
by
Daniel Sjögren
Reminders are nice and easy to use. When configuring reminders, simply fill in the basic criteria for the selected reminder type, and the defined recipient group will receive automatic notifications based on the time or event-based criteria defined.
The below example is using the reminder type Employee Attest Missing:
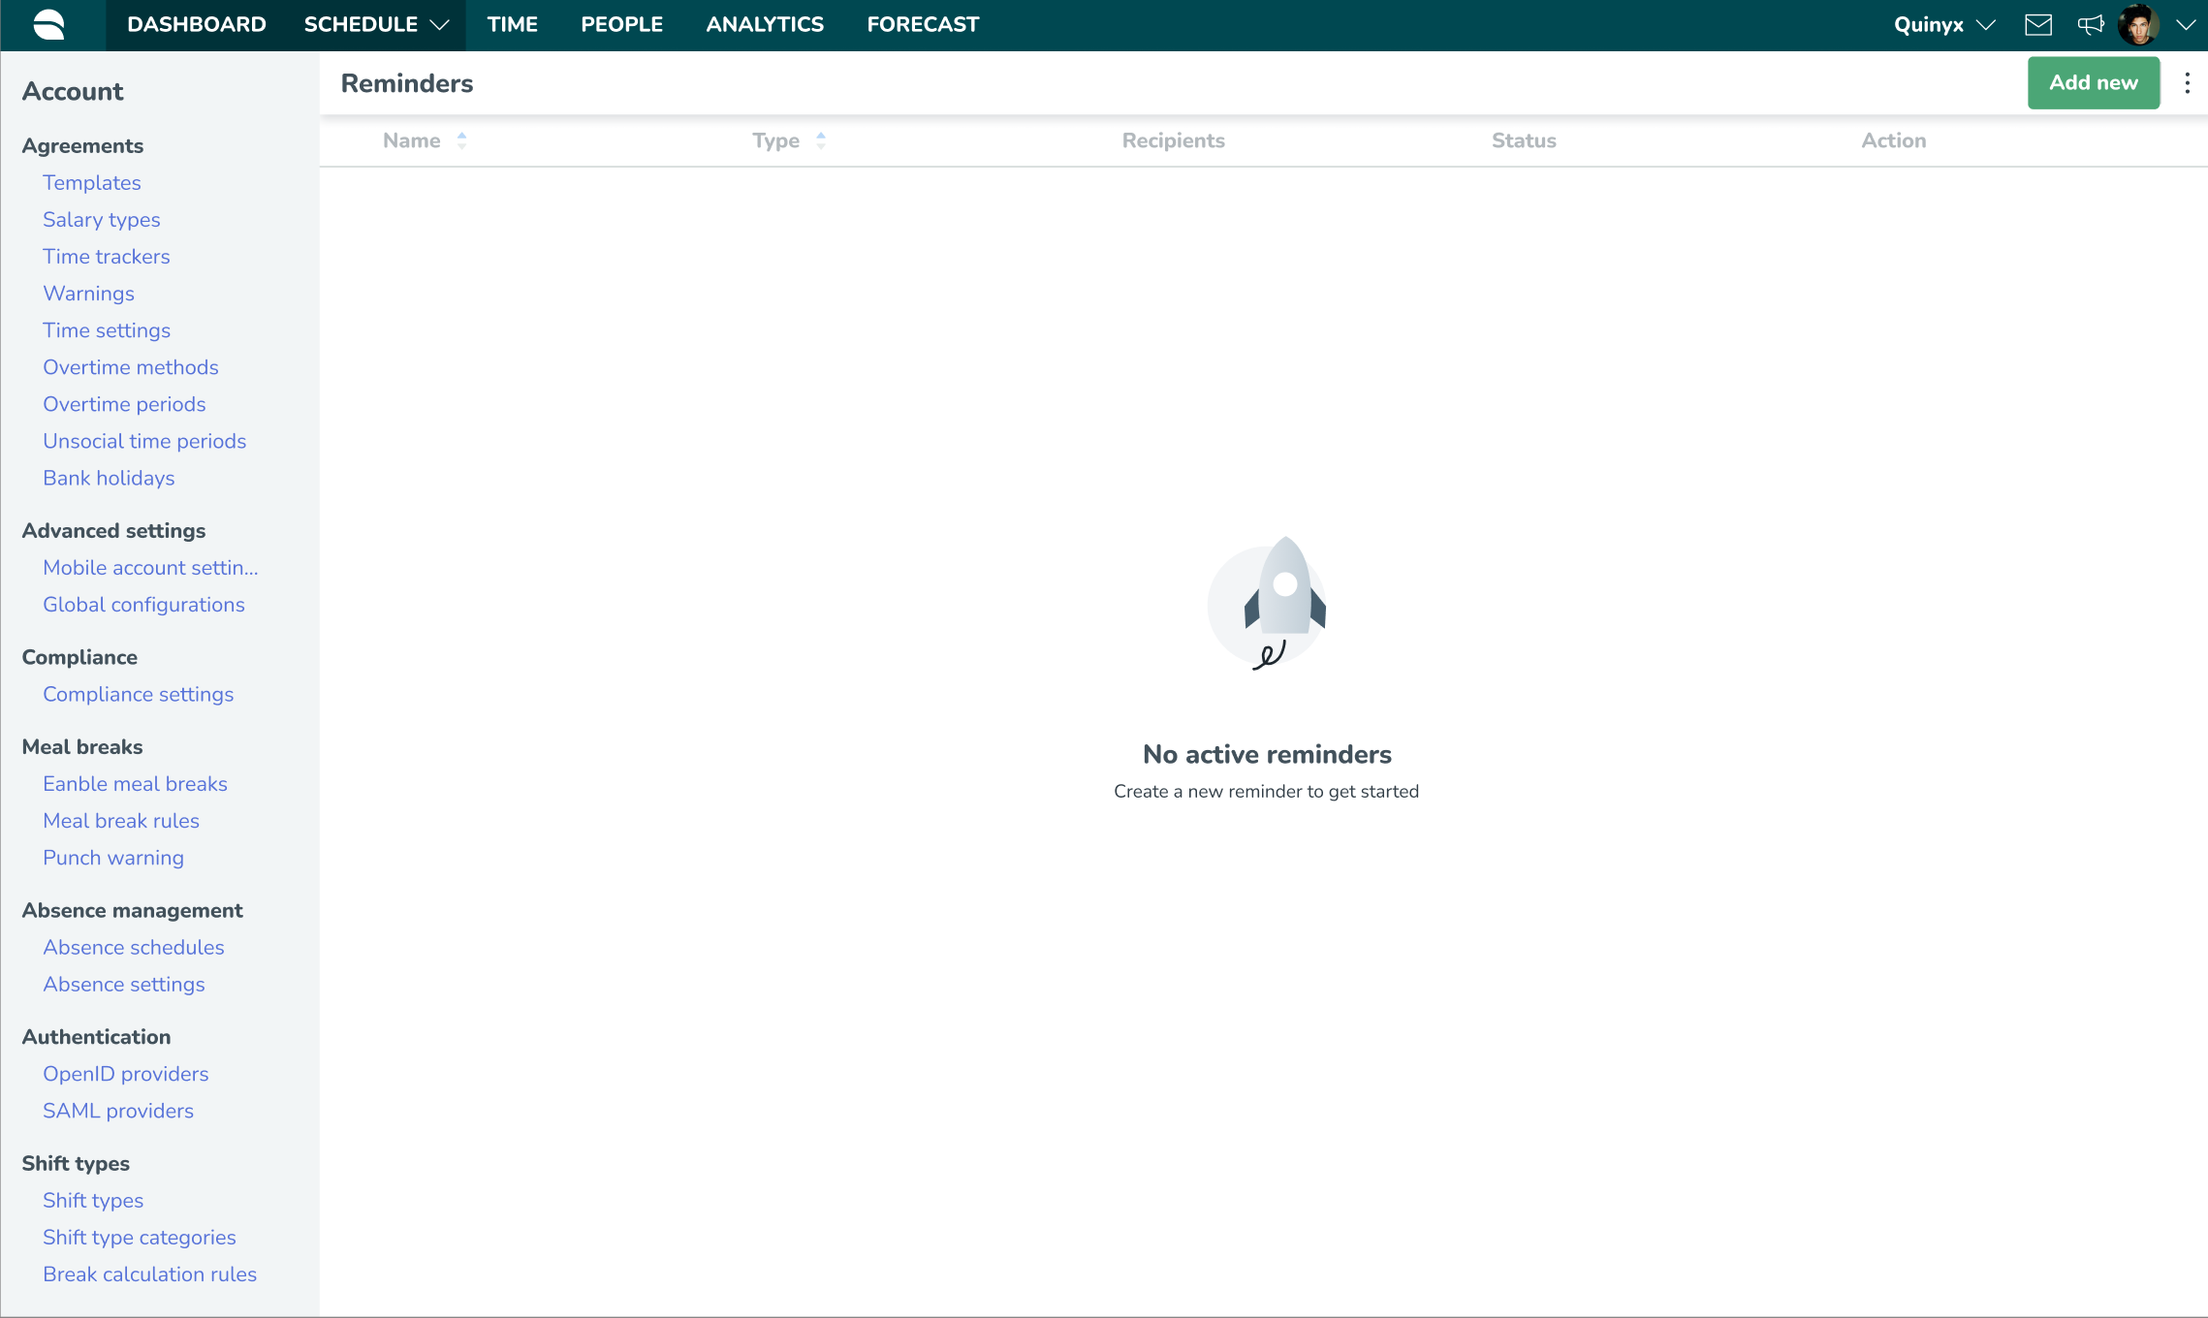
- Navigate to Account settings > Advanced settings > Reminders.
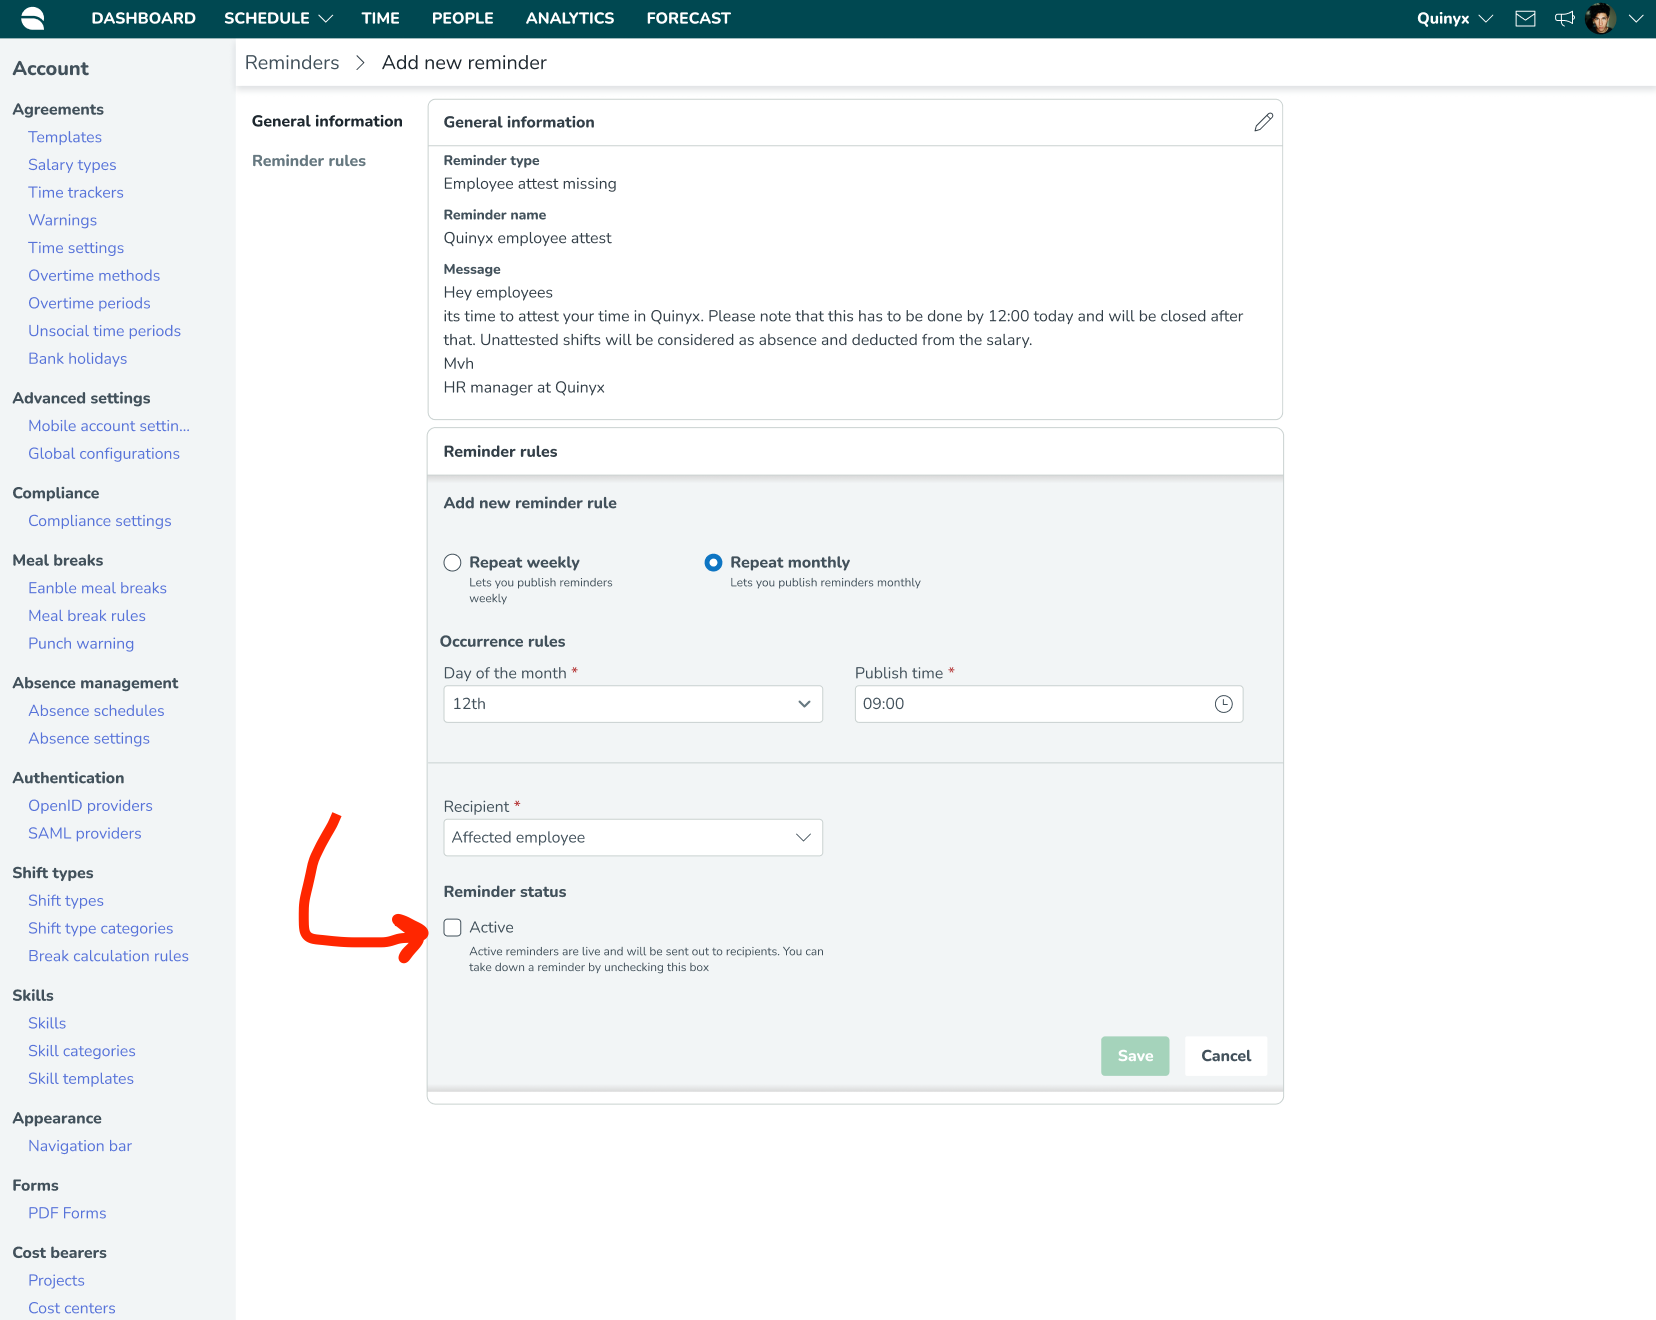
- Click the Add New button and populate the General Information (that is, information common to all reminder types). The selected reminder type will determine what additional fields are available once you hit Save and unlock the second Reminder Rules panel.
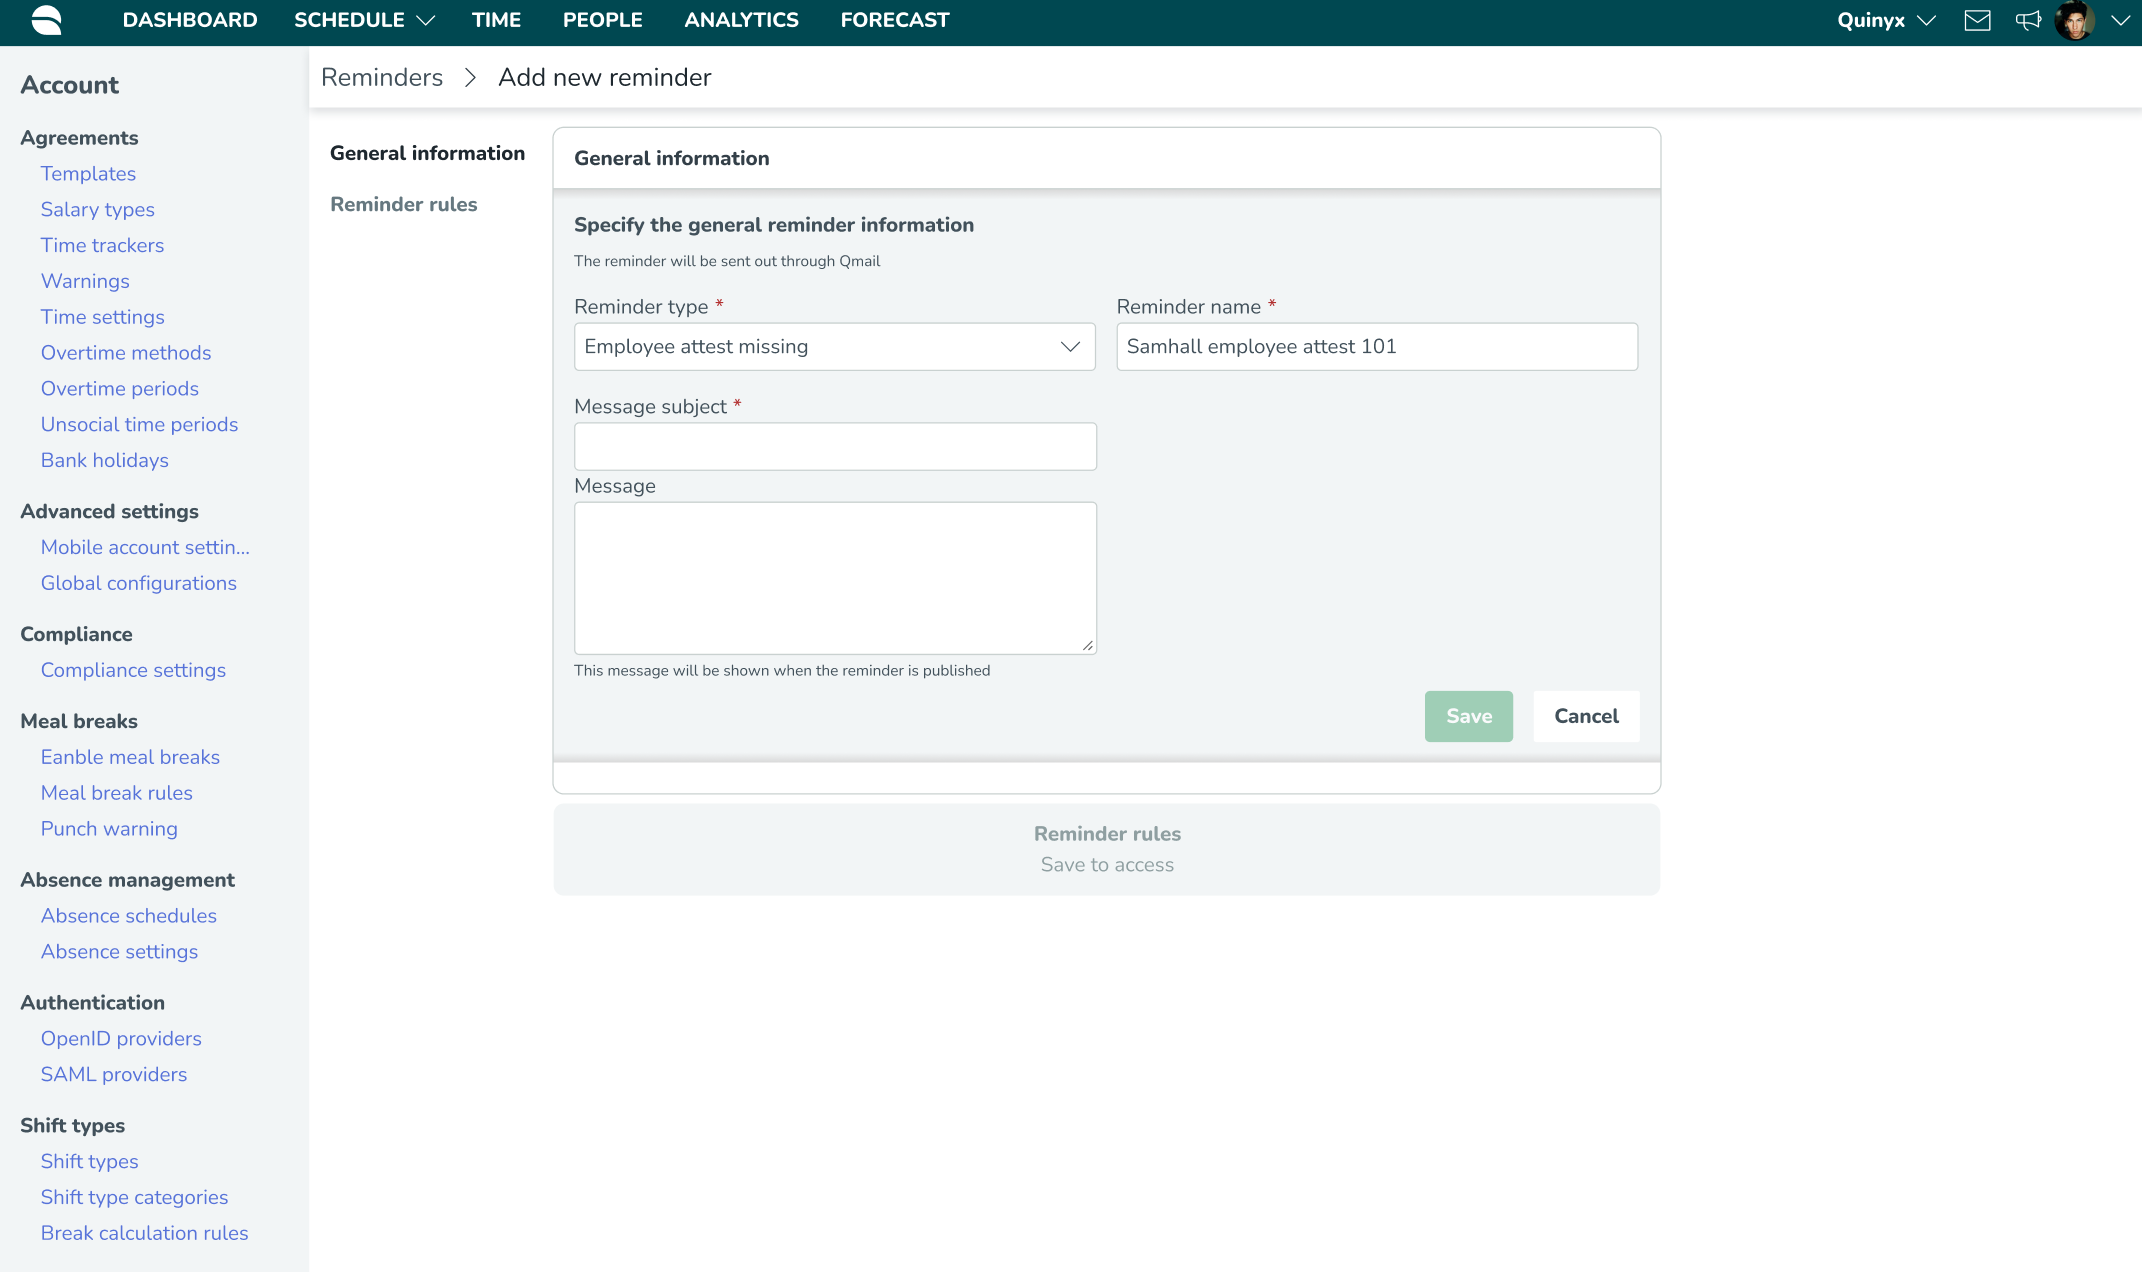
- In the Reminder Rules panel you can configure rules specific to the selected reminder type.
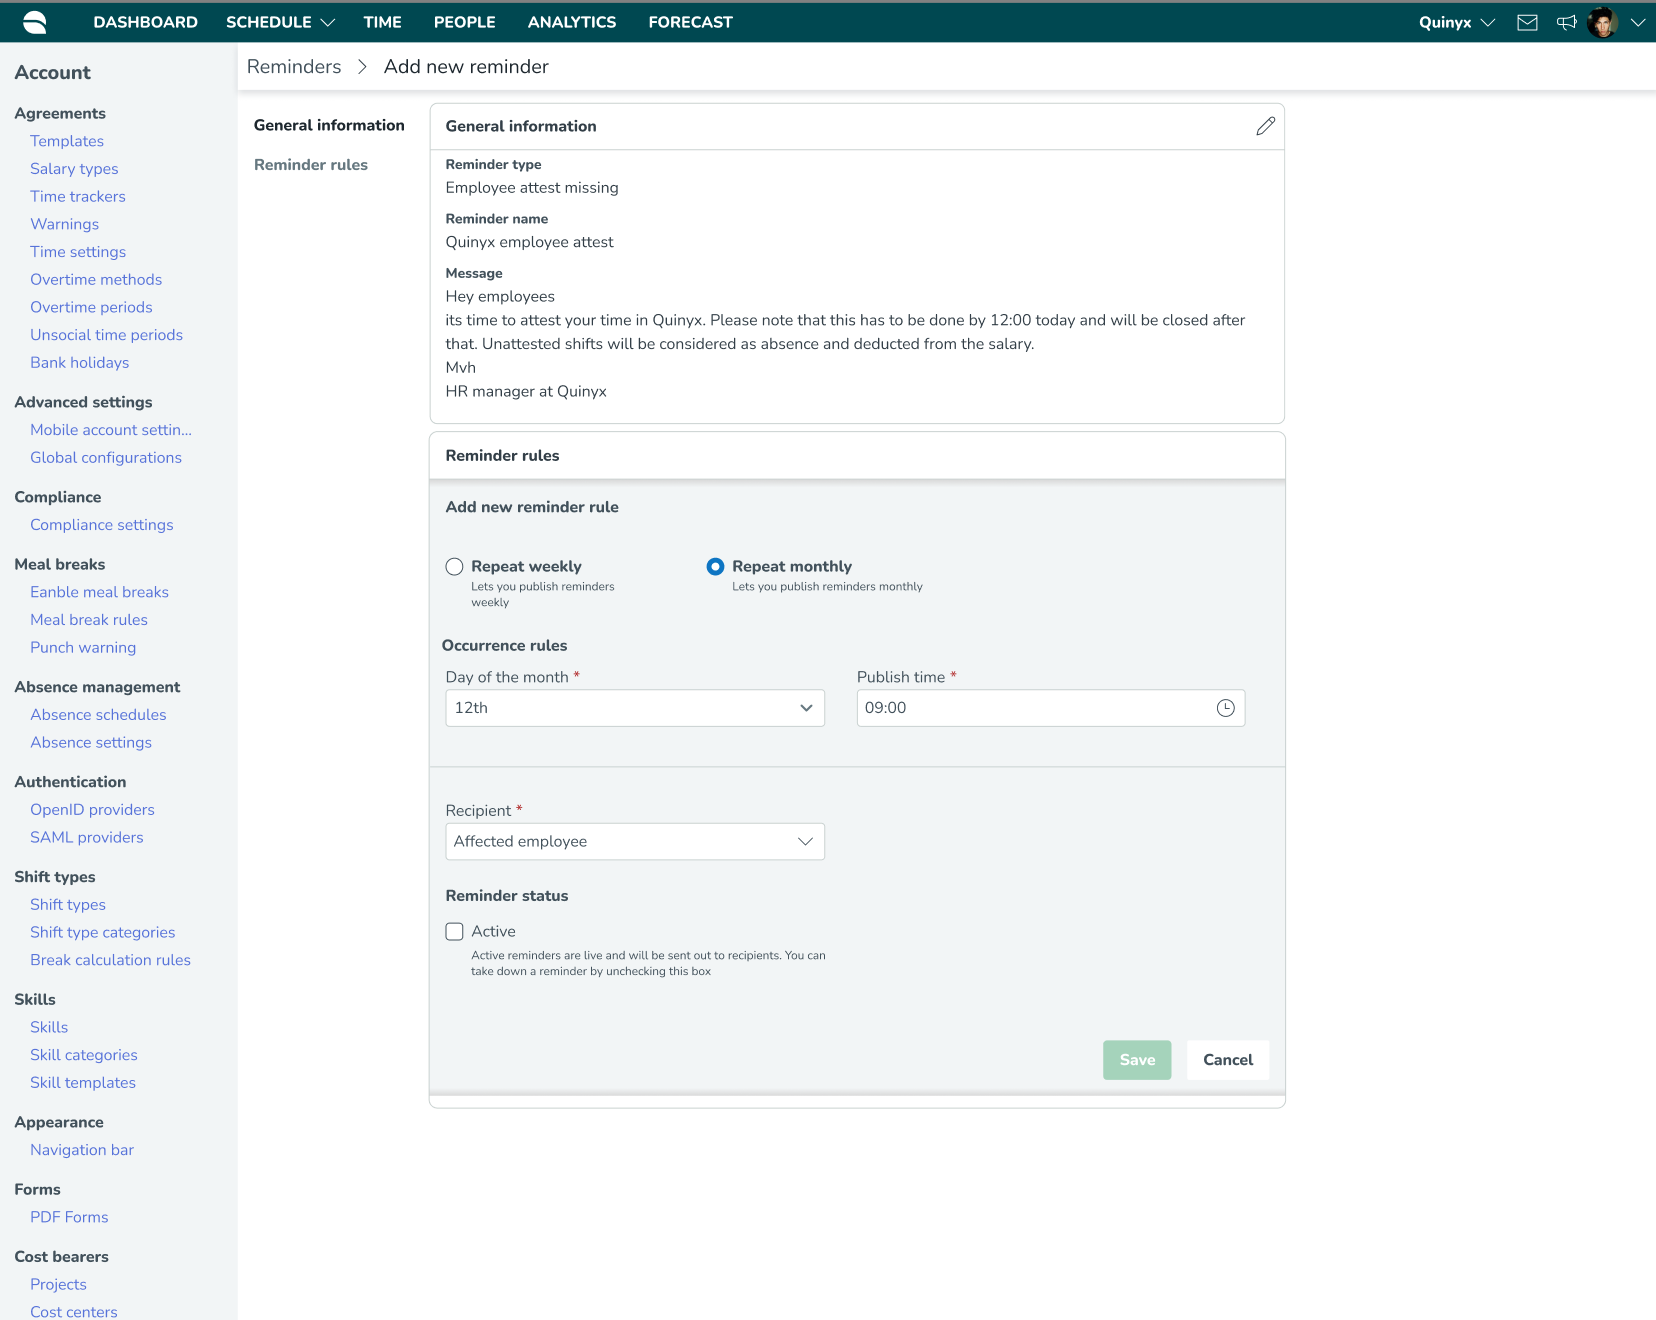
- One of the last steps is to determine whether or not you want to “Activate” your new reminder. If so, reminders will go live as soon as you hit Save. If unselected, it will be marked as "Inactive" until you choose to activate it, almost like a Draft state. Similarly, if you ever want to pause an active reminder for any reason, you can do so here.
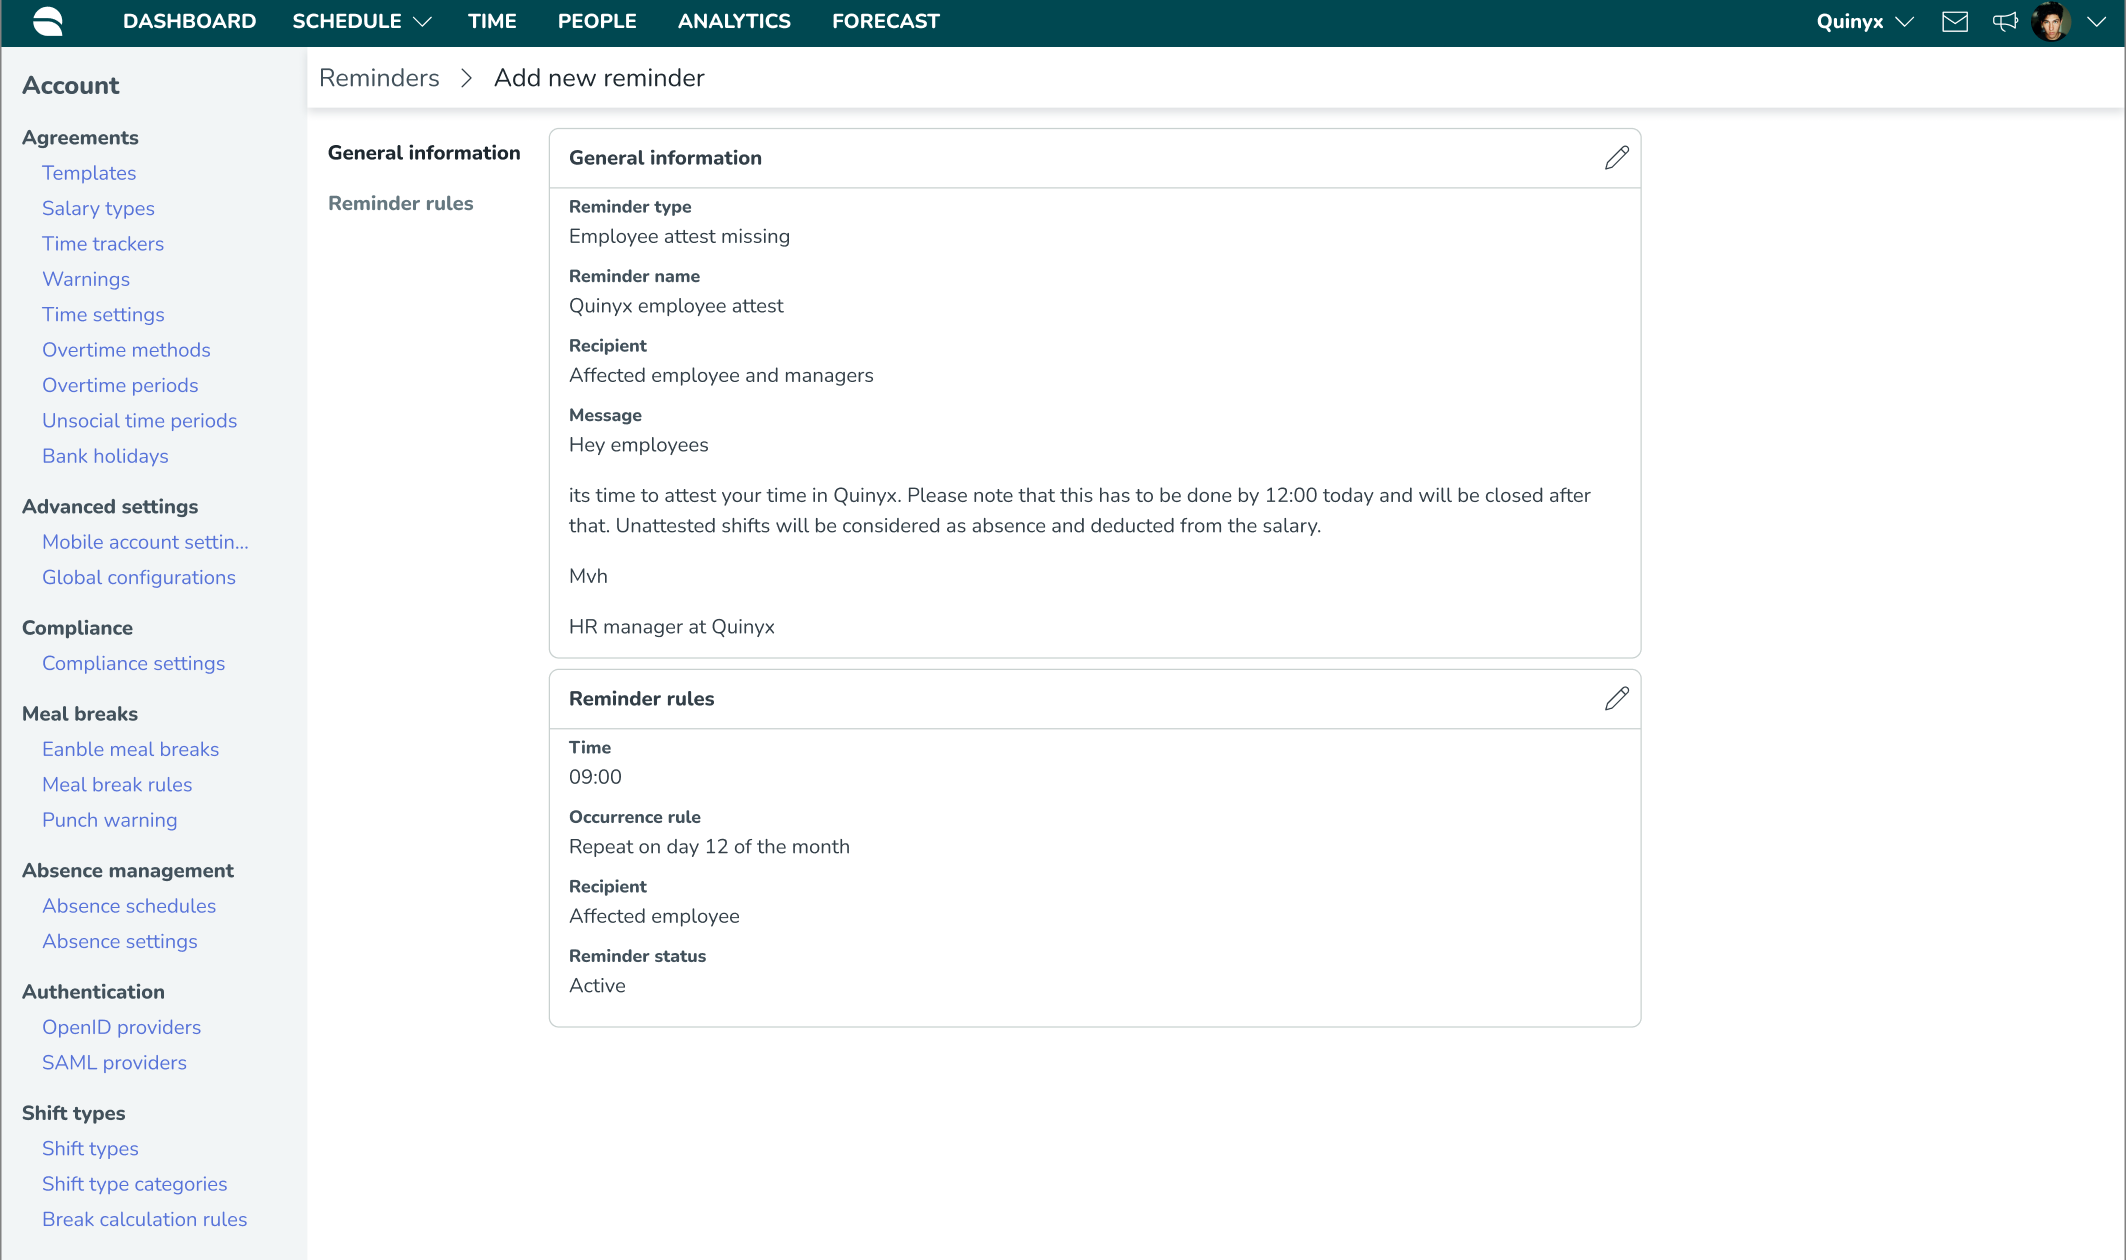
- After you hit Save, you’ll get a nice overview of your new reminder! If you want to change anything, you can always edit it accordingly.
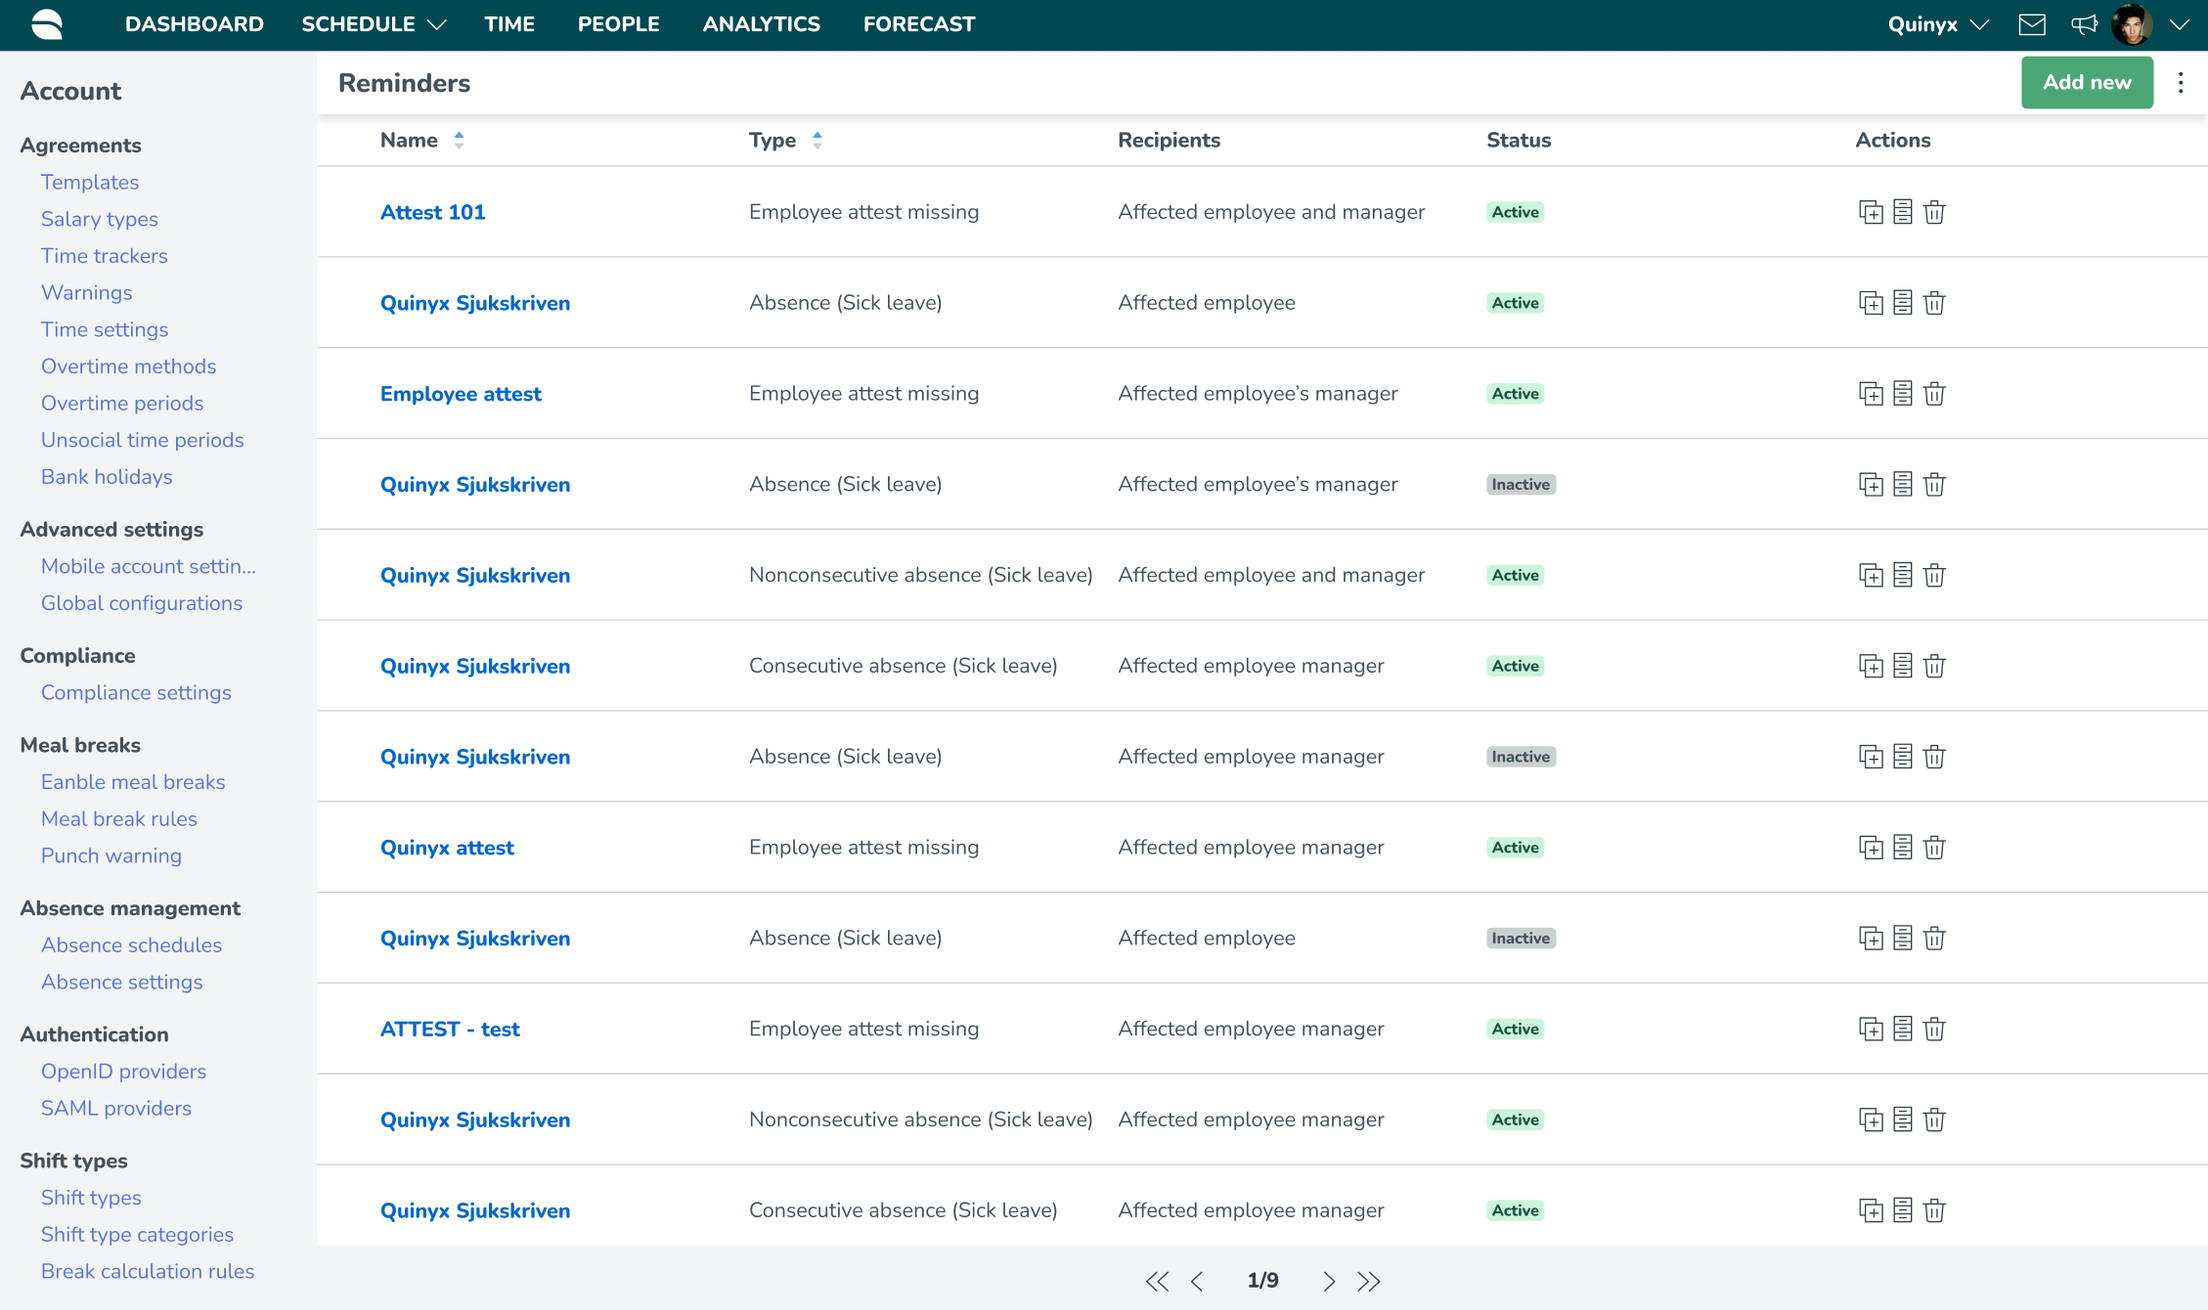
- Done! If you go back to the overview, you can see a nice list of all reminders set up for your company.
How to configure leave type reminders
When configuring leave type reminders - you follow the same flow as a typical reminder type, defining the type of reminder, the recipients and the custom message in the first panel.
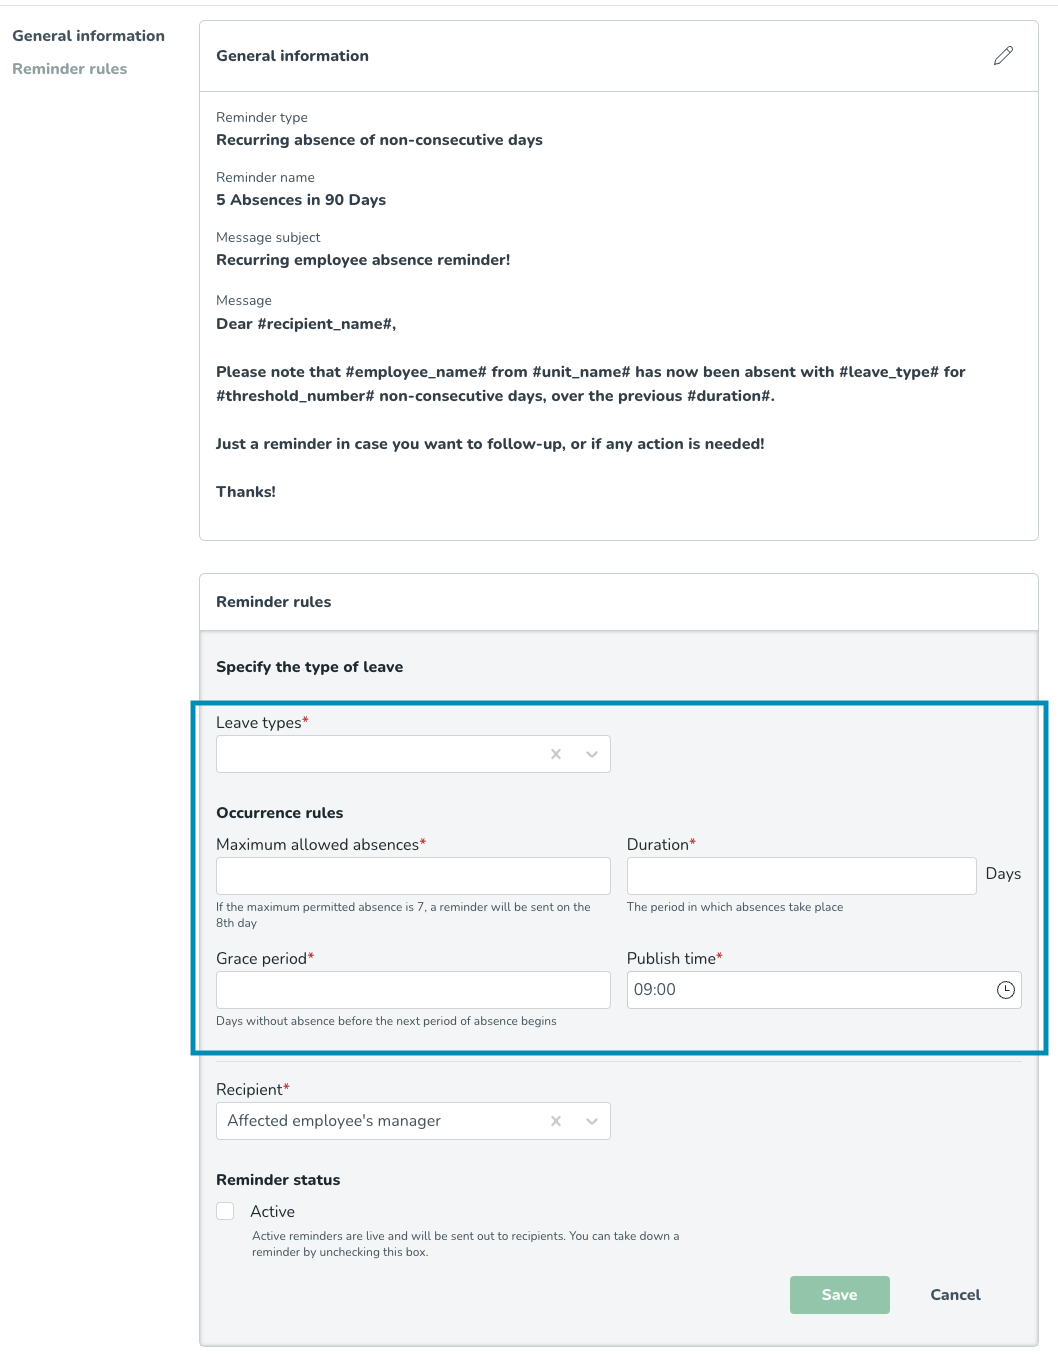
Once the first panel is saved, a second module is enabled, with some custom occurrence rule configurations unique to this reminder type.
Custom rules - Leave type reminders
Configuration | Definition | Validations |
Leave types | A dropdown that lets you select from the available Leave types configured for your organization. | You must select one leave type, specific to this reminder calculation. |
Maximum allowed absence | The number of absences after which you want to trigger a reminder. For example if you set it to 10, then once an employee registers their 11th absence, a reminder will be sent. | Required field |
Duration | The period of time (in days) in which you want to track the absences. For example, if you set this to 30 days, then if an employee registers their 11th absence on the 29th day (tracked from the date of their first absence) a notification will automatically be sent out. On the other hand - if an employee registers their 11th absence on the 35th day, no notification will be sent out (as it no longer fulfills the criteria of the reminder). | |
Grace period | The grace period is a configuration in Quinyx that gives users more control over leave type reminders and ensures the information they receive is both meaningful and accurate. The grace period allows users to define the number of days without absence that must pass before the system resets and begins counting a new period of absences for an employee. This helps prevent unnecessary notifications and ensures that only relevant absence patterns are flagged. For example: suppose a company sets a grace period of 7 days for a “Non-consecutive leave type reminder". If an employee, John, takes sick leave for 3 days in January and then another 4 days in February, the system would trigger the reminder if his absences exceed a pre-set threshold, for example, 7 days within a certain period. However, if John has 7 days without any absence after his February sick leave, the grace period ensures that the counting of his absences will reset. If he takes another sick day in March, it will be considered part of a new absence period, rather than accumulating on top of his earlier absences. The grace period helps avoid triggering reminders for long-spaced absences, ensuring managers focus on meaningful absence patterns that require attention, rather than isolated, minor events. |
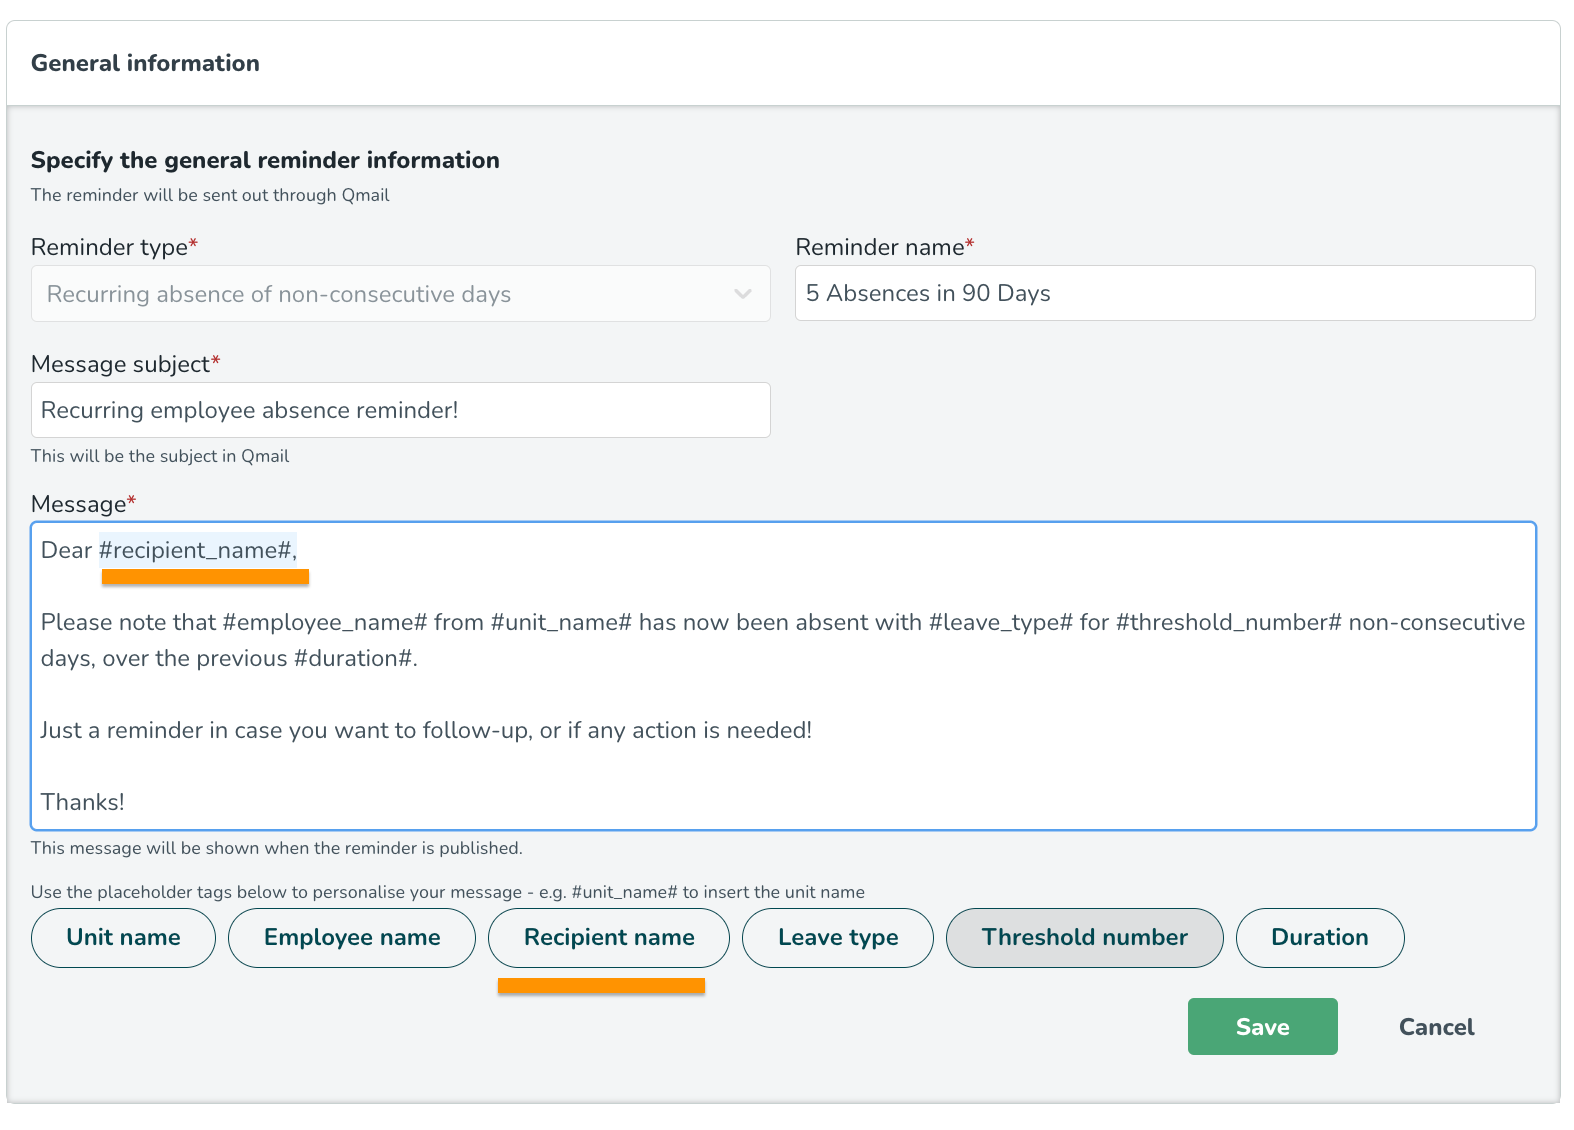
Dynamic placeholders
Dynamic placeholders allow you to better customize the subject and message of your reminders so that your reminders will include dynamic information to enable personalized information within the content of each reminder.
#recipient_name# (via the the information will be dynamic, so rather than reading a static Dear Employee the placeholder will automatically be replaced by the name of the recipient for that reminder - for example, Dear Erik.Each reminder type has different placeholders available, as indicated by the “quick insert” options along the bottom, based on the criteria of each reminder type. With it - you can better customize every one of your reminders with the most critical information for each recipient.
Placeholders | Description |
Employee name | Adds a dynamic placeholder for the name of the employee affected by the reminder. |
Unit name | Adds a dynamic placeholder that will add the name of the unit of the employee affected by the reminder. |
Recipient name | Adds a dynamic placeholder that will add the name of the user who will receive the reminder. |
Leave type | Adds a dynamic placeholder that will add the name of the leave type that triggers the reminder. |
Threshold number | Adds a dynamic placeholder for the threshold number for a leave type used in the reminder. |
Duration | Adds a dynamic placeholder for the duration of the absence. |
Below is an example of how dynamic placeholders could be used in a reminder message: