Forecast configuration
 Updated
by
Leigh Hutchens
Updated
by
Leigh Hutchens
In Forecast, you are able to configure a forecast to be both created automatically and also to display granularity in less than an hour.
- Go to account settings.
- Go to Statistics > Forecast configurations.
- Click Add.
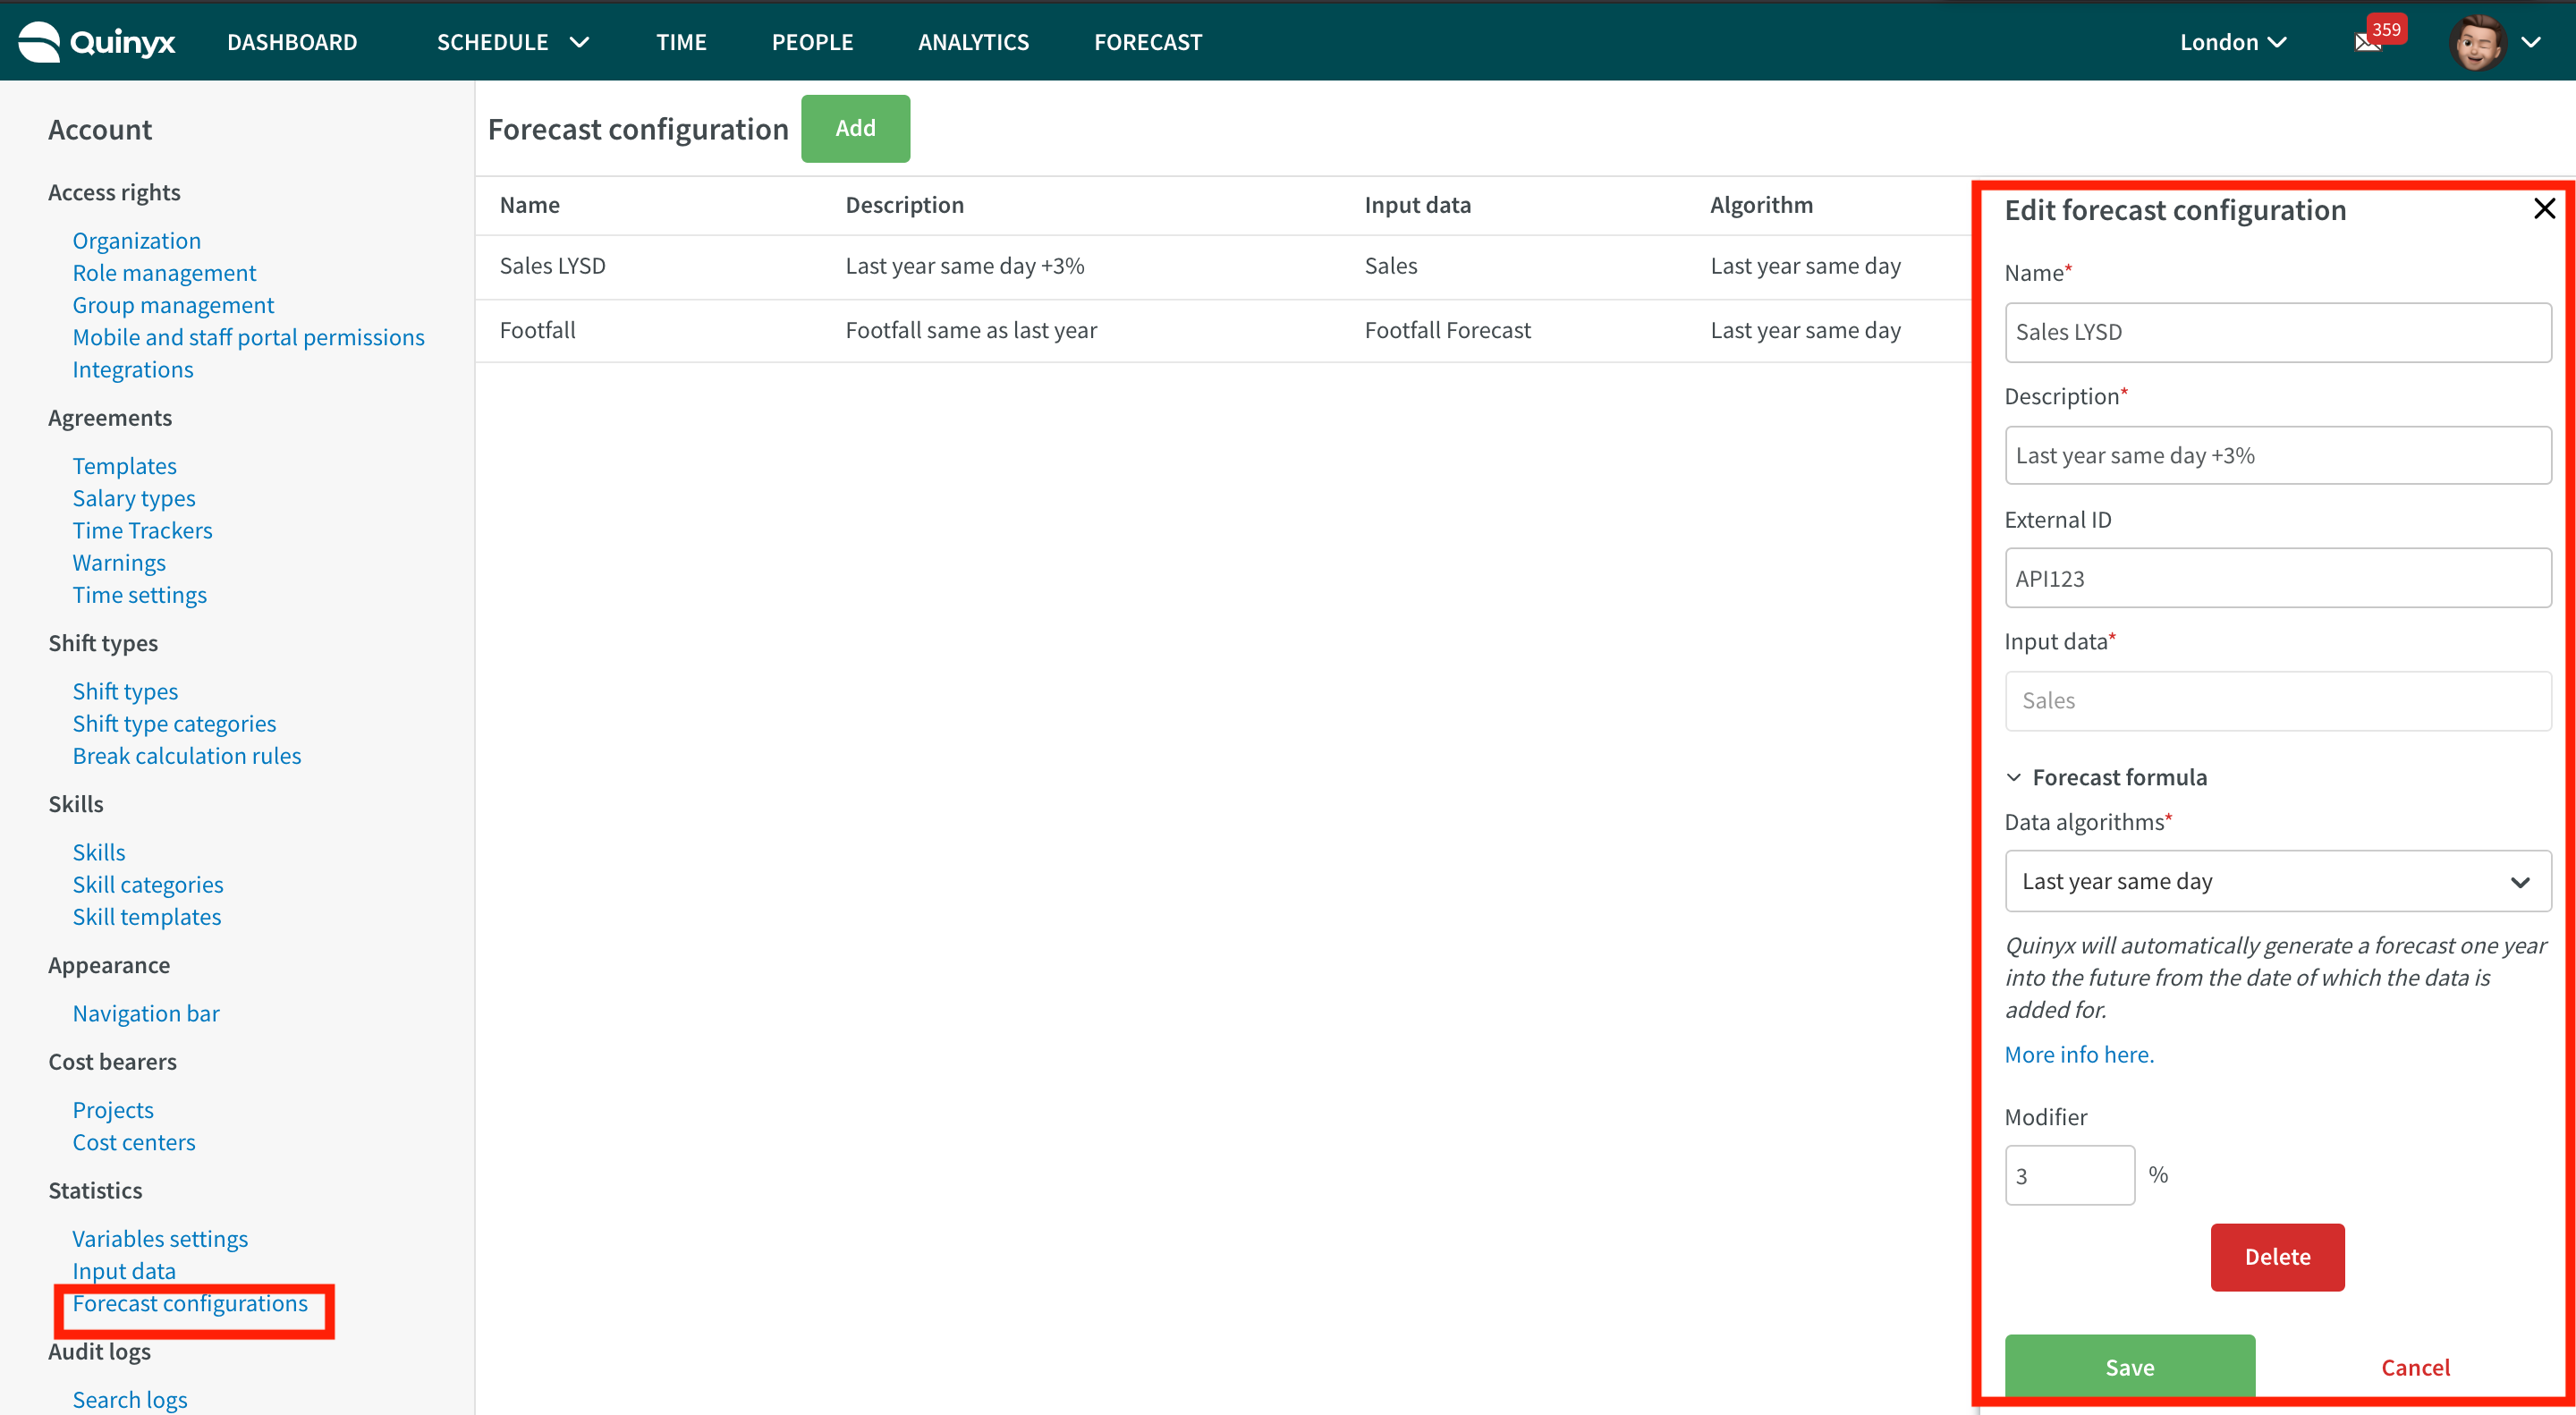
Name | This is the name of the forecast and how it will be named in schedule views and other relevant views |
Description | A description of this configuration to be able to easily identify it if many configurations are created |
External ID | An id for referencing to this specific forecast configuration when using the API |
Variable | Here you choose what input data should be used, as set up in Statistics > Input data. You may have multiple configurations for the same input data |
Data algorithms | This is where you define what algorithms to use. Currently the following exists
|
Modifier % | With this you may modify the previously selected algorithm with a modifier in % |
After you have added input data corresponding to the data that you will send into Quinyx, you can continue to configure or edit your forecast configuration on account manager level. Click here for guidance.