Employee Hub Admin - Organizational management
Quinyx operates using two types of hierarchies: unit hierarchy and collaboration groups. Employees are assigned to units, and these units (or individual users) are linked to collaboration groups. Collaboration groups manage the user experience within the Employee Hub, determining factors like content access and distribution. However, to get the collaboration group up and running, you must create an organizational structure to connect the collaboration group.
Configuring and using the Quinyx Admin portal is a multi-step process.
- Organizational management: Create your organization in the Quinyx Admin portal.
- Collaboration Group management: Set up collaboration groups to structure your teams and associate units to collaboration groups to organize your workforce by units.
- User management: Associate employees to collaboration groups to ensure they are assigned to the correct groups.
- Role and permission management: Define and control user access by setting up roles, editing permissions, and managing staff categories.
Organizational structure
The diagram below illustrates the organizational structure and hierarchy within the Quinyx platform. It shows how employees are organized into districts and units, which are further grouped into collaboration groups. These collaboration groups are crucial in determining the user experience in the Employee Hub, such as controlling access to content and distribution options. The diagram highlights two distinct hierarchies, unit and collaboration groups, demonstrating how various entities like HQ, managers, and stores are interconnected.
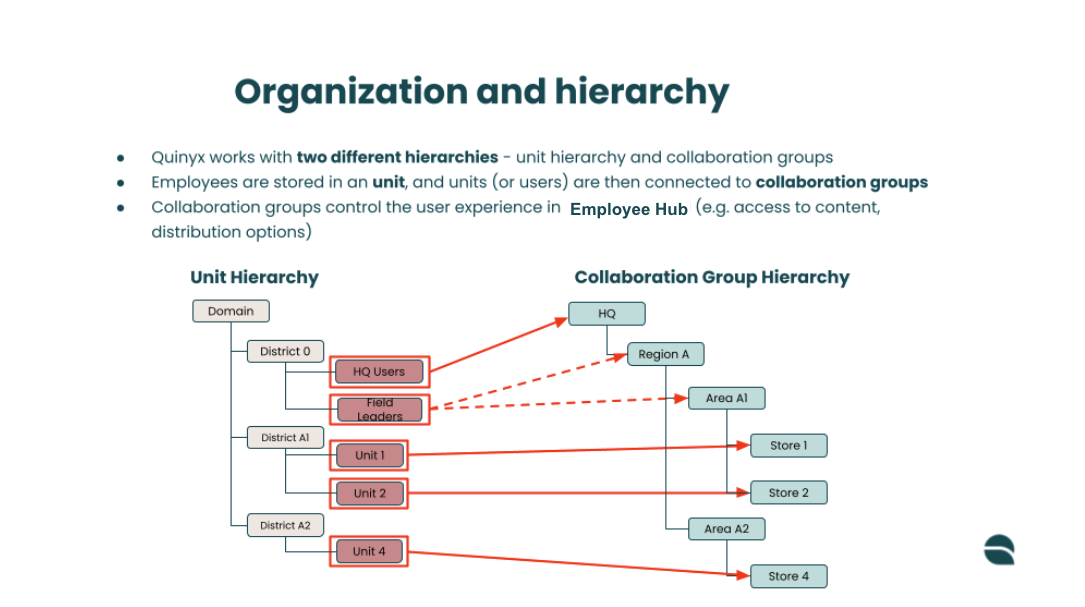
The company’s organizational structure is often a good starting point for setting up your configuration. However, you may need to make some adjustments to achieve the specific permission levels you want in Quinyx. The structure in Quinyx doesn’t need to match your company’s actual organizational structure exactly.
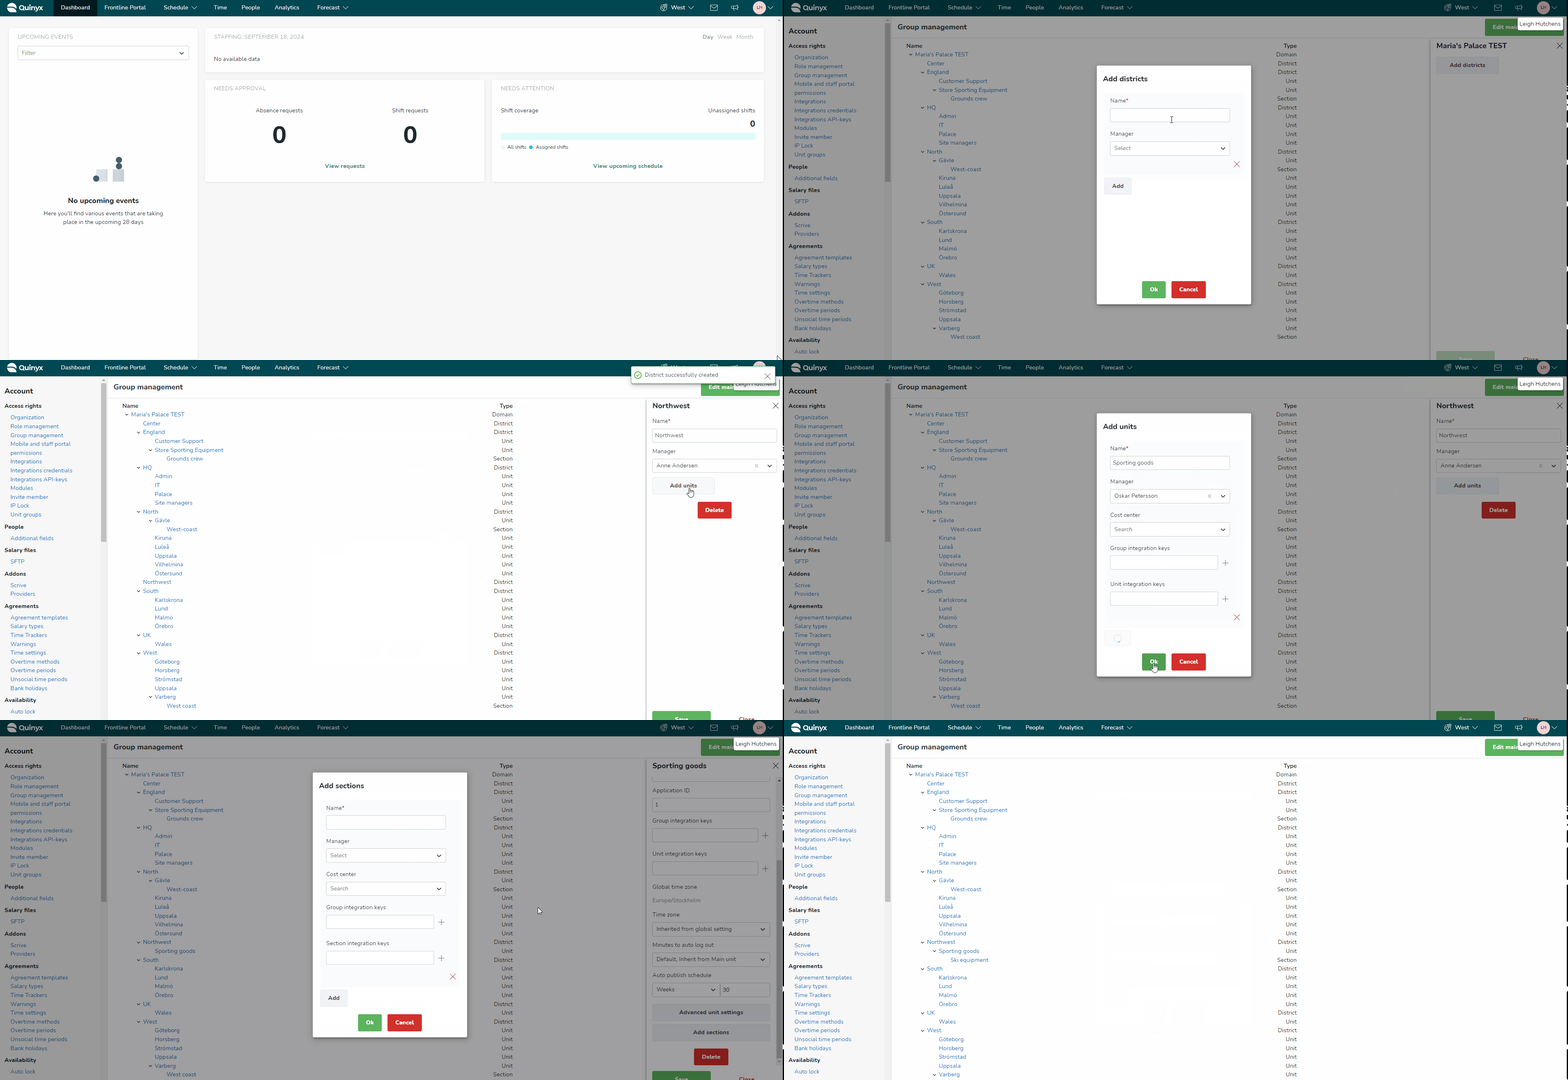
Adding a new store or group
Organizing employees and stores into units and groups is vital for efficient operations and content distribution. We will give you a quick explanation of how to create and configure units, but you can click here to read a more in-depth article about group management.
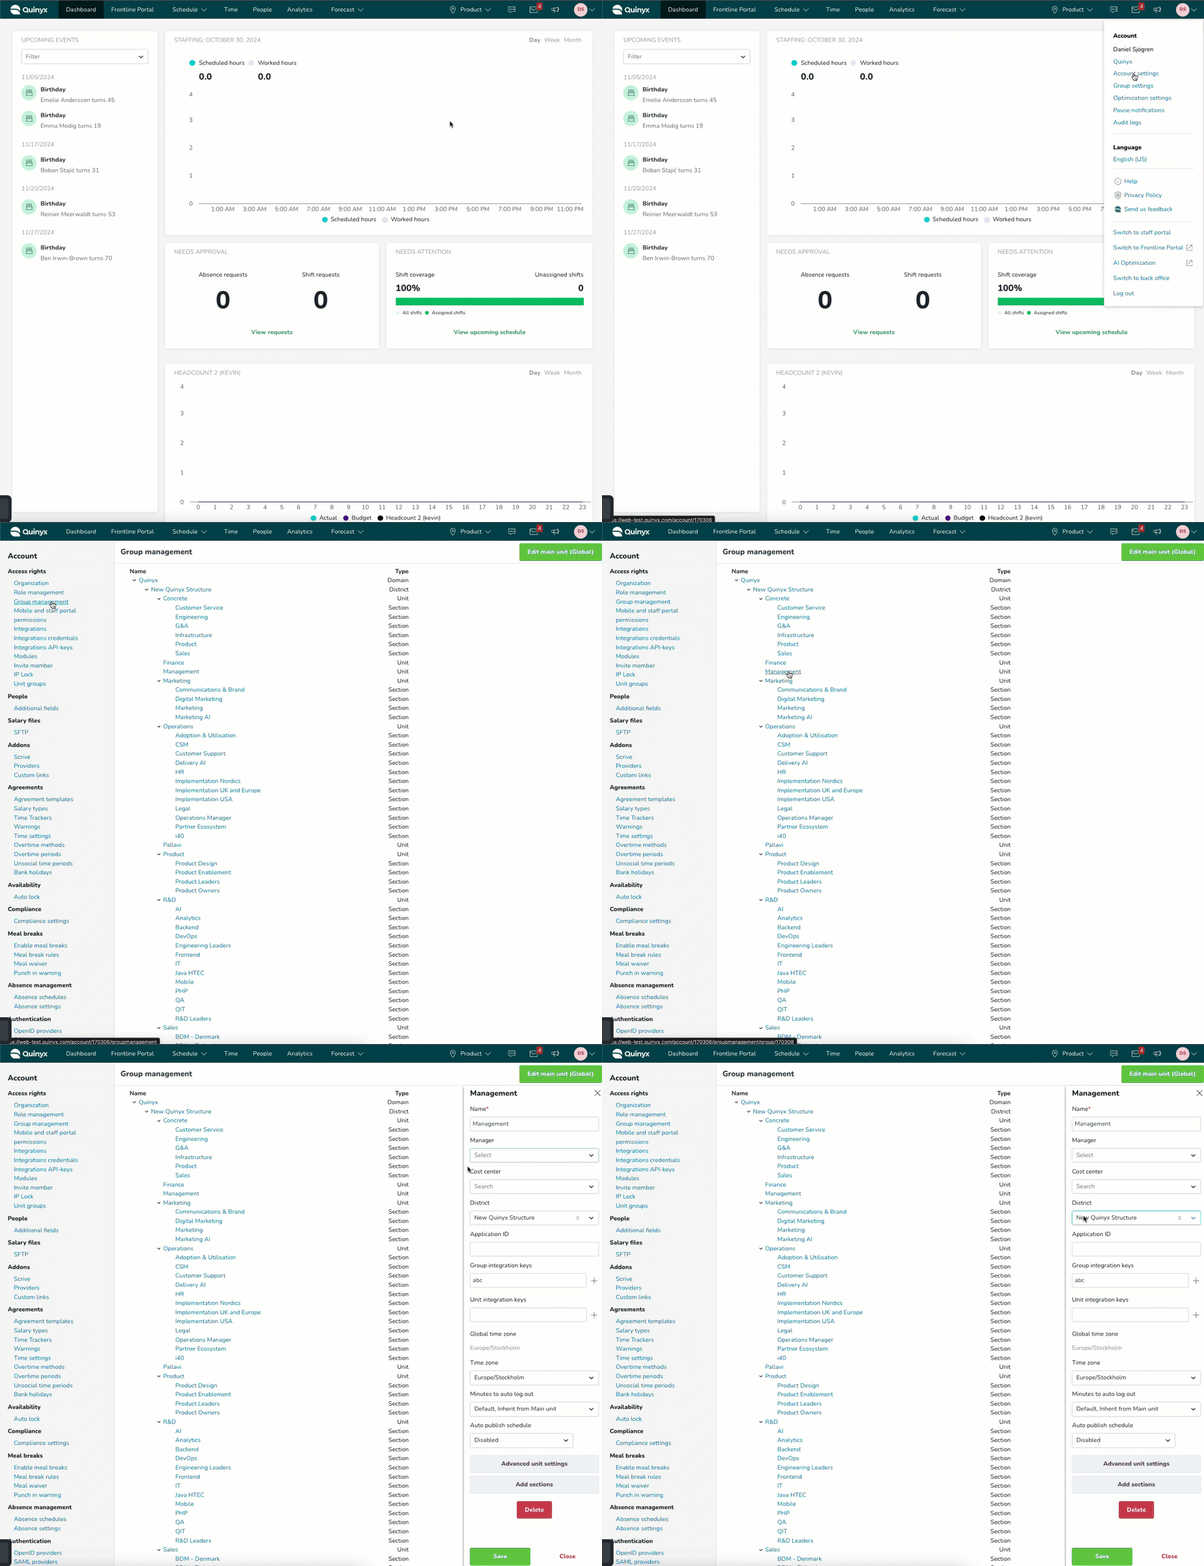
- Navigate to Account settings > Group management.
- At the top of the organizational hierarchy tree, select the Domain.
- Select the Add districts button and set the name of the district and a manager for the new district.
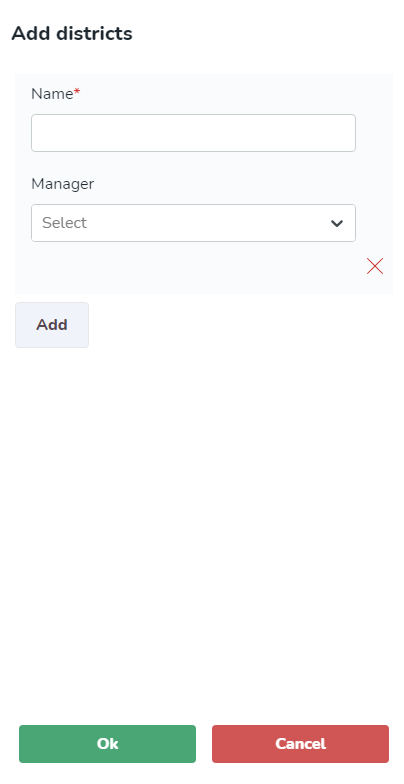
- Select the Ok button.
- Select the newly created district.
- Select the Add units button.
- Set the Name, manager, cost center, and each integration key for your unit.
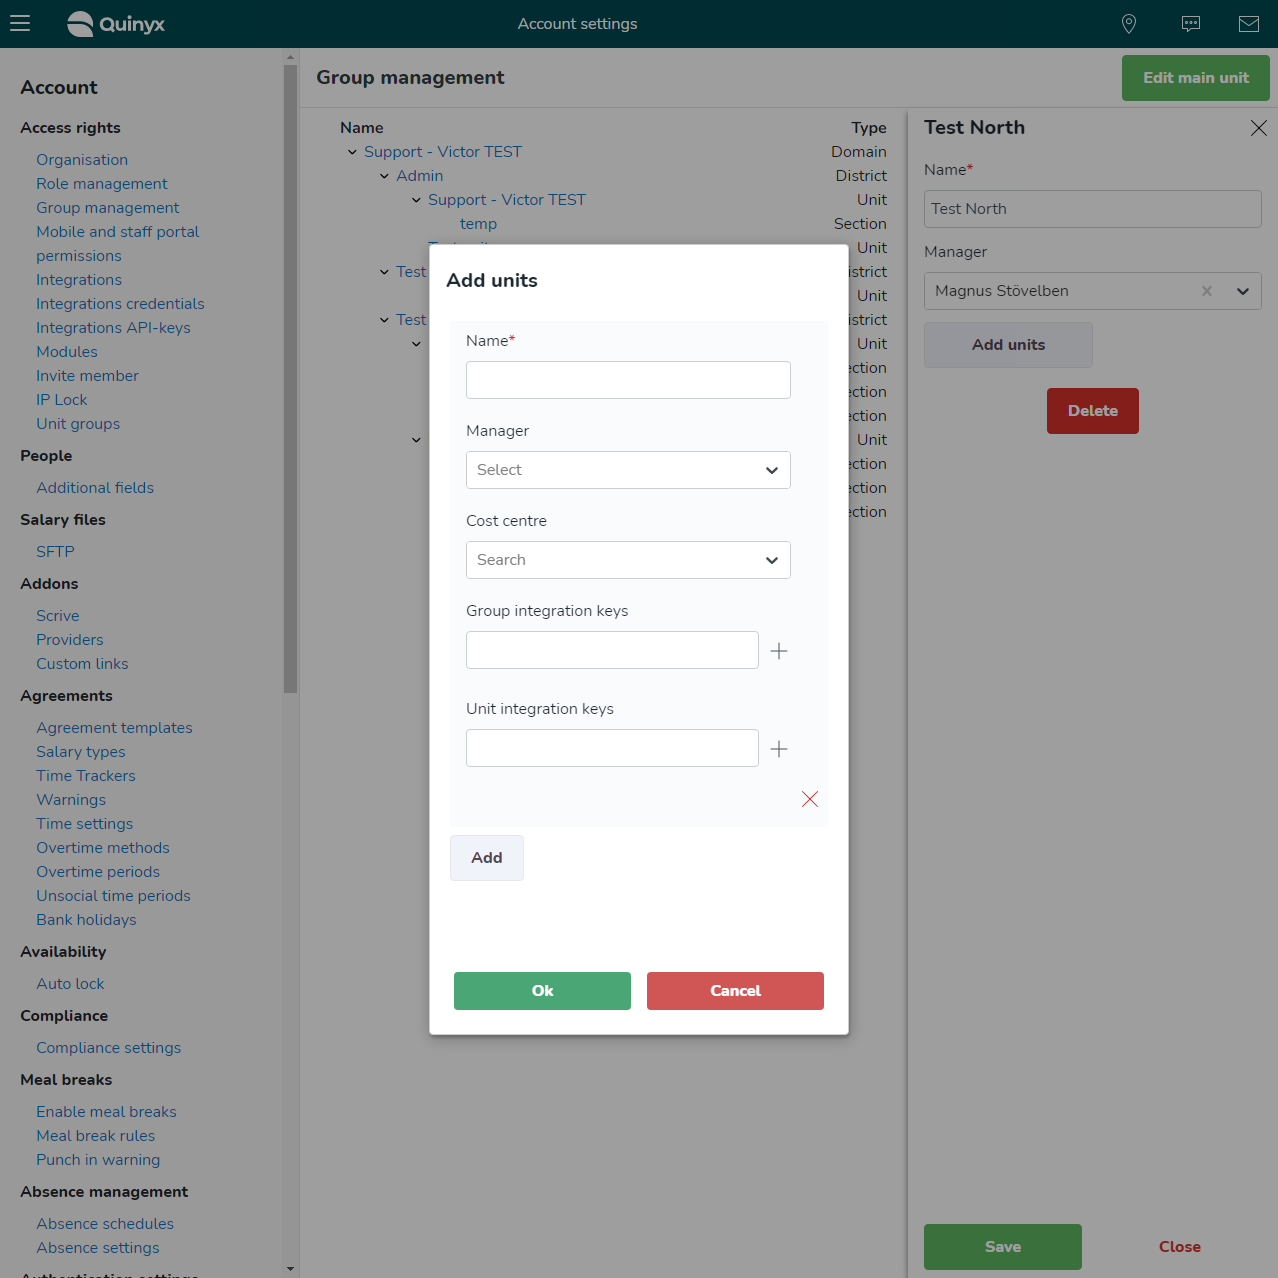
- Select the Ok button.
Your district, unit, or section has been added. The Employee Hub needs collaboration groups as well as the organization. Click here to read more about setting up a collaboration group and associating users/ units.
Editing a Store or Group
Editing a Store
- Navigate to Account settings > Group management.
- In the organizational hierarchy tree, click on the district, unit, or section you wish to edit.
- In the side panel, you can edit the name, manager, cost center, and group and integration keys.
Editing a Group
- Navigate to Account settings > Employee Hub settings > Collaboration groups > select the collaboration group you want to edit.
- A side panel will open where you can edit the Collaboration group name, Group type label, Domo embed ID, Associated groups, Associated employees, and Child collaboration groups.

If you want to edit an existing integration key, change it before saving the section. If you want to remove an existing integration key, delete the entered key from the field before saving the section.

