Employee Hub - Create a story
 Updated
by
Daniel Sjögren
Updated
by
Daniel Sjögren
You can create and use stories to give users a clear view of things I need to know.
Getting Started
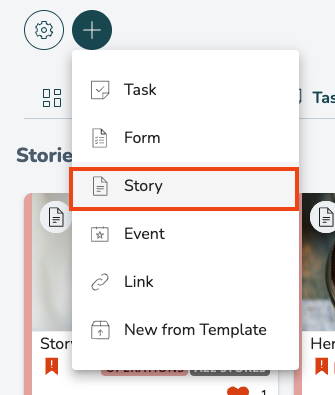
You can create a new story by clicking on the + icon in the header.

Choose the Story button within the drop-down view.
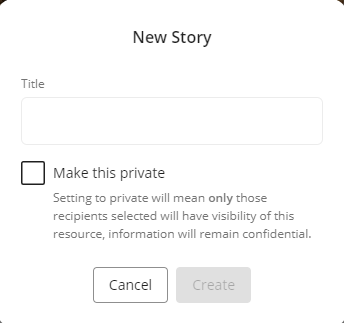
You will be given two options once the Story button has been selected. The first option is to give your new story a title. The second option is to make the story private or not. If you select the checkbox and make a story private, the story will only be visible to the recipients and author.
Cover Image
Add a cover image to make your story stand out in the dashboard. To do this, select the plus icon within the Cover Image field.
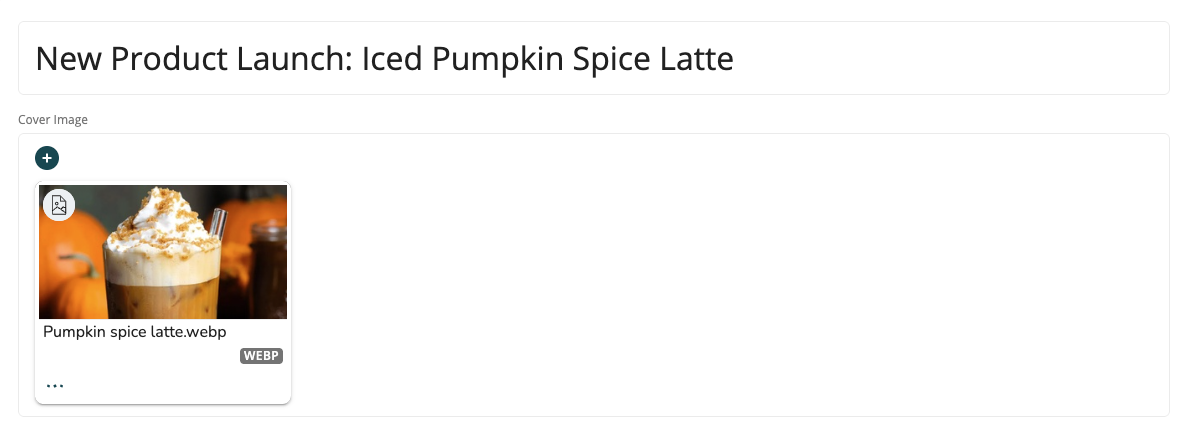
Once the plus button has been selected, you will be redirected to a page where you can upload an image. You can either select the blue file icon and select what image to upload or drag and drop the image to this page. Once an image has been selected, you can hit the Save and then the Upload button to add the image as a cover image for your story.
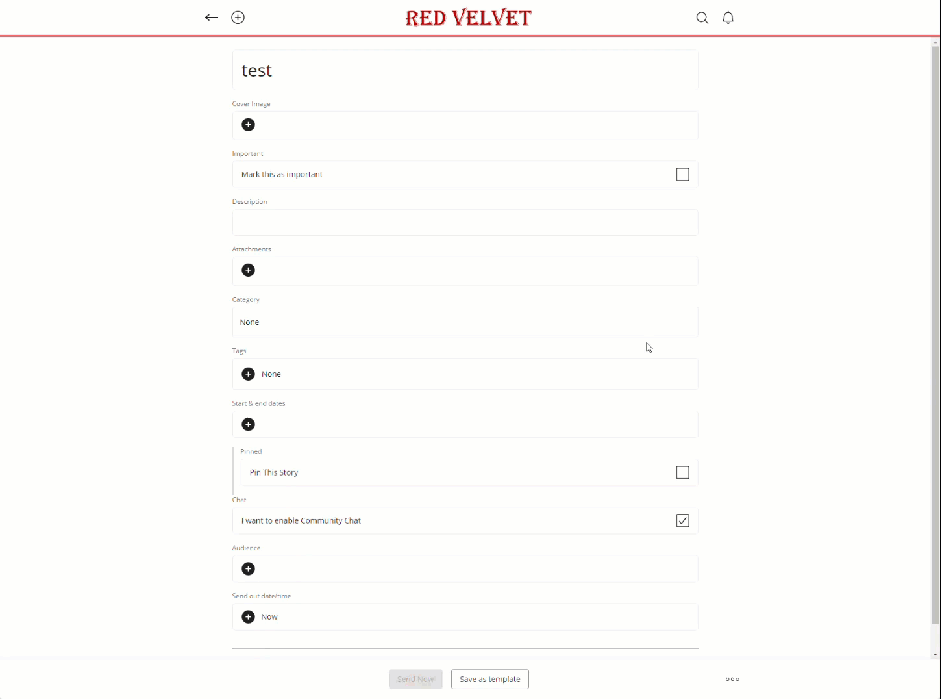
Important
If necessary or useful, you can mark the story as important.

Description
Enter a description. Use this to explain the story in detail. You can format your description, and you can:
- Change text size and color
- Add links
- Insert images
- Embed videos (from a .mp4 file or from a YouTube/Vimeo link)

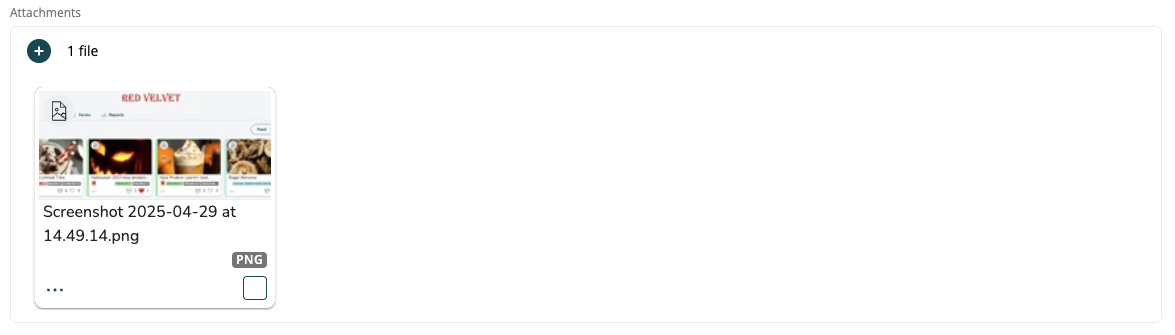
Attachments
Add attachments to support your story. You can add most types of files here, but if you add image or multi-page PDF files, the recipients will be able to view these files within the Story without needing to download them.
Category
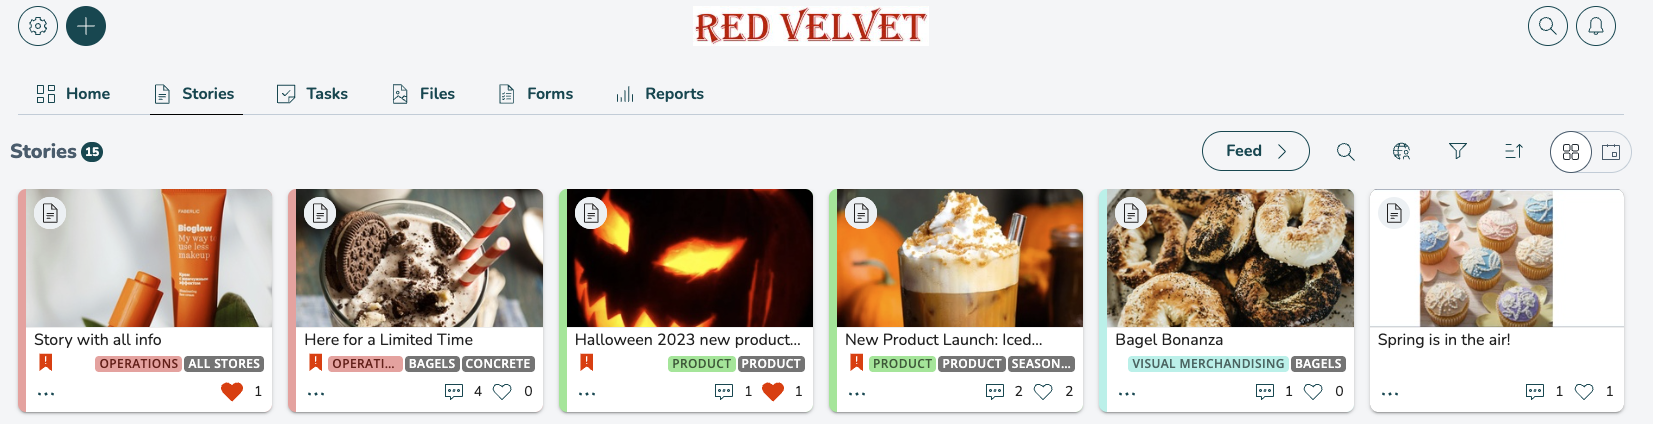
You can add a category to your story to filter it in the Story dashboard.

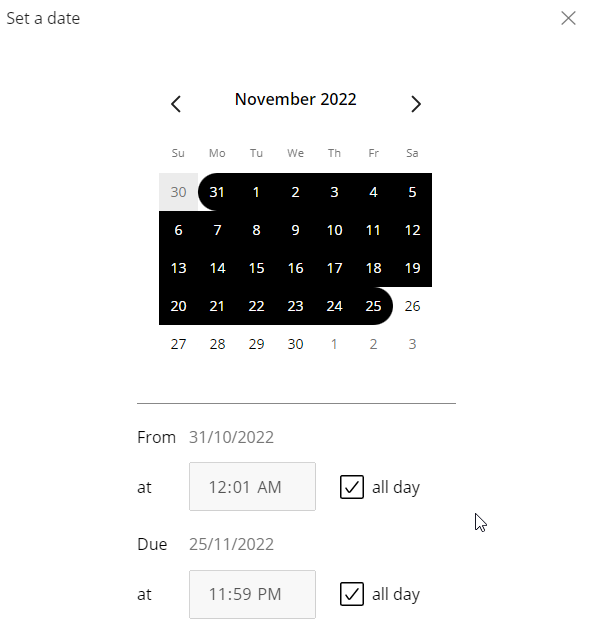
Start & End dates
You can set a start and end date for the story. This will determine the dates the story appears on the calendar. If no start/end date is selected, the story will not appear on the calendar at all.
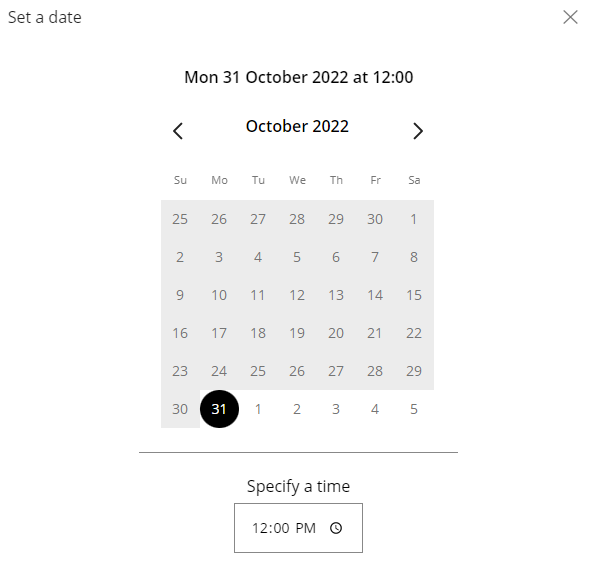
Send out date/time
You can select the date and time the story will be sent to the recipients. The default value of this setting is Now, meaning that the story will be sent immediately once the Send Now button has been selected. If you choose a future date, then the story will be sent out on said date.

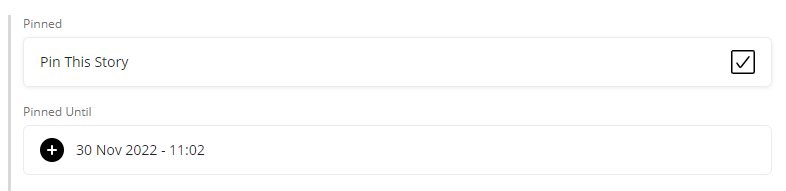
Pin this Story
Head office teams and field leaders can promote content to ensure key information is consumed by all relevant staff and is always available in a prominent area of the application. Content can be pinned for a particular time period to the top of the user’s Launchpad (homepage). Pinned content will remain on a store/user's homepage even when it has been read by that store/user.
Community Chat
If you'd like the audience to be able to discuss the Story you're sharing, ensure that you enable Community Chat.

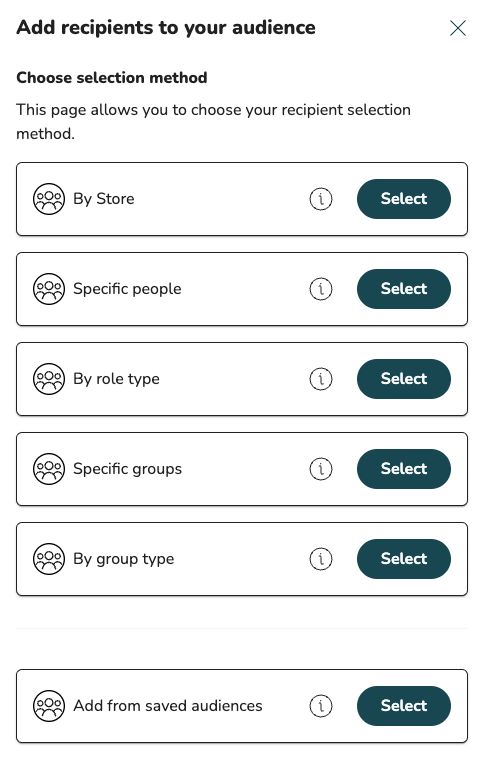
Audience
Choose who the story should be shared with. Below are the listed recipient selection methods you can choose from:
- Specific groups: Selecting using this method allows you to search through your organization for specific groups and add only those groups to your audience.
- By group type: Selecting using this method allows you to select all groups of the desired type located within and beneath your chosen level in the organization as recipients. For example, it will allow you to select all store groups within a specific region.
- By Store: This mode operates like "Select by group type", but with a streamlined step: it automatically chooses the tasking group type, taking you straight to the hierarchy for group selection.
- By role type: Selecting using this method allows you to pick a role type and then pick a group within your organization. This will select all roles of the desired type located within and beneath your chosen level in the organization. For example, it will allow you to select all managers within a specific region.
- Add from saved audiences: This mode allows you to add recipients from existing saved audience lists. It also adds the recipients without adding associated settings, which means your current settings for your audience is retained.
You'll be able to see at a glance which stores or groups will be able to access this story.

The audience can be edited after it is published if required.
Advanced actions in story details
There are some advanced actions you can take within the story's details. These actions differ depending on whether the story has been distributed or not. To access the advanced actions, you can select the icon with three dots in the bottom right corner.
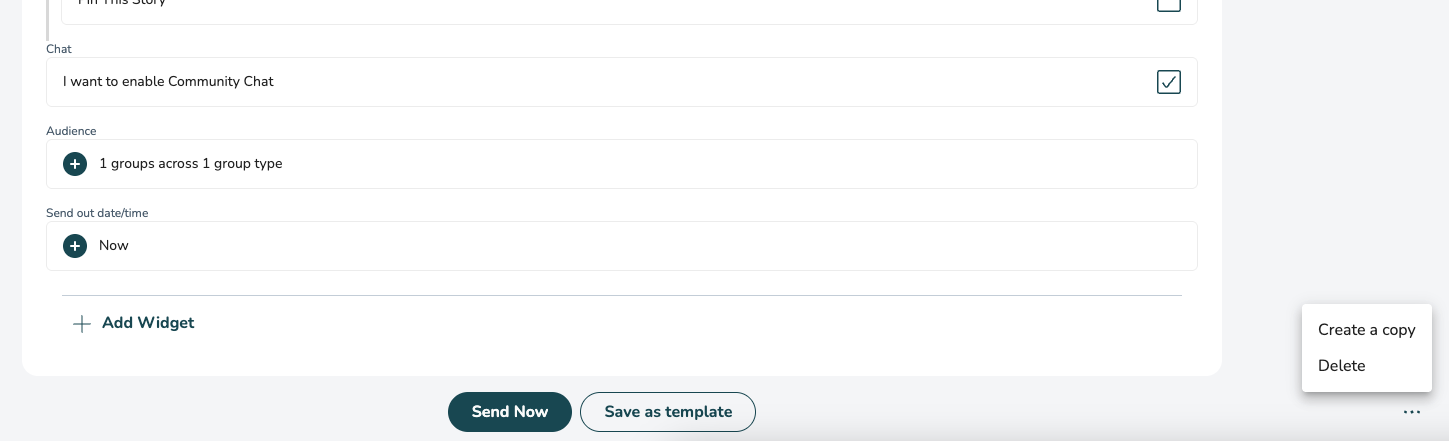
Once the button has been selected, you have three options:
- Create a copy of the story.
- Download all uploaded files to the story.
- Delete the story.
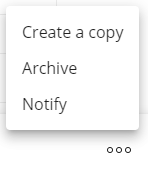
These three options will appear before the story has been distributed. If you select the icon with three dots in the bottom right corner within the details of a story that has been distributed, you will find these three options instead:
- Create a copy of the story.
- Archive the story.
- Notify recipients regarding the story.