Base schedule basics
There are several ways to build a schedule in Quinyx. The most common way is to combine scheduling of longer periods with ad hoc shifts in the schedule. In Quinyx, it’s possible to schedule longer periods in a simple and quick way. We call the function Base schedule. A base schedule is used to create a rolling schedule that follows the same pattern over a longer period of time. To navigate to Base schedule, click Schedule in the top menu and select Base Schedule.

When we create a schedule, there are two steps that you must do:
- Create your base schedule.
- Roll it out in the actual schedule, in other words, activate it. This will make it visible to staff members.
One schedule period, one rotation pattern
Base schedules can contain multiple employees and have one rotation pattern. Place all employees of your group (be it a unit or section) that are to have the same schedule period and rotation pattern in the same base schedule.
Which employees can be scheduled in my base schedule?
Active employees with a role today, in the past, or in the future will always display so you can schedule them as per your needs. This is because in theory, the base schedule you're working on might be rolled out in the future, past, or present.
If an employee at a later point in time is set to inactive, they will still remain in the base schedule since you might want to make re-rollouts for periods in the past when the employee still was active and had an active role on the Quinyx group in question. However, once you reassign or unassign the employee from all their shifts in the base schedule, the employee will disappear from the base schedule in question.
Base schedule features
Loading indicator
The top bar in the Base schedule features the same loading indicator as in Schedule. It appears as a blue, spinning circle in the top bar:

The loading indicator will appear as long as Quinyx is working on fetching and displaying new schedule items and/or employees. It won't, however, appear when you remove or rearrange data, such as when you're filtering out data already present in your base schedule or when you're editing sorting mode.
Preliminary nominal hours
Read more about preliminary nominal hours here.
View selection
By default, you see your entire base schedule from the first day of Week 1 until the last day of Week X. To see one day at a time, click the name of the weekday in question in the view or click the All icon in the menu. You can also select the Day or Week icon:

You can browse the days or weeks depending on which selection you made, using the arrows in the menu:

Employee count
You can view the number of employees currently displayed in the base schedule.

This count is useful any time you want to quickly get an idea of the number of employees you’re currently looking at in your schedule or base schedule.
Example 1
You just want to see how many people in total are working at your location today, so you navigate to the day view and make sure that the only filter groupings ticked are shifts, tasks, and punches and that Items in current view is selected in the Employee has field.
Example 2
You want to see how many people are currently absent from your location in the currently viewed period, so you select Items in current view and untick all filter groupings except for absences.
The number of employees displays regardless of view mode - day, week, month, or custom - and considers any filters applied. It is visible at all times but will not display if you’re using a very small screen, such as that of a mobile device.
View hour count on shifts
You can see how many hours a shift is in the base schedule on the actual shift:

Tooltips will display when hovering over any of the employee names in the schedule. The tooltip will contain the first and last name of the employee.This allows long employee names were to be fully visible.

View information per employee
You can see in the base schedule per employee when:
- A role has expired
- The main agreement has expired
- Employment has ended
You can see which date any of the above has occurred, and it's indicated with an exclamation mark on top of the employee's profile picture. On hover, you will be able to see additional details:

Quinyx doesn't remove employees with ended employments, they will be visible in the view. You can decide if you want to delete or reassign the shifts.
Note that it's not possible to roll out the base schedule on a date where the employee has not agreement, role or employment. However, you can still plan the employees schedule in the base schedule view and roll out on a date where there has an active employment, role and agreement.
Base schedule printout
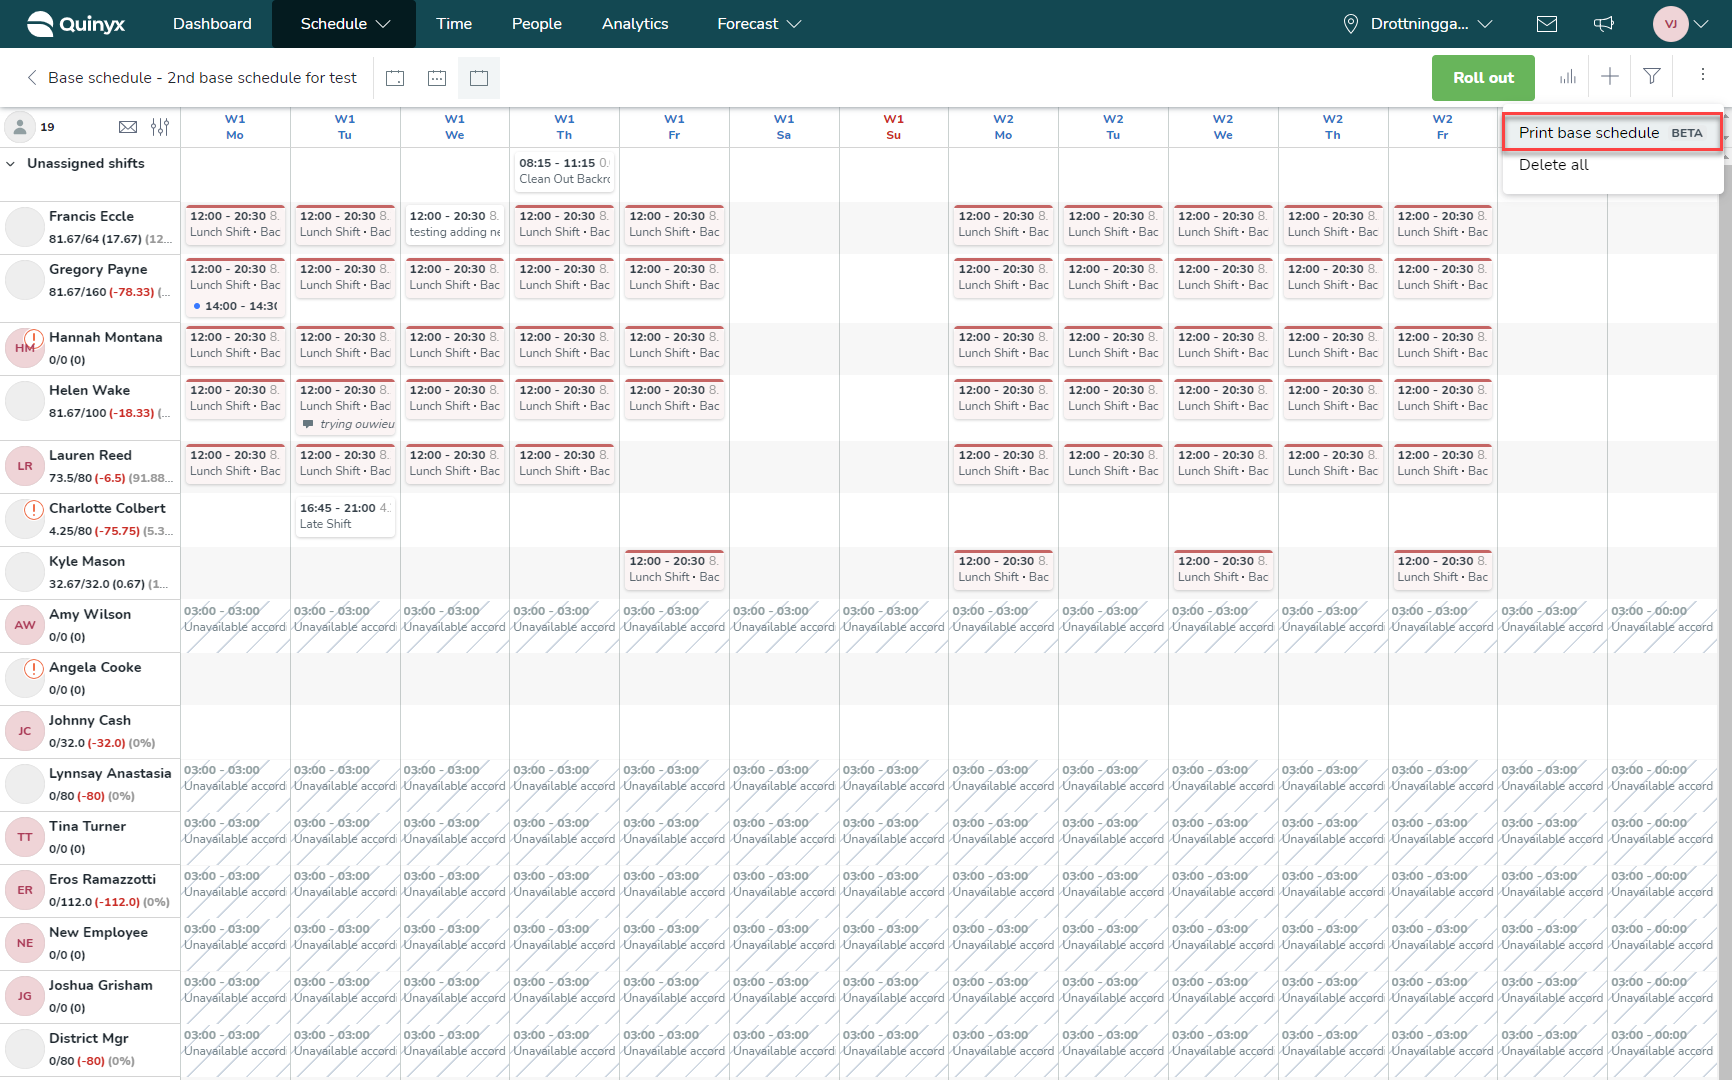
To print the base schedule, navigate to Base Schedule and click the icon with three dots in the top right corner of the view, then click Print schedule [BETA]. If you’re using a PC, You can also click your keyboard’s CTRL and P buttons. For Mac, click Command and P.

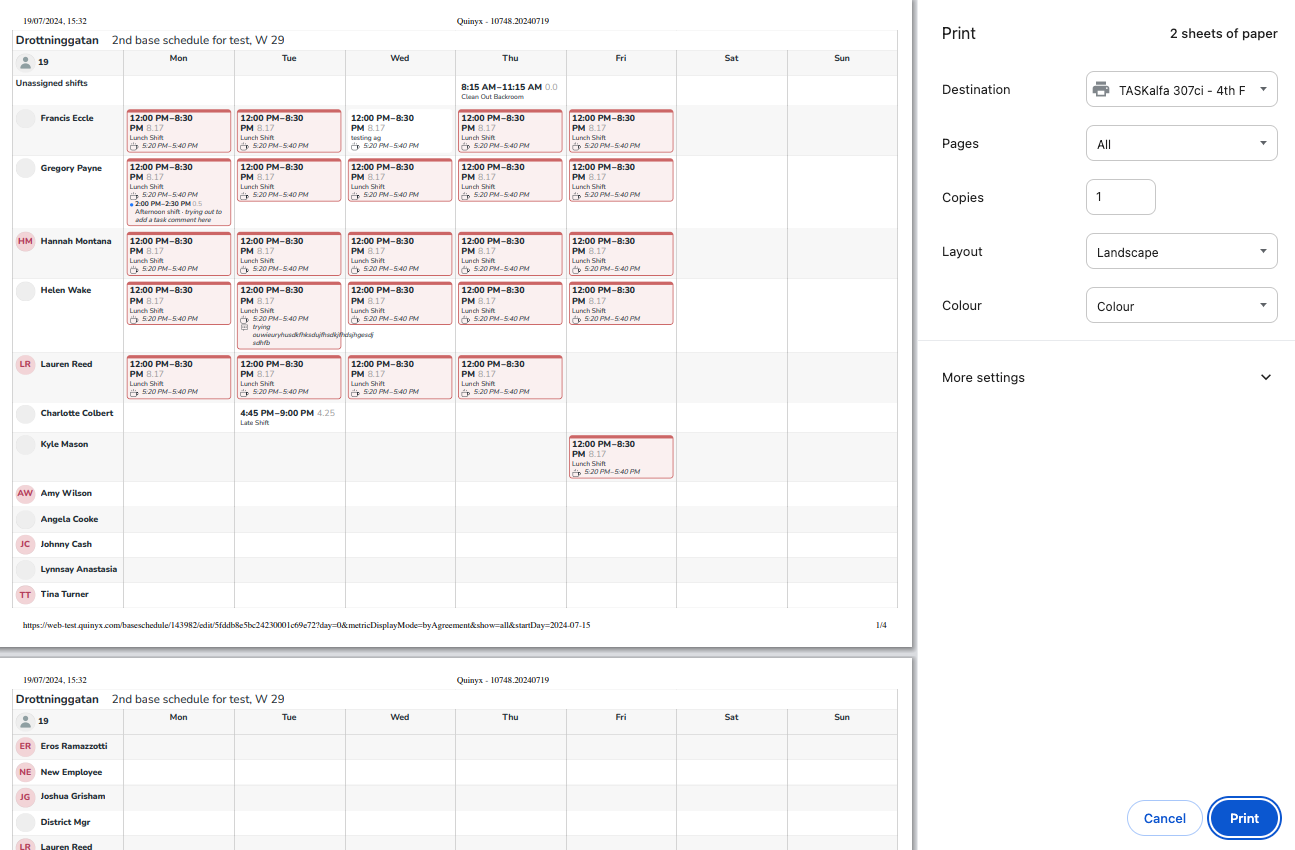
Performing the above keyboard shortcut will bring up your browser’s print dialog, where you can make use of the various options this dialog offers, including whether to print a paper format of the pre-view or rather save it as PDF:

Whether you save the printout as a PDF or print it on paper will differ slightly from the graphical user interface to ensure the information is readable. A reason for this is that some information is only available on hover in Quinyx.
The printout reflects your base schedule selections, such as those made in display options and filters, to allow you to include only the information most relevant to the employee in the printout.
The following lists graphical elements that are different in the printout compared to when you’re viewing the base schedule in Quinyx:
- View mode: If you display more than one week in Quinyx when printing, the printout will print as one week per sheet. In cases where the information in the base schedule doesn’t fit vertically on one sheet, the printout will print all sheets for the first week of the base schedule before doing the same for the remaining weeks of said calendar month.Due to technical constraints, if you print the daily view, it will print in a way that reflects the way a custom view displays in Quinyx when one single calendar date has been selected.
- Breaks: These are indicated using a coffee cup on the shift, followed by the break start and end times for shift types where the setting Show break in mobile app is enabled. For shift types where the setting is disabled, the break duration is displayed instead of the break start and end times.
- Shift comments: The full comment is displayed in the printout, even if it means a line break.
- Shift type name: In cases where the shift type name is too long to fit one same line, these will:
- If the shift type in question uses an abbreviation, the abbreviation will be displayed to save vertical height in the printout.
- If the shift type has no abbreviation, it will be displayed using line breaks.
- Statistics: These are currently not reflected in the printout to be consistent with the information available to employees using the Quinyx mobile app.
- Unavailability: Due to technical constraints, the printout currently doesn’t reflect unavailability information.
- Various interactive elements such as the envelope button for Qmail, entry point to Display options, entry point to filters, entry point to statistics, the “waving hand” indicating shift bookings, and so on aren’t reflected in the printout in an attempt to only include information valuable to the employees.
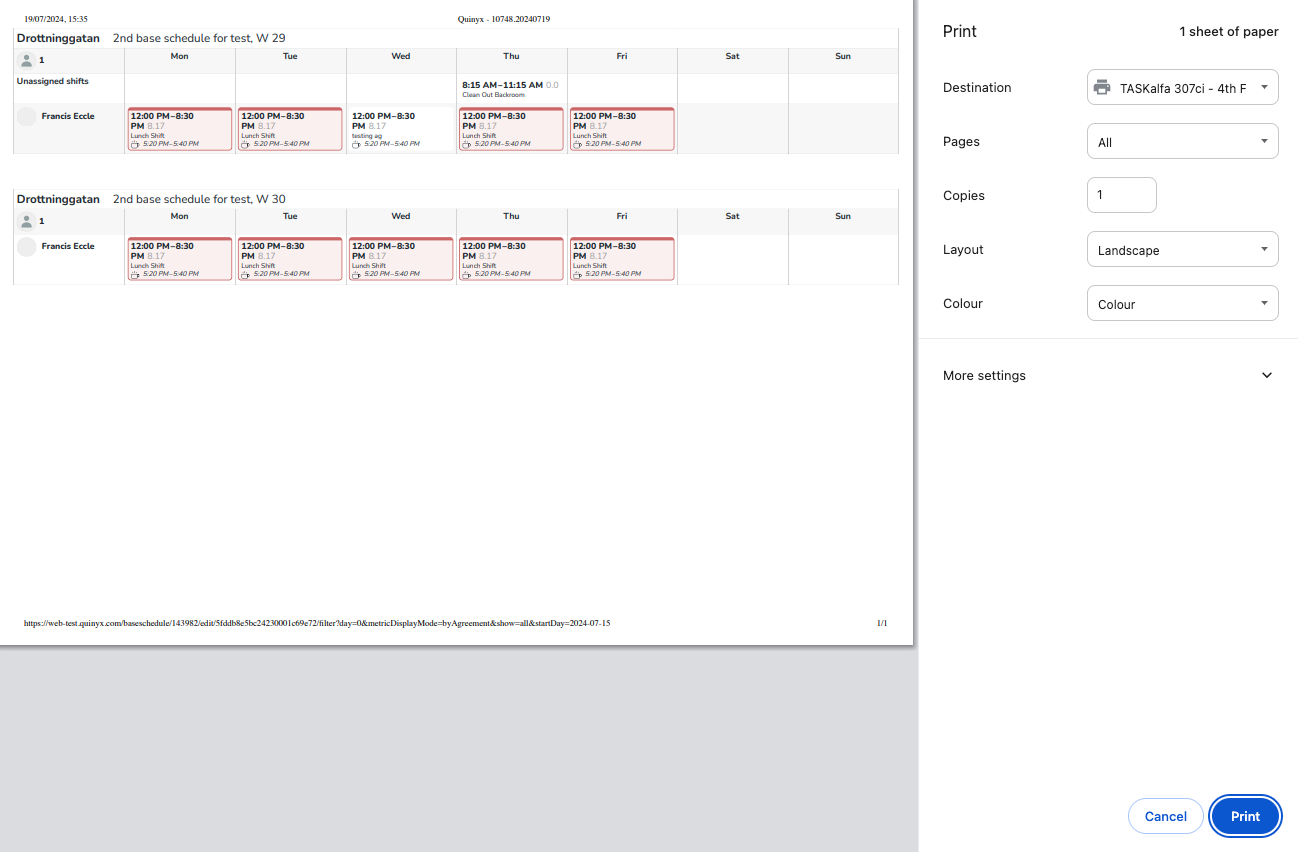
Printing one employee's base schedule
As described above, it is quite common practice to need to print one single employee’s row of a base schedule. The printout will contain as many weeks as possible on the same sheet of paper for your convenience.

Re-using a base schedule
A base schedule can be used over and over. The only thing you need to do is to select which dates to apply the Base schedule to and roll it out. You can read about how changes in Base Schedule and Schedule between rollouts work here.

