Punches
 Updated
by
Daniel Sjögren
Updated
by
Daniel Sjögren
What is a time punch?
A time punch is a record of the exact time an employee starts or ends their work shift. It's a crucial tool for accurately tracking work hours, ensuring fair compensation, and maintaining efficient workforce management. Employees can punch in and out using the Quinyx web app or the mobile app.
Add a punch to a shift
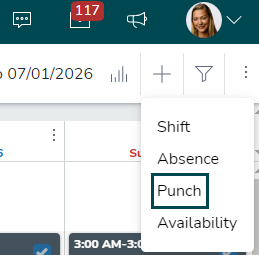
You can add punches in Quinyx by selecting + > Punch in the schedule view.
Select the employee and specify the date to link the punch to the corresponding shift.
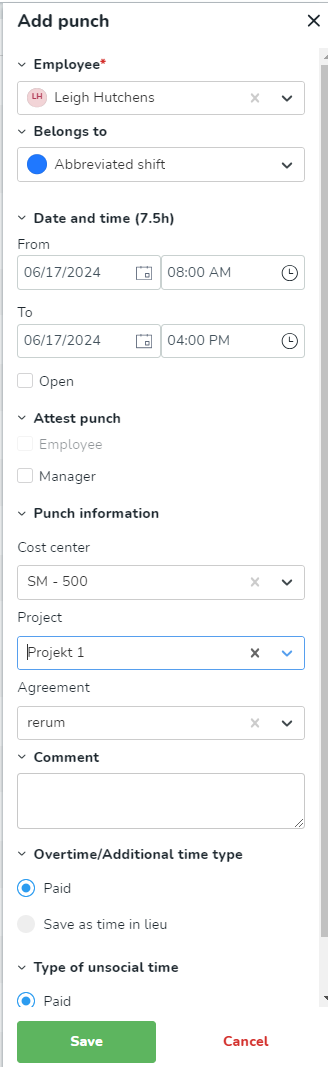
You can select the following fields:
Employee | Select the employee for whom you want to add a punch. |
Belongs to | The shift on which the employee is scheduled. |
Date and time | This section displays and allows you to edit the start and end times of the punch. The time displayed under the shift start and end times of the punch is the punch's initial value. |
Open | If an employee forgets to punch in for an ongoing shift, you can create an open punch during the shift, allowing the employee to punch out when the shift ends. You can only create an open punch for the current day. |
Attest punch | This section contains the check boxes for employees and managers attesting punches. Depending on your Time settings, the employee either has to attest the punch themselves or the manager can attest both for the employee and manager. Take a look at our Attest FAQ article and our Attest all / unattest all worked hours article for lots more information. |
Punch information |
|
Comment | Leaving a comment regarding the punch may be useful if, for instance, the cost center selected for the punch differs from the one usually used for this employee. In cases like these, the punch comment can help remind yourself and other administrators why this specific punch was set up the way it was. |
Overtime/Additional time type |
This section allows you to indicate whether overtime or additional time in this shift should be paid or saved as time off in lieu by ticking the appropriate radio boxes. The default value is based on the prevailing agreement, but any selection made here will override those settings for this specific punch. For example, if the agreement for Emma Aronsson states that overtime should be paid, but you select to compensate with time off in lieu, your choice will apply for this punch only. |
Type of unsocial time | Unsocial time is an enhanced (or supplemented) rate of pay used to reward and correctly compensate staff for working odd or undesirable hours. This could, for example, be night shifts, weekends, or bank holidays. Options here are:
|
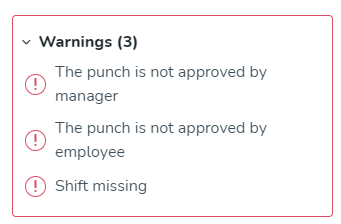
If you accidentally add a punch without a shift, you'll see a warning that a shift is missing.
Away group punches
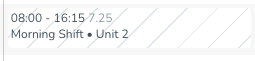
The following information will be displayed for each away-group punch:
- Punch type name
- Punch hour count
- Punch start and end time
- Unit/Section name (for punches where shifts are based in a section, we will display the section name; otherwise, we will display the unit name)
Edit an existing punch
Sometimes, you need to edit a punch for various reasons:
- Correcting errors: Mistakes, such as an employee punching in or out at the wrong time, can happen. Editing allows you to correct these errors to ensure accurate time records.
- Project and cost allocation: You may need to update the cost center or project associated with a punch to reflect the actual work performed, which is essential for budgeting and financial reporting.
- Adding comments or notes: You might need to add a comment to an existing punch to provide context for a particular punch, such as an extended break or a special project assignment.
- Attestation adjustments: If configured, employees and managers might need to attest to punches. Editing ensures that the records are correct before final approval.
Access the Edit punch side panel by selecting the punch. In the side panel, under the Edit punch heading, you can see any warnings associated with the punch.
In the panel, you can view and edit the following details:
Employee | Select the employee for whom you want to add a punch. |
Belongs to | The unit to which the employee belongs. |
Date and time | This section displays and allows you to edit the start and end times of the punch. The time displayed under the shift start and end times of the punch is the punch's initial value. |
Open | If an employee forgets to punch in for an ongoing shift, you can create an open punch during the shift, allowing the employee to punch out when the shift ends. You can only create an open punch for the current day. |
Attest punch | This section contains the check boxes for employees and managers attesting punches. Depending on your Time settings, the employee either has to attest the punch themselves or the manager can attest both for the employee and manager. Take a look at our Attest FAQ article and our Attest all / unattest all worked hours article for lots more information. |
Punch information |
|
Comment | Leaving a comment regarding the punch may be useful if, for instance, the cost center selected for the punch differs from the one usually used for this employee. In cases like these, the punch comment can help remind yourself and other administrators why this specific punch was set up the way it was. |
Overtime/Additional time type |
This section allows you to indicate whether overtime or additional time in this shift should be paid or saved as time off in lieu by ticking the appropriate radio boxes. The default value is based on the prevailing agreement, but any selection made here will override those settings for this specific punch. For example, if the agreement for Emma Aronsson states that overtime should be paid, but you select to compensate with time off in lieu, your choice will apply for this punch only. |
Type of unsocial time | Unsocial time is an enhanced (or supplemented) rate of pay used to reward and correctly compensate staff for working odd or undesirable hours. This could, for example, be night shifts, weekends, or bank holidays. Options here are:
|
Open punch validations
The daybreak setting determines when a new day begins, which directly sets the end time of the valid punch interval. The system draws this daybreak value from the "Business day break" setting located under the Advanced unit settings.
When calculating the valid punch interval, the interval ends exactly at tomorrow's daybreak time, and this end time is excluded from the valid window. Any open punches logged at or after this exact daybreak time will fail validation and be marked as "invalid (future)".
Here is how different daybreak settings affect the interval (assuming a current time of October 16 at 15:00 and a 24-hour Auto punch out flexibility):
- Daybreak = 0 hours: The new day starts at 00:00. The valid punch interval ends at October 17 at 00:00. A punch at 23:55 on October 16 is valid, but a punch at exactly 00:00 on October 17 will fail.
- Daybreak = 2 hours: The new day starts at 02:00. The valid punch interval is extended and ends at October 17 at 02:00. A punch at 01:55 on October 17 is valid, while a punch at exactly 02:00 on October 17 will fail.
In both scenarios, the start of the valid punch interval remains tied to the current time minus the auto punch out flexibility (e.g., October 15 at 15:00).
Punch rounding scenarios
To accommodate the punch rounding settings available for punches that originate in Webpunch and Mobile, which allow an employee to punch in 2 hours before the shift start, we introduced an additional 2 hours post-future daybreak.
Example
- A shift starting at 00:30 and ending at 06:30.
- Daybreak is set to 00:00.
- Punch rounding set to 30 minutes to shift start at punch in.
- Attempt to punch in early at 23:50.
- A future punch will be created to start at 00.00 based on agreement punch rounding settings.
Add a punch to a task
You can connect punches to tasks.
To add a punch to a task:
- In Schedule view, click + > Punch.
- In the Add punch panel, click the employee for whom you want to add a punch.
- Select the tasks from the drop-down, as you would select a shift.
- Choose the date and time.
- Set any other parameters you want to be associated with the punch, like requiring employee and/or manager attest, cost center, project, etc.
- Click Save.
- Now, the punch on the task will be visible in the Schedule view.
Attest punches
Attesting time punches is the process when managers and employees verify and confirm the accuracy of recorded work hours to ensure they reflect the actual time worked.
You can attest punches in a couple of ways:
One at a time
You can attest shifts individually by clicking on the punch.
Bulk attest
You can also bulk attest all the shifts within a given period by clicking the three dots beside an employee's name and selecting Attest all.

If you've attested punches by mistake or if they need to be modified, you can click on the three dots again and select Unattest all.
Pro tips!
- It's useful to create a filter on Unattested punches to ensure you haven't missed anything. Once everything is attested in the period, a green circle will appear around the user's picture. You can find attest status per employee or per unit under Time.
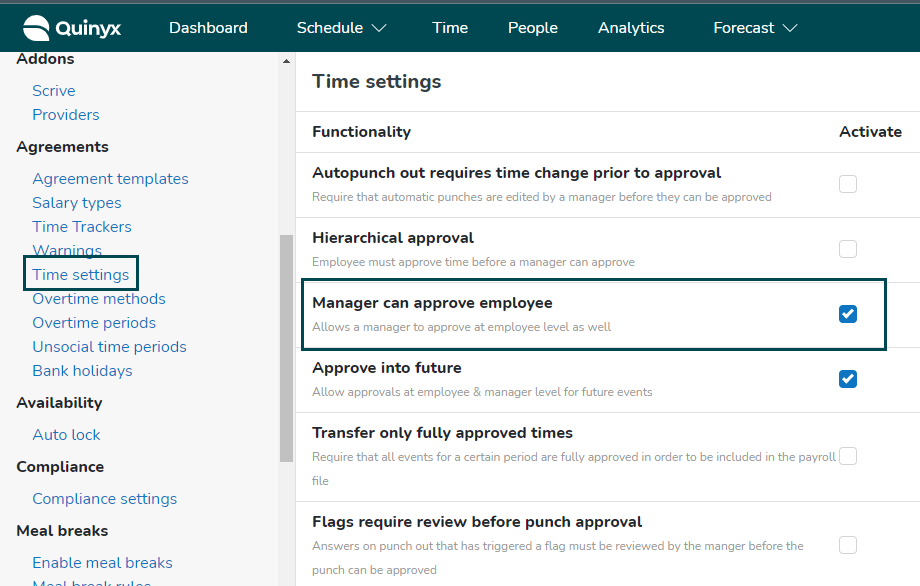
- The attestation process in Quinyx generally involves the employee attesting their hours first, followed by a manager. However, the system does allow for flexibility depending on your internal processes. In Time settings, you can configure the attestation process so that managers can also attest for the employees. However, by doing this, the employee attest checkbox will also be ticked if a manager decides to attest for an employee.
Resources
Want to keep learning about punches? Check out these articles: