Version 0214
 Updated
by
Leigh Hutchens
Updated
by
Leigh Hutchens
- Release summary
- Important notice!
- Quinyx web app Version 0214
Release date TBD
Release summary
Short on time and want a high-level summary? 🚀 Quinyx web app Version 0214 New functionality
New functionality requiring configuration updates
Updates and performance improvements
Bug fixes
Employee Hub Version 0214 New functionality
Updates and performance improvements
Bug fixes
SOAP API / Webservice updates
|
Important notice!
If you haven’t made any changes to the rules in the settings, the system will continue to behave just as it has before.
Quinyx web app Version 0214
Release date TBD
New functionality
New Compliance rules - Max hours per period (weeks)
With this release, we’re adding a new compliance rule to better support legal requirements in Sweden and Finland.
Max hours per period (weeks)
Category: Working Time
This rule addresses a specific compliance need in Sweden’s hospitality sector (hotels and restaurants). According to Swedish labor law, employees may not be scheduled for more than 142 hours over a four-week period.
To set this rule, you’ll need to define:
- Period (Weeks)
- Maximum time per period
How to set up a new rule
- Go to Account Settings and select Schedule compliance
- Open an existing Rule set or create a new one
- Click the (+) sign to add a new rule
- Select Max hours per period
– use the rule category filter to find it faster - Set the configuration and click Save
New functionality requiring configuration updates
Day-specific Bank Holiday (BH) rules: Enhanced BH configurations by day of the week
You can now configure different compensation rules for Bank Holidays based on the day of the week they fall on (e.g., apply one rule if the BH falls on a Monday-Friday and a different rule for a Saturday-Sunday BH). This offers more flexibility for complex compensation scenarios.
Configuration steps:
You can now configure the BH rules based on days of the week by:
- Go to the Bank Holiday rule settings found in Account Settings → Agreement Templates → selected ATs Bank Holiday tab → Select a BH or add one and then select Add rule.
- In the Add rule form. Select ‘Create only on selected days’ checkbox.
- Once selected, this will now activate the dropdown to select days. You can select one of multiple.Please ensure that you select at least one day or you will not be allowed to save.
- Click Save to save your rule.
- You can create multiple rules (max. of up to 7 for each day of the week).
When copying bank holidays to a new year, any day-specific rules you’ve configured (e.g., different rules for Sundays vs. Mondays) will now carry over automatically. This ensures that if a bank holiday falls on a different day next year — say, it’s on a Sunday this year but a Monday next year — the correct rules for that day will still apply. This helps maintain accuracy and reduces the need for manual adjustments year over year.
Updates and performance improvements
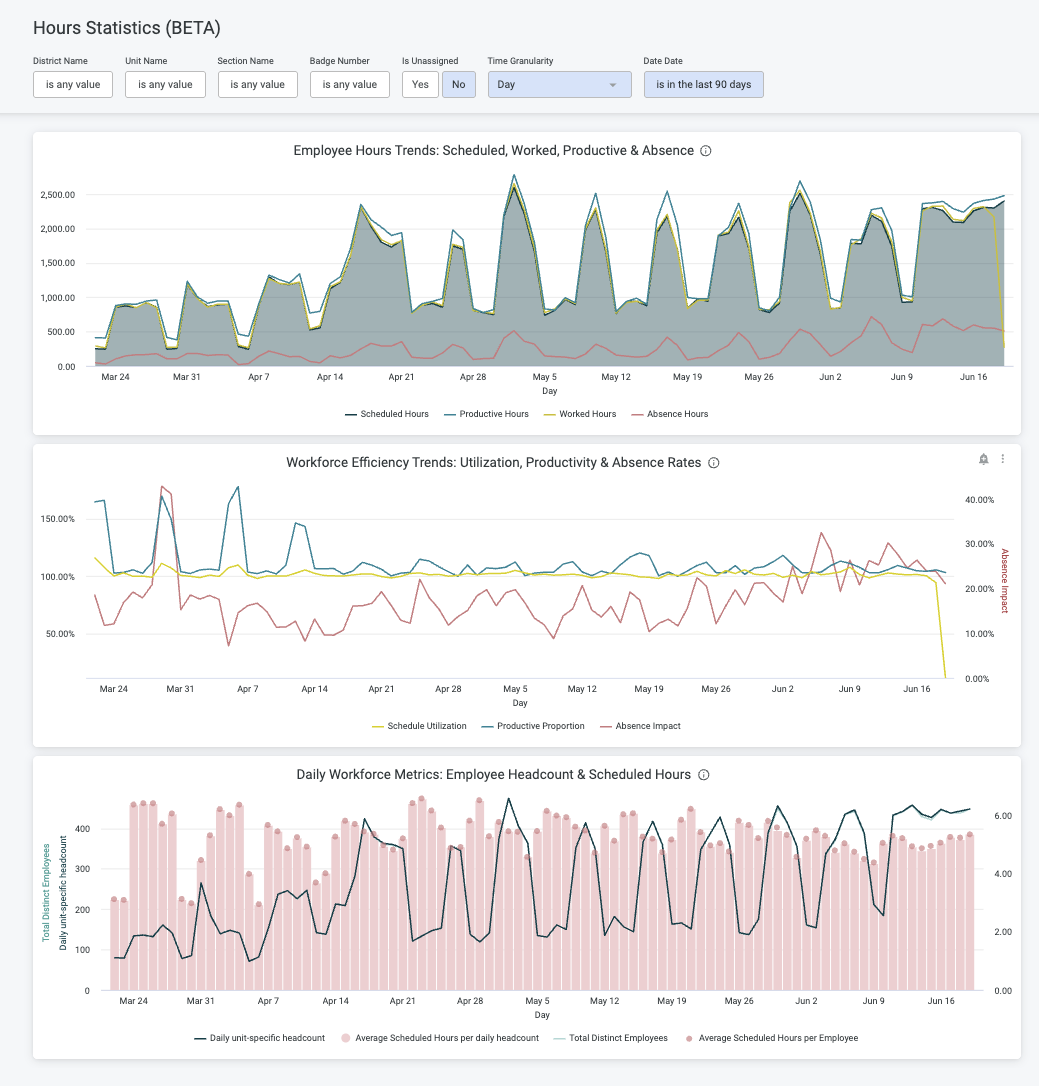
Advanced Analytics - Hours statistics
With this release, we’re improving on our Scheduled vs Worked Hours dashboard, and giving it a new name: Hours Statistics!
The "Hours Statistics" dashboards includes two new insights: productive hours and absence hours. This consolidates scheduled, worked, productive, and absence hours into a single view, enabling new multi-metric combo visuals to replace the existing side-by-side charts, making variance and productivity gaps obvious at a glance.
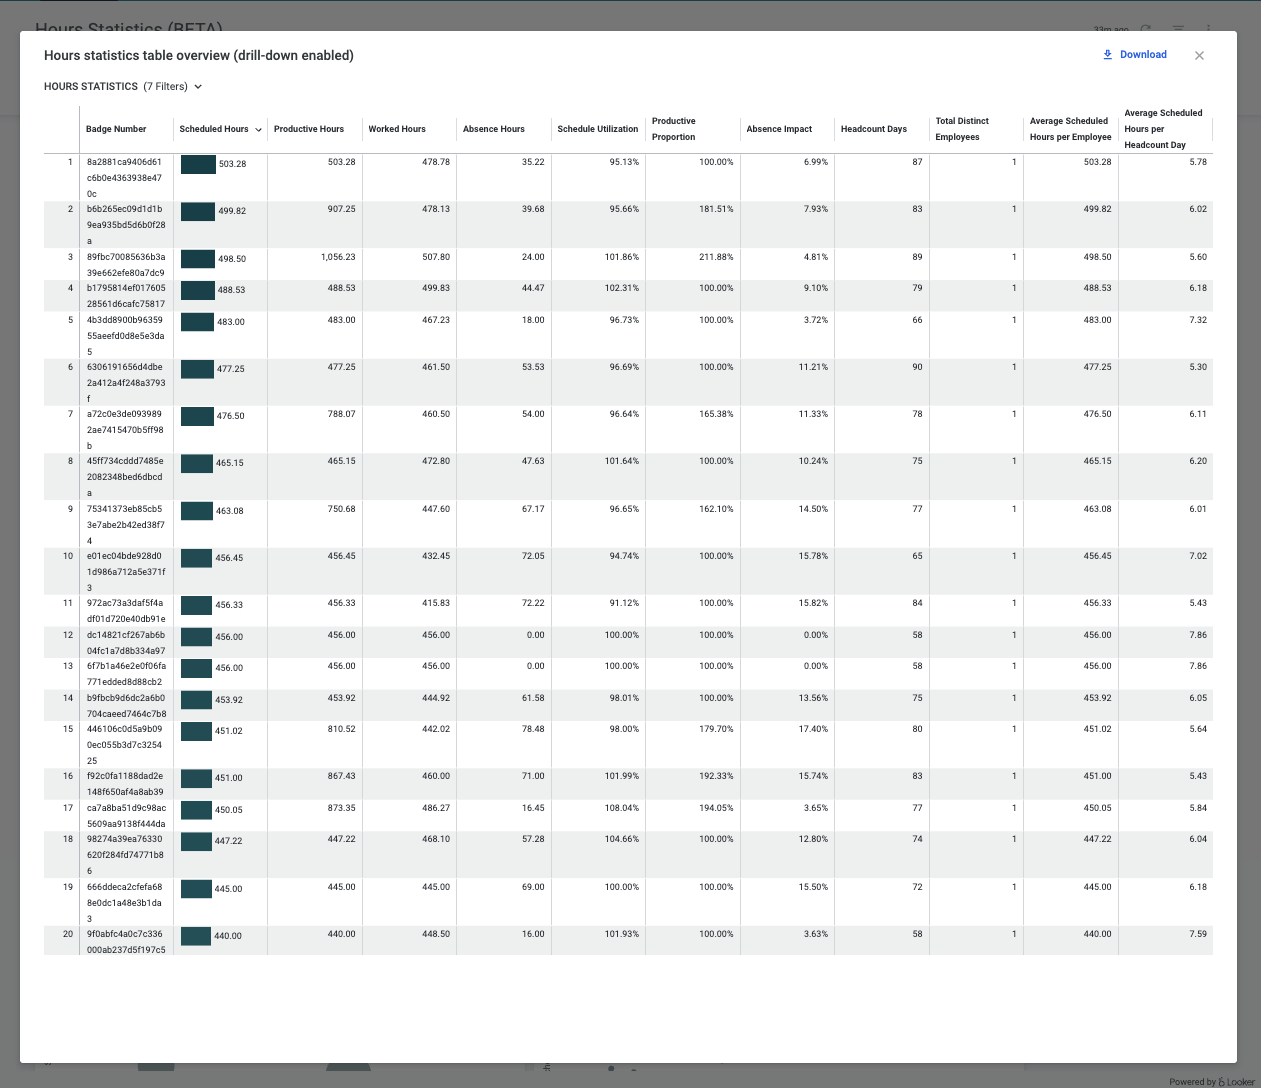
With the new dashboard - we’ve also enabled additional granularity to allow users to better explore their full organization hierarchy. Where before you were limited to a district and unit view, now you can drill deeper from a section to an individual badge number, with a new employee drill-down table now available for enable even deeper insights.
This update includes a new design with richer visualisations, deeper granularity, and better data accuracy across your entire organization. If you’d like to read on, you can find more details here!
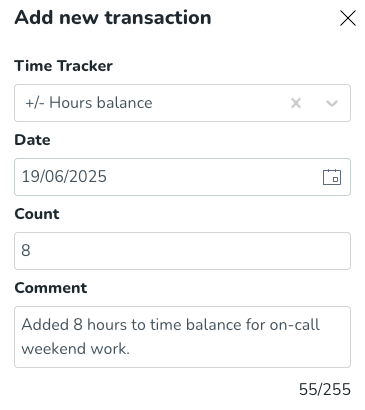
Adding comments to manual Time Tracker transactions
We've made it easier to track and understand manual changes to employee time balances. Managers and admins can now add a comment when making an adjustment, such as "Added 8 hours to time balance for on-call weekend work." These comments are displayed directly on the transactions overview page, ensuring every adjustment is documented and transparent. This greatly improves audibility and provides context for all manual entries.

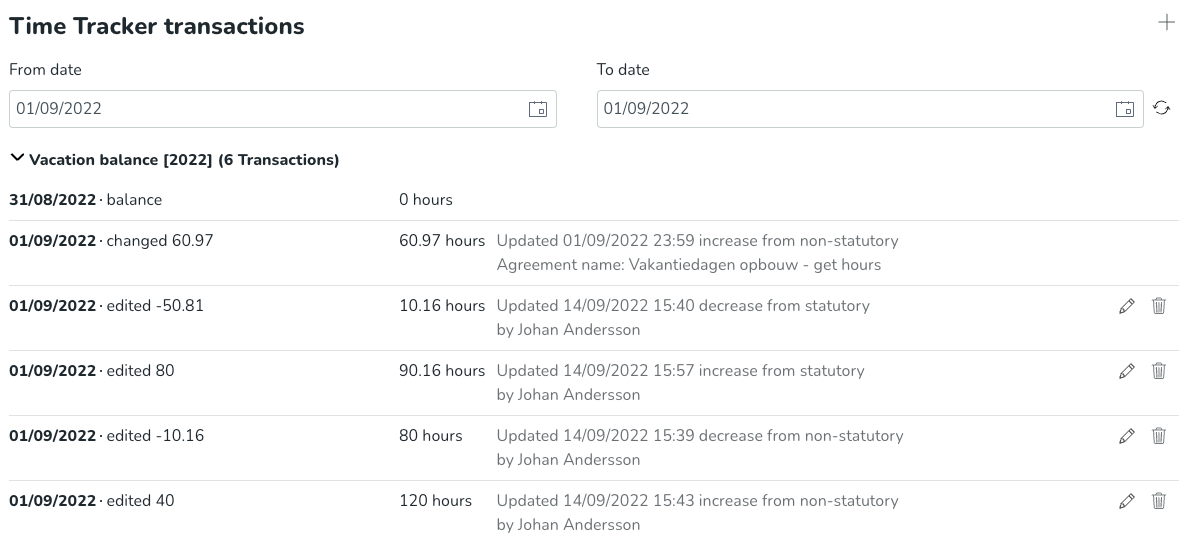
Improved visibility for Dutch vacation configuration: Time Tracker transactions
We've enhanced the time tracker transactions page for our users in the Netherlands who use the Dutch Vacation configurations. You can now easily understand between changes made to your statutory and non-statutory time off balances.
Bug fixes
- Resolved an issue where cost centers were not applied when accepting shift bookings through the notification panel. Cost center inheritance logic is now consistently applied, whether a shift is assigned manually or accepted via shift booking approval.
- Resolved an issue where shifts in the schedule view visually extended over day lines into other days. Shifts now display correctly within their scheduled day, making it easier to see which day a shift belongs to.
- Resolved an issue where headcount values got displayed as 0 when using decimals in the dynamic rule buckets.
New Quinyx HelpDocs content
- None at this time.
Employee Hub web app Version 0214
Release date TBD
New functionality
- None at this time.
Updates and performance improvements
Collaboration groups admin tools - Coming 9th July
Soon, we will be releasing two enhancements to the collaboration groups admin tools:
- Assign a collaboration group to a new parent
- Archive / unarchive a collaboration group
Collaboration group settings can be found via Account settings > Advanced settings > Employee Hub settings > Collaboration groups.
Assign a collaboration group to a new parent
Prior to the release of this feature, the only way to perform hierarchical realignments, i.e., move a collaboration group to a new location in the hierarchy, was to delete the original group and create a new one in the desired location. This caused issues such as:
- Resources belonging to the deleted group and any corresponding compliance and engagement data were lost.
- Resources distributed to/shared with the original group had to be redistributed to/reshared with the new group.
- Deletion of a group could not be undone; the data was permanently deleted.
As of July 9th, you will be able to assign a collaboration group to a new parent. All in-flight resources associated with the moved group, i.e., active tasks, forms, stories, etc., will be handled accordingly.
- Resources belonging to the moved group and any corresponding compliance and engagement data will be retained where appropriate, i.e., when the moved group still has oversight of the resource.
- Resources distributed to/shared with the moved group will not need to be redistributed to/reshared as long as the group still qualifies as part of the audience.
How to assign a collaboration group to a new parent
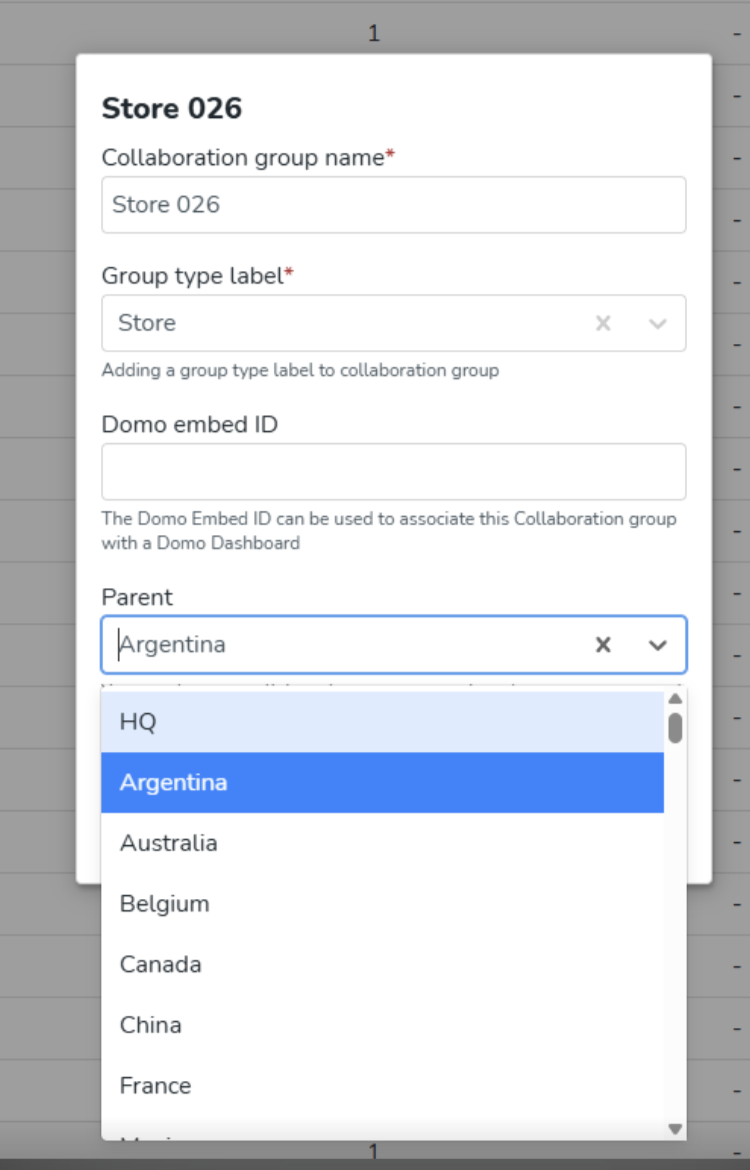
- Select the collaboration group you wish to move, the sidebar will open, and select the edit pencil.
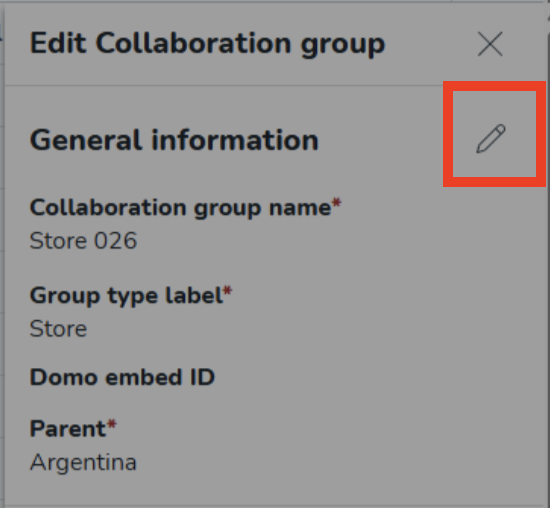
- The edit modal will appear, select the desired parent collaboration group from the dropdown list, and select Continue to confirm the parent change.
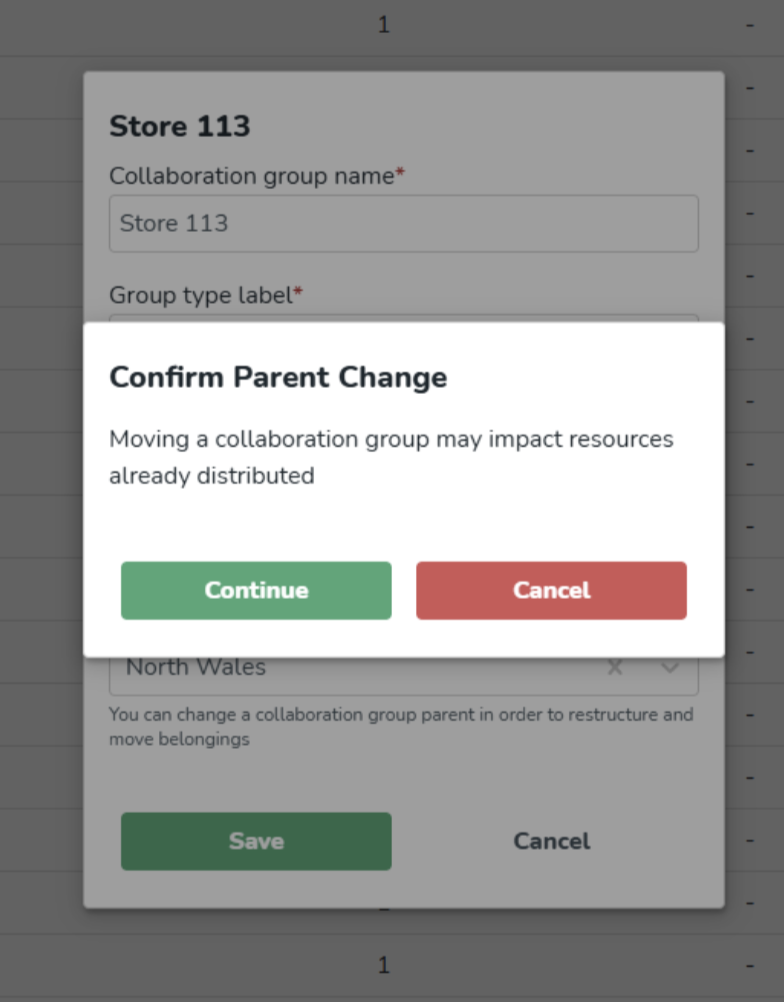
The collaboration group is now assigned to its new parent.
Archive a collaboration group
Prior to the release of this feature, the only way to tidy up your collaboration groups hierarchy was by deleting unwanted groups. This caused issues such as:
- Deletion of groups could not be undone, data was permanently deleted, and could not be retrieved if the group was deleted in error
- All child collaboration groups of a deleted parent were also deleted
As of July 9th, we are introducing a softer archive option. Archiving of a parent collaboration group will also archive all child collaboration groups. This action can then be undone, i.e., a collaboration group can be unarchived.
How to archive a collaboration group:
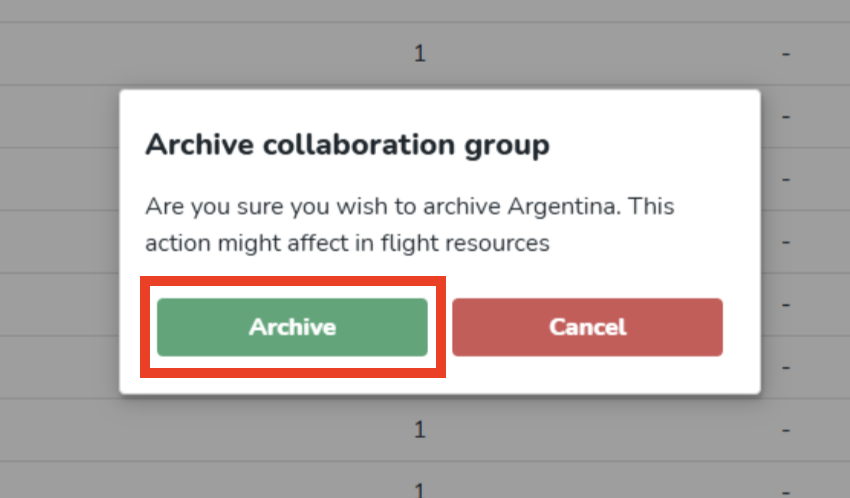
- Select the new archive button next to the collaboration group you wish to archive.

- Select archive to confirm you wish to archive the collaboration group, and the group is successfully archived.
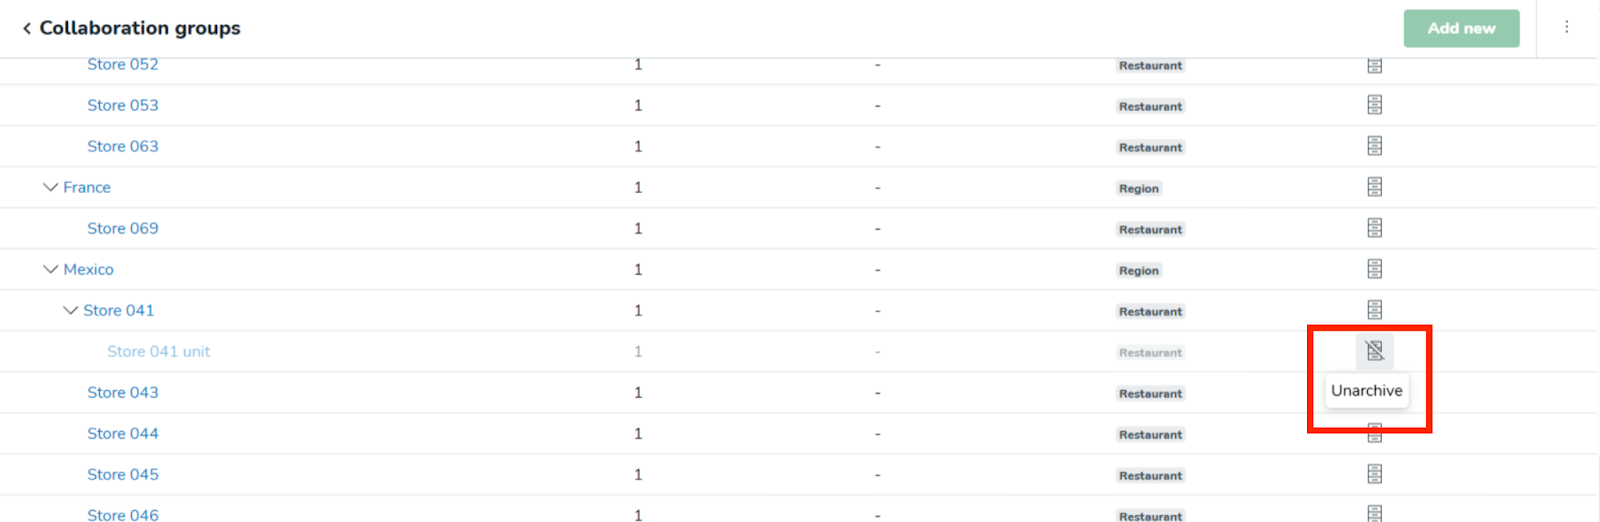
Archived collaboration groups are hidden by default. To show archived groups, select the ellipsis (three dots) and select View archived collaboration groups.

To return to active collaboration groups, select the ellipsis (three dots) and select Hide archived collaboration groups.

How to unarchive a collaboration group:
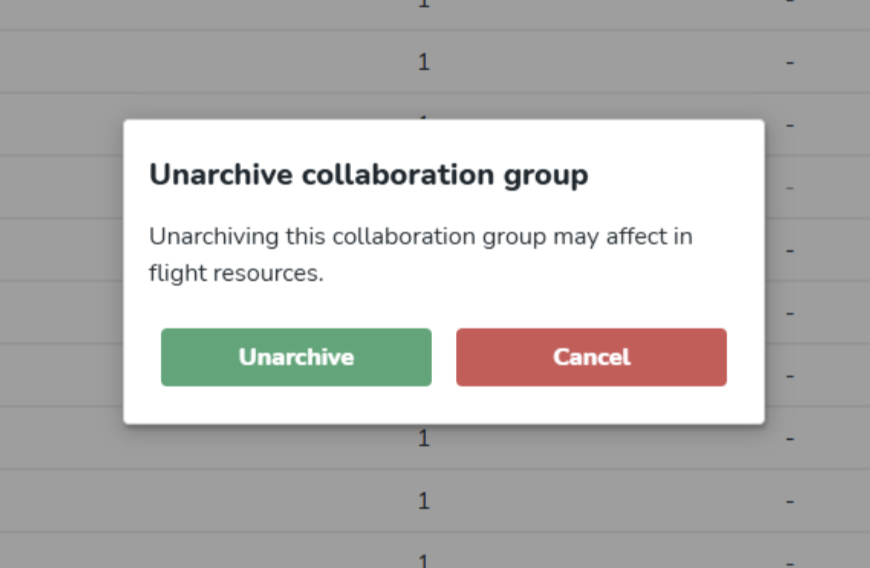
- Select the new unarchive button next to the archived collaboration group you wish to restore.
- Select Unarchive to confirm you wish to unarchive the collaboration group. The group has been successfully unarchived and will be shown in the list by default.
Bug fixes
- None at this time.
New Quinyx HelpDocs content
- None at this time.
SOAP API / Web service updates
None at this time.
Please make sure to forward this information to the party within your company responsible for integrations.