Import tools: People
 Updated
by
Leigh Hutchens
Updated
by
Leigh Hutchens
Add or update People in bulk using a Microsoft Excel file. The import process lets you:
- Download a pre-formatted template
- Add your people data
- Upload the completed file
- Choose how the import should be handled
Your file is validated before the import begins. If any rows fail during import, you can download a file containing the failed rows, correct them, and try again.
To add or update People in bulk, go to Account Settings and select People under Import Tools.
Before you begin
Make sure that:
- You have write access to Account settings, People, and People details.
- You have Microsoft Excel or another compatible spreadsheet application.
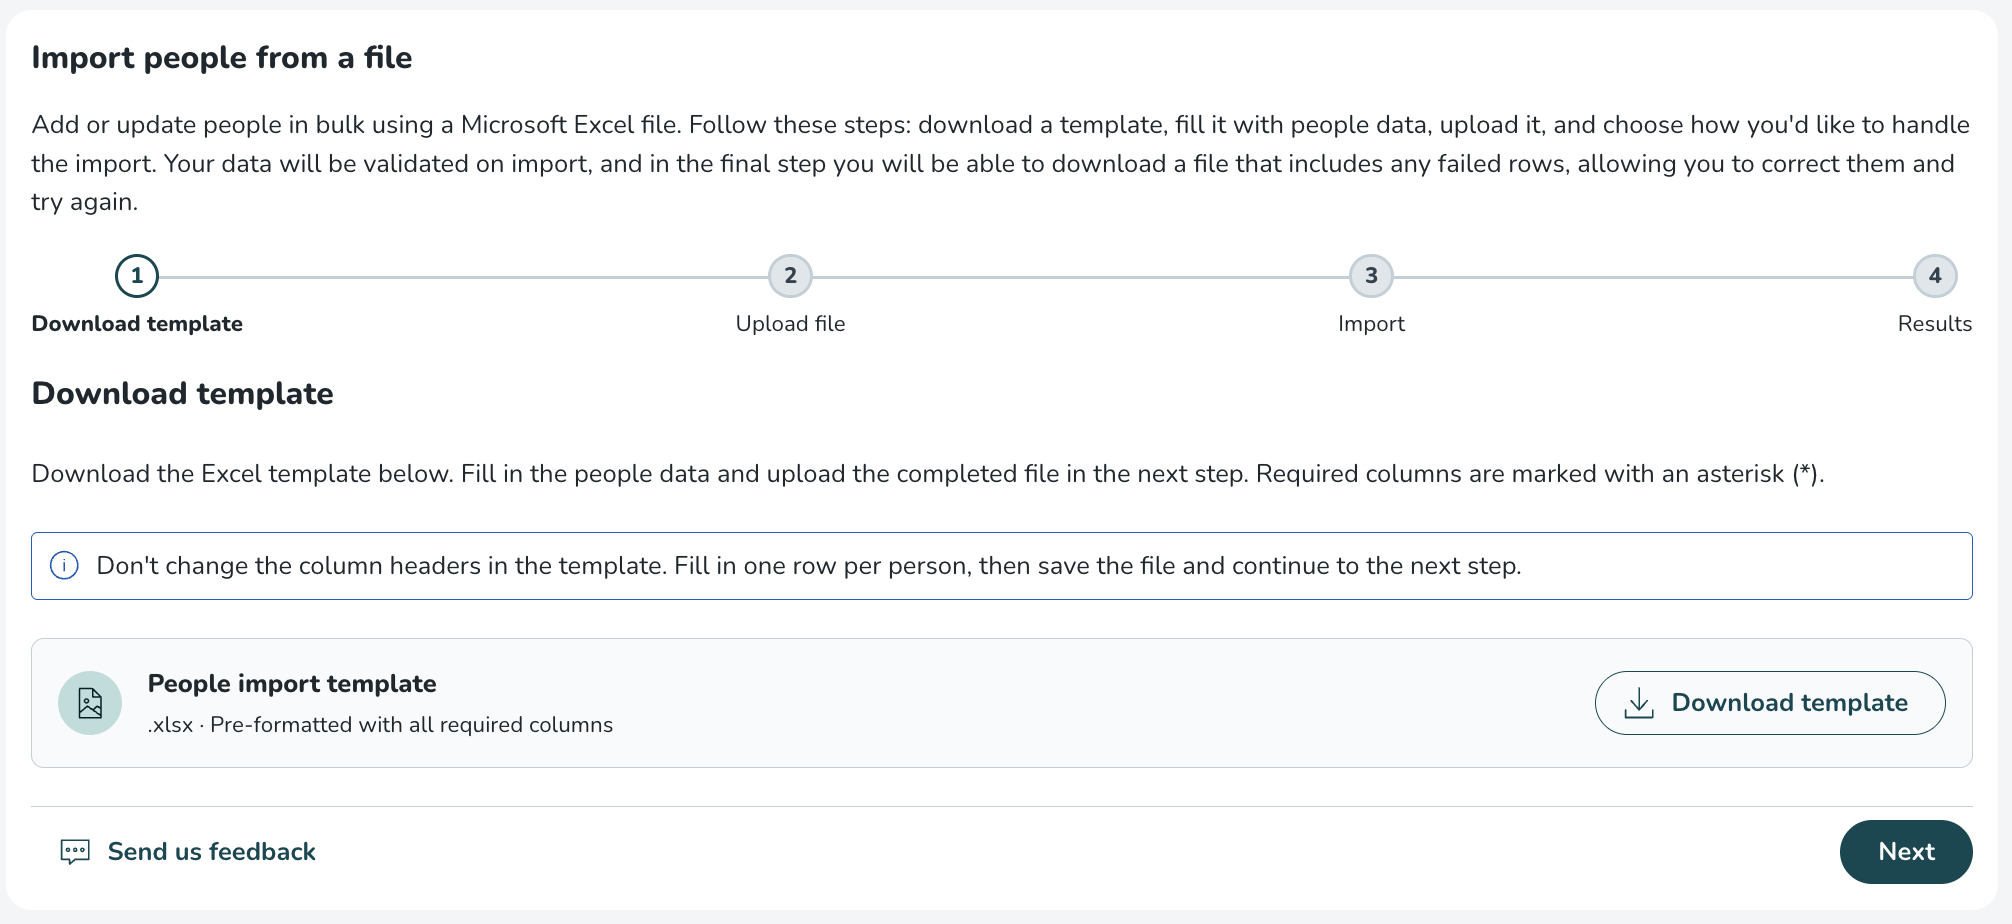
Step 1: Download the template
Click Download template to download the Microsoft Excel template.
The template is a pre-formatted .xlsx file containing all supported import columns. Required columns are marked with an asterisk (*). Some fields include dropdown lists based on your account setup to help ensure valid values are entered.
Open the file in Excel and fill in one row per person.
Template columns
The template includes the following columns. Required columns are marked with an asterisk (*). For some columns, the reference data is available to be used from a drop-down menu.

Column name | Required | Reference data exists | How to use it |
First name | Yes | No | Add a name of the person. Use max 40 characters. |
Last name | Yes | No | Add a last name of the person. Use max 40 characters. |
Badge number | Yes | No | Add current or new badge number. Use max 20 numbers. |
Yes | No | Add a unique email address of a person. | |
Staff category | Yes | Yes | From the dropdown menu, choose staff category that the person should get |
Home unit | Yes | Yes | From the dropdown menu, chose the home unit of a person |
Section | No | No | Chose a section that the person belongs to |
Home cost centre | No | Yes | From the dropdown menu, chose the home cost centre for a person |
Reporting to (First Last (Badge)) | No | Yes | From a dropdown menu, chose the name and the badge number of a person’s manager |
Agreement template | Yes | Yes | From a dropdown menu, select the Agreement template that should be assigned to a person |
Employment rate (%) | Yes | No | Specify employment rate percentage. Use numbers from 0 to 100, and for decimals use “.” |
Mobile number | No | No | Add person’s mobile number |
Phone number | No | No | Add person’s phone number |
Address | No | No | Add person’s address |
Postal code | No | No | Add person’s postal code |
City | No | No | Add person’s city |
Country | No | No | Add person’s country |
Date of birth (YYYY-MM-DD) | No | No | Add person’s date of birth in the YYYY-MM-DD format |
Social security number | No | No | Add person’s social security number |
Gender | No | Yes | From a dropdown menu, chose person’s gender |
Card number | No | No | Add person’s card number |
Login ID | No | No | Add person’s Login ID |
Employed date (YYYY-MM-DD) | No | No | Add person’s employed date, in YYYY-MM-DD format |
Industry start date (YYYY-MM-DD) | No | No | Add person’s industry start date, in YYYY-MM-DD format |
Sharable across units | No | Yes | From a dropdown menu, chose if the person is sharable across units |
When you’ve finished filling in the template, save the file. Go back to People Import tool and click Next.
Step 2: Upload the file
Upload your completed template file by either:
- Dragging and dropping it into the upload area, or
- Clicking the upload area to browse your computer
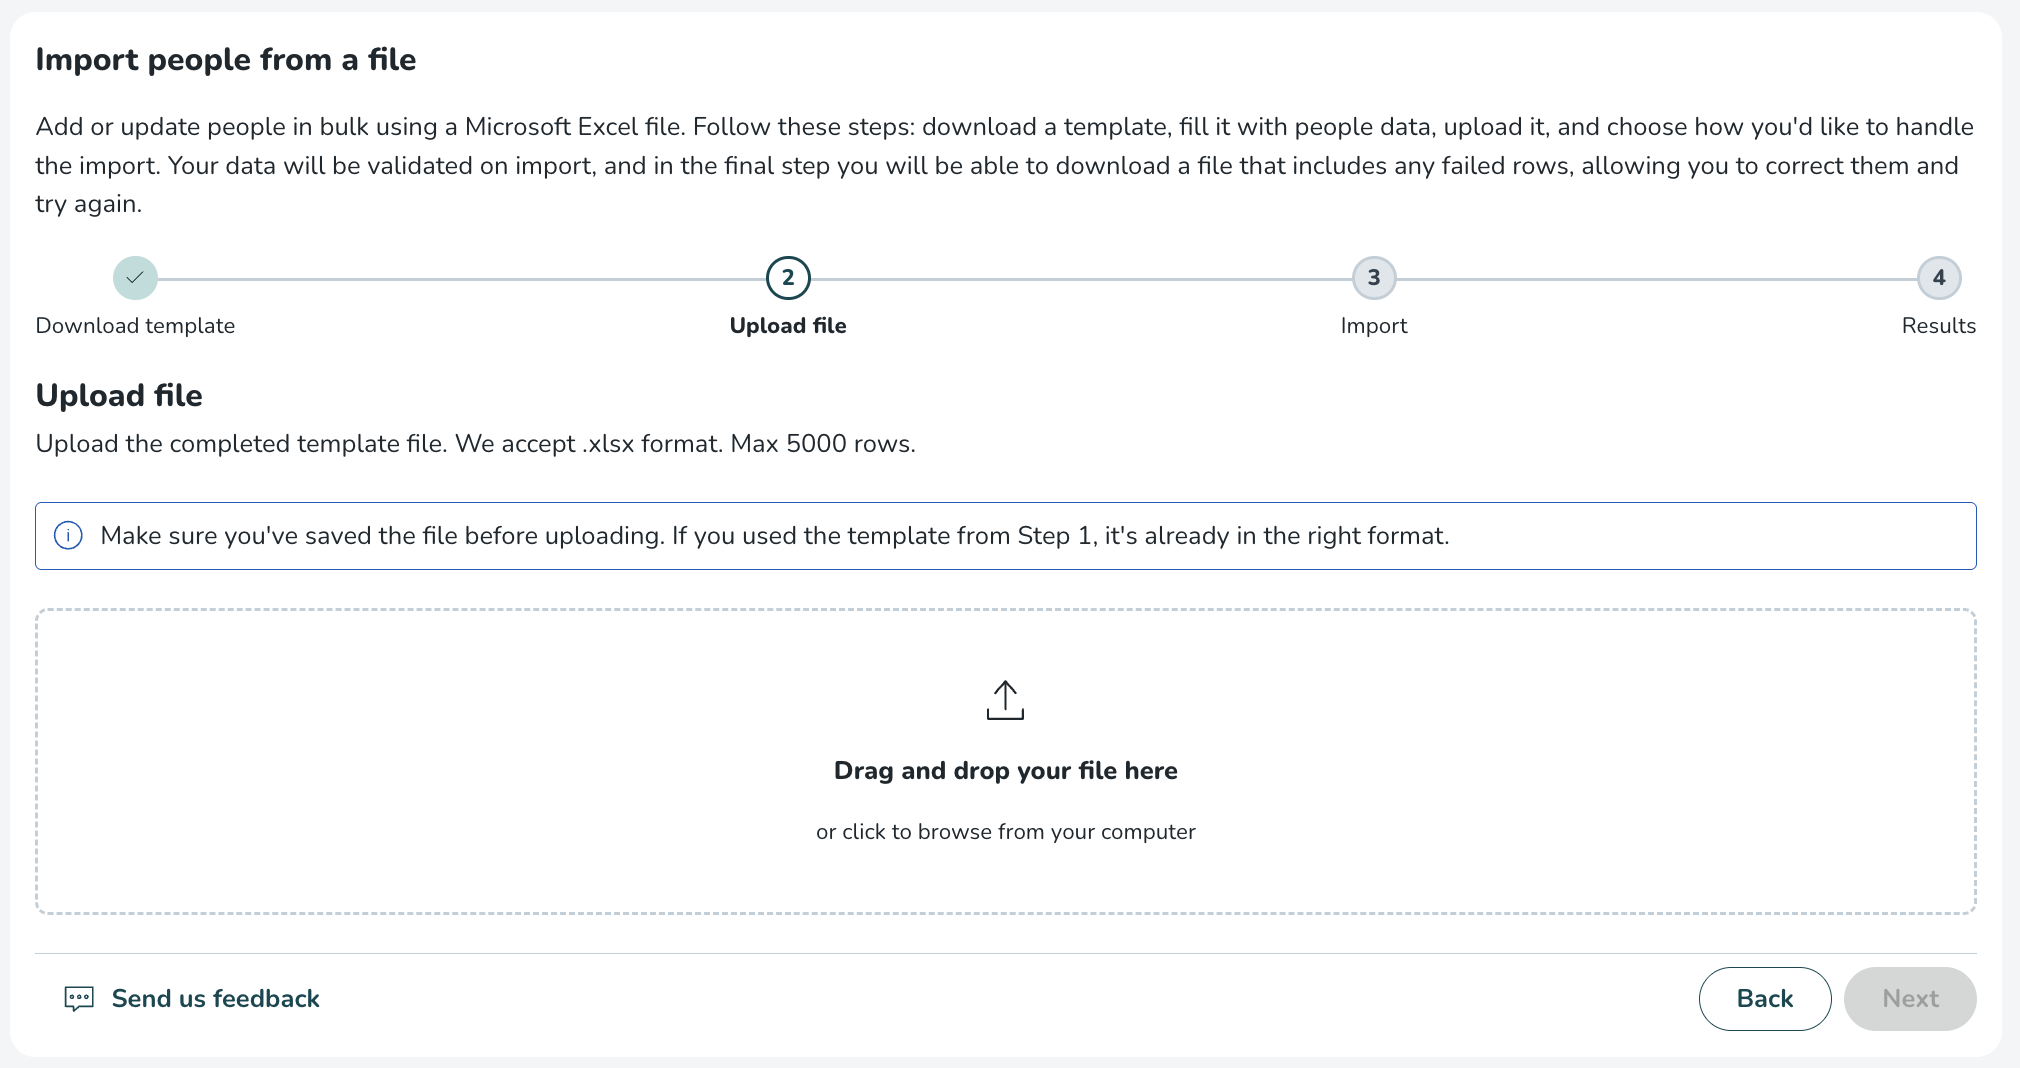
Your file must:
- Be in
.xlsxformat - Contain no more than 5,000 rows
The system validates the file before import and checks for issues such as missing required fields, invalid formatting, duplicate entries, and unsupported values.
If validation fails, one of the following error messages will appear:
{field} is required
Applies to all required columns:- First name
- Last name
- Badge number
- Staff category
- Home unit
- Agreement template
- Employment rate %
Invalid date in {field} - check that the date exists and uses YYYY-MM-DD format
Applies to:- Date of birth
- Employed date
- Industry start date
Invalid email format
Applies to: EmailDuplicate value in column {field}
Applies to: Email (checked for duplicates across all rows in the uploaded file)Invalid number in {field}
Applies to: Employment rate %Value in {field} is below minimum/Value in {field} exceeds maximum
Applies to: Employment rate % (allowed range: 0–100)Value in {field} exceeds maximum lengthInvalid value in {field} - select from the allowed options
Allowed values are:- Gender: Male, Female, Other
- Employed date
- Industry start date
Login ID must not contain spaces
Applies to: Login ID only{field} contains emoji or unsupported special characters
Applies to any string field where the value contains emoji.
Correct the issues and upload the file again.
If there are no issues found, the wizard displays a confirmation that the file was read successfully and the number of rows ready for import.
Click Next to continue.
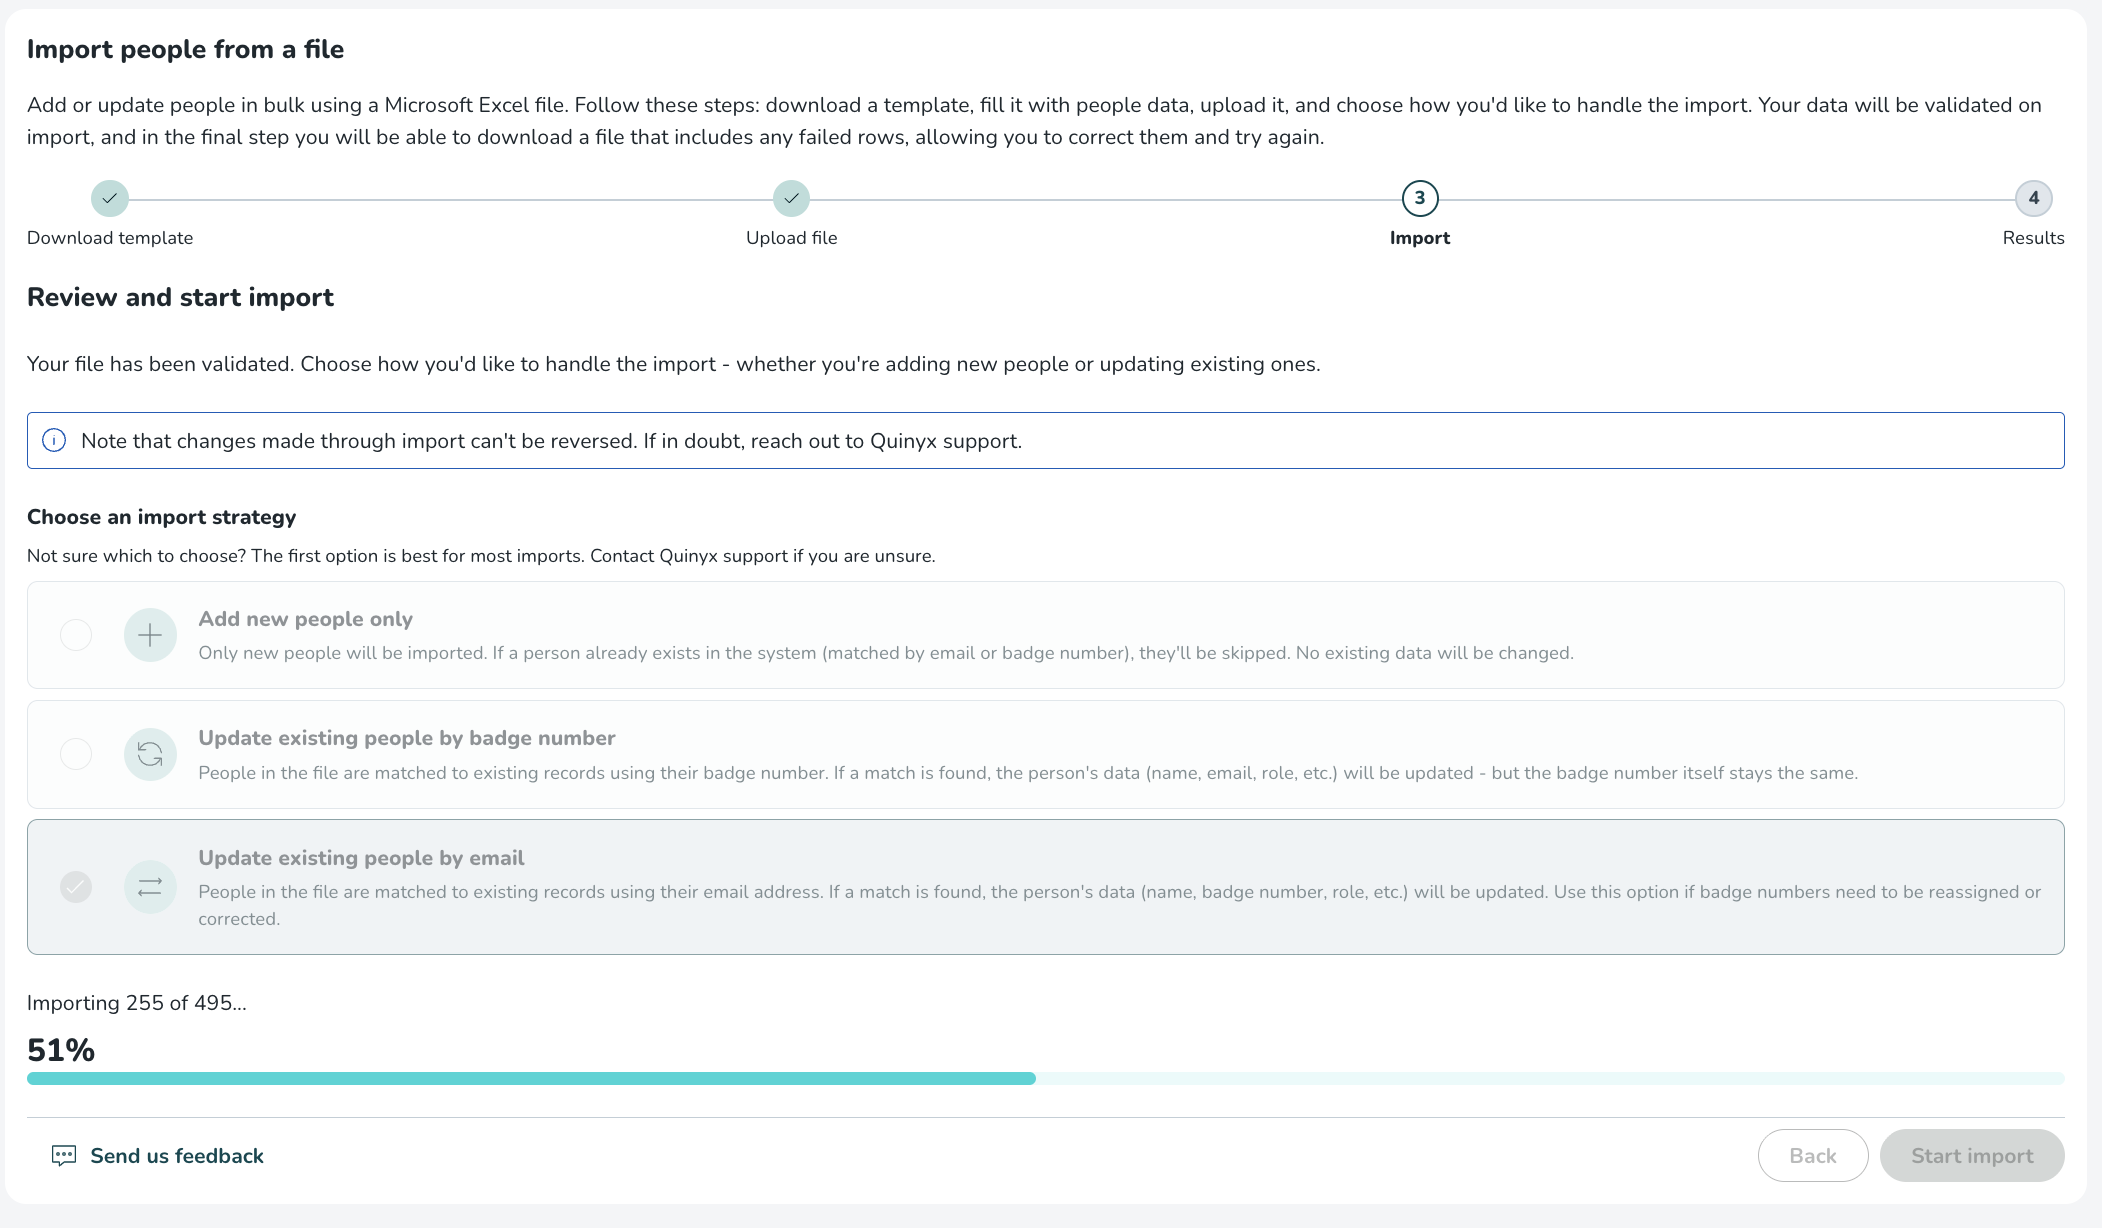
Step 3: Review and start the import
After validation is complete, on the next steps you can choose how you want Quinyx to handle the data.
On this step you can chose one of three import strategies.

Import strategies
Strategy 1. Add new people only
Creates new people from the uploaded file. If a person already exists in the system (matched by email or badge number), that row is skipped and no changes are made.
Use this option when:
- Importing people for the first time
- Adding new hires in bulk
Strategy 2. Update existing people by badge number
Matches people in the file to existing records using badge number. If a match is found, the person’s details are updated. The badge number itself will not be changed.
Use this option when:
- Existing badge numbers are correct
- You need to update other information for current people
Strategy 3. Update existing people by email
Matches people in the file to existing records using email address. If a match is found, the person’s details are updated, including the badge number. The email address itself will not be changed.
Use this option when:
- Badge numbers need to be corrected or reassigned (for example if there is new punch-in system that requires new badge numbers to be assigned to employees).
- Email is the most reliable identifier
After choosing the import strategy, chose to “Start import”. A progress bar shows the import status while it runs.
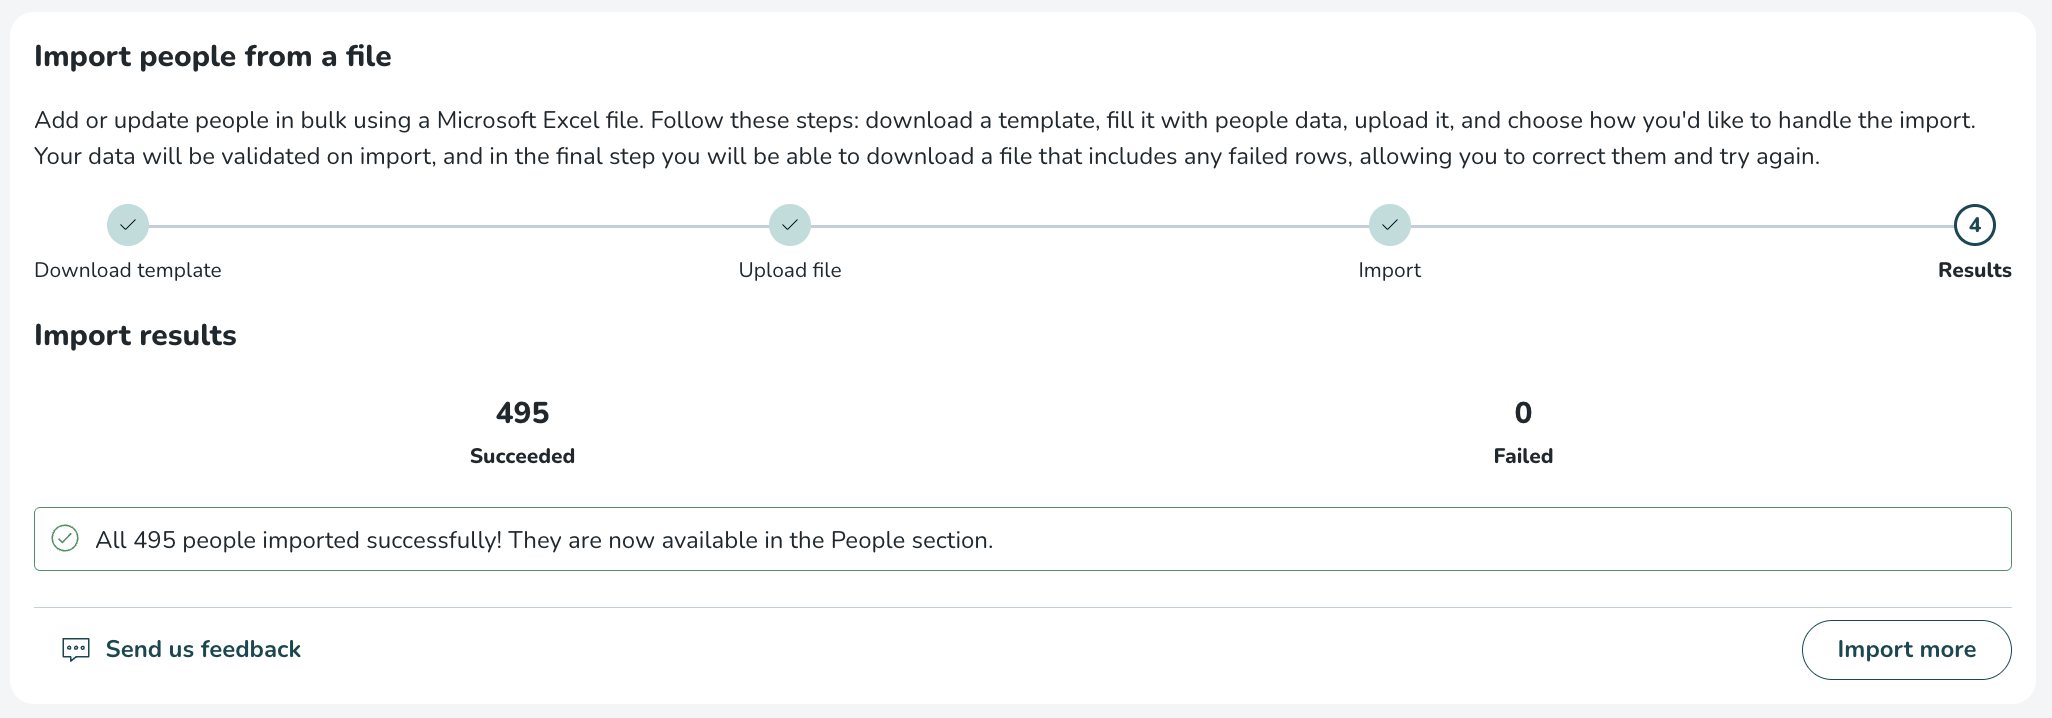
Step 4: Review the results
After the import completes, the results screen shows how many rows:
- Imported successfully
- Failed to import
If all rows are imported successfully, a confirmation message appears. Your imported people are now available in the People section.
If some rows fail, the results screen shows the number of:
- Successful rows
- Failed rows
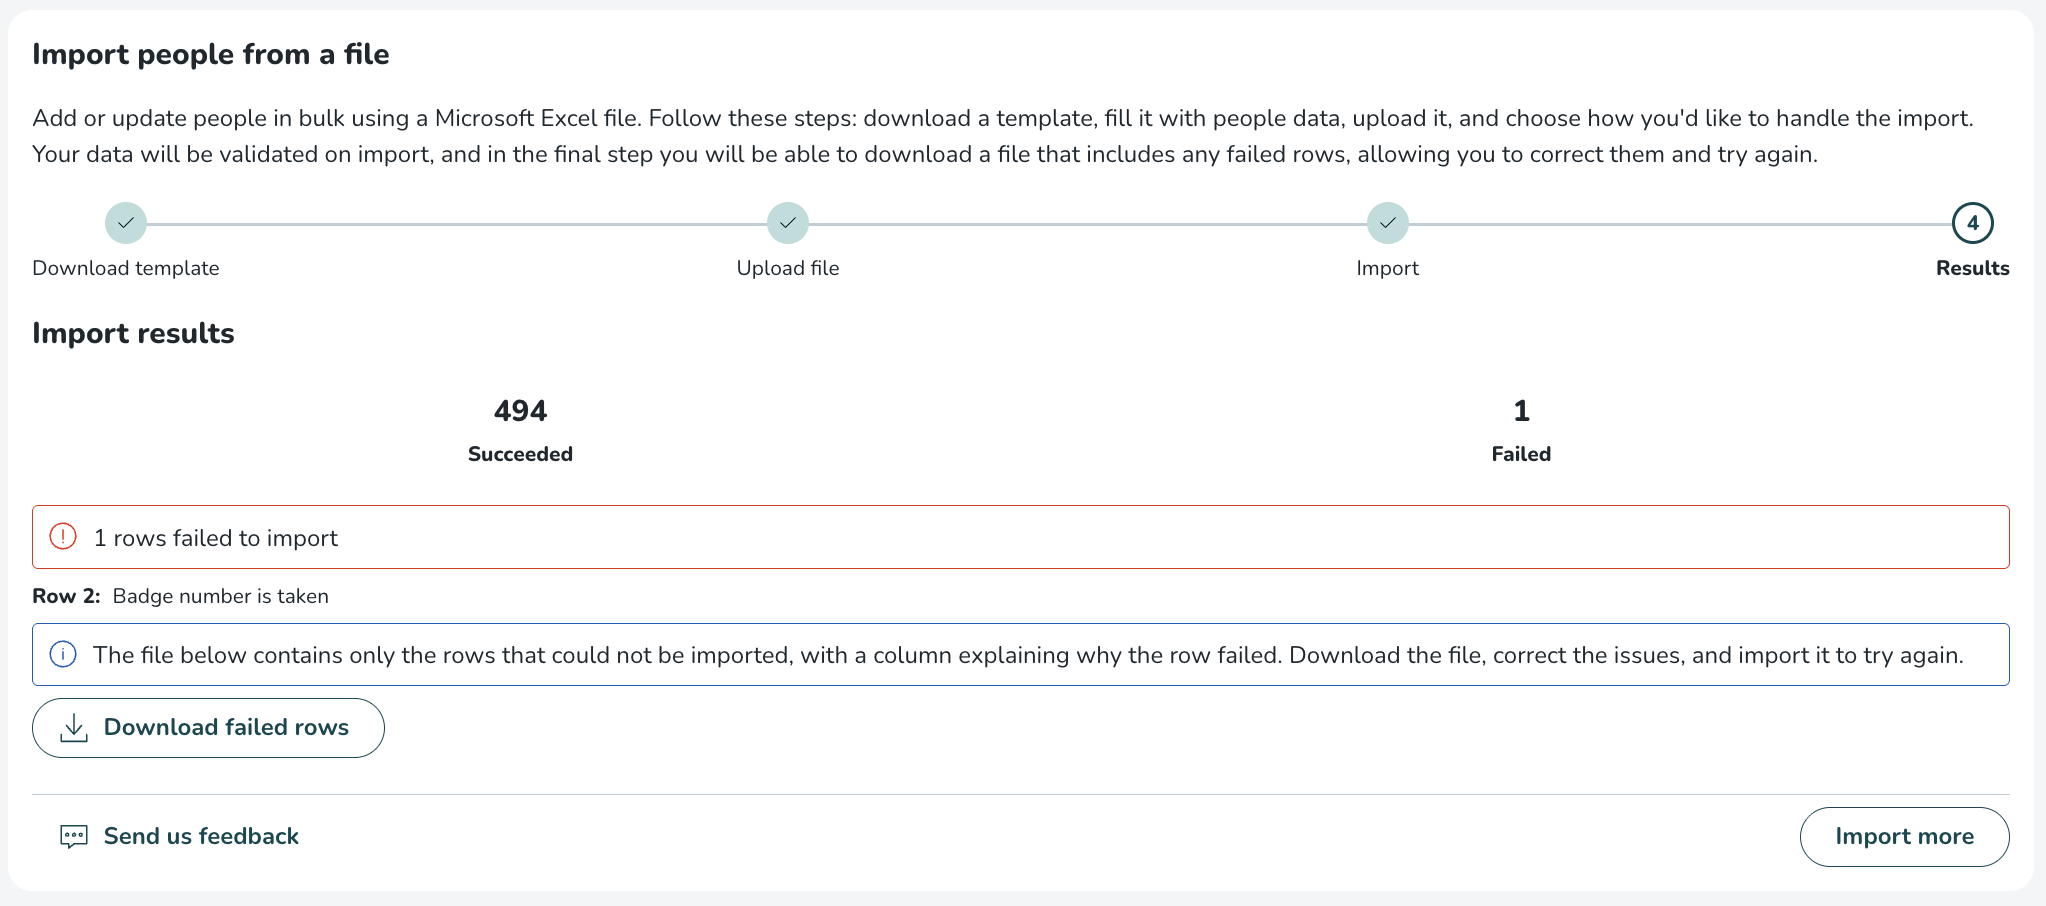
Fix failed rows
To correct and re-import failed rows:
- Click Download failed rows.
- Open the downloaded file.
- Review the Failure reason column, which is visible as the last column in the spreadsheet. This column explains why each row failed and what needs to be corrected.
Following failure messages with error codes can be encountered:- Badge number already exists in the system:
DUPLICATE_BADGE_NUMBER,error.employee.badgeNumber.used - A person with this badge number or email already exists:
EMPLOYEE_EXISTS - Staff category is not valid for this unit:
INVALID_STAFF_CATEGORY - Home unit is not valid:
INVALID_UNIT - Agreement template is not valid:
INVALID_AGREEMENT_TEMPLATE - Agreement template is not available for this person's home unit - district templates can only be used within their own district:
error.employee.agreementTemplate.unit.invalid - Cost centre is not valid for this person's home unit:
error.employee.costCentreId.unit.invalid
- Badge number already exists in the system:
- Correct the issues and save the file.
- Click Import more to upload the corrected file.
Tips and best practices
- Test with a small batch first
Before importing a large file, try importing 10–20 rows to verify formatting and data quality. - Check for duplicates
When using Add new people only, rows matching an existing email or badge number are skipped. - Use one row per person
Each row should represent one unique person. - Do not change template headers
Renaming, deleting, or reordering columns will cause the import to fail. - Save before uploading
Make sure the Excel file is saved before uploading. - Reuse the failed-rows file
You only need to re-import failed rows, not rows that already succeeded.