Pay schedule
 Updated
by
Daniel Sjögren
Updated
by
Daniel Sjögren
Pay Schedule
Pay Schedules allows organisations to automate and streamline their payroll runs by replacing manual grouping with a highly configurable system.
By grouping employees based on specific criteria such as pay cycle, employment type, and payroll file, companies can significantly improve processing efficiency while ensuring strict compliance with legal and local regulatory requirements.
This feature is essential for modern organisations as it reduces administrative errors, supports accurate financial planning, and allows for the deep customisation of payroll processes to meet the unique needs of different employee groups.
The implementation of pay schedules involves identifying strategic criteria for grouping workers, such as pay frequency, geographic location, departmental structure, or the nature of work, including full-time, part-time, and contract roles. Once these criteria are established, employees are seamlessly assigned to their appropriate schedule within the Quinyx platform to ensure consistency and accuracy in all payroll records.
Beyond operational improvements, the introduction of this feature has a significant impact on workforce satisfaction and morale. By supporting batch processing for payments, wage calculations, and tax deductions, the system ensures that employees are paid accurately and on time, which fosters a culture of transparency and trust between the organisation and its staff. This automation minimises the likelihood of mistakes and reduces the overall administrative burden, allowing for faster and more reliable payroll processing across the entire enterprise.
Enabling Pay schedules and configuration
Here is the step-by-step workflow to enable the Pay Schedules setting within Quinyx.
Workflow: Enabling pay schedules
- Step 1: Access account settings
- Action: Click on the user profile/Account icon located in the top-right corner of the dashboard.
- Selection: From the dropdown menu, select Account settings.
- Step 2: Navigate to advanced settings
- Action: Scroll down the left-hand navigation sidebar to the Advanced settings section.
- Selection: Click on Global account settings.
- Step 3: Open pay schedules configuration
- Action: In the main "Global account settings" list, locate the option for Pay schedules enablement.
- Selection: Click the link to open the configuration page.
- Step 4: Enable the setting
- Action: Locate the Enable pay schedules checkbox under the "Action" column.
- Selection: Click the Edit/Checkbox icon to toggle the setting to "Enabled" (indicated by a green checkmark).

Creating a new Pay schedule
Once enabled, you can define the specific parameters for your pay schedules.
- Access pay schedules: Select Pay Schedules under the Payroll settings section in the sidebar.
- Initiate creation: Click the green Add button in the top-right corner.
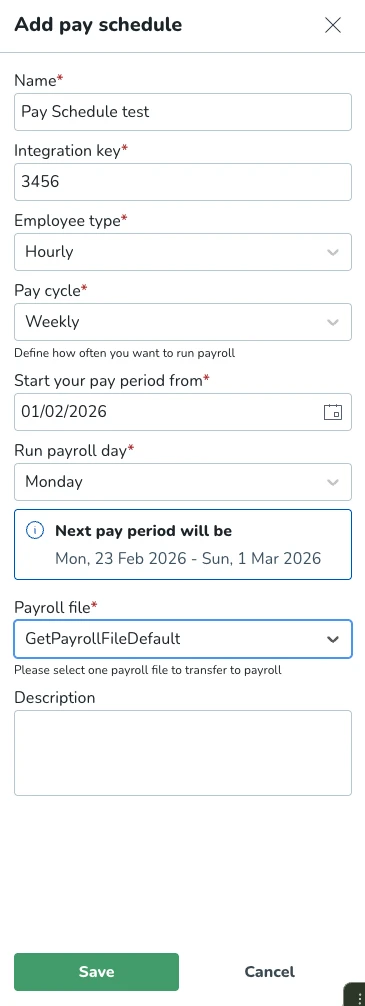
- Define Pay Schedule details: Fill in the following mandatory fields in the "Add pay schedule" slider:
- Name: Enter a descriptive name (e.g., "Pay schedule 1").
- Integration key: Provide a unique identifier code.
- Employee type: Select the applicable category between Hourly and Monthly.
- Pay cycle: Choose the frequency: Weekly, Bi-weekly, semi-monthly, monthly, and custom.
- Set pay period parameters:
- Start date: Select the date from the calendar when the pay period should begin.
- Run payroll day: Choose the specific day of the week (e.g., Monday) when the payroll is processed.
You will be presented with the next pay period, considering all the above parameters and the current date.
- Finalize configuration:
- Payroll file: Select the appropriate export format or file type from the dropdown - This file should match the file selected in the agreement templates of the employees you will assign to this pay schedule.
- Description: Add any relevant notes regarding the schedule.
- Save: Click the Save button to create the schedule.
ID and name validation: Quinyx will prevent duplicate IDs and case-insensitive duplicate names in pay schedule creation.
Field immutability: After creation, the ID, Pay cycle, Start date, Employee type, and Payroll file are locked to prevent payroll corruption.
Pay cycle logic description
The system must calculate periods and run dates using the following logic:
Weekly/Bi-weekly
- Logic: Calculated from a start date to a specific run day.
- Shortened periods: If the run day creates a mid-week start, the first period is shortened to align with the run day.
Monthly
- Logic: Runs on a specific day of the month (e.g., 31st).
- Boundary Handling: If a month is shorter than the selected day (e.g., February), the system will fallback to the last available day of that month.
Custom
- Logic: Incremental logic based on a user-defined number of days, weeks, or months.
- Continuity: The system will handle month and year boundaries, ensuring the next run date is the day after the period ends.
Review and edit pay schedules
- Confirmation: A success message ("Pay schedule successfully added") will appear at the top of the screen.
- Modification: If changes are needed, click the Pencil icon next to the schedule to reopen the editor. Note that only the Name and Description can be edited after a schedule is created; for other changes, a new schedule must be created.
Assigning the Pay Schedule to employees
Adding individual employees via the People tab
You can link a pay schedule to individual employee agreements via the People tab.
- Navigate to people: Click People in the top navigation bar.
- Select employee: Choose an employee from the list to open their profile.
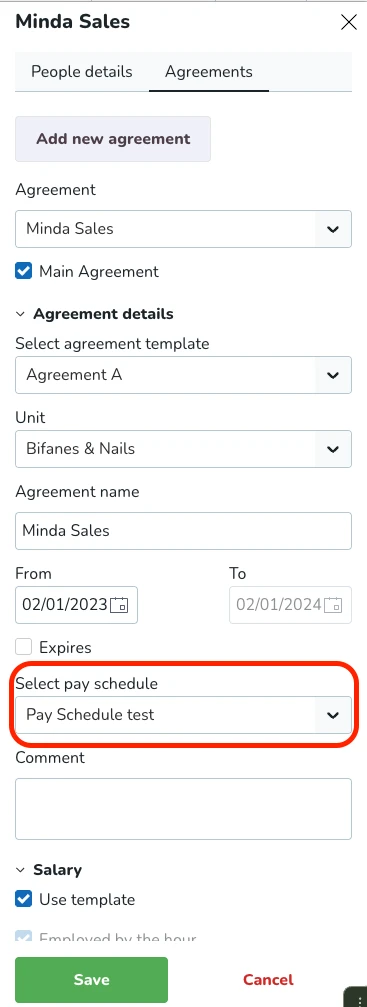
- Access agreements: Click the Agreements tab within the employee's side panel.
- Select agreement: Click on the specific agreement you wish to edit.
- Link schedule:* Locate the Select pay schedule dropdown menu.
- Select the desired schedule (e.g., "Pay Schedule test").
- Commit changes: Click Save at the bottom of the panel to apply the schedule to the employee.
Only Pay Schedules that match the employee type and payroll file will be displayed.
Bulk adding employees via Pay schedule settings
You can add employees in bulk to a pay schedule in the Pay schedule settings.
- Navigate to Account settings > Pay schedule settings.
- In the list of created pay schedules, click Add member.
- From the expanded side menu, click the Add member button.
- Select and/or search for an employee you wish to assign to the specific pay schedule.
- Done!
Changes to an agreement's employee type or payroll file to a value incompatible with its current assigned pay schedule will trigger a warning and automatically unassign the employee from the pay schedule.
Using pay schedules in the Time tab - Transfer to payroll
Once employees are linked to a pay schedule, use the following steps to process the payroll data:
- Click on the Time tab in the top navigation bar and select Adjust View from the sub-menu.
- Configure the view: An adjust view slider will appear on the right. You must define your data set here:
- Select pay schedule: Choose the specific schedule you wish to process (e.g., "Pay Schedule test").
- Date range: Selecting the pay schedule will auto-populate the From date and To date based on the defined period (e.g., 16/02/2026 to 22/02/2026).
- Filters: Pay schedule will apply additional filters such as districts, units, employees, and payroll file.
- Click the green Apply button at the bottom of the slider.
- Process Data: The system will display a progress bar while it compiles the data based on the defined filter. Once finished, the list will show employees and their status (e.g., "Ready to transfer").
Manual override: Verify that users can manually override these dates for historical reporting while the employee filter remains active.
Pay schedule actions
You have the option to edit, archive, or delete no longer relevant pay schedules. In Account settings > Payroll settings > Pay schedules you can create, edit, but also archive, or delete pay schedules.
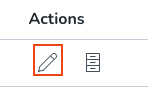
Edit pay schedule
In the pay schedule page > Actions > Click the pen icon. This allows you to edit the name and description of an existing pay schedule.
Archive a pay schedule
- In the Pay schedules page > Actions > Click the cupboard icon on an existing pay schedule. In the pop-up dialogue, confirm your choice. This allows you to archive an existing pay schedule.
- If you wish to unarchive a pay schedule, click the three dots menu in the top-right > View archived pay schedules > Click the crossed out cupboard icon.

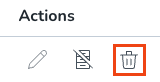
Delete a pay schedule
- In the Pay schedules page > Actions > Click the cupboard icon on an existing pay schedule.
- Click the three dots menu in the top-right > View archived pay schedules > Click the trashbin icon.